ICGOO在线商城 > 开发板,套件,编程器 > 评估板 - 嵌入式 - MCU,DSP > YRDKRL78G13
 Datasheet下载
- 型号: YRDKRL78G13
- 制造商: RENESAS ELECTRONICS
- 库位|库存: xxxx|xxxx
- 要求:
| 数量阶梯 | 香港交货 | 国内含税 |
| +xxxx | $xxxx | ¥xxxx |
查看当月历史价格
查看今年历史价格
YRDKRL78G13产品简介:
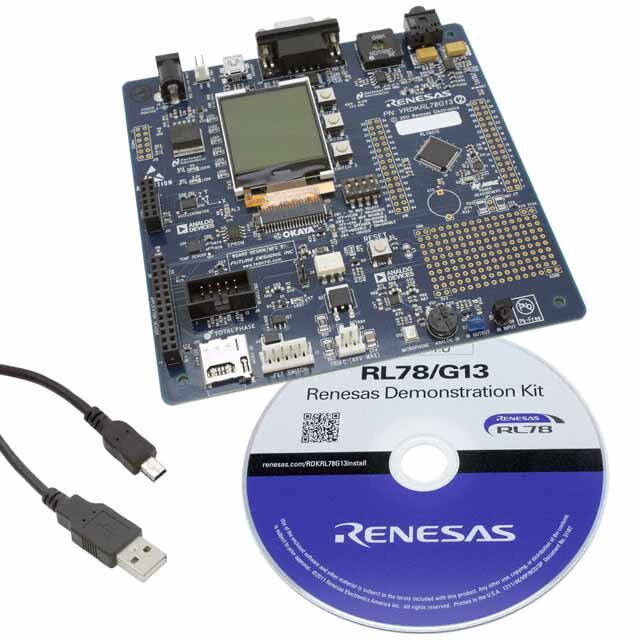
ICGOO电子元器件商城为您提供YRDKRL78G13由RENESAS ELECTRONICS设计生产,在icgoo商城现货销售,并且可以通过原厂、代理商等渠道进行代购。 YRDKRL78G13价格参考。RENESAS ELECTRONICSYRDKRL78G13封装/规格:评估板 - 嵌入式 - MCU,DSP, RL78/G13 Renesas Demonstration Kit RL78 MCU 16-Bit RL78 Embedded Evaluation Board。您可以下载YRDKRL78G13参考资料、Datasheet数据手册功能说明书,资料中有YRDKRL78G13 详细功能的应用电路图电压和使用方法及教程。
| 参数 | 数值 |
| 产品目录 | 编程器,开发系统 |
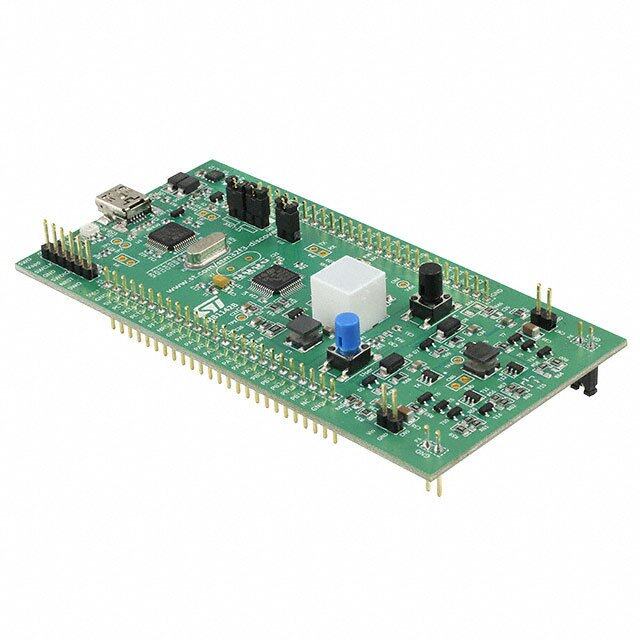
| 描述 | KIT DEV RSK FOR RL78G13 |
| 产品分类 | 评估板 - 嵌入式 - MCU, DSP |
| 品牌 | Renesas Electronics America |
| 数据手册 | |
| 产品图片 |
|
| 产品型号 | YRDKRL78G13 |
| rohs | 无铅 / 符合限制有害物质指令(RoHS)规范要求 |
| 产品系列 | RL78 |
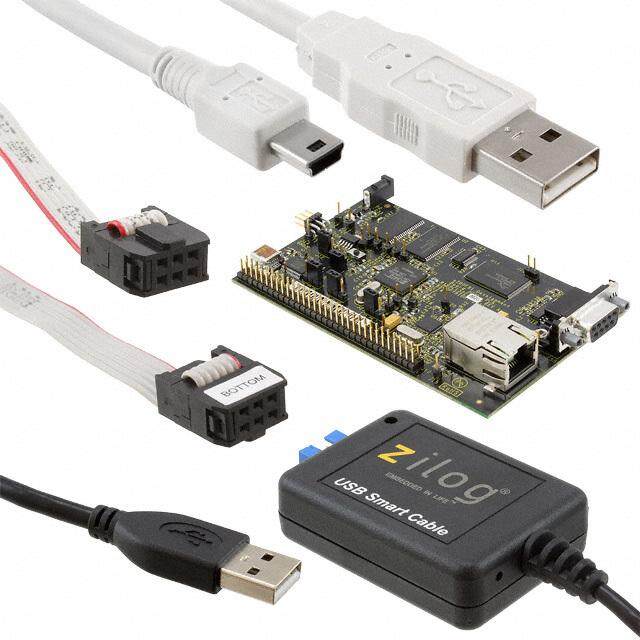
| 内容 | 板,电缆,LCD |
| 安装类型 | 固定 |
| 平台 | Renesas 演示套件 |
| 操作系统 | - |
| 板类型 | 评估平台 |
| 标准包装 | 1 |
| 核心处理器 | RL78 |
| 类型 | MCU 16-位 |
| 设计资源 | 点击此处下载产品Datasheethttp://am.renesas.com/media/products/tools/introductory_evaluation_tools/renesas_demo_kits/yrdkrl78g13/child_folder/YRDKRL78G13_GBR_2.ziphttp://am.renesas.com/media/products/tools/introductory_evaluation_tools/renesas_demo_kits/yrdkrl78g13/child_folder/RL78_G13_MFG_BOM_for_Renesas.xls |
| 配套使用产品/相关产品 | RL78/G13 |


- 商务部:美国ITC正式对集成电路等产品启动337调查
- 曝三星4nm工艺存在良率问题 高通将骁龙8 Gen1或转产台积电
- 太阳诱电将投资9.5亿元在常州建新厂生产MLCC 预计2023年完工
- 英特尔发布欧洲新工厂建设计划 深化IDM 2.0 战略
- 台积电先进制程称霸业界 有大客户加持明年业绩稳了
- 达到5530亿美元!SIA预计今年全球半导体销售额将创下新高
- 英特尔拟将自动驾驶子公司Mobileye上市 估值或超500亿美元
- 三星加码芯片和SET,合并消费电子和移动部门,撤换高东真等 CEO
- 三星电子宣布重大人事变动 还合并消费电子和移动部门
- 海关总署:前11个月进口集成电路产品价值2.52万亿元 增长14.8%


PDF Datasheet 数据手册内容提取
Renesas Demonstration Kit for RL78G13 Quick-Start Guide 1.1 Do not connect the USB port on the RDK until the installation software has been installed! • Software for this kit can be found at www.renesas.com/rdkRL78G13install. This Renesas site includes all the latest installation and application programs and application notes. • This board comes pre-installed with an interactive demo program. During this quick installation, we will load IAR Compiler based demo projects. Should you want to return the board to the factory original condition, simply load the “Factory Demo” into the board using IAR System’s “Embedded Workshop KickStart”, and locate and upload the project present on the companion DVD called RL78Theremin. This project is also available online (above link). • For basic operation, the RDKRL78G13 only needs USB power. The Aux Power Jack J4 (+5v Regulated input) is only necessary in high current operation. • The single install contains the following components: a. IAR Embedded Workbench for RL78 (version 1.10.5 or above) b. Renesas AutoUpdater c. Debug drivers, example and demo software for the RL78G13 RDK d. Applilet3 for RL78 e. Documentation: Schematics, Gerbers, RL78 Hardware Manual, RL78 Software Manual, YRDKRL78G13 User’s Manual, this YRDKRL78G13 Quick-Start Guide and other development tools release notes. Software Download and Installation 1. First Installation should be based on the companion DVD; subsequent updates should be checked online. 2. Alternate installation can be done by browsing at: www.renesas.com/rdkRL78G13install. 3. Click on “Download installation CD for the RL78G13 RDK” and download the file to your hard drive. Execute the file to extract the CD files to your computer. Locate the file “Setup.exe” in the CD files. Double click on this file to start installation. Follow the on screen directions to install the required software. We recommend you install ALL the software! You may also need to register the IAR product. Connection 4. On the RDK, ensure the switch, SW5, is set to “DEBUG” (ON, OFF, ON, ON) as shown on the right. 5. Connect one end of the included USB cable to your computer and the other end to Mini USB connector, J16, to the left of the serial D-SUB. This is the debug interface and from where we power the board. 6. The ‘Found New Hardware’ Wizard may appear. Please follow the steps below to install the drivers. Note that administrator privileges are required for a Windows™ 2000/XP/Vista/Win7 machines. Windows™ 2000/XP Windows Vista / Windows 7 (32 or 64) a. Select option ‘No, not this time’ in “Found New Hardware” a. Select “Locate and install driver software (recommended)”. Wizard dialog, and click <Next> button. b. Verify the “Recommended” option is selected and click b. “User Account Control” dialog box will appear. If applicable, enter <Next>. administrator password and click <OK>. c. If using Windows XP, go to step ‘e’; otherwise, click <Next>. c. Driver installation will start. After a couple of minutes a “Windows security” dialog box will appear, select “install this driver software anyway.” d. Click <Next> to install the driver. d. “Device driver software installed successfully” pop-up will appear in the windows toolbar and installation will be completed. e. Click <Finish> to close the wizard. RDK Validation Before we program the board, let’s verify the board is working when you received it. 7. On the RDK, set the switch, SW5, so it’s set to “RUN” (ON, ON, ON, ON) as shown on the right. 8. Press the “RESET” button located above the Analog Devices logo. • A crosshair should appear on the display similar to the picture on the right. • As you tilt the board, the dot should move around the display. • Pressing SWITCH 3 next to the “mute” text on the display will cause the speaker to emit a tone. Tilting the board on the ‘f’ axis will cause the tone’s pitch to change, while tilting the board on the ‘V’ axis will cause the volume to change. • Sequentially pressing SWITCH 3 will mute and unmute the tone. 9. When you are done, set the switch, SW5, back to “DEBUG” (ON, OFF, ON, ON). November 30, 2011 R20UT2568EU0101
IAR’s Embedded Workbench for RL78 and Demonstration Programs The RL78G13 RDK is supported by IAR System’s Embedded Workbench Kickstart. This demo version of the IAR tools is full featured, but limited to a 16KB compiled output. Embedded Workbench integrates various tools such as the compiler, assembler, debugger and editor into a common graphical user interface. 10. Launch “IAR Embedded Workbench for Renesas RL78 1.10 Kickstart” from the Start Menu (All Programs > IAR Systems > IAR Embedded Workbench for Renesas RL78 1.10 Kickstart). 11. In the “IAR Information Center for Renesas RL78” window, click on the “Example Projects” icon. 12. In the “Example projects” window, click on the “RL78G13 Demonstration Kit Samples ” icon. 13. In the “Renesas Electronics Examples” window, click on the “RL78 Demonstration Kit Samples” icon. 14. In the “RL78 Demonstration Kit Samples” window, click on the “YRDKRL78G13 RL78/G13 Demonstration Kit Samples” icon. 15. Click on “Open project” for the Debugging project. Then select a destination folder to where the Workspace will be copied. The IDE should come up with the list of demo projects. 16. Alternately, you can navigate to the example project (RDKRL78G13.eww) that is placed along that tree : \RL78\examples\Renesas\Development Kit Samples\RDKRL78G13\Debugging Project NOTE: While we were drilling down in the pages above, we could have selected other third-party vendors such as SEGGER or Micrium versus Renesas, and under the “YRDKRL78G13 RL78/G13 Demonstration Kit Samples” page, we could have selected any of the other available demos. Select and Build a Project 17. The Workspace window is open and lists a dozen projects featuring demos with the ADC, the serial port, the DMA engine, the IIC port, the LVD, the RTC and various timers. Click one of these modules, right-click and select “Set as active”. This will activate the current project. 18. Under the “Workspace” dialog, right click on the selected project and click on “Rebuild All.” This can also be done from the top menu bar by selecting “Project”, then “Rebuild All.” NOTE: On the dialog where we selected “Tutorial - Debug”, you could have selected any of the number of example projects that show how to use this device. Connect to the Renesas Demonstration Kit 19. Make sure your board is connected with the dip switches set for “DEBUG” as indicated in steps 3 and 4 above. 20. Click the “Download and Debug” icon on the icon bar or by selecting “Project”, then “Download and Debug” from the top menu bar. Embedded Workbench will download the code to the RL78 RDK and switch to debug mode. Note: The ‘Downloading” window will show the progress of the download; once completed it will disappear. This may be VERY fast. Running the Demo! 21. Click the “Reset” icon on the debug icon bar or by selecting “Debug”, then “Reset” from the top menu bar. 22. Click the “Go” icon on the debug icon bar or by selecting “Debug”, then “Go” from the top menu bar. • Initially, the LCD Display will show a welcome screen with some directions for each demo. • Press a given combination of SW1/SW2/SW3 and the rotary potentiometer to go thru the demo based on the displayed instructions. • You may find additional information in the project Text Files. 23. Click the “Stop” icon to stop code execution. Embedded Workbench will display the source code at the current program counter. 24. Press the “Stop Debugging” icon when you are finished with the debugger. This will return you to the editor windows. Compilers The demonstration code is built using IAR Systems’ Embedded Workbench. This compiler is fully functional, but limited to 16KB. Fully licensed RL78 compiler versions are available from your IAR supplier. Support Support Forums for this RDK: www.RenesasRulz.com/rdkRL78G13 Online training for RL78 and other products and tools is available at: www.RenesasInteractive.com Website for this RDK: www.renesas.com/rdkRL78G13install Technical Support Email Addresses: America: techsupport.america@renesas.com // Europe: tools.support.eu@renesas.com // Japan: csc@renesas.com © 2011 Renesas Electronics America, Inc. All rights reserved. © 2011 Renesas Electronics Corporation. All rights reserved. November 30, 2011 R20UT2568EU0101