ICGOO在线商城 > R0K536CAMS000BE
 Datasheet下载
- 型号: R0K536CAMS000BE
- 制造商: RENESAS ELECTRONICS
- 库位|库存: xxxx|xxxx
- 要求:
| 数量阶梯 | 香港交货 | 国内含税 |
| +xxxx | $xxxx | ¥xxxx |
查看当月历史价格
查看今年历史价格
R0K536CAMS000BE产品简介:
ICGOO电子元器件商城为您提供R0K536CAMS000BE由RENESAS ELECTRONICS设计生产,在icgoo商城现货销售,并且可以通过原厂、代理商等渠道进行代购。 提供R0K536CAMS000BE价格参考以及RENESAS ELECTRONICSR0K536CAMS000BE封装/规格参数等产品信息。 你可以下载R0K536CAMS000BE参考资料、Datasheet数据手册功能说明书, 资料中有R0K536CAMS000BE详细功能的应用电路图电压和使用方法及教程。
| 参数 | 数值 |
| 产品目录 | 编程器,开发系统 |
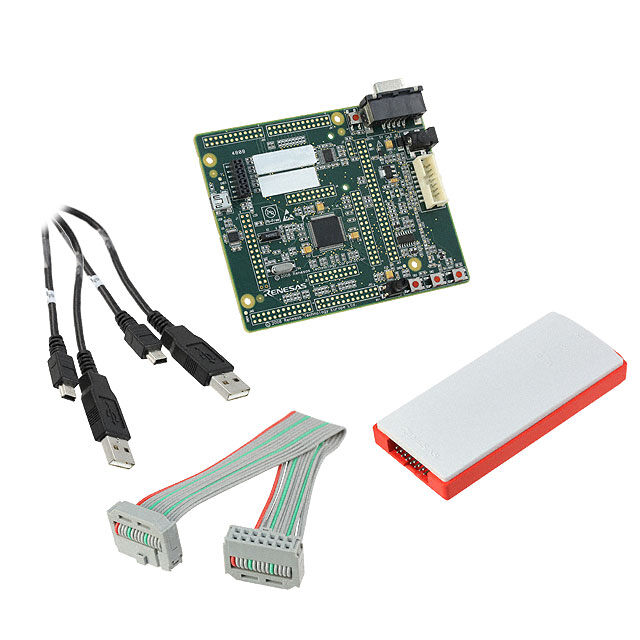
| 描述 | KIT STARTER FOR M16C/6C |
| 产品分类 | 评估板 - 嵌入式 - MCU, DSP |
| 品牌 | Renesas Electronics America |
| 数据手册 | |
| 产品图片 |
|
| 产品型号 | R0K536CAMS000BE |
| rohs | 无铅 / 符合限制有害物质指令(RoHS)规范要求 |
| 产品系列 | M16C |
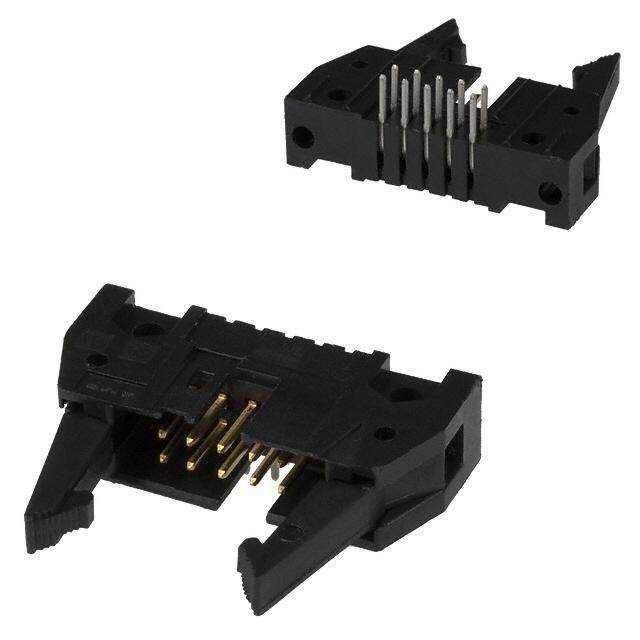
| 内容 | 板,电缆,LCD,E8a 编程器 |
| 安装类型 | 固定 |
| 平台 | Renesas 入门套件 |
| 操作系统 | - |
| 板类型 | 评估平台 |
| 标准包装 | 1 |
| 核心处理器 | M16C/60 |
| 类型 | MCU 16-位 |
| 设计资源 | |
| 配套使用产品/相关产品 | M16C/6C |


- 商务部:美国ITC正式对集成电路等产品启动337调查
- 曝三星4nm工艺存在良率问题 高通将骁龙8 Gen1或转产台积电
- 太阳诱电将投资9.5亿元在常州建新厂生产MLCC 预计2023年完工
- 英特尔发布欧洲新工厂建设计划 深化IDM 2.0 战略
- 台积电先进制程称霸业界 有大客户加持明年业绩稳了
- 达到5530亿美元!SIA预计今年全球半导体销售额将创下新高
- 英特尔拟将自动驾驶子公司Mobileye上市 估值或超500亿美元
- 三星加码芯片和SET,合并消费电子和移动部门,撤换高东真等 CEO
- 三星电子宣布重大人事变动 还合并消费电子和移动部门
- 海关总署:前11个月进口集成电路产品价值2.52万亿元 增长14.8%


PDF Datasheet 数据手册内容提取
To our customers, Old Company Name in Catalogs and Other Documents On April 1st, 2010, NEC Electronics Corporation merged with Renesas Technology Corporation, and Renesas Electronics Corporation took over all the business of both companies. Therefore, although the old company name remains in this document, it is a valid Renesas Electronics document. We appreciate your understanding. Renesas Electronics website: http://www.renesas.com April 1st, 2010 Renesas Electronics Corporation Issued by: Renesas Electronics Corporation (http://www.renesas.com) Send any inquiries to http://www.renesas.com/inquiry.
Notice 1. All information included in this document is current as of the date this document is issued. Such information, however, is subject to change without any prior notice. Before purchasing or using any Renesas Electronics products listed herein, please confirm the latest product information with a Renesas Electronics sales office. Also, please pay regular and careful attention to additional and different information to be disclosed by Renesas Electronics such as that disclosed through our website. 2. Renesas Electronics does not assume any liability for infringement of patents, copyrights, or other intellectual property rights of third parties by or arising from the use of Renesas Electronics products or technical information described in this document. No license, express, implied or otherwise, is granted hereby under any patents, copyrights or other intellectual property rights of Renesas Electronics or others. 3. You should not alter, modify, copy, or otherwise misappropriate any Renesas Electronics product, whether in whole or in part. 4. Descriptions of circuits, software and other related information in this document are provided only to illustrate the operation of semiconductor products and application examples. You are fully responsible for the incorporation of these circuits, software, and information in the design of your equipment. Renesas Electronics assumes no responsibility for any losses incurred by you or third parties arising from the use of these circuits, software, or information. 5. When exporting the products or technology described in this document, you should comply with the applicable export control laws and regulations and follow the procedures required by such laws and regulations. You should not use Renesas Electronics products or the technology described in this document for any purpose relating to military applications or use by the military, including but not limited to the development of weapons of mass destruction. Renesas Electronics products and technology may not be used for or incorporated into any products or systems whose manufacture, use, or sale is prohibited under any applicable domestic or foreign laws or regulations. 6. Renesas Electronics has used reasonable care in preparing the information included in this document, but Renesas Electronics does not warrant that such information is error free. Renesas Electronics assumes no liability whatsoever for any damages incurred by you resulting from errors in or omissions from the information included herein. 7. Renesas Electronics products are classified according to the following three quality grades: “Standard”, “High Quality”, and “Specific”. The recommended applications for each Renesas Electronics product depends on the product’s quality grade, as indicated below. You must check the quality grade of each Renesas Electronics product before using it in a particular application. You may not use any Renesas Electronics product for any application categorized as “Specific” without the prior written consent of Renesas Electronics. Further, you may not use any Renesas Electronics product for any application for which it is not intended without the prior written consent of Renesas Electronics. Renesas Electronics shall not be in any way liable for any damages or losses incurred by you or third parties arising from the use of any Renesas Electronics product for an application categorized as “Specific” or for which the product is not intended where you have failed to obtain the prior written consent of Renesas Electronics. The quality grade of each Renesas Electronics product is “Standard” unless otherwise expressly specified in a Renesas Electronics data sheets or data books, etc. “Standard”: Computers; office equipment; communications equipment; test and measurement equipment; audio and visual equipment; home electronic appliances; machine tools; personal electronic equipment; and industrial robots. “High Quality”: Transportation equipment (automobiles, trains, ships, etc.); traffic control systems; anti-disaster systems; anti- crime systems; safety equipment; and medical equipment not specifically designed for life support. “Specific”: Aircraft; aerospace equipment; submersible repeaters; nuclear reactor control systems; medical equipment or systems for life support (e.g. artificial life support devices or systems), surgical implantations, or healthcare intervention (e.g. excision, etc.), and any other applications or purposes that pose a direct threat to human life. 8. You should use the Renesas Electronics products described in this document within the range specified by Renesas Electronics, especially with respect to the maximum rating, operating supply voltage range, movement power voltage range, heat radiation characteristics, installation and other product characteristics. Renesas Electronics shall have no liability for malfunctions or damages arising out of the use of Renesas Electronics products beyond such specified ranges. 9. Although Renesas Electronics endeavors to improve the quality and reliability of its products, semiconductor products have specific characteristics such as the occurrence of failure at a certain rate and malfunctions under certain use conditions. Further, Renesas Electronics products are not subject to radiation resistance design. Please be sure to implement safety measures to guard them against the possibility of physical injury, and injury or damage caused by fire in the event of the failure of a Renesas Electronics product, such as safety design for hardware and software including but not limited to redundancy, fire control and malfunction prevention, appropriate treatment for aging degradation or any other appropriate measures. Because the evaluation of microcomputer software alone is very difficult, please evaluate the safety of the final products or system manufactured by you. 10. Please contact a Renesas Electronics sales office for details as to environmental matters such as the environmental compatibility of each Renesas Electronics product. Please use Renesas Electronics products in compliance with all applicable laws and regulations that regulate the inclusion or use of controlled substances, including without limitation, the EU RoHS Directive. Renesas Electronics assumes no liability for damages or losses occurring as a result of your noncompliance with applicable laws and regulations. 11. This document may not be reproduced or duplicated, in any form, in whole or in part, without prior written consent of Renesas Electronics. 12. Please contact a Renesas Electronics sales office if you have any questions regarding the information contained in this document or Renesas Electronics products, or if you have any other inquiries. (Note 1) “Renesas Electronics” as used in this document means Renesas Electronics Corporation and also includes its majority- owned subsidiaries. (Note 2) “Renesas Electronics product(s)” means any product developed or manufactured by or for Renesas Electronics.
Quick Start Renesas Starter Kit for M16C6C
1. Installation Do not connect the E8A debugger hardware until the software support has been installed. 1. Insert the CD into your computer’s CD-ROM drive. The CD should automatically run the installation program. If the installer does not start, browse to the CD root folder and double click on ‘setup.exe’. 2. Windows Vista users may see “User Account Control” dialog box. If applicable enter the administrator password and click <OK>. 3. The installer will ask you which language is to be used, please choose the appropriate one and click <OK>. 4. On the first screen of the installer proper, click <Next>. 5. The License Agreement will be shown, read and click <Yes>. 6. The next screen asks you to pick the world region – please select and click <Next>. 7. The destination folders are specified on the next screens. It is recommended to accept the default settings. Click <Next> to continue. 8. Click <Next> on all screens until the Installation process commences. 9. After the completion of successful installation, click <Finish>. 2. Connection 10. Fit the LCD module to the connector marked ‘LCD’ on the RSK, so it lies above U4. Ensure all the pins of the connector are correctly inserted in the socket. 11. Now connect the E8A Emulator to header marked ‘E8A’ on the RSK using the ribbon cable. 12. Connect the E8A debugger to a spare USB port of PC. 13. The ‘Found New Hardware’ Wizard will appear. Please follow the steps below to install the drivers. Note that, administrator privileges are required for a Windows™ 2000/XP/Vista machine. Windows™ 2000/XP Windows Vista a. Select option ‘No, not this time’ in “Found New a. Select “Locate and install driver software Hardware” Wizard dialog, and Click <Next> button. (recommended)”. b. Verify the “Recommended” option is selected and b. “User Account Control” dialog box will appear. If click <Next>. applicable, enter administrator password and click <OK>. c. If using Windows XP, go to step e; otherwise click c. Driver installation will start. After couple of minutes <Next>. “Windows security” dialog box will appear, select d. Click <Next> to install the driver. “install this driver software anyway”. e. Click <Finish> to close the wizard. d. “Device driver software installed successfully” pop- up will appear in the windows toolbar and installation will complete. Note: The Windows driver signing dialog may be displayed. Please accept the driver to continue. 3. HEW Workspace HEW integrates various tools such as compiler, assembler, debugger and editor into a common graphical user interface. To learn more on how to use HEW, open the HEW manual installed on your computer (Start Menu > All Programs > Renesas > High-performance Embedded Workshop > Manual Navigator). 14. Launch HEW from the Start Menu. (Start Menu > All Programs > Renesas > High-performance Embedded Workshop). 15. In the “Welcome” dialog box: Verify “Create New Workspace” is selected. Click <OK> 16. In the “New Project Workspace” dialog box: Set the “CPU Family” to “M16C”, and verify the “Tool chain” is set to “Renesas M16C Standard”. Select “RSKM16C6C” from the left hand pane. 17. Enter a name for the workspace. The project name will be automatically completed with the Workspace name. You can change this name to ‘Tutorial’ if required. Click <OK>. 18. On the “RSKM16C6C – Step 1” window: Select “Tutorial” and click <Next>. 19. On the “RSKM16C6C – Step 2” window: Click <Finish>. 20. On the Project Generator Information window: Click <OK>. The project that is created has two configurations. The Release configuration can be used for the final release code version. The Debug configuration allows modifications to the configuration for debugging. 21. Select the ‘Debug’ build configuration in the left hand drop down list on the tool bar. 22. Click on the ‘Build’ icon to compile, assemble and link the project. 4. Programming and Debug 23. Ensure that ‘SessionM16C_E8a_SYSTEM’ session in the right hand drop down list on the tool bar is selected.
24. Click the <Connect> button on the debug toolbar 25. Select the correct device type (e.g. R5F36CAM for RSKM16C6C) and MCU group (M16C/6C Group for RSKM16C6C) as shown in the following dialog box. 26. Select ‘Erase Flash and Connect’ option. 27. Check the option “Power Target from Emulator”, Select power supply using radio button as ‘5.0V’. Make sure that the option “PM13 (b3 of 000005H) is 1” is checked under ‘MCU setting’ tab, the baud rate is set to 750000bps, and the Firmware location Work RAM is set to 0400h and click <OK>. If this isn’t the first time you have used the E8A module with this RSK, please skip to step 32. First use of the E8A module 28. The ‘Please choose driver’ dialog will be shown. Click <OK> 29. The ‘Driver Details’ dialog will be shown, please select “Renesas E-Series USB Driver” as illustrated. The ‘Interface’ and ‘Channel’ items will be automatically populated. Click <Close>. 30. The Firmware setup dialog will be shown warning you not to disconnect the USB cable until the firmware download is complete. Click <OK>. 31. The firmware will be downloaded to the E8A module; this will take a few moments. Please do not disconnect the E8A from the host during download, doing so is likely to damage the E8A module. 32. Right click on the download module listed in the left hand pane and select ‘Download’. The code will not yet be downloaded to the microcontroller.
33. Click the <Reset – Go> button. The code will now be downloaded (this may take several seconds) and will then run. You will see the LEDs flashing on the board. 34. Click the <Stop> button. The code will stop and the source code will be opened at the current program counter. 5. Next Step After you have completed this quick start procedure, please review the tutorial code and sample code that came with the kit. You can add projects to the current workspace by selecting (Project > Insert Project) from the main menu. The tutorials will help you understand the device and development process using Renesas Development Tools. The Hardware manual supplied with this RSK is current at the time of publication. Please check for any updates to the device manual from the Renesas internet site at: www.renesas.com/renesas_starter_kits 6. Renesas M16C Compiler The version of the compiler provided with this RSK is fully functional but time limited. You have 60 days to evaluate the full product before the compiler will limit the code linker to 64k bytes. Full licensed M16C compiler versions are available from your Renesas supplier. 7. Support Online technical support and information is available at: www.renesas.com/renesas_starter_kits Technical Contact Details America: techsupport.rta@renesas.com Europe: tools.support.eu@renesas.com Japan: csc@renesas.com Note on Autoupdate: The Autoupdater is configured to automatically add itself to the Startup folder in the Windows Start Menu and use the registry defaults for access to the web. After restarting the machine the Icon will appear in the System Tray next to the clock. To change the settings or access Autoupdate, simply right-click on the icon and use the menu that appears. © 2009 Renesas Technology Europe Ltd. © 2009 Renesas Technology Corporation. © 2009 Renesas Solutions Corporation. D008974_11_V001