ICGOO在线商城 > 集成电路(IC) > 数据采集 - 模数转换器 > DDC264CKZAW

 Datasheet下载
- 型号: DDC264CKZAW
- 制造商: Texas Instruments
- 库位|库存: xxxx|xxxx
- 要求:
| 数量阶梯 | 香港交货 | 国内含税 |
| +xxxx | $xxxx | ¥xxxx |
查看当月历史价格
查看今年历史价格
DDC264CKZAW产品简介:
ICGOO电子元器件商城为您提供DDC264CKZAW由Texas Instruments设计生产,在icgoo商城现货销售,并且可以通过原厂、代理商等渠道进行代购。 DDC264CKZAW价格参考。Texas InstrumentsDDC264CKZAW封装/规格:数据采集 - 模数转换器, 20 Bit Analog to Digital Converter 64 Input 32 Sigma-Delta 100-NFBGA (9x9)。您可以下载DDC264CKZAW参考资料、Datasheet数据手册功能说明书,资料中有DDC264CKZAW 详细功能的应用电路图电压和使用方法及教程。
| 参数 | 数值 |
| 产品目录 | 集成电路 (IC) |
| 描述 | IC ADC 20BIT 6.25KSPS 100NFBGA |
| 产品分类 | |
| 品牌 | Texas Instruments |
| 数据手册 | |
| 产品图片 | |
| 产品型号 | DDC264CKZAW |
| rohs | 无铅 / 符合限制有害物质指令(RoHS)规范要求 |
| 产品系列 | - |
| 位数 | 20 |
| 供应商器件封装 | 100-NFBGA(9x9) |
| 其它名称 | DDC264CKZAW-ND |
| 包装 | 托盘 |
| 安装类型 | 表面贴装 |
| 封装/外壳 | 100-LFBGA |
| 工作温度 | 0°C ~ 70°C |
| 数据接口 | 串行 |
| 标准包装 | 168 |
| 特性 | 同步采样 |
| 电压源 | 模拟和数字 |
| 转换器数 | 32 |
| 输入数和类型 | 64 单端 |
| 采样率(每秒) | 6.25k |


- 商务部:美国ITC正式对集成电路等产品启动337调查
- 曝三星4nm工艺存在良率问题 高通将骁龙8 Gen1或转产台积电
- 太阳诱电将投资9.5亿元在常州建新厂生产MLCC 预计2023年完工
- 英特尔发布欧洲新工厂建设计划 深化IDM 2.0 战略
- 台积电先进制程称霸业界 有大客户加持明年业绩稳了
- 达到5530亿美元!SIA预计今年全球半导体销售额将创下新高
- 英特尔拟将自动驾驶子公司Mobileye上市 估值或超500亿美元
- 三星加码芯片和SET,合并消费电子和移动部门,撤换高东真等 CEO
- 三星电子宣布重大人事变动 还合并消费电子和移动部门
- 海关总署:前11个月进口集成电路产品价值2.52万亿元 增长14.8%


PDF Datasheet 数据手册内容提取
Product Sample & Technical Tools & Support & Folder Buy Documents Software Community DDC264 SBAS368D–MAY2006–REVISEDDECEMBER2016 DDC264 64-Channel, Current-Input Analog-to-Digital Converter 1 Features 3 Description • Single-ChipSolutiontoDirectlyMeasure64Low- The DDC264 is a 20-bit, 64-channel, current-input 1 analog-to-digital (A/D) converter. It combines both LevelCurrents current-to-voltage and A/D conversion so that 64 • ProvenHigh-Precision,TrueIntegrating separate low-level current output devices, such as ArchitectureWith100%ChargeCollection photodiodes, can be directly connected to its inputs • EasyUpgradeforExistingDDCFamily anddigitized. Applications For each of the 64 inputs, the DDC264 uses the • VeryLowPower:3mW/channel proven dual switched integrator front-end. This • ExtremelyLinear: configuration allows for continuous current INL= ±0.025%ofReading ±1ppmofFSR integration: while one integrator is being digitized by the onboard A/D converter, the other is integrating • LowNoise:6.3ppmofFSR the input current. This architecture provides both a • AdjustableFull-ScaleRange very stable offset and a loss-less collection of the • AdjustableSpeed input current. Adjustable integration times range from 160 µs to 1 s, allowing currents from fAs to µAs to be – DataRatesupto6kSPSWith20-bit continuouslymeasuredwithoutstandingprecision. Performance The DDC264 has a serial interface designed for – IntegrationTimesaslowas160 µs daisy-chaining in multi-device systems. Simply • Daisy-ChainableSerialInterface connect the output of one device to the input of the • In-PackageBypassCapacitorsSimplifyPCB next to create the chain. Common clocking feeds all Design the devices in the chain so that the digital overhead inamulti-DDC264systemisminimal. 2 Applications The DDC264 uses a 5-V analog supply and a 2.7-V • CTScannerDAS to 3.6-V digital supply. Bypass capacitors within the DDC264 package help minimize the external • PhotodiodeSensors component requirements. Operating over the • X-RayDetectionSystems temperature range of 0°C to 70°C, the DDC264 SPACER 100-pin NFBGA package is offered in two versions: SPACER the DDC264C for low-power applications, and the DDC264CKwhenhigherspeedsarerequired. SimplifiedSchematic DeviceInformation(1) REF3040 OPA350 VREF Buffer PARTNUMBER PACKAGE BODYSIZE(NOM) DDC264 NFBGA(100) 9.00mm×9.00mm AVDD DVDD (1) For all available packages, see the orderable addendum at VREF CLK theendofthedatasheet. IN1 Configuration CONV and DIN_CFG Control CLK_CFG RESET To/From Controller DVALID Serial DCLK Interface DIN IN64 DOUT DDC264 QGND AGND DGND Copyright © 2016, Texas Instruments Incorporated ProtectedbyUSPatent#5841310 1 An IMPORTANT NOTICE at the end of this data sheet addresses availability, warranty, changes, use in safety-critical applications, intellectualpropertymattersandotherimportantdisclaimers.PRODUCTIONDATA.
DDC264 SBAS368D–MAY2006–REVISEDDECEMBER2016 www.ti.com Table of Contents 1 Features.................................................................. 1 8.5 Programming...........................................................21 2 Applications........................................................... 1 8.6 RegisterMaps.........................................................23 3 Description............................................................. 1 9 ApplicationandImplementation........................ 24 4 RevisionHistory..................................................... 2 9.1 ApplicationInformation............................................24 9.2 TypicalApplication..................................................25 5 DeviceComparisonTable..................................... 3 10 PowerSupplyRecommendations..................... 29 6 PinConfigurationandFunctions......................... 4 10.1 Power-UpSequencing..........................................29 7 Specifications......................................................... 5 10.2 PowerSuppliesandGrounding............................29 7.1 AbsoluteMaximumRatings......................................5 11 Layout................................................................... 30 7.2 ESDRatings..............................................................5 11.1 LayoutGuidelines.................................................30 7.3 RecommendedOperatingConditions.......................5 11.2 LayoutExample....................................................31 7.4 ThermalInformation..................................................6 12 DeviceandDocumentationSupport................. 32 7.5 ElectricalCharacteristics...........................................6 7.6 TypicalCharacteristics..............................................8 12.1 ReceivingNotificationofDocumentationUpdates32 12.2 CommunityResources..........................................32 8 DetailedDescription............................................ 11 12.3 Trademarks...........................................................32 8.1 Overview.................................................................11 12.4 ElectrostaticDischargeCaution............................32 8.2 FunctionalBlockDiagram.......................................13 12.5 Glossary................................................................32 8.3 FeatureDescription.................................................13 13 Mechanical,Packaging,andOrderable 8.4 DeviceFunctionalModes........................................20 Information........................................................... 32 4 Revision History NOTE:Pagenumbersforpreviousrevisionsmaydifferfrompagenumbersinthecurrentversion. ChangesfromRevisionC(July2011)toRevisionD Page • AddedESDRatingstable,FeatureDescriptionsection,DeviceFunctionalModes,ApplicationandImplementation section,PowerSupplyRecommendationssection,Layoutsection,DeviceandDocumentationSupportsection,and Mechanical,Packaging,andOrderableInformationsection.................................................................................................. 1 • MovedAVDDandDVDDrowstoRecommendedOperatingConditionstable...................................................................... 6 • MovedDynamicCharacteristicsrowstoRecommendedOperatingConditionstable .......................................................... 6 • DeletedVoltagerowfromElectricalCharacteristicstable..................................................................................................... 6 • Changed1.65mAto825µAinVoltageReferencesection................................................................................................. 16 • Changed680µAto340µAinVoltageReferencesection................................................................................................... 16 • Changed64to128intheformulainReadingtheMeasurementsection............................................................................ 27 • Changedhigh-impedancetolow-impedanceinShieldingAnalogSignalPathssection..................................................... 30 ChangesfromRevisionB(January,2011)toRevisionC Page • UpdatedNOISEvsC table;revisedvaluesforRange0performanceinfCandElectrons........................................ 7 SENSOR ChangesfromRevisionA(January,2011)toRevisionB Page • ChangedsecondparagraphofBasicIntegrationCyclesectiontocorrectCONVtimingdescriptionerror......................... 13 2 SubmitDocumentationFeedback Copyright©2006–2016,TexasInstrumentsIncorporated ProductFolderLinks:DDC264
DDC264 www.ti.com SBAS368D–MAY2006–REVISEDDECEMBER2016 5 Device Comparison Table MAXIMUM POWER/CHANNEL PRODUCT NO.OFCHANNELS FULL-SCALE PACKAGE-PIN DATARATE ATMAXDATARATE DDC112 2 1000pC 2KSPS 80mW SO-28,TQFP-32 DDC112K 2 1000pC 3KSPS 85mW SO-28,TQFP-32 DDC114 4 350pC 3.1KSPS 18mW QFN-48 DDC118 8 350pC 3.1KSPS 18mW QFN-48 DDC316 16 12pC 100KSPS 28mW BGA-64 DDC232C 32 350pC 3.1KSPS 7mW BGA-64 DDC232CK 32 350pC 6.2KSPS 10mW BGA-64 DDC264C 64 150pC 3.1KSPS 3mW BGA-100 DDC264CK 64 150pC 6.2KSPS 5.5mW BGA-100 DDC1128 128 150pC 6.2KSPS 5.5mW BGA-192 DD2256A 256 150pC 17KSPS 2.2mW BGA-323 Copyright©2006–2016,TexasInstrumentsIncorporated SubmitDocumentationFeedback 3 ProductFolderLinks:DDC264
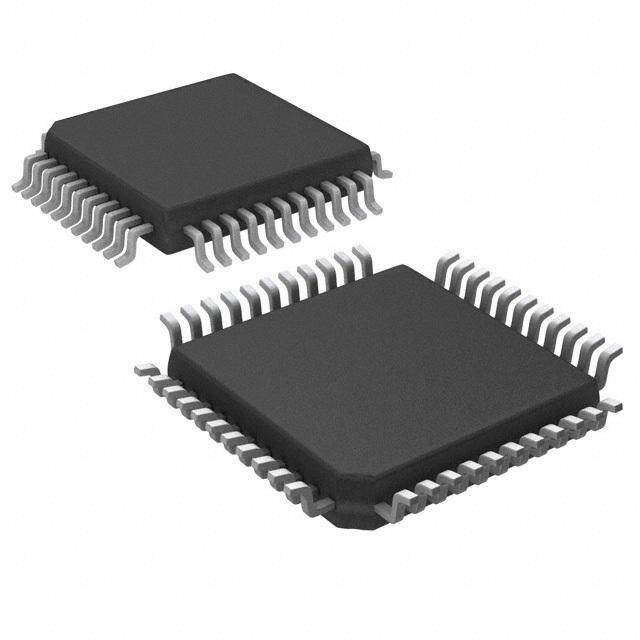
DDC264 SBAS368D–MAY2006–REVISEDDECEMBER2016 www.ti.com 6 Pin Configuration and Functions ZAWPackage 100-PinNFBGA TopView Columns K J H G F E D C B A IN39 IN40 IN8 IN45 IN16 IN49 IN51 IN55 IN57 IN58 1 IN38 IN7 IN41 IN12 IN48 IN19 IN20 IN23 IN25 IN26 2 IN37 IN6 IN9 IN44 IN15 IN50 IN53 IN56 IN60 IN59 3 IN3 IN5 IN42 IN11 IN47 IN18 IN21 IN28 IN27 IN32 4 IN34 IN35 IN10 IN43 IN14 IN52 IN54 IN61 IN62 IN63 5 R o w IN33 IN4 IN36 IN13 IN46 IN17 IN22 IN29 IN30 IN31 s 6 IN1 IN2 QGND QGND AGND AGND AGND AGND IN24 IN64 7 AGND AGND AGND AVDD AGND VREF VREF AGND AGND AGND 8 AVDD AVDD AVDD AVDD AVDD DGND DGND RST DIN_CFG CLK_CFG 9 CONV DGND DGND DVALID CLK DVDD DVDD DCLK DIN DOUT 10 PinFunctions PIN I/O DESCRIPTION NAME NO. AGND A8,B8,C7,C8,D7,E7,F7,F8,H8,J8.K8 Analog Analogground AVDD F9,G8,G9,H9,J9,K9 Analog Analogpowersupply,5-Vnominal CLK F10 Digitalinput Masterclockinput CLK_CFG A9 Digitalinput Configurationregisterclockinput CONV K10 Digitalinput Conversioncontrolinput:0=integrateonsideB;1=integrateonsideA DCLK C10 Digitalinput Serialdataclockinput DGND D9,E9,H10,J10 Digital Digitalground DIN B10 Digitalinput Serialdatainput DIN_CFG B9 Digitalinput Configurationregisterdatainput DOUT A10 Digitaloutput Serialdataoutput DVALID G10 Digitaloutput Datavalidoutput,activelow DVDD D10,E10 Digital Digitalpowersupply,3.3-Vnominal IN1-IN64 Rows1-6,A7,B7,J7,K7 Analoginput Analoginputsforchannels1to64 QGND G7,H7 Analog Quietanalogground;seetheguidelinesdescribedinLayout RESET C9 Digitalinput Digitalreset,activelow VREF D8,E8 Analoginput Externalvoltagereferenceinput,4.096-Vnominal 4 SubmitDocumentationFeedback Copyright©2006–2016,TexasInstrumentsIncorporated ProductFolderLinks:DDC264
DDC264 www.ti.com SBAS368D–MAY2006–REVISEDDECEMBER2016 7 Specifications 7.1 Absolute Maximum Ratings overoperatingfree-airtemperaturerange(unlessotherwisenoted) (1) MIN MAX UNIT AVDDtoAGND –0.3 6 V DVDDtoDGND –0.3 3.6 V AGNDtoDGND ±0.2 V VREFinputtoAGND 2 AVDD+0.3 V AnaloginputtoAGND –0.3 0.7 V DigitalinputvoltagetoDGND –0.3 0.3 V DigitaloutputvoltagetoDGND –0.3 0.3 V Operatingtemperature 0 70 °C Junctiontemperature,T 150 °C J Storagetemperature,T –60 150 °C stg (1) StressesbeyondthoselistedunderAbsoluteMaximumRatingsmaycausepermanentdamagetothedevice.Thesearestressratings only,whichdonotimplyfunctionaloperationofthedeviceattheseoranyotherconditionsbeyondthoseindicatedunderRecommended OperatingConditions.Exposuretoabsolute-maximum-ratedconditionsforextendedperiodsmayaffectdevicereliability. 7.2 ESD Ratings VALUE UNIT Electrostatic Humanbodymodel(HBM),perANSI/ESDA/JEDECJS-001,allpins(1) ±4000 V V (ESD) discharge Chargeddevicemodel(CDM),perJEDECspecificationJESD22-C101,allpins(2) ±1000 (1) JEDECdocumentJEP155statesthat500-VHBMallowssafemanufacturingwithastandardESDcontrolprocess. (2) JEDECdocumentJEP157statesthat250-VCDMallowssafemanufacturingwithastandardESDcontrolprocess. 7.3 Recommended Operating Conditions overoperatingfree-airtemperaturerange(unlessotherwisenoted) MIN NOM MAX UNIT V Referencevoltage 4 4.096 4.2 V REF POWER-SUPPLYREQUIREMENTS DDC264C 4.75 5 5.25 Analogpowersupplyvoltage(AVDD) V DDC264CK 4.9 5 5.1 Digitalpowersupplyvoltage(DVDD) 2.7 3.3 3.6 V DYNAMICCHARACTERISTICS DDC264C 3 3.125 Datarate kSPS DDC264CK 6 6.25 DDC264C 320 333 1,000,000 t Integrationtime µs INT DDC264CK 160 166 1,000,000 DDC264C 1 5 Clkdiv=0 MHz DDC264CK 1 10 Systemclock DDC264C 4 20 Clkdiv=1 MHz DDC264CK 4 40 Dataclock(DCLK) 32 MHz Configurationclock(CLK_CFG) 20 MHz Copyright©2006–2016,TexasInstrumentsIncorporated SubmitDocumentationFeedback 5 ProductFolderLinks:DDC264
DDC264 SBAS368D–MAY2006–REVISEDDECEMBER2016 www.ti.com 7.4 Thermal Information DDC264C, DDC264CK THERMALMETRIC(1) UNIT ZAW(NFBGA) 100PINS R Junction-to-ambientthermalresistance 25.7 °C/W θJA R Junction-to-case(top)thermalresistance 9.8 °C/W θJC(top) R Junction-to-boardthermalresistance 7.1 °C/W θJB ψ Junction-to-topcharacterizationparameter 0.1 °C/W JT ψ Junction-to-boardcharacterizationparameter 7 °C/W JB R Junction-to-case(bottom)thermalresistance — °C/W θJC(bot) (1) Formoreinformationabouttraditionalandnewthermalmetrics,seetheSemiconductorandICPackageThermalMetricsapplication report. 7.5 Electrical Characteristics atT =25°C,AVDD=5V,DVDD=3V,VREF=4.096V,t =333µsforDDC264Cor166µsforDDC264CK, A INT andrange=3(150pC)(unlessotherwisenoted) PARAMETER TESTCONDITIONS MIN TYP MAX UNIT ANALOGINPUT Range0 10.5 12.5 14.5 pC Range1 47.5 50 52.5 pC Range2 95 100 105 pC Range3 142.5 150 157.5 pC Negativefull-scalerange –0.4%ofPositivefull-scalerange pC ACCURACY Noise,low-levelinput(1) Range=3,CSENSOR(2)=35pF 6.3 ppmofFSR(3),rms ±0.025% ±0.05% Integrallinearityerror(4) Reading Reading ±1-ppm ±1.5-ppm FSR FSR Nomissingcodes,format=1 20 Resolution Bits Nomissingcodes,format=0 16 Inputbiascurrent TA=25°Cto45°C ±0.5 ±5 pA Rangeerrormatch(5) 0.1% 0.5% FSR RangesensitivitytoVREF VREF=4.096±0.1V 1:1 Offseterror ±500 ±1000 ppmofFSR Offseterrormatch(5) ±150 ppmofFSR DCbiasvoltage(6) Low-levelinput(<1%FSR) ±0.1 ±1 mV Power-supplyrejectionratio AtDC 100 ±300 ppmofFSR/V PERFORMANCEOVERTEMPERATURE Offsetdrift ±0.5 5(7) ppmofFSR/°C Offsetdriftstability ±0.2 2(7) ppmofFSR/minute DCbiasvoltagedrift(6) ±3 μV/°C Inputbiascurrentdrift TA=25°Cto45°C 0.01 1(7) pA/°C Rangedrift(8) 25 50 ppm/°C Rangedriftmatch(5) ±5 ppm/°C REFERENCE Inputcurrent(9) AveragevaluewithtINT=333µs 825 μA AveragevaluewithtINT=166µs(DDC264CK) 1650 μA (1) Inputislessthan1%offull-scale. (2) C isthecapacitanceseenattheDDC264inputsfromwiring,photodiode,etc. SENSOR (3) FSRisfull-scalerange. (4) Abest-fitlineisusedinmeasuringnonlinearity. (5) MatchingbetweensideAandsideBofthesameinput. (6) VoltageproducedbytheDDC264atitsinputthatisappliedtothesensor. (7) Ensuredbydesign;notproductiontested. (8) Rangedriftdoesnotincludeexternalreferencedrift. (9) Inputreferencecurrentdecreaseswithincreasingt (seeVoltageReference). INT 6 SubmitDocumentationFeedback Copyright©2006–2016,TexasInstrumentsIncorporated ProductFolderLinks:DDC264
DDC264 www.ti.com SBAS368D–MAY2006–REVISEDDECEMBER2016 Electrical Characteristics (continued) atT =25°C,AVDD=5V,DVDD=3V,VREF=4.096V,t =333µsforDDC264Cor166µsforDDC264CK, A INT andrange=3(150pC)(unlessotherwisenoted) PARAMETER TESTCONDITIONS MIN TYP MAX UNIT DIGITALINPUTANDOUTPUT VIH 0.8×DVDD DVDD+0.1 V VIL –0.1 0.2×DVDD V VOH IOH=–500µA DVDD–0.4 V VOL IOL=500µA 0.4 V IIN Inputcurrent 0<VIN<DVDD ±10 µA Dataformat(10) Straightbinary POWER-SUPPLYREQUIREMENTS DDC264C 34 Analogcurrent mA DDC264CK 60 DDC264C 7.5 Digitalcurrent mA DDC264CK 15 DDC264C 192 256 Totalpowerdissipation mW DDC264CK 350 DDC264C 3 4 Perchannelpowerdissipation mW/Channel DDC264CK 5.5 (10) Dataformatisstraightbinarywithasmalloffset.Thenumberofbitsintheoutputwordiscontrolledbytheformatbit. Table1.NOISEvsC (1) SENSOR C SENSOR RANGE 0pF 10pF 30pF 43pF 57pF 100pF 270pF 470pF 1000pF ppmofFSR,rms Range0:12.5pC 16 20 30 37 44 71 160 270 510 Range1:50pC 6.4 7.4 10 12 14 21 45 74 130 Range2:100pC 5.1 5.5 7.1 8 9.1 12 25 39 71 Range3:150pC 4.8 5 6 6.5 7.2 9.6 17 27 49 fC,rms Range0:12.5pC 0.2 0.25 0.38 0.46 0.55 0.89 2 3.38 6.38 Range1:50pC 0.32 0.37 0.53 0.62 0.73 1.09 2.29 3.73 6.88 Range2:100pC 0.51 0.55 0.71 0.8 0.91 1.28 2.5 3.97 7.16 Range3:150pC 0.72 0.75 0.9 0.98 1.08 1.45 2.67 4.14 7.36 Electrons,rms Range0:12.5pC 1250 1560 2340 2890 3430 5540 12480 21070 39790 Range1:50pC 2010 2310 3340 3910 4570 6800 14200 23300 42900 Range2:100pC 3220 3440 4450 5000 5680 7990 15600 24800 44700 Range3:150pC 4530 4730 5610 6120 6770 9050 16700 25800 45900 (1) NoiseinTable1isexpressedinthreedifferentunitsforreaderconvenience.Thefirstsectionlistsnoiseinunitsofpartspermillionof full-scalerange;thesecondsectionshowsnoiseasanequivalentinputcharge(infC);andthethirdsectionconvertsnoisetoelectrons. Copyright©2006–2016,TexasInstrumentsIncorporated SubmitDocumentationFeedback 7 ProductFolderLinks:DDC264
DDC264 SBAS368D–MAY2006–REVISEDDECEMBER2016 www.ti.com 7.6 Typical Characteristics atT =25°C(unlessotherwisenoted) A 70 125 e) DDC264C, 3kSPS e) DDC264CK, 6kSPS Range 0 al 60 Range 0 al 100 c c S S ull- 50 ull- 75 Range 3 F F m of 40 Range 3 m of 50 p 30 p 25 p p y ( 20 y ( 0 nearit 10 nearit -25 Range 2 nli 0 nli -50 al No -10 Range 1 Range 2 al No -75 Range 1 egr -20 egr -100 Int -30 Int -125 0 100k 200k 300k 400k 500k 600k 700k 800k 900k 1M 0 100k 200k 300k 400k 500k 600k 700k 800k 900k 1M Input (ppm of Full-Scale) Input (ppm of Full-Scale) Figure1.IntegralNonlinearity Figure2.IntegralNonlinearity 50 125 e) DDC264C, 3kSPS e) DDC264CK, 6kSPS cal 40 Range 3, +25°C cal 100 Range 3, +25°C S S Full- 30 Average Full- 75 of 20 of 50 m m p 10 p 25 p p Average y ( 0 y ( 0 earit -10 earit -25 n n nli -20 nli -50 o o al N -30 al N -75 egr -40 egr -100 Int -50 Int -125 0 100k 200k 300k 400k 500k 600k 700k 800k 900k 1M 0 100k 200k 300k 400k 500k 600k 700k 800k 900k 1M Input (ppm of Full-Scale) Input (ppm of Full-Scale) Figure3.IntegralNonlinearityEnvelopeofAll64Channels Figure4.IntegralNonlinearityEnvelopeofAll64Channels 50 125 e) DDC264C, 3kSPS +75°C e) DDC264CK, 6kSPS Scal 40 Range 3 +60°C Scal 100 Range 3 +75°C Full- 30 Full- 75 +60°C m of 20 m of 50 +45°C p 10 p 25 p p y ( 0 y ( 0 earit -10 +45°C earit -25 n +25°C n nli -20 nli -50 egral No --3400 -5°C egral No -1-0705 +25°C -5°C Int -50 Int -125 0 100k 200k 300k 400k 500k 600k 700k 800k 900k 1M 0 100k 200k 300k 400k 500k 600k 700k 800k 900k 1M Input (ppm of Full-Scale) Input (ppm of Full-Scale) Figure5.IntegralNonlinearityvsTemperature Figure6.IntegralNonlinearityvsTemperature 8 SubmitDocumentationFeedback Copyright©2006–2016,TexasInstrumentsIncorporated ProductFolderLinks:DDC264
DDC264 www.ti.com SBAS368D–MAY2006–REVISEDDECEMBER2016 Typical Characteristics (continued) atT =25°C(unlessotherwisenoted) A 10 12 DDC264C, 3kSPS Range 1 RMS) 98 DCDSECN2SO6R4C=K 3,5 6pkFSPS RMS) 10 e, 7 Range 3 e, Range 2 al al 8 Sc 6 Sc Full- 5 Full- 6 m of 4 m of Range 3 p p 4 p 3 p e ( e ( ois 2 ois 2 DDC264C, 3kSPS N 1 N DDC264CK, 6kSPS C = 35pF 0 0 SENSOR 0.1 1 10 100 0 20 40 60 80 100 Integration Time (ms) Percentage of Input (%) Figure7.NOISEvsIntegrationTime Figure8.NOISEvsInputLevel 40 10 CSENSOR= 35pF DDC264C, 3kSPS S) 35 DDC264CK, 6kSPS M Ranges 1, 2, 3 R 30 of Full-Scale, 2250 RRaannggee 1 0 Current (pA) 1 m 15 s pp Bia 0.1 e ( 10 Range 2 s oi N 5 Range 3 0 0.01 0 10 20 30 40 50 60 70 0 10 20 30 40 50 60 70 Temperature (°C) Temperature (°C) Figure9.NOISEvsTemperature Figure10.InputBIASCurrentvsTemperature 250 12 DDC264C, 3kSPS Repeated measurement DDC264C, 3kSPS 200 DC264CK, 6kSPS of offset drift taken over DC264CK, 6kSPS R) 150 Ranges 1, 2, 3 10 a 1-min interval Range 3 S m of F 10500 ences 8 et Drift (pp -1-05000 % of Occurr 64 s Off -150 2 -200 -250 0 25 30 35 40 45 50 55 60 65 70 6 5 3 5 0 5 3 5 6 Temperature (°C) -0. -0.4 -0. -0.1 0.1 0. 0.4 0. Offset Drift (ppm of FSR/min) Figure11.OffsetDriftvsTemperature Figure12.OffsetDriftStabilityOverTimeHistogram Copyright©2006–2016,TexasInstrumentsIncorporated SubmitDocumentationFeedback 9 ProductFolderLinks:DDC264
DDC264 SBAS368D–MAY2006–REVISEDDECEMBER2016 www.ti.com Typical Characteristics (continued) atT =25°C(unlessotherwisenoted) A 70 20 65 DDC264CK DDC264CK 60 6kSPS 15 6kSPS A) 55 A) m m nt ( 50 nt ( 10 e e Curr 45 Curr DDC264C 3kSPS 40 DDC264C 5 3kSPS 35 30 0 0 10 20 30 40 50 60 70 0 10 20 30 40 50 60 70 Temperature (°C) Temperature (°C) Figure13.AnalogSupplyCurrentvsTemperature Figure14.DigitalSupplyCurrentvsTemperature 2.5 3.5 DDC264C Range 3 DDC264CK Range 3 3kSPS 3 6kSPS 2 mV) Range 2 mV) 2.5 Range 2 age ( 1.5 age ( 2 Volt Range 1 Volt Bias 1 Range 0 Bias 1.5 Range 1 C C 1 D D Range 0 0.5 0.5 0 0 0 10 20 30 40 50 60 70 80 90 100 0 10 20 30 40 50 60 70 80 90 100 Percentage of Input (%) Percentage of Input (%) Figure15.DCBIASVoltagevsInputPercentage Figure16.DCBIASVoltagevsInputPercentage 600 DDC264C, 3kSPS 550 DDC264CK, 6kSPS Range 0 500 ) s m 450 r R, 400 S F 350 of 300 m p 250 p Range 3 ( 200 e Range 2 s 150 oi Range 1 N 100 50 0 0 100 200 300 400 500 600 700 800 900 1000 C (pF) SENSOR Figure17.NOISEvsC SENSOR 10 SubmitDocumentationFeedback Copyright©2006–2016,TexasInstrumentsIncorporated ProductFolderLinks:DDC264
DDC264 www.ti.com SBAS368D–MAY2006–REVISEDDECEMBER2016 8 Detailed Description 8.1 Overview The DDC264 contains 64 identical input channels (see Functional Block Diagram) that perform the function of current-to-voltage integration followed by a multiplexed A/D conversion. Each input has two integrators (see Figure 18) so that the current-to-voltage integration can be continuous in time. The DDC264 continuously integratestheinputsignalbyswitchingintegrationsbetweensideAandsideB. For example, while side A integrates the input signal, the side B outputs are digitized by the onboard ADC. This integration and A/D conversion process is controlled by the convert pin, CONV. The results from side A and side B of each signal input are stored in a serial output shift register. The DVALID output goes low when the shift registerdataarereadytoberetrieved. Input Side A Integrator Current IN1 QGND To ADC Photodiode Side B Integrator QGND Figure18. DualSwitchedIntegratorArchitecture Figure 19 shows a few integration cycles beginning after the device has been powered up, reset, and the Configuration Register has been programmed. The top signal is CONV and is supplied by the user. The integration status trace indicates which side is integrating. The output digital interface of the DDC264 sends the digital results through a synchronous serial interface that consists of a data clock (DCLK), a valid data pin (DVALID), a serial data output pin (DOUT), and a serial data input pin (DIN). As described above, DVALID goes active low when data are ready to be retrieved from the DDC264. It stays low until DCLK is taken high and then back low by the user. The text below the DVALID pulse indicates the side of the data available to be read. The arrow is used to match the data to the corresponding integration. Table 2 shows the timing specifications for Figure19. Copyright©2006–2016,TexasInstrumentsIncorporated SubmitDocumentationFeedback 11 ProductFolderLinks:DDC264
DDC264 SBAS368D–MAY2006–REVISEDDECEMBER2016 www.ti.com Overview (continued) Input current Q t CONV INT Integration Integrate B Integrate A Integrate B Integrate A Status DVALID t DR Side B Side A Side B Data Data Data Figure19. IntegrationSequenceTiming Table2.TimingRequirementsforIntegrationSequenceTiming MIN TYP MAX UNIT DDC264C(1) 320 1,000,000 t Integrationtime µs INT DDC264CK(2) 160 DDC264C(1) 276.4±0.4 t Timeuntildataready µs DR DDC264CK(2) 138.2±0.2 (1) Internalclockfrequency=5MHz (2) Internalclockfrequency=10MHz 12 SubmitDocumentationFeedback Copyright©2006–2016,TexasInstrumentsIncorporated ProductFolderLinks:DDC264
DDC264 www.ti.com SBAS368D–MAY2006–REVISEDDECEMBER2016 Finally, a second set of digital signals (DIN_CFG and CLK_CFG pins, see Configuration Register — Read and WriteOperations)isusedtoconfiguretheDDC264byaddressingadedicatedregister. 8.2 Functional Block Diagram VREF DVDD AVDD 0.2 (cid:29)F 0.1 (cid:29)F 0.3 (cid:29)F Dual IN1 Switched CLK Integrator ’6 CONV ADC Configuration and DIN_CFG Dual Control IN2 Switched CLK_CFG Integrator RESET Dual IN3 Switched Integrator ’6 ADC Dual DVALID IN4 Switched Integrator DCLK Dual IN61 Switched Integrator Serial ’6 Interface ADC Dual IN62 Switched Integrator DOUT Dual IN63 Switched Integrator ’6 ADC DIN Dual IN64 Switched Integrator AGND DGND Copyright © 2016, Texas Instruments Incorporated 8.3 Feature Description 8.3.1 DualSwitchedIntegrator:BasicIntegrationCycle The topology of the front end of the DDC264 is an analog integrator as shown in Figure 20. In this diagram, only input IN1 is shown. The input stage consists of an operational amplifier, a selectable feedback capacitor network (C ), and several switches that implement the integration cycle. The timing relationships of all of the switches F shown in Figure 20 are illustrated in Figure 21. Figure 21 conceptualizes the operation of the integrator input stageoftheDDC264andmustnotbeusedasanexacttimingtoolfordesign. Copyright©2006–2016,TexasInstrumentsIncorporated SubmitDocumentationFeedback 13 ProductFolderLinks:DDC264
DDC264 SBAS368D–MAY2006–REVISEDDECEMBER2016 www.ti.com Feature Description (continued) See Figure 22 for the block diagrams of the reset, integrate, wait, and convert states of the integrator section of the DDC264. This internal switching network is controlled externally with the convert pin (CONV) and the system clock (CLK). For the best noise performance, CONV must be synchronized with the falling edge of CLK. TI recommendstogglingCONVwithin±10nsofthefallingedgeofCLK. The noninverting inputs of the integrators are connected to the QGND pin. Consequently, the DDC264 analog ground, QGND, must be as clean as possible. In Figure 20, the feedback capacitors (C ) are shown in parallel F betweentheinvertinginputandoutputoftheoperationalamplifier.Atthebeginningofaconversion,theswitches S ,S ,S ,S ,S ,andS areset(seeFigure21). A/D INTA INTB REF1 REF2 RESET At the completion of an A/D conversion, the charge on the integration capacitor (C ) is reset with S and F REF1 S (see Figure 21 and Figure 22a). This process is done during reset. In this manner, the selected capacitor RESET is charged to the reference voltage, VREF. Once the integration capacitor is charged, S and S are REF1 RESET switched so that VREF is no longer connected to the amplifier circuit while it waits to begin integrating (see Figure 22b). With the rising edge of CONV, S closes, which begins the integration of side A. This process INTA putstheintegratorstageintoitsintegratemode(seeFigure22c). Charge from the input signal is collected on the integration capacitor, causing the voltage output of the amplifier to decrease. The falling edge of CONV stops the integration by switching the input signal from side A to side B (S andS ).PriortothefallingedgeofCONV,thesignalonsideBwasconvertedbytheA/Dconverterand INTA INTB reset during the time that side A was integrating. With the falling edge of CONV, side B starts integrating the input signal. At this point, the output voltage of the side A operational amplifier is presented to the input of the A/Dconverter(seeFigure22d). A special elecrostatic discharge (ESD) structure protects the inputs but does not increase current leakage on the inputpins. Range Selection Capacitors (C ) F S REF1 3pF VREF 12.5pF Range[0] Bit 25pF Range[1] Bit CIunrpreuntt IN1 SINTA SREF2 SADC1A SRESET To Converter ESD Protection Integrator A S Photodiode Diodes INTB QGND Integrator B Figure20. BasicIntegrationConfiguration 14 SubmitDocumentationFeedback Copyright©2006–2016,TexasInstrumentsIncorporated ProductFolderLinks:DDC264
DDC264 www.ti.com SBAS368D–MAY2006–REVISEDDECEMBER2016 Feature Description (continued) CONV CLK S INTA S INTB S REF1 S REF2 S RESET S A/D1A ConfIingtuergartaiotonr oAf Convert Wait Reset Wait Integrate Convert Wait Reset Wait DVALID VREF Integrator A Voltage Output Figure21. IntegrationTiming(seeFigure20) CF SREF1 CF SREF1 VREF VREF S S INT SREF2 INT SREF2 IN IN SRESET ToConverter SRESET ToConverter SA/D SA/D a) Reset/Auto Zero Configuration b) Wait Configuration CF SREF1 CF SREF1 VREF VREF SINT SREF2 SINT SREF2 IN IN S ToConverter S ToConverter RESET RESET S S A/D A/D c) Integrate Configuration d) Convert Configuration Figure22. FourConfigurationsoftheFront-EndIntegrators Copyright©2006–2016,TexasInstrumentsIncorporated SubmitDocumentationFeedback 15 ProductFolderLinks:DDC264
DDC264 SBAS368D–MAY2006–REVISEDDECEMBER2016 www.ti.com Feature Description (continued) 8.3.2 IntegrationCapacitors There are four different capacitor configurations available on-chip for both sides of every channel in the DDC264. These internal capacitors are trimmed in production to achieve the specified performance for range error of the DDC264. The range control bits (Range[1:0]) set the capacitor value for all integrators. Consequently, all inputs and both sides of each input always have the same full-scale range. Table 3 shows the capacitor value selected foreachrangeselection. Table3.RangeSelection RANGECONTROLBITS RANGE CF INPUTRANGE Range[1] Range[0] 0 0 0 3pF –0.04to12.5pC 1 0 1 12.5pF –0.2to50pC 2 1 0 25pF –0.4to100pC 3 1 1 37.5pF –0.6to150pC 8.3.3 VoltageReference The external voltage reference is used to reset the integration capacitors before an integration cycle begins. It is also used by the A/D converter while the converter is measuring the voltage stored on the integrators after an integration cycle ends. During this sampling, the external reference must supply the charge required by the A/D converter. For an integration time of 333 µs, this charge translates to an average V current of approximately REF 825 µA. The amount of charge required by the A/D converter is independent of the integration time; therefore, increasing the integration time lowers the average current. For example, an integration time of 800 µs lowers the averageV currentto340µA. REF 8.3.4 SerialDataOutputandControlInterface 8.3.4.1 SystemandDataClocks(CLKandDCLK) The device internal clock is derived directly or after a divide by 4 from the CLK input (see Bit[13] in the configuration register). TI recommends driving the CLK pin with a free-running clock source (that is, do not start andstopCLKbetweenconversions).Makesuretheclocksignalsareclean—avoidovershootorringing. As explained in Overview, DCLK is used to read out the data (more details in the following sections). For best performance, generate CLK and DCLK clocks from the same clock source. Disable DCLK by taking it low after thedatahavebeenshiftedoutandwhileCONVistransitioning. When using multiple DDC264 devices, pay close attention to the DCLK distribution on the printed-circuit board (PCB). In particular, make sure to minimize skew in the DCLK signal because this can lead to timing violations in theserialinterfacespecifications.SeeCascadingMultipleConvertersformoredetails. 8.3.4.2 CONV:SettingtheIntegrationTime As explained in Overview, one integration cycle happens between two consecutive CONV signal edges. For the best noise performance, CONV must be synchronized with the falling edge of CLK. TI recommends toggling CONVwithin±10nsofthefallingedgeofCLK. The minimum t for the DDC264 scales directly with the internal clock frequency. With an internal clock INT frequency of 10 MHz, the minimum time is 160 μs, which is achieved with the right register settings (see Configuration Register — Read and Write Operations for more details). If the minimum integration time is violated, the DDC264 stops continuously integrating the input signal. To return to normal operation (that is, continuous integration) after a violation of the minimum tINT specification, perform three integrations that each last for a minimum of 5000 internal clock periods. In other words, integrate three times with each integration lasting for at least 1 ms when using an internal clock frequency of 5 MHz. During this time, ignore the DVALID pin.Oncethethreeintegrationscomplete,normalcontinuousoperationresumes,anddatacanberetrieved. 16 SubmitDocumentationFeedback Copyright©2006–2016,TexasInstrumentsIncorporated ProductFolderLinks:DDC264
DDC264 www.ti.com SBAS368D–MAY2006–REVISEDDECEMBER2016 8.3.4.3 DataValid(DVALID) The DVALID signal indicates that data are ready to be read. Data retrieval may begin after DVALID goes low. Thissignalisgeneratedusinganinternalclockdivideddownfromthesystemclock,CLK.Thephaserelationship between this internal clock and CLK is set when power is first applied and is random. Because the user must synchronize CONV with CLK, the DVALID signal has a random phase relationship with CONV. This uncertainty is ±1/f . Polling DVALID eliminates any concern about this relationship. If the data readback is timed from CLK CONV, make sure to wait for the required amount of time. The data stored internally is lost if not read before the nextDVALID. 8.3.4.4 DataFormat The serial output data are provided in an offset binary code as shown in Table 4. The format bit in the configuration register selects how many bits are used in the output word. When format = 1, 20 bits are used. When format = 0, the lower four bits are truncated so that only 16 bits are used. Note that the LSB size is 16 times bigger when format = 0. An offset is included in the output to allow slightly negative inputs (for example, fromboardleakages)fromclippingthereading.Thisoffsetisapproximately0.4%ofthepositivefull-scale. Table4.IdealOutputCodevsInputSignal(1) INPUTSIGNAL IDEALOUTPUTCODEFORMAT=1 IDEALOUTPUTCODEFORMAT=0 ≥100%FS 11111111111111111111 1111111111111111 0.001531%FS 00000001000000010000 0000000100000001 0.001436%FS 00000001000000001111 0000000100000000 0.000191%FS 00000001000000000010 0000000100000000 0.000096%FS 00000001000000000001 0000000100000000 0%FS 00000001000000000000 0000000100000000 –0.3955%FS 00000000000000000000 0000000000000000 (1) Excludestheeffectsofnoise,INL,offset,andgainerrors. 8.3.4.5 DataRetrieval The data from the last conversion are available for retrieval on the falling edge of DVALID (see Figure 23 and Table5).Dataareshiftedoutonthefallingedgeofthedataclock,DCLK. Make sure not to retrieve data around changes in CONV because this change can introduce noise. Stop activity onDCLKatleast2 µsbeforeorafteraCONVtransition. Setting the format bit = 0 (16-bit output word) reduces the time required to retrieve data by 20% because there are fewer bits to shift out. This technique can be useful in multichannel systems requiring only 16 bits of resolution. CLK t PDCDV DVALID t t HDDODV PDDCDV DCLK t HDDODC DOUT Input 64 Input 64 Input 63 Input 5 Input 4 Input 2 Input 1 Input 1 Input 64 MSB LSB LSB LSB MSB LSB MSB LSB MSB t PDDCDO Figure23. DigitalInterfaceTimingDiagramforDataRetrievalFromaSingleDDC264 Copyright©2006–2016,TexasInstrumentsIncorporated SubmitDocumentationFeedback 17 ProductFolderLinks:DDC264
DDC264 SBAS368D–MAY2006–REVISEDDECEMBER2016 www.ti.com Table5.TimingforDDC264DataRetrieval MIN TYP MAX UNIT t PropagationdelayfromfallingedgeofCLKtoDVALIDLow 10 ns PDCDV t PropagationdelayfromfallingedgeofDCLKtoDVALIDHigh 5 ns PDDCDV t HoldtimethatDOUTisvalidbeforethefallingedgeofDVALID 400 ns HDDODV t HoldtimethatDOUTisvalidafterfallingedgeofDCLK 4 ns HDDODC t PropagationdelayfromfallingedgeofDCLKtovalidDOUT 25 ns PDDCDO 8.3.4.5.1 CascadingMultipleConverters MultipleDDC264devicescanbeconnectedinaserialconfiguration;seeFigure24. DOUTcanbeusedwithDINtodaisy-chainmultipleDDC264devicestogethertominimizewiring.Inthismodeof operation,theserialdataoutputisshiftedthroughmultipleDDC264s;seeFigure24. Figure25showsthetimingdiagramwhentheDINinputisusedtodaisy-chainseveraldevices.Table6 givesthe timingspecificationfordataretrievalusingDIN. Data Clock D K D K D K D K VALI DCL VALI DCL VALI DCL VALI DCL D D D D Data Retrieval DOUT DDC264 DIN DOUT DDC264 DIN DOUT DDC264 DIN DOUT DDC264 DIN Output 4 3 2 1 4 3 2 1 4 3 2 1 4 3 2 1 6 6 6 6 4 3 2 1 6 6 6 6 4 3 2 1 6 6 6 6 4 3 2 1 6 6 6 6 4 3 2 1 N N N N N N N N N N N N N N N N N N N N N N N N N N N N N N N N I I I I I I I I I I I I I I I I I I I I I I I I I I I I I I I I Sensor 56 55 54 53 96 95 94 93 92 91 90 89 32 31 30 29 28 27 26 25 68 67 66 65 64 63 62 61 4 3 2 1 2 2 2 2 1 1 1 1 1 1 1 1 1 1 1 1 1 1 1 1 Copyright © 2016,Texas Instruments Incorporated Figure24. Daisy-ChainedDDC264s DVALID DCLK tSTDIDC tHDDIDC DIN Input Input Input Input Input 3 Input 2 Input 2 Input 1 Input 1 DOUT 256 256 255 256 LSB MSB LSB MSB LSB MSB LSB MSB MSB (1) SeeCascadingMultipleConverters. Figure25. TimingDiagramWhenUsingDDC264DINFunction Table6.TimingforDDC264DataRetrievalUsingDIN MIN TYP MAX UNIT t SetuptimefromDINtofallingedgeofDCLK 10 ns STDIDC t HoldtimeforDINafterfallingedgeofDCLK 10 ns HDDIDC 18 SubmitDocumentationFeedback Copyright©2006–2016,TexasInstrumentsIncorporated ProductFolderLinks:DDC264
DDC264 www.ti.com SBAS368D–MAY2006–REVISEDDECEMBER2016 8.3.4.5.2 RetrievalBeforeCONVToggles Inthismethod,dataretrievalbeginssoonafter DVALID goeslowandfinishesbeforeCONVtoggles,asshownin Figure 26. For best performance, data retrieval must stop t before CONV toggles. This method is most SDCV appropriate for longer integration times and yields the best performance results as the output interface toggling noise does not interfere with the ADC conversion operation. The maximum time available for readback is t – t – t . The maximum number of DDC264s that can be daisy-chained together (format = 1) is INT CMDR SDCV calculatedbyEquation1. t -(t + t ) INT DR SDCV (20´64)t DCLK Note:(16×64)τ isusedforformat=0,whereτ istheperiodofthedataclock (1) DCLK DCLK For example, if t = 1000 µs and DCLK = 20 MHz, the maximum number of DDC264s with format = 1 is shown INT inEquation2. 1000ms-278.4ms = 11.5®11 DDC264s (1280)(50ns) or14DDC264sforformat=0 (2) CONV tINT tINT DVALID tDR t SDCV ¼ ¼ DCLK ¼ ¼ DOUT Side B Side A Data Data Figure26. ReadbackBeforeCONVToggles Table7.TimingforReadback MIN TYP MAX UNIT t DataretrievalshutdownbeforeorafteredgeofCONV 2 µs SDCV 8.3.4.5.3 RetrievalAfterCONVToggles For shorter integration times, more time is available if data retrieval begins after CONV toggles and ends before the new data are ready. Data retrieval must wait t after CONV toggles before beginning. See Figure 27 for SDCV an example of this timing sequence. The maximum time available for retrieval is t – (t + t ), DR SDCV HDDODV regardless of t . The maximum number of DDC264s that can be daisy-chained together with format = 1 is INT calculatedbyEquation3. 274ms (20´64)t DCLK Note:(16×64)τ isforformat=0 (3) DCLK ForDCLK=20MHz,themaximumnumberofDDC264sisfour(orfiveforformat=0). Copyright©2006–2016,TexasInstrumentsIncorporated SubmitDocumentationFeedback 19 ProductFolderLinks:DDC264
DDC264 SBAS368D–MAY2006–REVISEDDECEMBER2016 www.ti.com CONV tINT tINT tINT DVALID t DR t t SDCV HDDODV ¼ ¼ ¼ DCLK ¼ ¼ ¼ DOUT Side A Side B Side A Data Data Data Figure27. ReadbackAfterCONVToggles 8.3.4.5.4 RetrievalBeforeandAfterCONVToggles For the absolute maximum time for data retrieval, data can be retrieved before and after CONV toggles. Nearly all of t is available for data retrieval. Figure 28 illustrates how this process is done by combining the two INT previous methods. Pause the retrieval during CONV toggling to prevent digital noise, as discussed previously, andfinishbeforethenextdataareready.Themaximumnumber of DDC264s that can be daisy-chained together withformat=1iscalculatedbyEquation4. t -(t + t + t ) INT SDCV SDCV HDDODV (20´64)t DCLK Note:(16×64)τ isusedforformat=0 (4) DCLK Fort =400µsandDCLK=20MHz,themaximumnumberofDDC264sissix(orsevenforformat=0). INT CONV tINT tINT tINT DVALID t SDCV t t SDCV HDDODV ¼ ¼ ¼ ¼ ¼ ¼ DCLK ¼ ¼ ¼ ¼ ¼ ¼ DOUT Side B Side A Data Data Figure28. ReadbackBeforeandAfterCONVToggles 8.4 Device Functional Modes Therearenofunctionalmodesforthisdevice. 20 SubmitDocumentationFeedback Copyright©2006–2016,TexasInstrumentsIncorporated ProductFolderLinks:DDC264
DDC264 www.ti.com SBAS368D–MAY2006–REVISEDDECEMBER2016 8.5 Programming 8.5.1 Reset(RESET) The DDC264 is reset asynchronously by taking the RESET input low, as shown in Figure 29. Make sure the release pulse is a minimum of t wide. It is very important that RESET is glitch-free to avoid unintentional RST resets. The Configuration Register must be programmed immediately afterwards. After programming the DDC264,waitatleastfourconversionsbeforeusingthedata. RESET tRST Figure29. ResetTiming 8.5.2 ConfigurationRegister —ReadandWriteOperations The Configuration Register must be programmed after power-up or a device reset. The DIN_CFG, CLK_CFG, and RESET pins are used to write to this register. When beginning a write operation, hold CONV low and strobe RESET; see Figure 30. Then begin shifting in the configuration data on DIN_CFG. Data are written to the Configuration Register most significant bit first. The data are internally latched on the falling edge of CLK_CFG. Partial writes to the Configuration Register are not allowed, that is, make sure to send all 16 bits when updating theregister. Optional readback of the Configuration Register is available immediately after the write sequence. During readback, 320 '0's, then the 16-bit configuration data followed by a 4-bit revision ID and the check pattern are shifted out on the DOUT pin on the rising edge of DCLK. The check pattern can be used to check or verify the DOUTfunctionality. NOTE With format = 1, the check pattern is 300 bits, with only the last 72 bits non-zero. This sequence of outputs is repeated twice for each DDC264 block and daisy-chaining is supported in configuration readback. Table 9 shows the check pattern configuration during readback. Table 8 shows the timing for the Configuration Register read and write operations. Strobe CONV to begin normal operation, that is, CONV must not toggle during thereadbackoperation. Table8.TimingRequirementsfortheConfigurationRegisterRead/Write MIN TYP MAX UNIT tWTRST WaitRequiredfromResetHightoFirstRisingEdgeofCLK_CFG 2 µs WaitRequiredfromLastCLK_CFGofWriteOperationto tWTWR FirstDCLKofReadOperation 2 µs tSTCF Set-UpTimefromDIN_CFGtoFallingEdgeofCLK_CFG 10 ns tHDCF HoldTimeforDIN_CFGAfterFallingEdgeofCLK_CFG 10 ns tRST PulseWidthforRESETActive 1 µs Table9.CheckPatternDuringReadback FORMAT CHECKPATTERN TOTAL BIT (Hex) READBACKBITS 0 1800s,30F066012480F6h 1024 1 2280s,30F066012480F69055h 1280 Copyright©2006–2016,TexasInstrumentsIncorporated SubmitDocumentationFeedback 21 ProductFolderLinks:DDC264
DDC264 SBAS368D–MAY2006–REVISEDDECEMBER2016 www.ti.com tRST RESET Configuration Register Operations(1) Normal Operation tWTRST tWTWR CLK_CFG tSTCF tHDCF DIN_CFG MSB LSB Read Configuration Register Write Configuration Register Data and Check Pattern 1 320(2) DCLK DOUT MSB LSB 320 0s(2) Configuration Check Pattern Register Data CONV CLKmustberunningduringConfigurationRegisterwriteandreadoperations. In16-bitmode(format=0),only2560sarereadbeforetheConfigurationRegisterwriteandreadoperations. Figure30. ConfigurationRegisterWriteandReadOperations 22 SubmitDocumentationFeedback Copyright©2006–2016,TexasInstrumentsIncorporated ProductFolderLinks:DDC264
DDC264 www.ti.com SBAS368D–MAY2006–REVISEDDECEMBER2016 8.6 Register Maps ConfigurationRegisterBitAssignments BIT15 BIT14 BIT13 BIT12 BIT11 BIT10 BIT9 BIT8 0 0 Clkdiv 0 0 Range[1] Range[0] Format BIT7 BIT6 BIT5 BIT4 BIT3 BIT2 BIT1 BIT0 Version 0 0 Reserved 0 0 0 Test Bits15:14 Thesebitsmustalwaysbesetto 0. Bit13 Clkdiv TheClkdivinputenablesaninternaldivideronthesystemclockasshowninTable10.When Clkdiv=1,thesystemclockisdividedby4.Thisconfigurationallowsasystemclockthatis fasterbyafactoroffour,whichinturnprovidesafinerquantizationoftheintegrationtime, becausetheCONVsignalmustbesynchronizedwiththesystemclockforthebestperformance. 0=Internalclockdividersetto1 1=Internalclockdividersetto4 Table10.ClkdivOperation ClkdivBIT CLKDIVIDERVALUE CLKFREQUENCY INTERNALCLOCKFREQUENCY 0 1 5MHz 5MHz 1 4 20MHz 5MHz Bits12:11 Thesebitsmustalwaysbesetto 0. Bits10:9 Range[1:0] Thesebitssetthefull-scalerange. 00=Range0 =12.5pC 10=Range2 =100pC 01=Range1 =50pC 11=Range3 =150pC Bit8 Format Formatselectshowmanybitsareusedinthedataoutputword. 0=16-bitoutput 1=20-bitoutput Bit7 Version Thisbitmustbesettomatchthedevicebeingused. Mustbesetto0forDDC264C. Mustbesetto1forDDC264CK. Bits6:5 Thesebitsmustalwaysbesetto 0. Bit4 Reserved Thisbitisreservedandmustbesetto 0. Bits3:1 Thesebitsmustalwaysbesetto 0. Bit0 Test WhenTestModeisused,theinputs(IN1throughIN64)aredisconnectedfromtheDDC264 integratorstoenabletheusertomeasureazeroinputsignalregardlessofthecurrentsupplied totheinputs. 0=TESTmodeoff 1=TESTmodeon Copyright©2006–2016,TexasInstrumentsIncorporated SubmitDocumentationFeedback 23 ProductFolderLinks:DDC264
DDC264 SBAS368D–MAY2006–REVISEDDECEMBER2016 www.ti.com 9 Application and Implementation NOTE Information in the following applications sections is not part of the TI component specification, and TI does not warrant its accuracy or completeness. TI’s customers are responsible for determining suitability of components for their purposes. Customers should validateandtesttheirdesignimplementationtoconfirmsystemfunctionality. 9.1 Application Information A typical application case of the DDC family of products, including the DDC264, is the measurement of currents produced by photodiodes when excited by light, or the equivalent charge over a period of time (see Equation 5). The DDC264 can measure 64 channels simultaneously. As explained in Functional Block Diagram, the measurement is done by integrating the currents during a given time, set by the two consecutive edges of the CONVsignal,providedbythesystem,seeFigure19.TheresultoftheintegrationisshowninEquation5. t ò f Q= i(t)dt t i where • t andt representtheinstantwheretheintegrationstartsandfinishes,respectively i f • i(t)theinputcurrent(whichisafunctionoftime) • QthereportedresultbytheDDC (5) Alltemporalinformationofiinthatintervalislostandonlyanequivalentaverageicanbeobtained. The user must also provide a CLK signal used to run all the internal circuits, including the ADCs, which converts the result of the integration and generate a DVALID pulse to indicate that the conversion is done. The controller, then, can read that data, before it gets erased by the next conversion. The following sections explain the necessarycontrolsignalstooperatethedevice,andthechoicesthatthecircuitdesignercanmake. 24 SubmitDocumentationFeedback Copyright©2006–2016,TexasInstrumentsIncorporated ProductFolderLinks:DDC264
DDC264 www.ti.com SBAS368D–MAY2006–REVISEDDECEMBER2016 9.2 Typical Application Figure31. TypicalApplicationCircuit Copyright©2006–2016,TexasInstrumentsIncorporated SubmitDocumentationFeedback 25 ProductFolderLinks:DDC264
DDC264 SBAS368D–MAY2006–REVISEDDECEMBER2016 www.ti.com Typical Application (continued) 9.2.1 DesignRequirements For the following example, assume the user wants to measure the current coming from 128 photodiodes every 500µs,andthemaximumcurrentperphotodiodeis250nA. 9.2.2 DetailedDesignProcedure 9.2.2.1 InputConnection Figure 31 represents a top level schematic of a solution for this case. 2 DDC264 are used. Inputs are representedonthetopschematicbythetwoconnectorsontheleftandrightsides. The photodiodes must be connected to the inputs in such a way that the current flows into the device. To achieve that, usually the anode of the photodiode is connected to the input of the device (see Figure 20) and the cathode to a node with the same or higher voltage, in such a way that the photodiode is reverse biased or not biased at all. The application usually determines the choice. No bias minimizes dark current in the photodiode; therefore, minimizing errors during the integration or measurement of small signal currents. Nevertheless, the parasitic junction capacitance of the photodiode decreases with the reverse bias voltage. The lower the input capacitance, the lower the input noise (see Table 1). As such, applying a reverse bias reduces the noise of the measurement while increasing the dark current. The user must choose depending on their application. In applications with small signal currents, usually no bias is applied. In that case, the cathodes can be connected to AGND. Notice that although only positive currents (in the direction towards the inside of the device) can be measured, the device has around 0.4% margin towards the negative excursion. In this way, small offsets and negative currentsdonotsaturatethedeviceinthebottomrailandcanbedetectedandmeasured. 9.2.2.2 SelectingIntegrationTime,DeviceClock,andRange The second step is to select the right integration time. There may be system level constraints that set this. For instance, to get at least a given number of readings per second. Going faster than that may not be helpful, degrade performance and increase power unnecessarily. In this case, the user wants to, at least, get 2 KSPS (integration time = 500 µs). With 500 µs, the maximum integrated charge would be 250 nA × 500 µs = 125 pC. This is too much for Range 2 (100 pC full scale) but falls comfortably in Range 3 (150 pC). As such, the likely preferred option is to use Range 3 by setting bits 9 and 10 to one. Another potential option is to run the device slightly faster such that Range 2 can be used. In this case, 100 pC/250 nA = 400 µs, or 2.5 KSPS. Notice that this frequency (the frequency at which input currents are sampled) is actually 2× the frequency of the CONV signal. That is, 400 µs is half the period of the CONV signal, i.e. the time between two consecutive edges of the CONVsignal. The user must check the specification and performance curves to see the differences between both ranges for the specific conditions. Normally, performance may be close in both cases and operating the device slower may givesomeextraadvantageonpowerandhelprelaxpracticalsystemconstraints. For this particular case, both choices can be supported with the lower speed version device (DDC264C version), which supports up to 3 KSPS. As such, to benefit from this, the user must set bit 7 to zero. In this mode, the maximum internal clock is 5 MHz, so the user can choose to drive the CLK pin of the device with a 5-MHz clock maximumorwitha20-MHzclockmaximumandtheinternaldivideby4(settingregisterbit13toone). Notice that using a slower external clock is also possible, but the ADC conversion lasts longer (see t in DR Table 2). This affects the time left to capture data after DVALID and before CONV edge (see Reading the Measurement) 9.2.2.3 VoltageReference It is critical that V be stable during the different modes of operation (see Figure 22). The A/D converter REF measures the voltage on the integrator with respect to V . Because the integrator capacitors are initially reset REF to V , any drop in V from the time the capacitors are reset to the time when the converter measures the REF REF integrator output introduces an offset. It is also important that V be stable over longer periods of time because REF changes in V correspond directly to changes in the full-scale range. Finally, V must introduce as little REF REF additionalnoiseaspossible. 26 SubmitDocumentationFeedback Copyright©2006–2016,TexasInstrumentsIncorporated ProductFolderLinks:DDC264
DDC264 www.ti.com SBAS368D–MAY2006–REVISEDDECEMBER2016 Typical Application (continued) For these reasons, it is strongly recommended that the external reference source be buffered with an operational amplifier, as shown in Figure 32. In this circuit, the voltage reference is generated by a +4.096 V reference. A low-pass filter to reduce noise connects the reference to an operational amplifier configured as a buffer. This amplifier must have low noise and input/output common-mode ranges that support V . Even though the circuit REF in Figure 32might appear to be unstable because of the large output capacitors, it works well for the OPA350. TI does not recommend a series resistor be placed at its output to improve stability, because this can cause a drop in V which produces large offsets. 10 µF and 0.7 Ω are good initial values for the decoupling network close to REF theDDC264,butmayhavetobeoptimizeddependingonitsplacementandboardlayout. +5V +5V 0.10μF 0.47μF 7 2 1 6 To VREF Pin on 2 1kΩ 3 OPA350 the DDC264 REF3040 + 0.7Ω 0.7Ω 47μF 0.10μF 4 100μF(1) 10μF(1) 3 Near Each DDC Copyright © 2016,Texas Instruments Incorporated (1) CeramicX5Rcapacitorsarerecommended. Figure32. RecommendedExternalVoltageReferenceCircuitforBestLow-NoiseOperation Figure31showsaportionofthedrivingcircuitonthetoppart,drivingoneoftheDDC264.Thisassumesthatthe output of the reference IC is routed from somewhere else, due, for instance, to space limitations on the board. Being the reference noise critical for the final performance of the system, TI recommends shielding and passing the filter the signal low. The bottom of Figure 31 shows the second DDC264 where the reference is driven by the same buffer as the first DDC and only a decoupling network is added close to the device. This is again assuming space and cost limitations. Ideally the use of two different buffers, one close to each reference, isolates interactionsbetweenbothdevicesfrombeingcoupledthroughthereferenceline. 9.2.2.4 ReadingtheMeasurement As explained in Data Retrieval, the data can be read as soon as DVALID goes low. The user can choose to monitor this signal or simply wait a period of time predicted by t in Table 2. For this example, assuming that a DR CLK frequency of 5 MHz was selected, the data would be ready after approximately 276 µs. Staying with Range 3, the integration time is 500 µs and as such, after detecting DVALID, there is approximately 500 µs – 276 µs to read the data. We assume 220 µs to avoid getting too close to the CONV edge. In 20 bit mode, reading two DDC264, with daisy chain between DOUT and DIN, see Figure 31, would take 128 × 20 × (1/32 MHz) = 80 µs, which fits in the interval between DVALID and next CONV edge. This minimizes noise due to the DCLK and DOUT switching during the conversion of the ADC (which happens from CONV edge to /DVALID) and can help improve the performance. In Figure 31, both converters are connected in daisy chain, which minimizes the number of traces being routed back to the controller. One small drawback of this approach versus shifting the data of both DDC264 in parallel (without the daisy chain) is that the outputs switch for longer time (2×), increasing the total power by a small fraction (as the output switching power is only a small portion of the total power consumption). Another solution is to transfer part or all the data during the ADC conversion (see Retrieval Before and After CONV Toggles and Retrieval After CONV Toggles). A potential way to minimize this noise, speciallyiftheDOUTtracesarelongistobufferthemonboard,closetothedevice. Copyright©2006–2016,TexasInstrumentsIncorporated SubmitDocumentationFeedback 27 ProductFolderLinks:DDC264
DDC264 SBAS368D–MAY2006–REVISEDDECEMBER2016 www.ti.com 9.2.3 ApplicationCurve The frequency response of the DDC264 is set by the front-end integrators and is that of a traditional continuous time integrator, as shown in Figure 33. By adjusting the integration time, t , the user can change the 3-dB INT bandwidth and the location of the notches in the response. The frequency response of the A/D converter that follows the front-end integrator is of no consequence because the converter samples a held signal from the integrators. That is, the input to the A/D converter is always a DC signal. The output of the front-end integrators are sampled; therefore, aliasing can occur. Whenever the frequency of the input signal exceeds one-half of the samplingratethesignalfoldsbackdowntolowerfrequencies. 0 −10 B) −20 d ( n Gai −30 −40 −50 0.1 1 10 100 t t t t INT INT INT INT Frequency Figure33. FrequencyResponse 28 SubmitDocumentationFeedback Copyright©2006–2016,TexasInstrumentsIncorporated ProductFolderLinks:DDC264
DDC264 www.ti.com SBAS368D–MAY2006–REVISEDDECEMBER2016 10 Power Supply Recommendations 10.1 Power-Up Sequencing Before device power-up, all digital and analog inputs must be low. At the time of power-up, all of these signals must remain low until the power supplies have stabilized, as shown in Figure 34. The analog supply must come up before or at the same time as the digital supply. At this time, begin supplying the master clock signal to the CLK pin. Wait for time t , then give a RESET pulse. After releasing RESET, the Configuration Register must POR bewritten.Table11showsthetimingforthepower-upsequence. t POR Power Supplies t RST RESET CLK Configuration Write to the Serial Interface Configuration Register Figure34. DDC264TimingDiagramatPower-Up Table11.TimingforDDC264Power-UpSequence MIN TYP MAX UNIT t Waitafterpower-upuntilreset 250 ms POR 10.2 Power Supplies and Grounding Both AVDD and DVDD must be as quiet as possible. It is particularly important to eliminate noise from AVDD that is non-synchronous with the DDC264 operation. Figure 35 illustrates how to supply power to the DDC264. Each DDC264 has internal bypass capacitors on AVDD and DVDD; therefore, the only external bypass capacitors typically required are 10-µF ceramic capacitors, one per PCB. TI recommends connecting both the analoganddigitalgrounds(AGNDandDGND)toasinglegroundplaneonthePCB. Analog Supply 0.3μF AVDD AGND 10μF DDC264 Digital Supply 0.1μF DVDD DGND 10μF Copyright © 2016,Texas Instruments Incorporated Figure35. PowerSupplyConnections Copyright©2006–2016,TexasInstrumentsIncorporated SubmitDocumentationFeedback 29 ProductFolderLinks:DDC264
DDC264 SBAS368D–MAY2006–REVISEDDECEMBER2016 www.ti.com 11 Layout 11.1 Layout Guidelines 11.1.1 ShieldingAnalogSignalPaths As with any precision circuit, careful PCB layout ensures the best performance. It is essential to make short, direct interconnections and avoid stray wiring capacitance—particularly at the analog input pins and QGND. The analog input pins are low-impedance and extremely sensitive to extraneous noise. The QGND pin must be treated as a sensitive analog signal and connected directly to the supply ground with proper shielding. Leakage currents between the PCB traces can exceed the input bias current of the DDC264 if shielding (guard) is not implemented. Digital signals (including digital supply) must be kept as far as possible from the analog input signalsonthePCB.Ifpossible,avoidrunningdigitalsupplyplanesoveranaloggroundorsignals. 11.1.2 PowerSupplyRouting Figure 36 shows a diagram summarizing the concept behind the power supply distribution used in the DDC264 evaluationmodule(EVM). In theoretical terms, from an isolation perspective, generating all required supplies from different sources (LDOs) may be the best but may actually be not practical/too costly. In Figure 36, an analog supply is used to generate and drive the VREF/Buffer supplies and the DDC AVDD. The AGND runs parallel to this plane (above or below). The VREF signal is also routed in the same location. As seen on the figure, these do not overlap with the digital supply/ground/signalsatanymoment. Away from the analog portion, a digital supply can be used/shared between the FPGA and the DDC. Nevertheless a star configuration is used to isolate the effect between both as much as possible. For the same reason,thephysicalplanesofbothdigitalsuppliesarealsoseparated. Notice nevertheless, that it is not a bad practice to include places along the separation between all these planes to allow for shorts, whether through a zero value resistor or a ferrite bead. This enables fine tuning of the design performance. 11.1.3 ReferenceRouting In the case where only one reference buffer is used for multiple DDCs, all reference pins must be as isolated as possible from each other to avoid interactions between devices. One potential approach to this is to do a star connection where the traces to the reference of each device are connected to the others only at the output of the driver.KeepVREFshieldedfromanynoisysignals,likedigitaltracesorsupplies. 30 SubmitDocumentationFeedback Copyright©2006–2016,TexasInstrumentsIncorporated ProductFolderLinks:DDC264
DDC264 www.ti.com SBAS368D–MAY2006–REVISEDDECEMBER2016 11.2 Layout Example VREFan AVDD d Supply Buffer Other 3.3V FPGA Supply Supplies QGND to AGND DDC Digital Pins short FPGA DDC264 DDC Analog Pins xDGND (layer 1) DGND (layer 1) AGND (layer 1) FPGA 3.3V Plane (layer 2) DVDD Plane (layer 2) AVDD Plane (layer 2) FPGA 3.3V to DDC DVDD short xDGND to DGND short DGND to AGND short Copyright © 2016, Texas Instruments Incorporated Figure36. DDC264LayoutExample Copyright©2006–2016,TexasInstrumentsIncorporated SubmitDocumentationFeedback 31 ProductFolderLinks:DDC264
DDC264 SBAS368D–MAY2006–REVISEDDECEMBER2016 www.ti.com 12 Device and Documentation Support 12.1 Receiving Notification of Documentation Updates To receive notification of documentation updates, navigate to the device product folder on ti.com. In the upper right corner, click on Alert me to register and receive a weekly digest of any product information that has changed.Forchangedetails,reviewtherevisionhistoryincludedinanyreviseddocument. 12.2 Community Resources The following links connect to TI community resources. Linked contents are provided "AS IS" by the respective contributors. They do not constitute TI specifications and do not necessarily reflect TI's views; see TI's Terms of Use. TIE2E™OnlineCommunity TI'sEngineer-to-Engineer(E2E)Community.Createdtofostercollaboration amongengineers.Ate2e.ti.com,youcanaskquestions,shareknowledge,exploreideasandhelp solveproblemswithfellowengineers. DesignSupport TI'sDesignSupport QuicklyfindhelpfulE2Eforumsalongwithdesignsupporttoolsand contactinformationfortechnicalsupport. 12.3 Trademarks E2EisatrademarkofTexasInstruments. Allothertrademarksarethepropertyoftheirrespectiveowners. 12.4 Electrostatic Discharge Caution Thesedeviceshavelimitedbuilt-inESDprotection.Theleadsshouldbeshortedtogetherorthedeviceplacedinconductivefoam duringstorageorhandlingtopreventelectrostaticdamagetotheMOSgates. 12.5 Glossary SLYZ022—TIGlossary. Thisglossarylistsandexplainsterms,acronyms,anddefinitions. 13 Mechanical, Packaging, and Orderable Information The following pages include mechanical, packaging, and orderable information. This information is the most current data available for the designated devices. This data is subject to change without notice and revision of thisdocument.Forbrowser-basedversionsofthisdatasheet,refertotheleft-handnavigation. 32 SubmitDocumentationFeedback Copyright©2006–2016,TexasInstrumentsIncorporated ProductFolderLinks:DDC264
PACKAGE OPTION ADDENDUM www.ti.com 18-Jan-2016 PACKAGING INFORMATION Orderable Device Status Package Type Package Pins Package Eco Plan Lead/Ball Finish MSL Peak Temp Op Temp (°C) Device Marking Samples (1) Drawing Qty (2) (6) (3) (4/5) DDC264CKZAW ACTIVE NFBGA ZAW 100 168 Green (RoHS SNAGCU Level-3-260C-168 HR 0 to 70 DDC264K & no Sb/Br) DDC264CKZAWR ACTIVE NFBGA ZAW 100 1000 Green (RoHS SNAGCU Level-3-260C-168 HR 0 to 70 DDC264K & no Sb/Br) DDC264CZAW ACTIVE NFBGA ZAW 100 168 Green (RoHS SNAGCU Level-3-260C-168 HR 0 to 70 DDC264 & no Sb/Br) DDC264CZAWR ACTIVE NFBGA ZAW 100 1000 Green (RoHS SNAGCU Level-3-260C-168 HR 0 to 70 DDC264 & no Sb/Br) (1) The marketing status values are defined as follows: ACTIVE: Product device recommended for new designs. LIFEBUY: TI has announced that the device will be discontinued, and a lifetime-buy period is in effect. NRND: Not recommended for new designs. Device is in production to support existing customers, but TI does not recommend using this part in a new design. PREVIEW: Device has been announced but is not in production. Samples may or may not be available. OBSOLETE: TI has discontinued the production of the device. (2) Eco Plan - The planned eco-friendly classification: Pb-Free (RoHS), Pb-Free (RoHS Exempt), or Green (RoHS & no Sb/Br) - please check http://www.ti.com/productcontent for the latest availability information and additional product content details. TBD: The Pb-Free/Green conversion plan has not been defined. Pb-Free (RoHS): TI's terms "Lead-Free" or "Pb-Free" mean semiconductor products that are compatible with the current RoHS requirements for all 6 substances, including the requirement that lead not exceed 0.1% by weight in homogeneous materials. Where designed to be soldered at high temperatures, TI Pb-Free products are suitable for use in specified lead-free processes. Pb-Free (RoHS Exempt): This component has a RoHS exemption for either 1) lead-based flip-chip solder bumps used between the die and package, or 2) lead-based die adhesive used between the die and leadframe. The component is otherwise considered Pb-Free (RoHS compatible) as defined above. Green (RoHS & no Sb/Br): TI defines "Green" to mean Pb-Free (RoHS compatible), and free of Bromine (Br) and Antimony (Sb) based flame retardants (Br or Sb do not exceed 0.1% by weight in homogeneous material) (3) MSL, Peak Temp. - The Moisture Sensitivity Level rating according to the JEDEC industry standard classifications, and peak solder temperature. (4) There may be additional marking, which relates to the logo, the lot trace code information, or the environmental category on the device. (5) Multiple Device Markings will be inside parentheses. Only one Device Marking contained in parentheses and separated by a "~" will appear on a device. If a line is indented then it is a continuation of the previous line and the two combined represent the entire Device Marking for that device. (6) Lead/Ball Finish - Orderable Devices may have multiple material finish options. Finish options are separated by a vertical ruled line. Lead/Ball Finish values may wrap to two lines if the finish value exceeds the maximum column width. Addendum-Page 1
PACKAGE OPTION ADDENDUM www.ti.com 18-Jan-2016 Important Information and Disclaimer:The information provided on this page represents TI's knowledge and belief as of the date that it is provided. TI bases its knowledge and belief on information provided by third parties, and makes no representation or warranty as to the accuracy of such information. Efforts are underway to better integrate information from third parties. TI has taken and continues to take reasonable steps to provide representative and accurate information but may not have conducted destructive testing or chemical analysis on incoming materials and chemicals. TI and TI suppliers consider certain information to be proprietary, and thus CAS numbers and other limited information may not be available for release. In no event shall TI's liability arising out of such information exceed the total purchase price of the TI part(s) at issue in this document sold by TI to Customer on an annual basis. Addendum-Page 2
PACKAGE MATERIALS INFORMATION www.ti.com 12-Feb-2019 TAPE AND REEL INFORMATION *Alldimensionsarenominal Device Package Package Pins SPQ Reel Reel A0 B0 K0 P1 W Pin1 Type Drawing Diameter Width (mm) (mm) (mm) (mm) (mm) Quadrant (mm) W1(mm) DDC264CKZAWR NFBGA ZAW 100 1000 330.0 16.4 9.3 9.3 1.5 12.0 16.0 Q1 DDC264CZAWR NFBGA ZAW 100 1000 330.0 16.4 9.3 9.3 1.5 12.0 16.0 Q1 PackMaterials-Page1
PACKAGE MATERIALS INFORMATION www.ti.com 12-Feb-2019 *Alldimensionsarenominal Device PackageType PackageDrawing Pins SPQ Length(mm) Width(mm) Height(mm) DDC264CKZAWR NFBGA ZAW 100 1000 350.0 350.0 43.0 DDC264CZAWR NFBGA ZAW 100 1000 350.0 350.0 43.0 PackMaterials-Page2
None
IMPORTANTNOTICEANDDISCLAIMER TIPROVIDESTECHNICALANDRELIABILITYDATA(INCLUDINGDATASHEETS),DESIGNRESOURCES(INCLUDINGREFERENCE DESIGNS),APPLICATIONOROTHERDESIGNADVICE,WEBTOOLS,SAFETYINFORMATION,ANDOTHERRESOURCES“ASIS” ANDWITHALLFAULTS,ANDDISCLAIMSALLWARRANTIES,EXPRESSANDIMPLIED,INCLUDINGWITHOUTLIMITATIONANY IMPLIEDWARRANTIESOFMERCHANTABILITY,FITNESSFORAPARTICULARPURPOSEORNON-INFRINGEMENTOFTHIRD PARTYINTELLECTUALPROPERTYRIGHTS. TheseresourcesareintendedforskilleddevelopersdesigningwithTIproducts.Youaresolelyresponsiblefor(1)selectingtheappropriate TIproductsforyourapplication,(2)designing,validatingandtestingyourapplication,and(3)ensuringyourapplicationmeetsapplicable standards,andanyothersafety,security,orotherrequirements.Theseresourcesaresubjecttochangewithoutnotice.TIgrantsyou permissiontousetheseresourcesonlyfordevelopmentofanapplicationthatusestheTIproductsdescribedintheresource.Other reproductionanddisplayoftheseresourcesisprohibited.NolicenseisgrantedtoanyotherTIintellectualpropertyrightortoanythird partyintellectualpropertyright.TIdisclaimsresponsibilityfor,andyouwillfullyindemnifyTIanditsrepresentativesagainst,anyclaims, damages,costs,losses,andliabilitiesarisingoutofyouruseoftheseresources. TI’sproductsareprovidedsubjecttoTI’sTermsofSale(www.ti.com/legal/termsofsale.html)orotherapplicabletermsavailableeitheron ti.comorprovidedinconjunctionwithsuchTIproducts.TI’sprovisionoftheseresourcesdoesnotexpandorotherwisealterTI’sapplicable warrantiesorwarrantydisclaimersforTIproducts. MailingAddress:TexasInstruments,PostOfficeBox655303,Dallas,Texas75265 Copyright©2019,TexasInstrumentsIncorporated