ICGOO在线商城 > 集成电路(IC) > 嵌入式 - 微控制器 > AT32UC3A1256-AUT
/AT32UC3A1256-AUT.jpg)
 Datasheet下载
- 型号: AT32UC3A1256-AUT
- 制造商: Atmel
- 库位|库存: xxxx|xxxx
- 要求:
| 数量阶梯 | 香港交货 | 国内含税 |
| +xxxx | $xxxx | ¥xxxx |
查看当月历史价格
查看今年历史价格
AT32UC3A1256-AUT产品简介:
ICGOO电子元器件商城为您提供AT32UC3A1256-AUT由Atmel设计生产,在icgoo商城现货销售,并且可以通过原厂、代理商等渠道进行代购。 AT32UC3A1256-AUT价格参考。AtmelAT32UC3A1256-AUT封装/规格:嵌入式 - 微控制器, AVR 微控制器 IC AVR®32 UC3 A1 32-位 66MHz 256KB(256K x 8) 闪存 100-TQFP(14x14)。您可以下载AT32UC3A1256-AUT参考资料、Datasheet数据手册功能说明书,资料中有AT32UC3A1256-AUT 详细功能的应用电路图电压和使用方法及教程。
| 参数 | 数值 |
| A/D位大小 | No ADC |
| 产品目录 | 集成电路 (IC)半导体 |
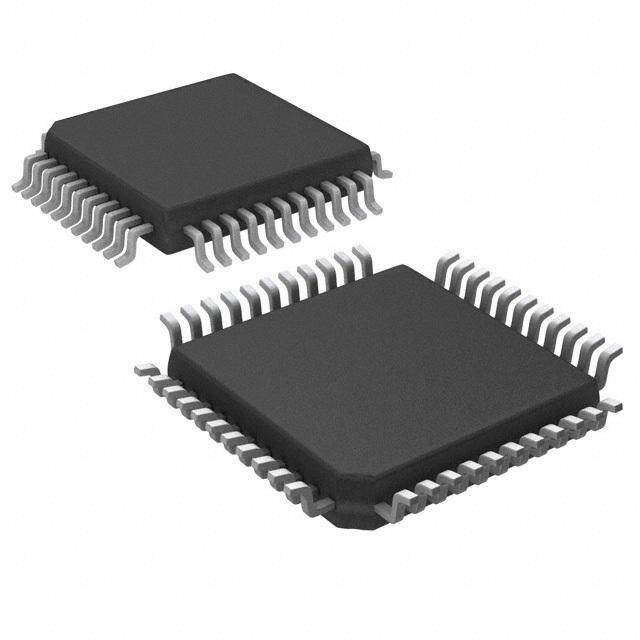
| 描述 | IC MCU 32BIT 256KB FLASH 100TQFP32位微控制器 - MCU 32-bit 256KB Flash |
| EEPROM容量 | - |
| 产品分类 | |
| I/O数 | 69 |
| 品牌 | Atmel |
| 产品手册 | |
| 产品图片 |
|
| rohs | 符合RoHS无铅 / 符合限制有害物质指令(RoHS)规范要求 |
| 产品系列 | 嵌入式处理器和控制器,微控制器 - MCU,32位微控制器 - MCU,Atmel AT32UC3A1256-AUTAVR®32 UC3 A1 |
| 数据手册 | |
| 产品型号 | AT32UC3A1256-AUT |
| PCN组件/产地 | |
| RAM容量 | 64K x 8 |
| 产品培训模块 | http://www.digikey.cn/PTM/IndividualPTM.page?site=cn&lang=zhs&ptm=24725http://www.digikey.cn/PTM/IndividualPTM.page?site=cn&lang=zhs&ptm=24997http://www.digikey.cn/PTM/IndividualPTM.page?site=cn&lang=zhs&ptm=24829http://www.digikey.cn/PTM/IndividualPTM.page?site=cn&lang=zhs&ptm=25676http://www.digikey.cn/PTM/IndividualPTM.page?site=cn&lang=zhs&ptm=26162http://www.digikey.cn/PTM/IndividualPTM.page?site=cn&lang=zhs&ptm=26159http://www.digikey.cn/PTM/IndividualPTM.page?site=cn&lang=zhs&ptm=26180 |
| 产品种类 | 32位微控制器 - MCU |
| 供应商器件封装 | * |
| 其它名称 | AT32UC3A1256AUT |
| 包装 | 托盘 |
| 可编程输入/输出端数量 | 69 |
| 商标 | Atmel |
| 商标名 | UC3 |
| 处理器系列 | AT32UC3x |
| 外设 | 欠压检测/复位,POR,PWM,WDT |
| 安装风格 | SMD/SMT |
| 定时器数量 | 3 Timer |
| 封装/外壳 | 100-TQFP |
| 封装/箱体 | TQFP-100 |
| 工作温度 | -40°C ~ 85°C |
| 工作电源电压 | 1.8 V, 3.3 V |
| 工厂包装数量 | 450 |
| 振荡器类型 | 内部 |
| 接口类型 | 2-Wire, RS-485, SPI, USART |
| 数据RAM大小 | 64 kB |
| 数据总线宽度 | 32 bit |
| 数据转换器 | A/D 8x10b |
| 最大工作温度 | + 85 C |
| 最大时钟频率 | 66 MHz |
| 最小工作温度 | - 40 C |
| 标准包装 | 450 |
| 核心 | AVR |
| 核心处理器 | AVR |
| 核心尺寸 | 32-位 |
| 片上ADC | Yes |
| 电压-电源(Vcc/Vdd) | 1.65 V ~ 3.6 V |
| 程序存储器大小 | 256 kB |
| 程序存储器类型 | Flash |
| 程序存储容量 | 256KB(256K x 8) |
| 系列 | UC3 A0/A1 |
| 输入/输出端数量 | 69 I/O |
| 连接性 | 以太网, I²C, SPI, SSC, UART/USART, USB OTG |
| 速度 | 66MHz |
| 配用 | /product-detail/zh/ATSTK600-RC28/ATSTK600-RC28-ND/2050917/product-detail/zh/ATAVRONEKIT/ATAVRONEKIT-ND/1886203/product-detail/zh/ATSTK600-TQFP100/ATSTK600-TQFP100-ND/1812224/product-detail/zh/ATEVK1100/ATEVK1100-ND/1577336 |

.jpg)


- 商务部:美国ITC正式对集成电路等产品启动337调查
- 曝三星4nm工艺存在良率问题 高通将骁龙8 Gen1或转产台积电
- 太阳诱电将投资9.5亿元在常州建新厂生产MLCC 预计2023年完工
- 英特尔发布欧洲新工厂建设计划 深化IDM 2.0 战略
- 台积电先进制程称霸业界 有大客户加持明年业绩稳了
- 达到5530亿美元!SIA预计今年全球半导体销售额将创下新高
- 英特尔拟将自动驾驶子公司Mobileye上市 估值或超500亿美元
- 三星加码芯片和SET,合并消费电子和移动部门,撤换高东真等 CEO
- 三星电子宣布重大人事变动 还合并消费电子和移动部门
- 海关总署:前11个月进口集成电路产品价值2.52万亿元 增长14.8%


PDF Datasheet 数据手册内容提取
Features • High Performance, Low Power 32-Bit Atmel® AVR® Microcontroller – Compact Single-cycle RISC Instruction Set Including DSP Instruction Set – Read-Modify-Write Instructions and Atomic Bit Manipulation – Performing 1.49 DMIPS / MHz Up to 91 DMIPS Running at 66 MHz from Flash (1 Wait-State) Up to 49 DMIPS Running at 33MHz from Flash (0 Wait-State) – Memory Protection Unit (cid:129) Multi-hierarchy Bus System – High-Performance Data Transfers on Separate Buses for Increased Performance 32-Bit Atmel AVR – 15 Peripheral DMA Channels Improves Speed for Peripheral Communication (cid:129) Internal High-Speed Flash Microcontroller – 512K Bytes, 256K Bytes, 128K Bytes Versions – Single Cycle Access up to 33 MHz – Prefetch Buffer Optimizing Instruction Execution at Maximum Speed – 4ms Page Programming Time and 8ms Full-Chip Erase Time AT32UC3A0512 – 100,000 Write Cycles, 15-year Data Retention Capability – Flash Security Locks and User Defined Configuration Area AT32UC3A0256 (cid:129) Internal High-Speed SRAM, Single-Cycle Access at Full Speed – 64K Bytes (512KB and 256KB Flash), 32K Bytes (128KB Flash) AT32UC3A0128 (cid:129) External Memory Interface on AT32UC3A0 Derivatives – SDRAM / SRAM Compatible Memory Bus (16-bit Data and 24-bit Address Buses) AT32UC3A1512 (cid:129) Interrupt Controller – Autovectored Low Latency Interrupt Service with Programmable Priority AT32UC3A1256 (cid:129) System Functions AT32UC3A1128 – Power and Clock Manager Including Internal RC Clock and One 32KHz Oscillator – Two Multipurpose Oscillators and Two Phase-Lock-Loop (PLL) allowing Independant CPU Frequency from USB Frequency – Watchdog Timer, Real-Time Clock Timer (cid:129) Universal Serial Bus (USB) – Device 2.0 Full Speed and On-The-Go (OTG) Low Speed and Full Speed – Flexible End-Point Configuration and Management with Dedicated DMA Channels – On-chip Transceivers Including Pull-Ups (cid:129) Ethernet MAC 10/100 Mbps interface – 802.3 Ethernet Media Access Controller – Supports Media Independent Interface (MII) and Reduced MII (RMII) (cid:129) One Three-Channel 16-bit Timer/Counter (TC) – Three External Clock Inputs, PWM, Capture and Various Counting Capabilities (cid:129) One 7-Channel 16-bit Pulse Width Modulation Controller (PWM) (cid:129) Four Universal Synchronous/Asynchronous Receiver/Transmitters (USART) – Independant Baudrate Generator, Support for SPI, IrDA and ISO7816 interfaces – Support for Hardware Handshaking, RS485 Interfaces and Modem Line (cid:129) Two Master/Slave Serial Peripheral Interfaces (SPI) with Chip Select Signals (cid:129) One Synchronous Serial Protocol Controller – Supports I2S and Generic Frame-Based Protocols (cid:129) One Master/Slave Two-Wire Interface (TWI), 400kbit/s I2C-compatible (cid:129) One 8-channel 10-bit Analog-To-Digital Converter (cid:129) 16-bit Stereo Audio Bitstream – Sample Rate Up to 50 KHz 32058K-AVR32-01/12
AT32UC3A (cid:129) On-Chip Debug System (JTAG interface) – Nexus Class 2+, Runtime Control, Non-Intrusive Data and Program Trace (cid:129) 100-pin TQFP (69 GPIO pins), 144-pin LQFP (109 GPIO pins) , 144 BGA (109 GPIO pins) (cid:129) 5V Input Tolerant I/Os (cid:129) Single 3.3V Power Supply or Dual 1.8V-3.3V Power Supply 2 32058K AVR32-01/12
AT32UC3A 1. Description The AT32UC3A is a complete System-On-Chip microcontroller based on the AVR32 UC RISC processor running at frequencies up to 66 MHz. AVR32 UC is a high-performance 32-bit RISC microprocessor core, designed for cost-sensitive embedded applications, with particular empha- sis on low power consumption, high code density and high performance. The processor implements a Memory Protection Unit (MPU) and a fast and flexible interrupt con- troller for supporting modern operating systems and real-time operating systems. Higher computation capabilities are achievable using a rich set of DSP instructions. The AT32UC3A incorporates on-chip Flash and SRAM memories for secure and fast access. For applications requiring additional memory, an external memory interface is provided on AT32UC3A0 derivatives. The Peripheral Direct Memory Access controller (PDCA) enables data transfers between periph- erals and memories without processor involvement. PDCA drastically reduces processing overhead when transferring continuous and large data streams b etween modules within the MCU. The PowerManager improves design flexibility and security: the on-chip Brown-Out Detector monitors the power supply, the CPU runs from the on-chip RC oscillator or from one of external oscillator sources, a Real-Time Clock and its associated timer keeps track of the time. The Timer/Counter includes three identical 16-bit timer/counter channels. Each channel can be independently programmed to perform frequency measurement, event counting, interval mea- surement, pulse generation, delay timing and pulse width modulation. The PWM modules provides seven independent channels with many configuration options including polarity, edge alignment and waveform non overlap control. One PWM channel can trigger ADC conversions for more accurate close loop control implementations. The AT32UC3A also features many communication interfaces for communication intensive applications. In addition to standard serial interfaces like UART, SPI or TWI, other interfaces like flexible Synchronous Serial Controller, USB and Ethernet MAC are available. The Synchronous Serial Controller provides easy access to serial communication protocols and audio standards like I2S. The Full-Speed USB 2.0 Device interface supports several USB Classes at the same time thanks to the rich End-Point configuration. The On-The-GO (OTG) Host interface allows device like a USB Flash disk or a USB printer to be directly connected to the processor. The media-independent interface (MII) and reduced MII (RMII) 10/100 Ethernet MAC module provides on-chip solutions for network-connected devices. AT32UC3A integrates a class 2+ Nexus 2.0 On-Chip Debug (OCD) System, with non-intrusive real-time trace, full-speed read/write memory access in addition to basic runtime control. 3 32058K AVR32-01/12
AT32UC3A 2. Configuration Summary The table below lists all AT32UC3A memory and package configurations: Ethernet Device Flash SRAM Ext. Bus Interface MAC Package AT32UC3A0512 512 Kbytes 64 Kbytes yes yes 144 pin LQFP 144 pin BGA AT32UC3A0256 256 Kbytes 64 Kbytes yes yes 144 pin LQFP 144 pin BGA AT32UC3A0128 128 Kbytes 32 Kbytes yes yes 144 pin LQFP 144 pin BGA AT32UC3A1512 512 Kbytes 64 Kbytes no yes 100 pin TQFP AT32UC3A1256 256 Kbytes 64 Kbytes no yes 100 pin TQFP AT32UC3A1128 128 Kbytes 32 Kbytes no yes 100 pin TQFP 3. Abbreviations (cid:129) GCLK: Power Manager Generic Clock (cid:129) GPIO: General Purpose Input/Output (cid:129) HSB: High Speed Bus (cid:129) MPU: Memory Protection Unit (cid:129) OCD: On Chip Debug (cid:129) PB: Peripheral Bus (cid:129) PDCA: Peripheral Direct Memory Access Controller (PDC) version A (cid:129) USBB: USB On-The-GO Controller version B 4 32058K AVR32-01/12
AT32UC3A 4. Blockdiagram Figure 4-1. Blockdiagram TTTCDDKOI INTEJTRAFGACE ACE ILNOTCEARLF ABCUSE FAST GPIO TMS NEXUS UC CPU ERF MCKO CLASS 2+ NT MMSEDEVOTOI[_5[1N....00]] OCD IMNESMTORRY PROTECTIODN ATUANIT EMORY I S64R AKBM EVTO_N INTERFACE INTERFACE M VBUS D+ USB B D- VBIDOF INTEDRMFAACE PBSM M M M SS FLASHNTROLLER 5F1LA2 SKHB COL, O CRS, DMA M HIGH SPEED C RXD[3..0], BUS MATRIX RX_CLK, RX_DV, DATA[15..0] RX_ER S CERY ADDR[23..0] ENERAL PURPOSE IOs TTTTXSXMMXXDP___D[CDE3EECLI.ENRO.,0KD,,],, ETH MEARCNET CPIBONBNTHRTESRRIDBOSHRBG-SLPUELBPE TBRCONFIGURATBIOHRNS I DH BP SGS -B B PEPBARBE AGISTERS BUCSPOENRTIPDRMHMOAELLREARL EXTERNAL BUS INTERFA(SDRAM & STATIC MEMOCONTROLLER) NSSSNSCSNNNDDNDCRWDDWWWSCCRAWAAC[EEEAK13SDSSKEI.0130E0T.0] G RXD TXD PPPPACBX EXKTNPINMST[I7_[7.N..0.0]] CIOENNXTTTEERRRORNLULAPELTR PDC UUSSAARRTT01 DSR,R DTTSRCR,XL ,KDC DTCSD, RI RPOSE IOs PPPPACBX RCEOAULN TTEIMRE PDC UUSSAARRTT23 RTSTC,XL DKCTS RAL PU E SERIAL SCK EN WATCHDOG PDC PERIPHERAL MISNOP,C MSO0SI G INTERFACE 0/1 TIMER NPCS[3..1] TX_CLOCK, TX_FRAME_SYNC 1R1C5O kSHCz MPAONWAGEERR PDC SCYONNCSTEHRRROIOALLNLEORUS RX_CLOCKT, XR_XD_AFTRAAME_SYNC XIN32 32 KHz RX_DATA XOUT32 OSC CLOCK XXOIUNT00 OSC0 GENCELORCAKTOR PDC ITNWTEOR-WFAIRCEE SSDCAL XIN1 OSC1 CONTROLLER XOUT1 PULSE WIDTH PLL0 CONSTLREOELPLER PDC CMOONDTURLOALTLIOENR PWM[6..0] PLL1 RESET RESET_N GCLK[3..0] CONTROLLER PDC ANDAILGOITGA LTO AD[7..0] ADVREF CONVERTER A[2..0] B[2..0] TIMER/COUNTER CLK[2..0] DC BITASUTRDEIOAM DATA[1..0] P DATAN[1..0] DAC 5 32058K AVR32-01/12
AT32UC3A 4.1 Processor and architecture 4.1.1 AVR32 UC CPU (cid:129) 32-bit load/store AVR32A RISC architecture. – 15 general-purpose 32-bit registers. – 32-bit Stack Pointer, Program Counter and Link Register reside in register file. – Fully orthogonal instruction set. – Privileged and unprivileged modes enabling efficient and secure Operating Systems. – Innovative instruction set together with variable instruction length ensuring industry leading code density. – DSP extention with saturating arithmetic, and a wide variety of multiply instructions. (cid:129) 3 stage pipeline allows one instruction per clock cycle for most instructions. – Byte, half-word, word and double word memory access. – Multiple interrupt priority levels. (cid:129) MPU allows for operating systems with memory protection. 4.1.2 Debug and Test system (cid:129) IEEE1149.1 compliant JTAG and boundary scan (cid:129) Direct memory access and programming capabilities through JTAG interface (cid:129) Extensive On-Chip Debug features in compliance with IEEE-ISTO 5001-2003 (Nexus 2.0) Class 2+ – Low-cost NanoTrace supported. (cid:129) Auxiliary port for high-speed trace information (cid:129) Hardware support for 6 Program and 2 data breakpoints (cid:129) Unlimited number of software breakpoints supported (cid:129) Advanced Program, Data, Ownership, and Watchpoint trace supported 4.1.3 Peripheral DMA Controller (cid:129) Transfers from/to peripheral to/from any memory space without intervention of the processor. (cid:129) Next Pointer Support, forbids strong real-time constraints on buffer management. (cid:129) Fifteen channels – Two for each USART – Two for each Serial Synchronous Controller – Two for each Serial Peripheral Interface – One for each ADC – Two for each TWI Interface 4.1.4 Bus system (cid:129) High Speed Bus (HSB) matrix with 6 Masters and 6 Slaves handled – Handles Requests from the CPU Data Fetch, CPU Instruction Fetch, PDCA, USBB, Ethernet Controller, CPU SAB, and to internal Flash, internal SRAM, Peripheral Bus A, Peripheral Bus B, EBI. – Round-Robin Arbitration (three modes supported: no default master, last accessed default master, fixed default master) – Burst Breaking with Slot Cycle Limit – One Address Decoder Provided per Master 6 32058K AVR32-01/12
AT32UC3A (cid:129) Peripheral Bus A able to run on at divided bus speeds compared to the High Speed Bus Figure 4-1 gives an overview of the bus system. All modules connected to the same bus use the same clock, but the clock to each module can be individually shut off by the Power Manager. The figure identifies the number of master and slave interfaces of each module connected to the High Speed Bus, and which DMA controller is connected to which peripheral. 7 32058K AVR32-01/12
AT32UC3A 5. Signals Description The following table gives details on the signal name classified by peripheral The signals are multiplexed with GPIO pins as described in ”Peripheral Multiplexing on I/O lines” on page 45. Table 5-1. Signal Description List Active Signal Name Function Type Level Comments Power Power VDDPLL Power supply for PLL 1.65V to 1.95 V Input Power VDDCORE Core Power Supply 1.65V to 1.95 V Input Power VDDIO I/O Power Supply 3.0V to 3.6V Input Power VDDANA Analog Power Supply 3.0V to 3.6V Input Power VDDIN Voltage Regulator Input Supply 3.0V to 3.6V Input Power VDDOUT Voltage Regulator Output 1.65V to 1.95 V Output GNDANA Analog Ground Ground GND Ground Ground Clocks, Oscillators, and PLL’s XIN0, XIN1, XIN32 Crystal 0, 1, 32 Input Analog XOUT0, XOUT1, Crystal 0, 1, 32 Output Analog XOUT32 JTAG TCK Test Clock Input TDI Test Data In Input TDO Test Data Out Output TMS Test Mode Select Input Auxiliary Port - AUX MCKO Trace Data Output Clock Output MDO0 - MDO5 Trace Data Output Output 8 32058K AVR32-01/12
AT32UC3A Table 5-1. Signal Description List Active Signal Name Function Type Level Comments MSEO0 - MSEO1 Trace Frame Control Output EVTI_N Event In Output Low EVTO_N Event Out Output Low Power Manager - PM GCLK0 - GCLK3 Generic Clock Pins Output RESET_N Reset Pin Input Low Real Time Counter - RTC RTC_CLOCK RTC clock Output Watchdog Timer - WDT WDTEXT External Watchdog Pin Output External Interrupt Controller - EIC EXTINT0 - EXTINT7 External Interrupt Pins Input KPS0 - KPS7 Keypad Scan Pins Output NMI_N Non-Maskable Interrupt Pin Input Low Ethernet MAC - MACB COL Collision Detect Input CRS Carrier Sense and Data Valid Input MDC Management Data Clock Output MDIO Management Data Input/Output I/O RXD0 - RXD3 Receive Data Input RX_CLK Receive Clock Input RX_DV Receive Data Valid Input RX_ER Receive Coding Error Input SPEED Speed TXD0 - TXD3 Transmit Data Output TX_CLK Transmit Clock or Reference Clock Output TX_EN Transmit Enable Output TX_ER Transmit Coding Error Output 9 32058K AVR32-01/12
AT32UC3A Table 5-1. Signal Description List Active Signal Name Function Type Level Comments External Bus Interface - HEBI ADDR0 - ADDR23 Address Bus Output CAS Column Signal Output Low DATA0- DATA15 Data Bus I/O NCS0 - NCS3 Chip Select Output Low NRD Read Signal Output Low NWAIT External Wait Signal Input Low NWE0 Write Enable 0 Output Low NWE1 Write Enable 1 Output Low NWE3 Write Enable 3 Output Low RAS Row Signal Output Low SDA10 SDRAM Address 10 Line Output SDCK SDRAM Clock Output SDCKE SDRAM Clock Enable Output SDCS0 SDRAM Chip Select Output Low SDWE SDRAM Write Enable Output Low General Purpose Input/Output 2 - GPIOA, GPIOB, GPIOC P0 - P31 Parallel I/O Controller GPIOA I/O P0 - P31 Parallel I/O Controller GPIOB I/O P0 - P5 Parallel I/O Controller GPIOC I/O P0 - P31 Parallel I/O Controller GPIOX I/O Serial Peripheral Interface - SPI0, SPI1 MISO Master In Slave Out I/O MOSI Master Out Slave In I/O NPCS0 - NPCS3 SPI Peripheral Chip Select I/O Low SCK Clock Output Synchronous Serial Controller - SSC RX_CLOCK SSC Receive Clock I/O 10 32058K AVR32-01/12
AT32UC3A Table 5-1. Signal Description List Active Signal Name Function Type Level Comments RX_DATA SSC Receive Data Input RX_FRAME_SYNC SSC Receive Frame Sync I/O TX_CLOCK SSC Transmit Clock I/O TX_DATA SSC Transmit Data Output TX_FRAME_SYNC SSC Transmit Frame Sync I/O Timer/Counter - TIMER A0 Channel 0 Line A I/O A1 Channel 1 Line A I/O A2 Channel 2 Line A I/O B0 Channel 0 Line B I/O B1 Channel 1 Line B I/O B2 Channel 2 Line B I/O CLK0 Channel 0 External Clock Input Input CLK1 Channel 1 External Clock Input Input CLK2 Channel 2 External Clock Input Input Two-wire Interface - TWI SCL Serial Clock I/O SDA Serial Data I/O Universal Synchronous Asynchronous Receiver Transmitter - USART0, USART1, USART2, USART3 CLK Clock I/O CTS Clear To Send Input DCD Data Carrier Detect Only USART1 DSR Data Set Ready Only USART1 DTR Data Terminal Ready Only USART1 RI Ring Indicator Only USART1 RTS Request To Send Output RXD Receive Data Input TXD Transmit Data Output 11 32058K AVR32-01/12
AT32UC3A Table 5-1. Signal Description List Active Signal Name Function Type Level Comments Analog to Digital Converter - ADC Analog AD0 - AD7 Analog input pins input Analog ADVREF Analog positive reference voltage input 2.6 to 3.6V input Pulse Width Modulator - PWM PWM0 - PWM6 PWM Output Pins Output Universal Serial Bus Device - USB DDM USB Device Port Data - Analog DDP USB Device Port Data + Analog Analog VBUS USB VBUS Monitor and OTG Negociation Input USBID ID Pin of the USB Bus Input USB_VBOF USB VBUS On/off: bus power control port output Audio Bitstream DAC (ABDAC) DATA0-DATA1 D/A Data out Outpu DATAN0-DATAN1 D/A Data inverted out Outpu 12 32058K AVR32-01/12
AT32UC3A 6. Power Considerations 6.1 Power Supplies The AT32UC3A has several types of power supply pins: (cid:129) VDDIO: Powers I/O lines. Voltage is 3.3V nominal. (cid:129) VDDANA: Powers the ADC Voltage is 3.3V nominal. (cid:129) VDDIN: Input voltage for the voltage regulator. Voltage is 3.3V nominal. (cid:129) VDDCORE: Powers the core, memories, and peripherals. Voltage is 1.8V nominal. (cid:129) VDDPLL: Powers the PLL. Voltage is 1.8V nominal. The ground pins GND are common to VDDCORE, VDDIO, VDDPLL. The ground pin for VDDANA is GNDANA. Refer to ”Power Consumption” on page 767 for power consumption on the various supply pins. Dual Power Supply Single Power Supply 3.3V VDDANA 3.3V VDDANA VDDIO VDDIO ADVREF ADVREF VDDIN VDDIN 1.8V 1.8V Regulator Regulator VDDOUT VDDOUT 1.8V VDDCORE VDDCORE VDDPLL VDDPLL 13 32058K AVR32-01/12
AT32UC3A 6.2 Voltage Regulator 6.2.1 Single Power Supply The AT32UC3A embeds a voltage regulator that converts from 3.3V to 1.8V. The regulator takes its input voltage from VDDIN, and supplies the output voltage on VDDOUT. VDDOUT should be externally connected to the 1.8V domains. Adequate input supply decoupling is mandatory for VDDIN in order to improve startup stability and reduce source voltage drop. Two input decoupling capacitors must be placed close to the chip. Adequate output supply decoupling is mandatory for VDDOUT to reduce ripple and avoid oscil- lations. The best way to achieve this is to use two capacitors in parallel between VDDOUT and GND as close to the chip as possible 3.3V VDDIN C C IN2 IN1 1.8V Regulator 1.8V VDDOUT C C OUT2 OUT1 Refer to Section 38.3 on page 765 for decoupling capacitors values and regulator characteristics 6.2.2 Dual Power Supply In case of dual power supply, VDDIN and VDDOUT should be connected to ground to prevent from leakage current. VDDIN VDDOUT 14 32058K AVR32-01/12
AT32UC3A 6.3 Analog-to-Digital Converter (A.D.C) reference. The ADC reference (ADVREF) must be provided from an external source. Two decoupling capacitors must be used to insure proper decoupling. 3.3V ADVREF C C VREF2 VREF1 Refer to Section 38.4 on page 765 for decoupling capacitors values and electrical characteristics. In case ADC is not used, the ADVREF pin should be connected to GND to avoid extra consumption. 15 32058K AVR32-01/12
AT32UC3A 7. Package and Pinout The device pins are multiplexed with peripheral functions as described in ”Peripheral Multiplexing on I/O lines” on page 45. Figure 7-1. TQFP100 Pinout 75 51 76 50 100 26 1 25 Table 7-1. TQFP100 Package Pinout 1 PB20 26 PA05 51 PA21 76 PB08 2 PB21 27 PA06 52 PA22 77 PB09 3 PB22 28 PA07 53 PA23 78 PB10 4 VDDIO 29 PA08 54 PA24 79 VDDIO 5 GND 30 PA09 55 PA25 80 GND 6 PB23 31 PA10 56 PA26 81 PB11 7 PB24 32 N/C 57 PA27 82 PB12 8 PB25 33 PA11 58 PA28 83 PA29 9 PB26 34 VDDCORE 59 VDDANA 84 PA30 10 PB27 35 GND 60 ADVREF 85 PC02 11 VDDOUT 36 PA12 61 GNDANA 86 PC03 12 VDDIN 37 PA13 62 VDDPLL 87 PB13 13 GND 38 VDDCORE 63 PC00 88 PB14 14 PB28 39 PA14 64 PC01 89 TMS 15 PB29 40 PA15 65 PB00 90 TCK 16 PB30 41 PA16 66 PB01 91 TDO 17 PB31 42 PA17 67 VDDIO 92 TDI 18 RESET_N 43 PA18 68 VDDIO 93 PC04 19 PA00 44 PA19 69 GND 94 PC05 20 PA01 45 PA20 70 PB02 95 PB15 21 GND 46 VBUS 71 PB03 96 PB16 22 VDDCORE 47 VDDIO 72 PB04 97 VDDCORE 16 32058K AVR32-01/12
AT32UC3A Table 7-1. TQFP100 Package Pinout 23 PA02 48 DM 73 PB05 98 PB17 24 PA03 49 DP 74 PB06 99 PB18 25 PA04 50 GND 75 PB07 100 PB19 Figure 7-2. LQFP144 Pinout 108 73 109 72 144 37 1 36 Table 7-2. VQFP144 Package Pinout 1 PX00 37 GND 73 PA21 109 GND 2 PX01 38 PX10 74 PA22 110 PX30 3 PB20 39 PA05 75 PA23 111 PB08 4 PX02 40 PX11 76 PA24 112 PX31 5 PB21 41 PA06 77 PA25 113 PB09 6 PB22 42 PX12 78 PA26 114 PX32 7 VDDIO 43 PA07 79 PA27 115 PB10 8 GND 44 PX13 80 PA28 116 VDDIO 9 PB23 45 PA08 81 VDDANA 117 GND 10 PX03 46 PX14 82 ADVREF 118 PX33 11 PB24 47 PA09 83 GNDANA 119 PB11 12 PX04 48 PA10 84 VDDPLL 120 PX34 13 PB25 49 N/C 85 PC00 121 PB12 14 PB26 50 PA11 86 PC01 122 PA29 15 PB27 51 VDDCORE 87 PX20 123 PA30 16 VDDOUT 52 GND 88 PB00 124 PC02 17 VDDIN 53 PA12 89 PX21 125 PC03 18 GND 54 PA13 90 PB01 126 PB13 19 PB28 55 VDDCORE 91 PX22 127 PB14 20 PB29 56 PA14 92 VDDIO 128 TMS 21 PB30 57 PA15 93 VDDIO 129 TCK 17 32058K AVR32-01/12
AT32UC3A Table 7-2. VQFP144 Package Pinout 22 PB31 58 PA16 94 GND 130 TDO 23 RESET_N 59 PX15 95 PX23 131 TDI 24 PX05 60 PA17 96 PB02 132 PC04 25 PA00 61 PX16 97 PX24 133 PC05 26 PX06 62 PA18 98 PB03 134 PB15 27 PA01 63 PX17 99 PX25 135 PX35 28 GND 64 PA19 100 PB04 136 PB16 29 VDDCORE 65 PX18 101 PX26 137 PX36 30 PA02 66 PA20 102 PB05 138 VDDCORE 31 PX07 67 PX19 103 PX27 139 PB17 32 PA03 68 VBUS 104 PB06 140 PX37 33 PX08 69 VDDIO 105 PX28 141 PB18 34 PA04 70 DM 106 PB07 142 PX38 35 PX09 71 DP 107 PX29 143 PB19 36 VDDIO 72 GND 108 VDDIO 144 PX39 Figure 7-3. BGA144 Pinout 18 32058K AVR32-01/12
AT32UC3A Table 7-3. BGA144 Package Pinout A1..M8 1 2 3 4 5 6 7 8 A VDDIO PB07 PB05 PB02 PB03 PB01 PC00 PA28 B PB08 GND PB06 PB04 VDDIO PB00 PC01 VDDPLL C PB09 PX33 PA29 PC02 PX28 PX26 PX22 PX21 D PB11 PB13 PB12 PX30 PX29 PX25 PX24 PX20 E PB10 VDDIO PX32 PX31 VDDIO PX27 PX23 VDDANA F PA30 PB14 PX34 PB16 TCK GND GND PX16 G TMS PC03 PX36 PX35 PX37 GND GND PA16 H TDO VDDCORE PX38 PX39 VDDIO PA01 PA10 VDDCORE J TDI PB17 PB15 PX00 PX01 PA00 PA03 PA04 K PC05 PC04 PB19 PB20 PX02 PB29 PB30 PA02 L PB21 GND PB18 PB24 VDDOUT PX04 PB31 VDDIN M PB22 PB23 PB25 PB26 PX03 PB27 PB28 RESET_N Table 7-4. BGA144 Package Pinout A9..M12 9 10 11 12 A PA26 PA25 PA24 PA23 B PA27 PA21 GND PA22 C ADVREF GNDANA PX19 PA19 D PA18 PA20 DP DM E PX18 PX17 VDDIO VBUS F PA17 PX15 PA15 PA14 G PA13 PA12 PA11 NC H PX11 PA08 VDDCORE VDDCORE J PX14 PA07 PX13 PA09 K PX08 GND PA05 PX12 L PX06 PX10 GND PA06 M PX05 PX07 PX09 VDDIO Note: NC is not connected. 19 32058K AVR32-01/12
AT32UC3A 8. I/O Line Considerations 8.1 JTAG pins TMS, TDI and TCK have pull-up resistors. TDO is an output, driven at up to VDDIO, and has no pull-up resistor. 8.2 RESET_N pin The RESET_N pin is a schmitt input and integrates a permanent pull-up resistor to VDDIO. As the product integrates a power-on reset cell, the RESET_N pin can be left unconnected in case no reset from the system needs to be applied to the product. 8.3 TWI pins When these pins are used for TWI, the pins are open-drain outputs with slew-rate limitation and inputs with inputs with spike-filtering. When used as GPIO-pins or used for other peripherals, the pins have the same characteristics as PIO pins. 8.4 GPIO pins All the I/O lines integrate a programmable pull-up resistor. Programming of this pull-up resistor is performed independently for each I/O line through the GPIO Controllers. After reset, I/O lines default as inputs with pull-up resistors disabled, except when indicated otherwise in the column “Reset State” of the GPIO Controller multiplexing tables. 20 32058K AVR32-01/12
AT32UC3A 9. Processor and Architecture This chapter gives an overview of the AVR32UC CPU. AVR32UC is an implementation of the AVR32 architecture. A summary of the programming model, instruction set and MPU is pre- sented. For further details, see the AVR32 Architecture Manual and the AVR32UC Technical Reference Manual. 9.1 AVR32 Architecture AVR32 is a new, high-performance 32-bit RISC microprocessor architecture, designed for cost- sensitive embedded applications, with particular emphasis on low power consumption and high code density. In addition, the instruction set architecture has been tuned to allow a variety of microarchitectures, enabling the AVR32 to be implemented as low-, mid- or high-performance processors. AVR32 extends the AVR family into the world of 32- and 64-bit applications. Through a quantitative approach, a large set of industry recognized benchmarks has been com- piled and analyzed to achieve the best code density in its class. In addition to lowering the memory requirements, a compact code size also contributes to the core’s low power characteris- tics. The processor supports byte and half-word data types without penalty in code size and performance. Memory load and store operations are provided for byte, half-word, word and double word data with automatic sign- or zero extension of half-word and byte data. The C-compiler is closely linked to the architecture and is able to exploit code optimization features, both for size and speed. In order to reduce code size to a minimum, some instructions have multiple addressing modes. As an example, instructions with immediates often have a compact format with a smaller imme- diate, and an extended format with a larger immediate. In this way, the compiler is able to use the format giving the smallest code size. Another feature of the instruction set is that frequently used instructions, like add, have a com- pact format with two operands as well as an extended format with three operands. The larger format increases performance, allowing an addition and a data move in the same instruction in a single cycle. Load and store instructions have several different formats in order to reduce code size and speed up execution. The register file is organized as sixteen 32-bit registers and includes the Program Counter, the Link Register, and the Stack Pointer. In addition, register R12 is designed to hold return values from function calls and is used implicitly by some instructions. 9.2 The AVR32UC CPU The AVR32 UC CPU targets low- and medium-performance applications, and provides an advanced OCD system, no caches, and a Memory Protection Unit (MPU). Java acceleration hardware is not implemented. AVR32 UC provides three memory interfaces, one High Speed Bus master for instruction fetch, one High Speed Bus master for data access, and one High Speed Bus slave interface allowing other bus masters to access data RAMs internal to the CPU. Keeping data RAMs internal to the CPU allows fast access to the RAMs, reduces latency and guarantees deterministic timing. Also, power consumption is reduced by not needing a full High Speed Bus access for memory accesses. A dedicated data RAM interface is provided for communicating with the internal data RAMs. 21 32058K AVR32-01/12
AT32UC3A A local bus interface is provided for connecting the CPU to device-specific high-speed systems, such as floating-point units and fast GPIO ports. This local bus has to be enabled by writing the LOCEN bit in the CPUCR system register. The local bus is able to transfer data between the CPU and the local bus slave in a single clock cycle. The local bus has a dedicated memory range allocated to it, and data transfers are performed using regular load and store instructions. Details on which devices that are mapped into the local bus space is given in the device-specific “Peripherals” chapter of this data sheet. Figure 9-1 on page 22 displays the contents of AVR32UC. Figure 9-1. Overview of the AVR32UC CPU er interface OCD interface Reset interface oll ntr Power/ co OCD upt system Reset err control nt I AVR32UC CPU pipeline MPU Instruction memory controller Data memory controller High High CPU Local Speed High Speed Bus master Speed Bus Bus Bus slave master e master ac erf gh Speed Bus gh Speed Bus gh Speed Bus PU Local Bus Data RAM int Hi Hi Hi C 9.2.1 Pipeline Overview AVR32 UC is a pipelined processor with three pipeline stages. There are three pipeline stages, Instruction Fetch (IF), Instruction Decode (ID) and Instruction Execute (EX). The EX stage is split into three parallel subsections, one arithmetic/logic (ALU) section, one multiply (MUL) sec- tion and one load/store (LS) section. Instructions are issued and complete in order. Certain operations require several clock cycles to complete, and in this case, the instruction resides in the ID and EX stages for the required num- ber of clock cycles. Since there is only three pipeline stages, no internal data forwarding is required, and no data dependencies can arise in the pipeline. Figure 9-2 on page 23 shows an overview of the AVR32 UC pipeline stages. 22 32058K AVR32-01/12
AT32UC3A Figure 9-2. The AVR32UC Pipeline MUL Multiply unit Regfile Regfile IF ID ALU ALU unit Read write Prefetch unit Decode unit Load-store LS unit 9.2.2 AVR32A Microarchitecture Compliance AVR32UC implements an AVR32A microarchitecture. The AVR32A microarchitecture is tar- geted at cost-sensitiv e, lower-end applications like smaller microcontrollers. This microarchitecture does not provide dedicated hardware registers for shadowing of register file registers in interrupt contexts. Additionally, it does not provide hardware registers for the return address registers and return status registers. Instead, all this information is stored on the system stack. This saves chip area at the expense of slower interrupt handling. Upon interrupt initiation, registers R8-R12 are automatically pushed to the system stack. These registers are pushed regardless of the priority level of the pending interrupt. The return address and status register are also automatically pushed to stack. The interrupt handler can therefore use R8-R12 freely. Upon interrupt completion, the old R8-R12 registers and status register are restored, and execution continues at the return address stored popped from stack. The stack is also used to store the status register and return address for exceptions and scall. Executing the rete or rets instruction at the completion of an exception or system call will pop this status register and continue execution at the popped return address. 9.2.3 Java Support AVR32UC does not provide Java hardware acceleration. 9.2.4 Memory protection The MPU allows the user to check all memory accesses for privilege violations. If an access is attempted to an illegal memory address, the access is aborted and an exception is taken. The MPU in AVR32UC is specified in the AVR32UC Technical Reference manual. 9.2.5 Unaligned reference handling AVR32UC does not support unaligned accesses, except for doubleword accesses. AVR32UC is able to perform word-aligned st.d and ld.d. Any other unaligned memory access will cause an address exception. Doubleword-sized accesses with word-aligned pointers will automatically be performed as two word-sized accesses. 23 32058K AVR32-01/12
AT32UC3A The following table shows the instructions with support for unaligned addresses. All other instructions require aligned addresses. Table 9-1. Instructions with unaligned reference support Instruction Supported alignment ld.d Word st.d Word 9.2.6 Unimplemented instructions The following instructions are unimplemented in AVR32UC, and will cause an Unimplemented Instruction Exception if executed: (cid:129) All SIMD instructions (cid:129) All coprocessor instructions (cid:129) retj, incjosp, popjc, pushjc (cid:129) tlbr, tlbs, tlbw (cid:129) cache 9.2.7 CPU and Architecture revision Two major revisions of the AVR32UC CPU currently exist. The device described in this datasheet uses CPU revision 2. The Architecture Revision field in the CONFIG0 system register identifies which architecture revision is implemented in a specific device. AVR32UC CPU revision 2 is fully backward-compatible with revision 1, ie. code compiled for revision 1 is binary-compatible with revision 2 CPUs. 24 32058K AVR32-01/12
AT32UC3A 9.3 Programming Model 9.3.1 Register file configuration The AVR32UC register file is shown below. Figure 9-3. The AVR32UC Register File Application Supervisor INT0 INT1 INT2 INT3 Exception NMI Bit 31 Bit 0 Bit 31 Bit 0 Bit 31 Bit 0 Bit 31 Bit 0 Bit 31 Bit 0 Bit 31 Bit 0 Bit 31 Bit 0 Bit 31 Bit 0 PC PC PC PC PC PC PC PC LR LR LR LR LR LR LR LR SP_APP SP_SYS SP_SYS SP_SYS SP_SYS SP_SYS SP_SYS SP_SYS R12 R12 R12 R12 R12 R12 R12 R12 R11 R11 R11 R11 R11 R11 R11 R11 R10 R10 R10 R10 R10 R10 R10 R10 R9 R9 R9 R9 R9 R9 R9 R9 R8 R8 R8 R8 R8 R8 R8 R8 INTR07PC INTR07PC INTR07PC INTR07PC INTR07PC INTR07PC INTR07PC INTR07PC INTR16PC INTR16PC INTR16PC INTR16PC INTR16PC INTR16PC INTR16PC INTR16PC FINRT5PC FINRT5PC FINRT5PC FINRT5PC FINRT5PC FINRT5PC FINRT5PC FINRT5PC SMR4PC SMR4PC SMR4PC SMR4PC SMR4PC SMR4PC SMR4PC SMR4PC R3 R3 R3 R3 R3 R3 R3 R3 R2 R2 R2 R2 R2 R2 R2 R2 R1 R1 R1 R1 R1 R1 R1 R1 R0 R0 R0 R0 R0 R0 R0 R0 SR SR SR SR SR SR SR SR 9.3.2 Status register configuration The Status Register (SR) is split into two halfwords, one upper and one lower, see Figure 9-4 on page 25 and Figure 9-5 on page 26. The lower word contains the C, Z, N, V and Q condition code flags and the R, T and L bits, while the upper halfword contains information about the mode and state the processor executes in. Refer to the AVR32 Architecture Manual for details. Figure 9-4. The Status Register High Halfword Bit 31 Bit 16 LC - - - - DM D - M2 M1 M0 EM I3M IF2EM I1M I0M GM Bit name 1 0 0 0 0 0 0 0 0 0 1 1 0 0 0 0 1 Initial value Global Interrupt Mask Interrupt Level 0 Mask Interrupt Level 1 Mask Interrupt Level 2 Mask Interrupt Level 3 Mask Exception Mask Mode Bit 0 Mode Bit 1 Mode Bit 2 Reserved Debug State Debug State Mask Reserved 25 32058K AVR32-01/12
AT32UC3A Figure 9-5. The Status Register Low Halfword Bit 15 Bit 0 R T - - - - - - - - L Q V N Z C Bit name 0 0 0 0 0 0 0 0 0 0 0 0 0 0 0 0 Initial value Carry Zero Sign Overflow Saturation Lock Reserved Scratch Register Remap Enable 9.3.3 Processor States 9.3.3.1 Normal RISC State The AVR32 processor supports several different execution contexts as shown in Table 9-2 on page 26. Table 9-2. Overview of execution modes, their priorities and privilege levels. Priority Mode Security Description 1 Non Maskable Interrupt Privileged Non Maskable high priority interrupt mode 2 Exception Privileged Execute exceptions 3 Interrupt 3 Privileged General purpose interrupt mode 4 Interrupt 2 Privileged General purpose interrupt mode 5 Interrupt 1 Privileged General purpose interrupt mode 6 Interrupt 0 Privileged General purpose interrupt mode N/A Supervisor Privileged Runs supervisor calls N/A Application Unprivileged Normal program execution mode Mode changes can be made under software control, or can be caused by external interrupts or exception processing. A mode can be interrupted by a higher priority mode, but never by one with lower priority. Nested exceptions can be supported with a minimal software overhead. When running an operating system on the AVR32, user processes will typically execute in the application mode. The programs executed in this mode are restricted from executing certain instructions. Furthermore, most system registers together with the upper halfword of the status register cannot be accessed. Protected memory areas are also not available. All other operating modes are privileged and are collectively called System Modes. They have full access to all priv- ileged and unprivileged resources. After a reset, the processor will be in supervisor mode. 9.3.3.2 Debug State The AVR32 can be set in a debug state, which allows implementation of software monitor rou- tines that can read out and alter system information for use during application development. This implies that all system and application registers, including the status registers and program counters, are accessible in debug state. The privileged instructions are also available. 26 32058K AVR32-01/12
AT32UC3A All interrupt levels are by default disabled when debug state is entered, but they can individually be switched on by the monitor routine by clearing the respective mask bit in the status register. Debug state can be entered as described in the AVR32UC Technical Reference Manual. Debug state is exited by the retd instruction. 9.3.4 System registers The system registers are placed outside of the virtual memory space, and are only accessible using the privileged mfsr and mtsr instructions. The table below lists the system registers speci- fied in the AVR32 architecture, some of which are unused in AVR32UC. The programmer is responsible for maintaining correct sequencing of any instructions following a mtsr instruction. For detail on the system registers, refer to the AVR32UC Technical Reference Manual. Table 9-3. System Registers Reg # Address Name Function 0 0 SR Status Register 1 4 EVBA Exception Vector Base Address 2 8 ACBA Application Call Base Address 3 12 CPUCR CPU Control Register 4 16 ECR Exception Cause Register 5 20 RSR_SUP Unused in AVR32UC 6 24 RSR_INT0 Unused in AVR32UC 7 28 RSR_INT1 Unused in AVR32UC 8 32 RSR_INT2 Unused in AVR32UC 9 36 RSR_INT3 Unused in AVR32UC 10 40 RSR_EX Unused in AVR32UC 11 44 RSR_NMI Unused in AVR32UC 12 48 RSR_DBG Return Status Register for Debug Mode 13 52 RAR_SUP Unused in AVR32UC 14 56 RAR_INT0 Unused in AVR32UC 15 60 RAR_INT1 Unused in AVR32UC 16 64 RAR_INT2 Unused in AVR32UC 17 68 RAR_INT3 Unused in AVR32UC 18 72 RAR_EX Unused in AVR32UC 19 76 RAR_NMI Unused in AVR32UC 20 80 RAR_DBG Return Address Register for Debug Mode 21 84 JECR Unused in AVR32UC 22 88 JOSP Unused in AVR32UC 23 92 JAVA_LV0 Unused in AVR32UC 24 96 JAVA_LV1 Unused in AVR32UC 25 100 JAVA_LV2 Unused in AVR32UC 27 32058K AVR32-01/12
AT32UC3A Table 9-3. System Registers (Continued) Reg # Address Name Function 26 104 JAVA_LV3 Unused in AVR32UC 27 108 JAVA_LV4 Unused in AVR32UC 28 112 JAVA_LV5 Unused in AVR32UC 29 116 JAVA_LV6 Unused in AVR32UC 30 120 JAVA_LV7 Unused in AVR32UC 31 124 JTBA Unused in AVR32UC 32 128 JBCR Unused in AVR32UC 33-63 132-252 Reserved Reserved for future use 64 256 CONFIG0 Configuration register 0 65 260 CONFIG1 Configuration register 1 66 264 COUNT Cycle Counter register 67 268 COMPARE Compare register 68 272 TLBEHI Unused in AVR32UC 69 276 TLBELO Unused in AVR32UC 70 280 PTBR Unused in AVR32UC 71 284 TLBEAR Unused in AVR32UC 72 288 MMUCR Unused in AVR32UC 73 292 TLBARLO Unused in AVR32UC 74 296 TLBARHI Unused in AVR32UC 75 300 PCCNT Unused in AVR32UC 76 304 PCNT0 Unused in AVR32UC 77 308 PCNT1 Unused in AVR32UC 78 312 PCCR Unused in AVR32UC 79 316 BEAR Bus Error Address Register 80 320 MPUAR0 MPU Address Register region 0 81 324 MPUAR1 MPU Address Register region 1 82 328 MPUAR2 MPU Address Register region 2 83 332 MPUAR3 MPU Address Register region 3 84 336 MPUAR4 MPU Address Register region 4 85 340 MPUAR5 MPU Address Register region 5 86 344 MPUAR6 MPU Address Register region 6 87 348 MPUAR7 MPU Address Register region 7 88 352 MPUPSR0 MPU Privilege Select Register region 0 89 356 MPUPSR1 MPU Privilege Select Register region 1 90 360 MPUPSR2 MPU Privilege Select Register region 2 91 364 MPUPSR3 MPU Privilege Select Register region 3 28 32058K AVR32-01/12
AT32UC3A Table 9-3. System Registers (Continued) Reg # Address Name Function 92 368 MPUPSR4 MPU Privilege Select Register region 4 93 372 MPUPSR5 MPU Privilege Select Register region 5 94 376 MPUPSR6 MPU Privilege Select Register region 6 95 380 MPUPSR7 MPU Privilege Select Register region 7 96 384 MPUCRA Unused in this version of AVR32UC 97 388 MPUCRB Unused in this version of AVR32UC 98 392 MPUBRA Unused in this version of AVR32UC 99 396 MPUBRB Unused in this version of AVR32UC 100 400 MPUAPRA MPU Access Permission Register A 101 404 MPUAPRB MPU Access Permission Register B 102 408 MPUCR MPU Control Register 103-191 412-764 Reserved Reserved for future use 192-255 768-1020 IMPL IMPLEMENTATION DEFINED 9.4 Exceptions and Interrupts AVR32UC incorporates a powerful exception handling scheme. The different exception sources, like Illegal Op-code and external interrupt requests, have different priority levels, ensuring a well- defined behavior when multiple exceptions are received simultaneously. Additionally, pending exceptions of a higher priority class may preempt handling of ongoing exceptions of a lower pri- ority class. When an event occurs, the execution of the instruction stream is halted, and execution control is passed to an event handler at an address specified in Table 9-4 on page 32. Most of the han- dlers are placed sequentially in the code space starting at the address specified by EVBA, with four bytes between each handler. This gives ample space for a jump instruction to be placed there, jumping to the event routine itself. A few critical handlers have larger spacing between them, allowing the entire event routine to be placed directly at the address specified by the EVBA-relative offset generated by hardware. All external interrupt sources have autovectored interrupt service routine (ISR) addresses. This allows the interrupt controller to directly specify the ISR address as an address relative to EVBA. The autovector offset has 14 address bits, giv- ing an offset of maximum 16384 bytes. The target address of the event handler is calculated as (EVBA | event_handler_offset), not (EVBA + event_handler_offset), so EVBA and exception code segments must be set up appropriately. The same mechanisms are used to service all dif- ferent types of events, including external interrupt requests, yielding a uniform event handling scheme. An interrupt controller does the priority handling of the external interrupts and provides the autovector offset to the CPU. 9.4.1 System stack issues Event handling in AVR32 UC uses the system stack pointed to by the system stack pointer, SP_SYS, for pushing and popping R8-R12, LR, status register and return address. Since event code may be timing-critical, SP_SYS should point to memory addresses in the IRAM section, since the timing of accesses to this memory section is both fast and deterministic. 29 32058K AVR32-01/12
AT32UC3A The user must also make sure that the system stack is large enough so that any event is able to push the required registers to stack. If the system stack is full, and an event occurs, the system will enter an UNDEFINED state. 9.4.2 Exceptions and interrupt requests When an event other than scall or debug request is received by the core, the following actions are performed atomically: 1. The pending event will not be accepted if it is masked. The I3M, I2M, I1M, I0M, EM and GM bits in the Status Register are used to mask different events. Not all events can be masked. A few critical events (NMI, Unrecoverable Exception, TLB Multiple Hit and Bus Error) can not be masked. When an event is accepted, hardware automatically sets the mask bits corresponding to all sources with equal or lower priority. This inhibits accep- tance of other events of the same or lower priority, except for the critical events listed above. Software may choose to clear some or all of these bits after saving the neces- sary state if other priority schemes are desired. It is the event source’s responsability to ensure that their events are left pending until accepted by the CPU. 2. When a request is accepted, the Status Register and Program Counter of the current context is stored to the system stack. If the event is an INT0, INT1, INT2 or INT3, regis- ters R8-R12 and LR are also automatically stored to stack. Storing the Status Register ensures that the core is returned to the previous execution mode when the current event handling is completed. When exceptions occur, both the EM and GM bits are set, and the application may manually enable nested exceptions if desired by clearing the appropriate bit. Each exception handler has a dedicated handler address, and this address uniquely identifies the exception source. 3. The Mode bits are set to reflect the priority of the accepted event, and the correct regis- ter file bank is selected. The address of the event handler, as shown in Table 9-4, is loaded into the Program Counter. The execution of the event handler routine then continues from the effective address calculated. The rete instruction signals the end of the event. When encountered, the Return Status Register and Return Address Register are popped from the system stack and restored to the Status Reg- ister and Program Counter. If the rete instruction returns from INT0, INT1, INT2 or INT3, registers R8-R12 and LR are also popped from the system stack. The restored Status Register contains information allowing the core to resume operation in the previous execution mode. This concludes the event handling. 9.4.3 Supervisor calls The AVR32 instruction set provides a supervisor mode call instruction. The scall instruction is designed so that privileged routines can be called from any context. This facilitates sharing of code between different execution modes. The scall mechanism is designed so that a minimal execution cycle overhead is experienced when performing supervisor routine calls from time- critical event handlers. The scall instruction behaves differently depending on which mode it is called from. The behav- iour is detailed in the instruction set reference. In order to allow the scall routine to return to the correct context, a return from supervisor call instruction, rets, is implemented. In the AVR32UC CPU, scall and rets uses the system stack to store the return address and the status register. 9.4.4 Debug requests The AVR32 architecture defines a dedicated debug mode. When a debug request is received by the core, Debug mode is entered. Entry into Debug mode can be masked by the DM bit in the 30 32058K AVR32-01/12
AT32UC3A status register. Upon entry into Debug mode, hardware sets the SR[D] bit and jumps to the Debug Exception handler. By default, debug mode executes in the exception context, but with dedicated Return Address Register and Return Status Register. These dedicated registers remove the need for storing this data to the system stack, thereby improving debuggability. The mode bits in the status register can freely be manipulated in Debug mode, to observe registers in all contexts, while retaining full privileges. Debug mode is exited by executing the retd instruction. This returns to the previous context. 9.4.5 Entry points for events Several different event handler entry points exists. In AVR32 UC, the reset address is 0x8000_0000. This places the reset address in the boot flash memory area. TLB miss exceptions and scall have a dedicated space relative to EVBA where their event han- dler can be placed. This speeds up execution by removing the need for a jump instruction placed at the program address jumped to by the event hardware. All other exceptions have a dedicated event routine entry point located relative to EVBA. The handler routine address identifies the exception source directly. AVR32UC uses the ITLB and DTLB protection exceptions to signal a MPU protection violation. ITLB and DTLB miss exceptions are used to signal that an access address did not map to any of the entries in the MPU. TLB multiple hit exception indicates that an access address did map to multiple TLB entries, signalling an error. All external interrupt requests have entry points located at an offset relative to EVBA. This autovector offset is specified by an external Interrupt Controller. The programmer must make sure that none of the autovector offsets interfere with the placement of other code. The autovec- tor offset has 14 address bits, giving an offset of maximum 16384 bytes. Special considerations should be made when loading EVBA with a pointer. Due to security con- siderations, the event handlers should be located in non-writeable flash memory, or optionally in a privileged memory protection region if an MPU is present. If several events occur on the same instruction, they are handled in a prioritized way. The priority ordering is presented in Table 9-4. If events occur on several instructions at different locations in the pipeline, the events on the oldest instruction are always handled before any events on any younger instruction, even if the younger instruction has events of higher priority than the oldest instruction. An instruction B is younger than an instruction A if it was sent down the pipeline later than A. The addresses and priority of simultaneous events are shown in Table 9-4. Some of the excep- tions are unused in AVR32 UC since it has no MMU, coprocessor interface or floating-point unit. 31 32058K AVR32-01/12
AT32UC3A Table 9-4. Priority and handler addresses for events Priority Handler Address Name Event source Stored Return Address 1 0x8000_0000 Reset External input Undefined 2 Provided by OCD system OCD Stop CPU OCD system First non-completed instruction 3 EVBA+0x00 Unrecoverable exception Internal PC of offending instruction 4 EVBA+0x04 TLB multiple hit MPU 5 EVBA+0x08 Bus error data fetch Data bus First non-completed instruction 6 EVBA+0x0C Bus error instruction fetch Data bus First non-completed instruction 7 EVBA+0x10 NMI External input First non-completed instruction 8 Autovectored Interrupt 3 request External input First non-completed instruction 9 Autovectored Interrupt 2 request External input First non-completed instruction 10 Autovectored Interrupt 1 request External input First non-completed instruction 11 Autovectored Interrupt 0 request External input First non-completed instruction 12 EVBA+0x14 Instruction Address CPU PC of offending instruction 13 EVBA+0x50 ITLB Miss MPU 14 EVBA+0x18 ITLB Protection MPU PC of offending instruction 15 EVBA+0x1C Breakpoint OCD system First non-completed instruction 16 EVBA+0x20 Illegal Opcode Instruction PC of offending instruction 17 EVBA+0x24 Unimplemented instruction Instruction PC of offending instruction 18 EVBA+0x28 Privilege violation Instruction PC of offending instruction 19 EVBA+0x2C Floating-point UNUSED 20 EVBA+0x30 Coprocessor absent UNUSED 21 EVBA+0x100 Supervisor call Instruction PC(Supervisor Call) +2 22 EVBA+0x34 Data Address (Read) CPU PC of offending instruction 23 EVBA+0x38 Data Address (Write) CPU PC of offending instruction 24 EVBA+0x60 DTLB Miss (Read) MPU 25 EVBA+0x70 DTLB Miss (Write) MPU 26 EVBA+0x3C DTLB Protection (Read) MPU PC of offending instruction 27 EVBA+0x40 DTLB Protection (Write) MPU PC of offending instruction 28 EVBA+0x44 DTLB Modified UNUSED 32 32058K AVR32-01/12
AT32UC3A 10. Memories 10.1 Embedded Memories (cid:129) Internal High-Speed Flash – 512 KBytes (AT32UC3A0512, AT32UC3A1512) – 256 KBytes (AT32UC3A0256, AT32UC3A1256) – 128 KBytes (AT32UC3A1128, AT32UC3A2128) - 0 Wait State Access at up to 33 MHz in Worst Case Conditions - 1 Wait State Access at up to 66 MHz in Worst Case Conditions - Pipelined Flash Architecture, allowing burst reads from sequential Flash locations, hiding penalty of 1 wait state access - Pipelined Flash Architecture typically reduces the cycle penalty of 1 wait state operation to only 15% compared to 0 wait state operation - 100 000 Write Cycles, 15-year Data Retention Capability - 4 ms Page Programming Time, 8 ms Chip Erase Time - Sector Lock Capabilities, Bootloader Protection, Security Bit - 32 Fuses, Erased During Chip Erase - User Page For Data To Be Preserved During Chip Erase (cid:129) Internal High-Speed SRAM, Single-cycle access at full speed – 64 KBytes (AT32UC3A0512, AT32UC3A0256, AT32UC3A1512, AT32UC3A1256) – 32KBytes (AT32UC3A1128) 10.2 Physical Memory Map The system bus is implemented as a bus matrix. All system bus addresses are fixed, and they are never remapped in any way, not even in boot. Note that AVR32 UC CPU uses unsegmented translation, as described in the AVR32 Architecture Manual. The 32-bit physical address space is mapped as follows: Table 10-1. AT32UC3A Physical Memory Map Size Device Start Address AT32UC3A0512 AT32UC3A1512 AT32UC3A0256 AT32UC3A1256 AT32UC3A0128 AT32UC3A1128 Embedded SRAM 0x0000_0000 64 Kbyte 64 Kbyte 64 Kbyte 64 Kbyte 32 Kbyte 32 Kbyte Embedded Flash 0x8000_0000 512 Kbyte 512 Kbyte 256 Kbyte 256 Kbyte 128 Kbyte 128 Kbyte EBI SRAM CS0 0xC000_0000 16 Mbyte - 16 Mbyte - 16 Mbyte - EBI SRAM CS2 0xC800_0000 16 Mbyte - 16 Mbyte - 16 Mbyte - EBI SRAM CS3 0xCC00_0000 16 Mbyte - 16 Mbyte - 16 Mbyte - EBI SRAM CS1 0xD000_0000 128 Mbyte - 128 Mbyte - 128 Mbyte - /SDRAM CS0 USB 0xE000_0000 64 Kbyte 64 Kbyte 64 Kbyte 64 Kbyte 64 Kbyte 64 Kbyte Configuration HSB-PB Bridge A 0xFFFE_0000 64 Kbyte 64 Kbyte 64 Kbyte 64 Kbyte 64 Kbyte 64 Kbyte HSB-PB Bridge B 0xFFFF_0000 64 Kbyte 64 Kbyte 64 kByte 64 kByte 64 Kbyte 64 Kbyte 33 32058K AVR32-01/12
AT32UC3A Table 10-2. Flash Memory Parameters General Purpose Flash Size Number of pages Page size Fuse bits Part Number (FLASH_PW) (FLASH_P) (FLASH_W) (FLASH_F) AT32UC3A0512 512 Kbytes 1024 128 words 32 fuses AT32UC3A1512 512 Kbytes 1024 128 words 32 fuses AT32UC3A0256 256 Kbytes 512 128 words 32 fuses AT32UC3A1256 256 Kbytes 512 128 words 32 fuses AT32UC3A1128 128 Kbytes 256 128 words 32 fuses AT32UC3A0128 128 Kbytes 256 128 words 32 fuses 10.3 Bus Matrix Connections Accesses to unused areas returns an error result to the master requesting such an access. The bus matrix has the several masters and slaves. Each master has its own bus and its own decoder, thus allowing a different memory mapping per master. The master number in the table below can be used to index the HMATRIX control registers. For example, MCFG0 is associated with the CPU Data master interface. Table 10-3. High Speed Bus masters Master 0 CPU Data Master 1 CPU Instruction Master 2 CPU SAB Master 3 PDCA Master 4 MACB DMA Master 5 USBB DMA Each slave has its own arbiter, thus allowing a different arbitration per slave. The slave number in the table below can be used to index the HMATRIX control registers. For example, SCFG3 is associated with the Internal SRAM Slave Interface. Table 10-4. High Speed Bus slaves Slave 0 Internal Flash Slave 1 HSB-PB Bridge 0 Slave 2 HSB-PB Bridge 1 Slave 3 Internal SRAM Slave 4 USBB DPRAM Slave 5 EBI 34 32058K AVR32-01/12
AT32UC3A Figure 10-1. HMatrix Master / Slave Connections HMATRIX SLAVES Internal Flash HSB-PBBridge 0 HSB-PBBridge 1 Internal SRAMSlave USBB Slave EBI 0 1 2 3 4 5 CPU Data 0 CPU 1 Instruction S R E ST CPU SAB 2 A M X RI T PDCA 3 A M H MACB 4 USBB DMA 5 35 32058K AVR32-01/12
AT32UC3A 11. Fuses Settings The flash block contains a number of general purpose fuses. Some of these fuses have defined meanings outside the flash controller and are described in this section. The general purpose fuses are erase by a JTAG chip erase. 11.1 Flash General Purpose Fuse Register (FGPFRLO) Table 11-1. FGPFR Register Description 31 30 29 28 27 26 25 24 GPF31 GPF30 GPF29 BODEN BODHYST BODLEVEL[5:4] 23 22 21 20 19 18 17 16 BODLEVEL[3:0] BOOTPROT EPFL 15 14 13 12 11 10 9 8 LOCK[15:8] 7 6 5 4 3 2 1 0 LOCK[7:0] BODEN: Brown Out Detector Enable Table 11-2. BODEN Field Description BODEN Description 0x0 BOD disabled 0x1 BOD enabled, BOD reset enabled 0x2 BOD enabled, BOD reset disabled 0x3 BOD disabled BODHYST: Brown Out Detector Hysteresis Table 11-3. BODEN Field Description BODHYST Description 0b The Brown out detector hysteresis is disabled 1b he Brown out detector hysteresis is enabled. BODLEVEL: Brown Out Detector Trigger Level This controls the voltage trigger level for the Brown out detector. Refer to sectionTable 38-6 on page 765 for values description. If the BODLEVEL is set higher than VDDCORE and enabled by fuses, the part will be in constant reset. To recover from this situation, apply an external voltage on VDDCORE that is higher than the BOD level and disable the BOD. 36 32058K AVR32-01/12
AT32UC3A LOCK, EPFL, BOOTPROT These are Flash controller fuses and are described in the FLASHC section. 11.2 Default Fuse Value The devices are shipped with the FGPFRLO register value: 0xFC07FFFF: (cid:129) GPF31 fuse set to 1b. This fuse is used by the pre-programmed USB bootloader. (cid:129) GPF30 fuse set to 1b. This fuse is used by the pre-programmed USB bootloader. (cid:129) GPF29 fuse set to 1b. This fuse is used by the pre-programmed USB bootloader. (cid:129) BODEN fuses set to 11b. BOD is disabled. (cid:129) BODHYST fuse set to 1b. The BOD hysteresis is enabled. (cid:129) BODLEVEL fuses set to 000000b. This is the minimum voltage trigger level for BOD. (cid:129) BOOTPROT fuses set to 011b. The bootloader protected size is 8 Ko. (cid:129) EPFL fuse set to 1b. External privileged fetch is not locked. (cid:129) LOCK fuses set to 1111111111111111b. No region locked. See also the AT32UC3A Bootloader user guide document. After the JTAG chip erase command, the FGPFRLO register value is 0xFFFFFFFF. 37 32058K AVR32-01/12
AT32UC3A 12. Peripherals 12.1 Peripheral address map Table 12-1. Peripheral Address Mapping Address Peripheral Name Bus 0xE0000000 USBB USBB Slave Interface - USBB HSB 0xFFFE0000 USBB USBB Configuration Interface - USBB PBB 0xFFFE1000 HMATRIX HMATRIX Configuration Interface - HMATRIX PBB 0xFFFE1400 FLASHC Flash Controller - FLASHC PBB 0xFFFE1800 MACB MACB Configuration Interface - MACB PBB 0xFFFE1C00 Static Memory Controller Configuration Interface - SMC PBB SMC 0xFFFE2000 SDRAM Controller Configuration Interface - SDRAMC PBB SDRAMC 0xFFFF0000 PDCA Peripheral DMA Interface - PDCA PBA 0xFFFF0800 INTC Interrupt Controller Interface - INTC PBA 0xFFFF0C00 PM Power Manager - PM PBA 0xFFFF0D00 RTC Real Time Clock - RTC PBA 0xFFFF0D30 WDT WatchDog Timer - WDT PBA 0xFFFF0D80 EIC External Interrupt Controller - EIC PBA 0xFFFF1000 GPIO General Purpose IO Controller - GPIO PBA 0xFFFF1400 Universal Synchronous Asynchronous Receiver USART0 PBA Transmitter - USART0 0xFFFF1800 Universal Synchronous Asynchronous Receiver USART1 PBA Transmitter - USART1 38 32058K AVR32-01/12
AT32UC3A Table 12-1. Peripheral Address Mapping (Continued) Address Peripheral Name Bus 0xFFFF1C00 Universal Synchronous Asynchronous Receiver USART2 PBA Transmitter - USART2 0xFFFF2000 Universal Synchronous Asynchronous Receiver USART3 PBA Transmitter - USART3 0xFFFF2400 SPI0 Serial Peripheral Interface - SPI0 PBA 0xFFFF2800 SPI1 Serial Peripheral Interface - SPI1 PBA 0xFFFF2C00 TWI Two Wire Interface - TWI PBA 0xFFFF3000 PWM Pulse Width Modulation Controller - PWM PBA 0xFFFF3400 SSC Synchronous Serial Controller - SSC PBA 0xFFFF3800 TC Timer/Counter - TC PBA 0xFFFF3C00 ADC Analog To Digital Converter - ADC PBA 12.2 CPU Local Bus Mapping Some of the registers in the GPIO module are mapped onto the CPU local bus, in addition to being mapped on the Peripheral Bus. These registers can therefore be reached both by accesses on the Peripheral Bus, and by accesses on the local bus. Mapping these registers on the local bus allows cycle-deterministic toggling of GPIO pins since the CPU and GPIO are the only modules connected to this bus. Also, since the local bus runs at CPU speed, one write or read operation can be performed per clock cycle to the local bus- mapped GPIO registers. 39 32058K AVR32-01/12
AT32UC3A The following GPIO registers are mapped on the local bus: Table 12-2. Local bus mapped GPIO registers Local Bus Port Register Mode Address Access 0 Output Driver Enable Register (ODER) WRITE 0x4000_0040 Write-only SET 0x4000_0044 Write-only CLEAR 0x4000_0048 Write-only TOGGLE 0x4000_004C Write-only Output Value Register (OVR) WRITE 0x4000_0050 Write-only SET 0x4000_0054 Write-only CLEAR 0x4000_0058 Write-only TOGGLE 0x4000_005C Write-only Pin Value Register (PVR) - 0x4000_0060 Read-only 1 Output Driver Enable Register (ODER) WRITE 0x4000_0140 Write-only SET 0x4000_0144 Write-only CLEAR 0x4000_0148 Write-only TOGGLE 0x4000_014C Write-only Output Value Register (OVR) WRITE 0x4000_0150 Write-only SET 0x4000_0154 Write-only CLEAR 0x4000_0158 Write-only TOGGLE 0x4000_015C Write-only Pin Value Register (PVR) - 0x4000_0160 Read-only 2 Output Driver Enable Register (ODER) WRITE 0x4000_0240 Write-only SET 0x4000_0244 Write-only CLEAR 0x4000_0248 Write-only TOGGLE 0x4000_024C Write-only Output Value Register (OVR) WRITE 0x4000_0250 Write-only SET 0x4000_0254 Write-only CLEAR 0x4000_0258 Write-only TOGGLE 0x4000_025C Write-only Pin Value Register (PVR) - 0x4000_0260 Read-only 40 32058K AVR32-01/12
AT32UC3A Table 12-2. Local bus mapped GPIO registers Local Bus Port Register Mode Address Access 3 Output Driver Enable Register (ODER) WRITE 0x4000_0340 Write-only SET 0x4000_0344 Write-only CLEAR 0x4000_0348 Write-only TOGGLE 0x4000_034C Write-only Output Value Register (OVR) WRITE 0x4000_0350 Write-only SET 0x4000_0354 Write-only CLEAR 0x4000_0358 Write-only TOGGLE 0x4000_035C Write-only Pin Value Register (PVR) - 0x4000_0360 Read-only 12.3 Interrupt Request Signal Map The various modules may output Interrupt request signals. These signals are routed to the Inter- rupt Controller (INTC), described in a later chapter. The Interrupt Controller supports up to 64 groups of interrupt requests. Each group can have up to 32 interrupt request signals. All interrupt signals in the same group share the same autovector address and priority level. Refer to the documentation for the individual submodules for a description of the semantics of the different interrupt requests. The interrupt request signals are connected to the INTC as follows. Table 12-3. Interrupt Request Signal Map Group Line Module Signal AVR32 UC CPU with optional MPU and SYSBLOCK 0 0 optional OCD COMPARE 0 External Interrupt Controller EIC 0 1 External Interrupt Controller EIC 1 2 External Interrupt Controller EIC 2 3 External Interrupt Controller EIC 3 4 External Interrupt Controller EIC 4 1 5 External Interrupt Controller EIC 5 6 External Interrupt Controller EIC 6 7 External Interrupt Controller EIC 7 8 Real Time Counter RTC 9 Power Manager PM 10 Frequency Meter FREQM 41 32058K AVR32-01/12
AT32UC3A Table 12-3. Interrupt Request Signal Map 0 General Purpose Input/Output GPIO 0 1 General Purpose Input/Output GPIO 1 2 General Purpose Input/Output GPIO 2 3 General Purpose Input/Output GPIO 3 4 General Purpose Input/Output GPIO 4 5 General Purpose Input/Output GPIO 5 6 General Purpose Input/Output GPIO 6 2 7 General Purpose Input/Output GPIO 7 8 General Purpose Input/Output GPIO 8 9 General Purpose Input/Output GPIO 9 10 General Purpose Input/Output GPIO 10 11 General Purpose Input/Output GPIO 11 12 General Purpose Input/Output GPIO 12 13 General Purpose Input/Output GPIO 13 0 Peripheral DMA Controller PDCA 0 1 Peripheral DMA Controller PDCA 1 2 Peripheral DMA Controller PDCA 2 3 Peripheral DMA Controller PDCA 3 4 Peripheral DMA Controller PDCA 4 5 Peripheral DMA Controller PDCA 5 6 Peripheral DMA Controller PDCA 6 3 7 Peripheral DMA Controller PDCA 7 8 Peripheral DMA Controller PDCA 8 9 Peripheral DMA Controller PDCA 9 10 Peripheral DMA Controller PDCA 10 11 Peripheral DMA Controller PDCA 11 12 Peripheral DMA Controller PDCA 12 13 Peripheral DMA Controller PDCA 13 14 Peripheral DMA Controller PDCA 14 4 0 Flash Controller FLASHC Universal Synchronous/Asynchronous 5 0 USART0 Receiver/Transmitter Universal Synchronous/Asynchronous 6 0 USART1 Receiver/Transmitter Universal Synchronous/Asynchronous 7 0 USART2 Receiver/Transmitter Universal Synchronous/Asynchronous 8 0 USART3 Receiver/Transmitter 42 32058K AVR32-01/12
AT32UC3A Table 12-3. Interrupt Request Signal Map 9 0 Serial Peripheral Interface SPI0 10 0 Serial Peripheral Interface SPI1 11 0 Two-wire Interface TWI 12 0 Pulse Width Modulation Controller PWM 13 0 Synchronous Serial Controller SSC 0 Timer/Counter TC0 14 1 Timer/Counter TC1 2 Timer/Counter TC2 15 0 Analog to Digital Converter ADC 16 0 Ethernet MAC MACB 17 0 USB 2.0 OTG Interface USBB 18 0 SDRAM Controller SDRAMC 19 0 Audio Bitstream DAC DAC 12.4 Clock Connections 12.4.1 Timer/Counters Each Timer/Counter channel can independently select an internal or external clock source for its counter: Table 12-4. Timer/Counter clock connections Source Name Connection Internal TIMER_CLOCK1 32 KHz Oscillator TIMER_CLOCK2 PBA clock / 2 TIMER_CLOCK3 PBA clock / 8 TIMER_CLOCK4 PBA clock / 32 TIMER_CLOCK5 PBA clock / 128 External XC0 See Section 12.7 XC1 XC2 12.4.2 USARTs Each USART can be connected to an internally divided clock: Table 12-5. USART clock connections USART Source Name Connection 0 Internal CLK_DIV PBA clock / 8 1 2 3 43 32058K AVR32-01/12
AT32UC3A 12.4.3 SPIs Each SPI can be connected to an internally divided clock: Table 12-6. SPI clock connections SPI Source Name Connection 0 Internal CLK_DIV PBA clock or PBA clock / 32 1 12.5 Nexus OCD AUX port connections If the OCD trace system is enabled, the trace system will take control over a number of pins, irre- spectively of the PIO configuration. Two different OCD trace pin mappings are possible, depending on the configuration of the OCD AXS register. For details, see the AVR32 UC Tech- nical Reference Manual. Table 12-7. Nexus OCD AUX port connections Pin AXS=0 AXS=1 EVTI_N PB19 PA08 MDO[5] PB16 PA27 MDO[4] PB14 PA26 MDO[3] PB13 PA25 MDO[2] PB12 PA24 MDO[1] PB11 PA23 MDO[0] PB10 PA22 EVTO_N PB20 PB20 MCKO PB21 PA21 MSEO[1] PB04 PA07 MSEO[0] PB17 PA28 12.6 PDC handshake signals The PDC and the peripheral modules communicate through a set of handshake signals. The fol- lowing table defines the valid settings for the Peripheral Identifier (PID) in the PDC Peripheral Select Register (PSR). Table 12-8. PDC Handshake Signals PID Value Peripheral module & direction 0 ADC 1 SSC - RX 2 USART0 - RX 3 USART1 - RX 44 32058K AVR32-01/12
AT32UC3A Table 12-8. PDC Handshake Signals PID Value Peripheral module & direction 4 USART2 - RX 5 USART3 - RX 6 TWI - RX 7 SPI0 - RX 8 SPI1 - RX 9 SSC - TX 10 USART0 - TX 11 USART1 - TX 12 USART2 - TX 13 USART3 - TX 14 TWI - TX 15 SPI0 - TX 16 SPI1 - TX 17 ABDAC 12.7 Peripheral Multiplexing on I/O lines Each GPIO line can be assigned to one of 3 peripheral functions; A, B or C. The following table define how the I/O lines on the peripherals A, B and C are multiplexed by the GPIO. Table 12-9. GPIO Controller Function Multiplexing TQFP100 VQFP144 PIN GPIO Pin Function A Function B Function C 19 25 PA00 GPIO 0 USART0 - RXD TC - CLK0 20 27 PA01 GPIO 1 USART0 - TXD TC - CLK1 23 30 PA02 GPIO 2 USART0 - CLK TC - CLK2 24 32 PA03 GPIO 3 USART0 - RTS EIM - EXTINT[4] DAC - DATA[0] 25 34 PA04 GPIO 4 USART0 - CTS EIM - EXTINT[5] DAC - DATAN[0] 26 39 PA05 GPIO 5 USART1 - RXD PWM - PWM[4] 27 41 PA06 GPIO 6 USART1 - TXD PWM - PWM[5] 28 43 PA07 GPIO 7 USART1 - CLK PM - GCLK[0] SPI0 - NPCS[3] 29 45 PA08 GPIO 8 USART1 - RTS SPI0 - NPCS[1] EIM - EXTINT[7] 30 47 PA09 GPIO 9 USART1 - CTS SPI0 - NPCS[2] MACB - WOL 31 48 PA10 GPIO 10 SPI0 - NPCS[0] EIM - EXTINT[6] 33 50 PA11 GPIO 11 SPI0 - MISO USB - USB_ID 36 53 PA12 GPIO 12 SPI0 - MOSI USB - USB_VBOF 37 54 PA13 GPIO 13 SPI0 - SCK SSC - 39 56 PA14 GPIO 14 SPI1 - NPCS[0] EBI - NCS[0] TX_FRAME_SYNC 40 57 PA15 GPIO 15 SSC - TX_CLOCK SPI1 - SCK EBI - ADDR[20] 45 32058K AVR32-01/12
AT32UC3A Table 12-9. GPIO Controller Function Multiplexing 41 58 PA16 GPIO 16 SSC - TX_DATA SPI1 - MOSI EBI - ADDR[21] 42 60 PA17 GPIO 17 SSC - RX_DATA SPI1 - MISO EBI - ADDR[22] 43 62 PA18 GPIO 18 SSC - RX_CLOCK SPI1 - NPCS[1] MACB - WOL SSC - 44 64 PA19 GPIO 19 SPI1 - NPCS[2] RX_FRAME_SYNC 45 66 PA20 GPIO 20 EIM - EXTINT[8] SPI1 - NPCS[3] 51 73 PA21 GPIO 21 ADC - AD[0] EIM - EXTINT[0] USB - USB_ID 52 74 PA22 GPIO 22 ADC - AD[1] EIM - EXTINT[1] USB - USB_VBOF 53 75 PA23 GPIO 23 ADC - AD[2] EIM - EXTINT[2] DAC - DATA[1] 54 76 PA24 GPIO 24 ADC - AD[3] EIM - EXTINT[3] DAC - DATAN[1] 55 77 PA25 GPIO 25 ADC - AD[4] EIM - SCAN[0] EBI - NCS[0] 56 78 PA26 GPIO 26 ADC - AD[5] EIM - SCAN[1] EBI - ADDR[20] 57 79 PA27 GPIO 27 ADC - AD[6] EIM - SCAN[2] EBI - ADDR[21] 58 80 PA28 GPIO 28 ADC - AD[7] EIM - SCAN[3] EBI - ADDR[22] 83 122 PA29 GPIO 29 TWI - SDA USART2 - RTS 84 123 PA30 GPIO 30 TWI - SCL USART2 - CTS 65 88 PB00 GPIO 32 MACB - TX_CLK USART2 - RTS USART3 - RTS 66 90 PB01 GPIO 33 MACB - TX_EN USART2 - CTS USART3 - CTS 70 96 PB02 GPIO 34 MACB - TXD[0] DAC - DATA0[] 71 98 PB03 GPIO 35 MACB - TXD[1] DAC - DATAN[0] 72 100 PB04 GPIO 36 MACB - CRS USART3 - CLK EBI - NCS[3] 73 102 PB05 GPIO 37 MACB - RXD[0] DAC - DATA1[] 74 104 PB06 GPIO 38 MACB - RXD[1] DAC - DATAN[1] 75 106 PB07 GPIO 39 MACB - RX_ER 76 111 PB08 GPIO 40 MACB - MDC 77 113 PB09 GPIO 41 MACB - MDIO 78 115 PB10 GPIO 42 MACB - TXD[2] USART3 - RXD EBI - SDCK 81 119 PB11 GPIO 43 MACB - TXD[3] USART3 - TXD EBI - SDCKE 82 121 PB12 GPIO 44 MACB - TX_ER TC - CLK0 EBI - RAS 87 126 PB13 GPIO 45 MACB - RXD[2] TC - CLK1 EBI - CAS 88 127 PB14 GPIO 46 MACB - RXD[3] TC - CLK2 EBI - SDWE 95 134 PB15 GPIO 47 MACB - RX_DV 96 136 PB16 GPIO 48 MACB - COL USB - USB_ID EBI - SDA10 98 139 PB17 GPIO 49 MACB - RX_CLK USB - USB_VBOF EBI - ADDR[23] 99 141 PB18 GPIO 50 MACB - SPEED ADC - TRIGGER PWM - PWM[6] 100 143 PB19 GPIO 51 PWM - PWM[0] PM - GCLK[0] EIM - SCAN[4] 1 3 PB20 GPIO 52 PWM - PWM[1] PM - GCLK[1] EIM - SCAN[5] 2 5 PB21 GPIO 53 PWM - PWM[2] PM - GCLK[2] EIM - SCAN[6] 3 6 PB22 GPIO 54 PWM - PWM[3] PM - GCLK[3] EIM - SCAN[7] 6 9 PB23 GPIO 55 TC - A0 USART1 - DCD 46 32058K AVR32-01/12
AT32UC3A Table 12-9. GPIO Controller Function Multiplexing 7 11 PB24 GPIO 56 TC - B0 USART1 - DSR 8 13 PB25 GPIO 57 TC - A1 USART1 - DTR 9 14 PB26 GPIO 58 TC - B1 USART1 - RI 10 15 PB27 GPIO 59 TC - A2 PWM - PWM[4] 14 19 PB28 GPIO 60 TC - B2 PWM - PWM[5] 15 20 PB29 GPIO 61 USART2 - RXD PM - GCLK[1] EBI - NCS[2] 16 21 PB30 GPIO 62 USART2 - TXD PM - GCLK[2] EBI - SDCS 17 22 PB31 GPIO 63 USART2 - CLK PM - GCLK[3] EBI - NWAIT 63 85 PC00 GPIO 64 64 86 PC01 GPIO 65 85 124 PC02 GPIO 66 86 125 PC03 GPIO 67 93 132 PC04 GPIO 68 94 133 PC05 GPIO 69 1 PX00 GPIO 100 EBI - DATA[10] USART0 - RXD 2 PX01 GPIO 99 EBI - DATA[9] USART0 - TXD 4 PX02 GPIO 98 EBI - DATA[8] USART0 - CTS 10 PX03 GPIO 97 EBI - DATA[7] USART0 - RTS 12 PX04 GPIO 96 EBI - DATA[6] USART1 - RXD 24 PX05 GPIO 95 EBI - DATA[5] USART1 - TXD 26 PX06 GPIO 94 EBI - DATA[4] USART1 - CTS 31 PX07 GPIO 93 EBI - DATA[3] USART1 - RTS 33 PX08 GPIO 92 EBI - DATA[2] USART3 - RXD 35 PX09 GPIO 91 EBI - DATA[1] USART3 - TXD 38 PX10 GPIO 90 EBI - DATA[0] USART2 - RXD 40 PX11 GPIO 109 EBI - NWE1 USART2 - TXD 42 PX12 GPIO 108 EBI - NWE0 USART2 - CTS 44 PX13 GPIO 107 EBI - NRD USART2 - RTS 46 PX14 GPIO 106 EBI - NCS[1] TC - A0 59 PX15 GPIO 89 EBI - ADDR[19] USART3 - RTS TC - B0 61 PX16 GPIO 88 EBI - ADDR[18] USART3 - CTS TC - A1 63 PX17 GPIO 87 EBI - ADDR[17] TC - B1 65 PX18 GPIO 86 EBI - ADDR[16] TC - A2 67 PX19 GPIO 85 EBI - ADDR[15] EIM - SCAN[0] TC - B2 87 PX20 GPIO 84 EBI - ADDR[14] EIM - SCAN[1] TC - CLK0 89 PX21 GPIO 83 EBI - ADDR[13] EIM - SCAN[2] TC - CLK1 91 PX22 GPIO 82 EBI - ADDR[12] EIM - SCAN[3] TC - CLK2 95 PX23 GPIO 81 EBI - ADDR[11] EIM - SCAN[4] 97 PX24 GPIO 80 EBI - ADDR[10] EIM - SCAN[5] 47 32058K AVR32-01/12
AT32UC3A Table 12-9. GPIO Controller Function Multiplexing 99 PX25 GPIO 79 EBI - ADDR[9] EIM - SCAN[6] 101 PX26 GPIO 78 EBI - ADDR[8] EIM - SCAN[7] 103 PX27 GPIO 77 EBI - ADDR[7] SPI0 - MISO 105 PX28 GPIO 76 EBI - ADDR[6] SPI0 - MOSI 107 PX29 GPIO 75 EBI - ADDR[5] SPI0 - SCK 110 PX30 GPIO 74 EBI - ADDR[4] SPI0 - NPCS[0] 112 PX31 GPIO 73 EBI - ADDR[3] SPI0 - NPCS[1] 114 PX32 GPIO 72 EBI - ADDR[2] SPI0 - NPCS[2] 118 PX33 GPIO 71 EBI - ADDR[1] SPI0 - NPCS[3] 120 PX34 GPIO 70 EBI - ADDR[0] SPI1 - MISO 135 PX35 GPIO 105 EBI - DATA[15] SPI1 - MOSI 137 PX36 GPIO 104 EBI - DATA[14] SPI1 - SCK 140 PX37 GPIO 103 EBI - DATA[13] SPI1 - NPCS[0] 142 PX38 GPIO 102 EBI - DATA[12] SPI1 - NPCS[1] 144 PX39 GPIO 101 EBI - DATA[11] SPI1 - NPCS[2] 12.8 Oscillator Pinout The oscillators are not mapped to the normal A,B or C functions and their muxings are controlled by registers in the Power Manager (PM). Please refer to the power manager chapter for more information about this. Table 12-10. Oscillator pinout TQFP100 pin VQFP144 pin Pad Oscillator pin 85 124 PC02 xin0 93 132 PC04 xin1 63 85 PC00 xin32 86 125 PC03 xout0 94 133 PC05 xout1 64 86 PC01 xout32 12.9 USART Configuration Table 12-11. USART Supported Mode Manchester SPI RS485 ISO7816 IrDA Modem Encoding USART0 Yes No No No No No USART1 Yes Yes Yes Yes Yes Yes USART2 Yes No No No No No USART3 Yes No No No No No 48 32058K AVR32-01/12
AT32UC3A 12.10 GPIO The GPIO open drain feature (GPIO ODMER register (Open Drain Mode Enable Register)) is not available for this device. 12.11 Peripheral overview 12.11.1 External Bus Interface (cid:129) Optimized for Application Memory Space support (cid:129) Integrates Two External Memory Controllers: – Static Memory Controller – SDRAM Controller (cid:129) Optimized External Bus: –16-bit Data Bus – 24-bit Address Bus, Up to 16-Mbytes Addressable – Optimized pin multiplexing to reduce latencies on External Memories (cid:129) 4 SRAM Chip Selects, 1SDRAM Chip Select: – Static Memory Controller on NCS0 – SDRAM Controller or Static Memory Controller on NCS1 – Static Memory Controller on NCS2 – Static Memory Controller on NCS3 12.11.2 Static Memory Controller (cid:129) 4 Chip Selects Available (cid:129) 64-Mbyte Address Space per Chip Select (cid:129) 8-, 16-bit Data Bus (cid:129) Word, Halfword, Byte Transfers (cid:129) Byte Write or Byte Select Lines (cid:129) Programmable Setup, Pulse And Hold Time for Read Signals per Chip Select (cid:129) Programmable Setup, Pulse And Hold Time for Write Signals per Chip Select (cid:129) Programmable Data Float Time per Chip Select (cid:129) Compliant with LCD Module (cid:129) External Wait Request (cid:129) Automatic Switch to Slow Clock Mode (cid:129) Asynchronous Read in Page Mode Supported: Page Size Ranges from 4 to 32 Bytes 12.11.3 SDRAM Controller (cid:129) Numerous Configurations Supported – 2K, 4K, 8K Row Address Memory Parts – SDRAM with Two or Four Internal Banks – SDRAM with 16-bit Data Path (cid:129) Programming Facilities – Word, Half-word, Byte Access – Automatic Page Break When Memory Boundary Has Been Reached – Multibank Ping-pong Access – Timing Parameters Specified by Software – Automatic Refresh Operation, Refresh Rate is Programmable (cid:129) Energy-saving Capabilities – Self-refresh, Power-down and Deep Power Modes Supported 49 32058K AVR32-01/12
AT32UC3A – Supports Mobile SDRAM Devices (cid:129) Error Detection – Refresh Error Interrupt (cid:129) SDRAM Power-up Initialization by Software (cid:129) CAS Latency of 1, 2, 3 Supported (cid:129) Auto Precharge Command Not Used 12.11.4 USB Controller (cid:129) USB 2.0 Compliant, Full-/Low-Speed (FS/LS) and On-The-Go (OTG), 12 Mbit/s (cid:129) 7 Pipes/Endpoints (cid:129) 960 bytes of Embedded Dual-Port RAM (DPRAM) for Pipes/Endpoints (cid:129) Up to 2 Memory Banks per Pipe/Endpoint (Not for Control Pipe/Endpoint) (cid:129) Flexible Pipe/Endpoint Configuration and Management with Dedicated DMA Channels (cid:129) On-Chip Transceivers Including Pull-Ups 12.11.5 Serial Peripheral Interface (cid:129) Supports communication with serial external devices – Four chip selects with external decoder support allow communication with up to 15 peripherals – Serial memories, such as DataFlash and 3-wire EEPROMs – Serial peripherals, such as ADCs, DACs, LCD Controllers, CAN Controllers and Sensors – External co-processors (cid:129) Master or slave serial peripheral bus interface – 8- to 16-bit programmable data length per chip select – Programmable phase and polarity per chip select – Programmable transfer delays between consecutive transfers and between clock and data per chip select – Programmable delay between consecutive transfers – Selectable mode fault detection (cid:129) Very fast transfers supported – Transfers with baud rates up to Peripheral Bus A (PBA) max frequency – The chip select line may be left active to speed up transfers on the same device 12.11.6 Two-wire Interface (cid:129) High speed up to 400kbit/s (cid:129) Compatibility with standard two-wire serial memory (cid:129) One, two or three bytes for slave address (cid:129) Sequential read/write operations 12.11.7 USART (cid:129) Programmable Baud Rate Generator (cid:129) 5- to 9-bit full-duplex synchronous or asynchronous serial communications – 1, 1.5 or 2 stop bits in Asynchronous Mode or 1 or 2 stop bits in Synchronous Mode – Parity generation and error detection – Framing error detection, overrun error detection – MSB- or LSB-first – Optional break generation and detection – By 8 or by-16 over-sampling receiver frequency – Hardware handshaking RTS-CTS – Receiver time-out and transmitter timeguard – Optional Multi-drop Mode with address generation and detection 50 32058K AVR32-01/12
AT32UC3A – Optional Manchester Encoding (cid:129) RS485 with driver control signal (cid:129) ISO7816, T = 0 or T = 1 Protocols for interfacing with smart cards – NACK handling, error counter with repetition and iteration limit (cid:129) IrDA modulation and demodulation – Communication at up to 115.2 Kbps (cid:129) Test Modes – Remote Loopback, Local Loopback, Automatic Echo (cid:129) SPI Mode – Master or Slave – Serial Clock Programmable Phase and Polarity – SPI Serial Clock (SCK) Frequency up to Internal Clock Frequency PBA/4 (cid:129) Supports Connection of Two Peripheral DMA Controller Channels (PDC) – Offers Buffer Transfer without Processor Intervention 12.11.8 Serial Synchronous Controller (cid:129) Provides serial synchronous communication links used in audio and telecom applications (with CODECs in Master or Slave Modes, I2S, TDM Buses, Magnetic Card Reader, etc.) (cid:129) Contains an independent receiver and transmitter and a common clock divider (cid:129) Offers a configurable frame sync and data length (cid:129) Receiver and transmitter can be programmed to start automatically or on detection of different event on the frame sync signal (cid:129) Receiver and transmitter include a data signal, a clock signal and a frame synchronization signal 12.11.9 Timer Counter (cid:129) Three 16-bit Timer Counter Channels (cid:129) Wide range of functions including: – Frequency Measurement – Event Counting – Interval Measurement – Pulse Generation – Delay Timing – Pulse Width Modulation – Up/down Capabilities (cid:129) Each channel is user-configurable and contains: – Three external clock inputs – Five internal clock inputs – Two multi-purpose input/output signals (cid:129) Two global registers that act on all three TC Channels 12.11.10 Pulse Width Modulation Controller (cid:129) 7 channels, one 20-bit counter per channel (cid:129) Common clock generator, providing Thirteen Different Clocks – A Modulo n counter providing eleven clocks – Two independent Linear Dividers working on modulo n counter outputs (cid:129) Independent channel programming – Independent Enable Disable Commands – Independent Clock – Independent Period and Duty Cycle, with Double Bufferization – Programmable selection of the output waveform polarity – Programmable center or left aligned output waveform 51 32058K AVR32-01/12
AT32UC3A 12.11.11 Ethernet 10/100 MAC (cid:129) Compatibility with IEEE Standard 802.3 (cid:129) 10 and 100 Mbits per second data throughput capability (cid:129) Full- and half-duplex operations (cid:129) MII or RMII interface to the physical layer (cid:129) Register Interface to address, data, status and control registers (cid:129) DMA Interface, operating as a master on the Memory Controller (cid:129) Interrupt generation to signal receive and transmit completion (cid:129) 28-byte transmit and 28-byte receive FIFOs (cid:129) Automatic pad and CRC generation on transmitted frames (cid:129) Address checking logic to recognize four 48-bit addresses (cid:129) Support promiscuous mode where all valid frames are copied to memory (cid:129) Support physical layer management through MDIO interface control of alarm and update time/calendar data 12.11.12 Audio Bitstream DAC (cid:129) Digital Stereo DAC (cid:129) Oversampled D/A conversion architecture – Oversampling ratio fixed 128x – FIR equalization filter – Digital interpolation filter: Comb4 – 3rd Order Sigma-Delta D/A converters (cid:129) Digital bitstream outputs (cid:129) Parallel interface (cid:129) Connected to Peripheral DMA Controller for background transfer without CPU intervention 52 32058K AVR32-01/12
AT32UC3A 13. Power Manager (PM) Rev: 2.0.0.1 13.1 Features (cid:129) Controls integrated oscillators and PLLs (cid:129) Generates clocks and resets for digital logic (cid:129) Supports 2 crystal oscillators 450 kHz-16MHz (cid:129) Supports 2 PLLs 80-240 MHz (cid:129) Supports 32 KHz ultra-low power oscillator (cid:129) Integrated low-power RC oscillator (cid:129) On-the fly frequency change of CPU, HSB, PBA, and PBB clocks (cid:129) Sleep modes allow simple disabling of logic clocks, PLLs, and oscillators (cid:129) Module-level clock gating through maskable peripheral clocks (cid:129) Wake-up from internal or external interrupts (cid:129) Generic clocks with wide frequency range provided (cid:129) Automatic identification of reset sources (cid:129) Controls brownout detector (BOD), RC oscillator, and bandgap voltage reference through control and calibration registers 13.2 Description The Power Manager (PM) controls the oscillators and PLLs, and generates the clocks and resets in the device. The PM controls two fast crystal oscillators, as well as two PLLs, which can multiply the clock from either oscillator to provide higher frequencies. Additionally, a low-power 32 KHz oscillator is used to generate the real-time counter clock for high accuracy real-time measurements. The PM also contains a low-power RC oscillator with fast start-up time, which can be used to clock the digital logic. The provided clocks are divided into synchronous and generic clocks. The synchronous clocks are used to clock the main digital logic in the device, namely the CPU, and the modules and peripherals connected to the HSB, PBA, and PBB buses. The generic clocks are asynchronous clocks, which can be tuned precisely within a wide frequency range, which makes them suitable for peripherals that require specific frequencies, such as timers and communication modules. The PM also contains advanced power-saving features, allowing the user to optimize the power consumption for an application. The synchronous clocks are divided into three clock domains, one for the CPU and HSB, one for modules on the PBA bus, and one for modules on the PBB bus.The three clocks can run at different speeds, so the user can save power by running periph- erals at a relatively low clock, while maintaining a high CPU performance. Additionally, the clocks can be independently changed on-the-fly, without halting any peripherals. This enables the user to adjust the speed of the CPU and memories to the dynamic load of the application, without disturbing or re-configuring active peripherals. Each module also has a separate clock, enabling the user to switch off the clock for inactive modules, to save further power. Additionally, clocks and oscillators can be automatically switched off during idle periods by using the sleep instruction on the CPU. The system will return to normal on occurrence of interrupts. The Power Manager also contains a Reset Controller, which collects all possible reset sources, generates hard and soft resets, and allows the reset source to be identified by software. 53 32058K AVR32-01/12
AT32UC3A 13.3 Block Diagram RCOSC Synchronous Synchronous clocks Clock Generator CPU, HSB, PBA, PBB Oscillator 0 PLL0 PLL1 Oscillator 1 Generic Clock Generic clocks Generator 32 KHz 32 KHz clock Oscillator for RTC OSC/PLL Control signals RC Oscillator Slow clock Oscillator and Startup PLL Control Counter Voltage Regulator Interrupts Sleep Controller Sleep instruction Calibration fuses Registers Brown-Out Reset Controller resets Detector Power-On Detector Other reset sources External Reset Pad Figure 13-1. Power Manager block diagram 54 32058K AVR32-01/12
AT32UC3A 13.4 Product Dependencies 13.4.1 I/O Lines The PM provides a number of generic clock outputs, which can be connected to output pins, multiplexed with GPIO lines. The programmer must first program the GPIO controller to assign these pins to their peripheral function. If the I/O pins of the PM are not used by the application, they can be used for other purposes by the GPIO controller. 13.4.2 Interrupt The PM interrupt line is connected to one of the internal sources of the interrupt controller. Using the PM interrupt requires the interrupt controller to be programmed first. 13.4.3 Clock implementation In AT32UC3A, the HSB shares the source clock with the CPU. This means that writing to the HSBDIV and HSBSEL bits in CKSEL has no effect. These bits will always read the same as CPUDIV and CPUSEL. 13.5 Functional Description 13.5.1 Slow clock The slow clock is generated from an internal RC oscillator which is always running, except in Static mode. The slow clock can be used for the main clock in the device, as described in ”Syn- chronous clocks” on page 58. The slow clock is also used for the Watchdog Timer and measuring various delays in the Power Manager. The RC oscillator has a 3 cycles startup time, and is always available when the CPU is running. The RC oscillator operates at approximately 115 kHz, and can be calibrated to a narrow range by the RCOSCCAL fuses. Software can also change RC oscillator calibration through the use of the RCCR register. Please see the Electrical Characteristics section for details. RC oscillator can also be used as the RTC clock when crystal accuracy is not required. 13.5.2 Oscillator 0 and 1 operation The two main oscillators are designed to be used with an external 450 kHz to 16 MHz crystal and two biasing capacitors, as shown in Figure 13-2. Oscillator 0 can be used for the main clock in the device, as described in ”Synchronous clocks” on page 58. Both oscillators can be used as source for the generic clocks, as described in ”Generic clocks” on page 61. The oscillators are disabled by default after reset. When the oscillators are disabled, the XIN and XOUT pins can be used as general purpose I/Os. When the oscillators are configured to use an external clock, the clock must be applied to the XIN pin while the XOUT pin can be used as a general purpose I/O. The oscillators can be enabled by writing to the OSCnEN bits in MCCTRL. Operation mode (external clock or crystal) is chosen by writing to the MODE field in OSCCTRLn. Oscillators are automatically switched off in certain sleep modes to reduce power consumption, as described in Section 13.5.7 on page 60. After a hard reset, or when waking up from a sleep mode that disabled the oscillators, the oscil- lators may need a certain amount of time to stabilize on the correct frequency. This start-up time can be set in the OSCCTRLn register. 55 32058K AVR32-01/12
AT32UC3A The PM masks the oscillator outputs during the start-up time, to ensure that no unstable clocks propagate to the digital logic. The OSCnRDY bits in POSCSR are automatically set and cleared according to the status of the oscillators. A zero to one transition on these bits can also be con- figured to generate an interrupt, as described in ”Interrupt Enable/Disable/Mask/Status/Clear” on page 76. C 2 XOUT XIN C 1 Figure 13-2. Oscillator connections 13.5.3 32KHz oscillator operation The 32KHz oscillator operates as described for Oscillator 0 and 1 above. The 32KHz oscillator is used as source clock for the Real-Time Counter. The oscillator is disabled by default, but can be enabled by writing OSC32EN in OSCCTRL32. The oscillator is an ultra-low power design and remains enabled in all sleep modes except Static mode. While the 32 KHz oscillator is disabled, the XIN32 and XOUT32 pins are available as general purpose I/Os. When the oscillator is configured to work with an external clock (MODE field in OSCCTRL32 register), the external clock must be connected to XIN32 while the XOUT32 pin can be used as a general purpose I/O. The startup time of the 32KHz oscillator can be set in the OSCCTRL32, after which OSC32RDY in POSCSR is set. An interrupt can be generated on a zero to one transition of OSC32RDY. As a crystal oscillator usually requires a very long startup time (up to 1 second), the 32 KHz oscillator will keep running across resets, except Power-On-Reset. 13.5.4 PLL operation The device contains two PLLs, PLL0 and PLL1. These are disabled by default, but can be enabled to provide high frequency source clocks for synchronous or generic clocks. The PLLs can take either Oscillator 0 or 1 as reference clock. The PLL output is divided by a multiplication factor, and the PLL compares the resulting clock to the reference clock. The PLL will adjust its output frequency until the two compared clocks are equal, thus locking the output frequency to a multiple of the reference clock frequency. The Voltage Controlled Oscillator inside the PLL can generate frequencies from 80 to 240 MHz. To make the PLL output frequencies under 80 MHz the OTP[1] bitfield could be set. This will 56 32058K AVR32-01/12
AT32UC3A divide the output of the PLL by two and bring the clock in range of the max frequency of the CPU. When the PLL is switched on, or when changing the clock source or multiplication factor for the PLL, the PLL is unlocked and the output frequency is undefined. The PLL clock for the digital logic is automatically masked when the PLL is unlocked, to prevent connected digital logic from receiving a too high frequency and thus become unstable. PLLM UL PLLO PT[1] Output fvco f Divider 0 PLL Mask PLL clock 1/2 1 Osc0 clock 0 Inpu t Phase VCO Lock Lock bit Detector Detector Divider Osc1 1 clock PLLO PT PLLO SC PLLD IV Figure 13-3. PLL with control logic and filters 13.5.4.1 Enabling the PLL PLLn is enabled by writing the PLLEN bit in the PLLn register. PLLOSC selects Oscillator 0 or 1 as clock source. The PLLMUL and PLLDIV bitfields must be written with the multiplication and division factors, respectively, creating the voltage controlled ocillator frequency f and the PLL VCO frequency f : PLL f = (PLLMUL+1)/(PLLDIV) (cid:129) f if PLLDIV > 0. VCO OSC f = 2*(PLLMUL+1) (cid:129) f if PLLDIV = 0. VCO OSC If PLLOPT[1] field is set to 0: f = f PLL VCO. If PLLOPT[1] field is set to 1: f = f / 2 PLL VCO . The PLLn:PLLOPT field should be set to proper values according to the PLL operating fre- quency. The PLLOPT field can also be set to divide the output frequency of the PLLs by 2. The lock signal for each PLL is available as a LOCKn flag in POSCSR. An interrupt can be gen- erated on a 0 to 1 transition of these bits. 57 32058K AVR32-01/12
AT32UC3A 13.5.5 Synchronous clocks The slow clock (default), Oscillator 0, or PLL0 provide the source for the main clock, which is the common root for the synchronous clocks for the CPU/HSB, PBA, and PBB modules. The main clock is divided by an 8-bit prescaler, and each of these four synchronous clocks can run from any tapping of this prescaler, or the undivided main clock, as long as f (cid:0)f . The synchro- CPU PBA,B, nous clock source can be changed on-the fly, responding to varying load in the application. The clock domains can be shut down in sleep mode, as described in ”Sleep modes” on page 60. Additionally, the clocks for each module in the four domains can be individually masked, to avoid power consumption in inactive modules. Sleep Sleep instruction Controller 0 Mask Main clock CPU clocks Slow clock Osc0 clock Prescaler 1 HSB clocks PLL0 clock PBAclocks CPUMASK CPUDIV PBB clocks MCSEL CPUSEL Figure 13-4. Synchronous clock generation 13.5.5.1 Selecting PLL or oscillator for the main clock The common main clock can be connected to the slow clock, Oscillator 0, or PLL0. By default, the main clock will be connected to the slow clock. The user can connect the main clock to Oscil- lator 0 or PLL0 by writing the MCSEL bitfield in the Main Clock Control Register (MCCTRL). This must only be done after that unit has been enabled, otherwise a deadlock will occur. Care should also be taken that the new frequency of the synchronous clocks does not exceed the maximum frequency for each clock domain. 13.5.5.2 Selecting synchronous clock division ratio The main clock feeds an 8-bit prescaler, which can be used to generate the synchronous clocks. By default, the synchronous clocks run on the undivided main clock. The user can select a pres- 58 32058K AVR32-01/12
AT32UC3A caler division for the CPU clock by writing CKSEL:CPUDIV to 1 and CPUSEL to the prescaling value, resulting in a CPU clock frequency: f = f / 2(CPUSEL+1) CPU main Similarly, the clock for the PBA, and PBB can be divided by writing their respective bitfields. To ensure correct operation, frequencies must be selected so that f (cid:0)f . Also, frequencies CPU PBA,B must never exceed the specified maximum frequency for each clock domain. CKSEL can be written without halting or disabling peripheral modules. Writing CKSEL allows a new clock setting to be written to all synchronous clocks at the same time. It is possible to keep one or more clocks unchanged by writing the same value a before to the xxxDIV and xxxSEL bit- fields. This way, it is possible to e.g. scale CPU and HSB speed according to the required performance, while keeping the PBA and PBB frequency constant. 13.5.5.3 Clock Ready flag There is a slight delay from CKSEL is written and the new clock setting becomes effective. Dur- ing this interval, the Clock Ready (CKRDY) flag in ISR will read as 0. If IER:CKRDY is written to 1, the Power Manager interrupt can be triggered when the new clock setting is effective. CKSEL must not be re-written while CKRDY is 0, or the system may become unstable or hang. 13.5.6 Peripheral clock masking By default, the clock for all modules are enabled, regardless of which modules are actually being used. It is possible to disable the clock for a module in the CPU, HSB, PBA, or PBB clock domain by writing the corresponding bit in the Clock Mask register (CPU/HSB/PBA/PBB) to 0. When a module is not clocked, it will cease operation, and its registers cannot be read or written. The module can be re-enabled later by writing the corresponding mask bit to 1. A module may be connected to several clock domains, in which case it will have several mask bits. Table 13-5 contains a list of implemented maskable clocks. 13.5.6.1 Cautionary note Note that clocks should only be switched off if it is certain that the module will not be used. Switching off the clock for the internal RAM will cause a problem if the stack is mapped there. Switching off the clock to the Power Manager (PM), which contains the mask registers, or the corresponding PBx bridge, will make it impossible to write the mask registers again. In this case, they can only be re-enabled by a system reset. 13.5.6.2 Mask Ready flag Due to synchronization in the clock generator, there is a slight delay from a mask register is writ- ten until the new mask setting goes into effect. When clearing mask bits, this delay can usually be ignored. However, when setting mask bits, the registers in the corresponding module must not be written until the clock has actually be re-enabled. The status flag MSKRDY in ISR pro- vides the required mask status information. When writing either mask register with any value, this bit is cleared. The bit is set when the clocks have been enabled and disabled according to the new mask setting. Optionally, the Power Manager interrupt can be enabled by writing the MSKRDY bit in IER. 59 32058K AVR32-01/12
AT32UC3A 13.5.7 Sleep modes In normal operation, all clock domains are active, allowing software execution and peripheral operation. When the CPU is idle, it is possible to switch off the CPU clock and optionally other clock domains to save power. This is activated by the sleep instruction, which takes the sleep mode index number as argument. 13.5.7.1 Entering and exiting sleep modes The sleep instruction will halt the CPU and all modules belonging to the stopped clock domains. The modules will be halted regardless of the bit settings of the mask registers. Oscillators and PLLs can also be switched off to save power. Some of these modules have a rel- atively long start-up time, and are only switched off when very low power consumption is required. The CPU and affected modules are restarted when the sleep mode is exited. This occurs when an interrupt triggers. Note that even if an interrupt is enabled in sleep mode, it may not trigger if the source module is not clocked. 13.5.7.2 Supported sleep modes The following sleep modes are supported. These are detailed in Table 13-1. (cid:129)Idle: The CPU is stopped, the rest of the chip is operating. Wake-up sources are any interrupt. (cid:129)Frozen: The CPU and HSB modules are stopped, peripherals are operating. Wake-up sources are any interrupt from PB modules. (cid:129)Standby: All synchronous clocks are stopped, but oscillators and PLLs are running, allowing quick wake-up to normal mode. Wake-up sources are RTC or external interrupt (EIC). (cid:129)Stop: As Standby, but Oscillator 0 and 1, and the PLLs are stopped. 32 KHz (if enabled) and RC oscillators and RTC/WDT still operate. Wake-up sources are RTC, external interrupt (EIC), or external reset pin. (cid:129)DeepStop: All synchronous clocks, Oscillator 0 and 1 and PLL 0 and 1 are stopped. 32 KHz oscillator can run if enabled. RC oscillator still operates. Bandgap voltage reference and BOD is turned off. Wake-up sources are RTC, external interrupt (EIC) or external reset pin. (cid:129)Static: All oscillators, including 32 KHz and RC oscillator are stopped. Bandgap voltage refer- ence BOD detector is turned off. Wake-up sources are external interrupt (EIC) in asynchronous mode only or external reset pin. Table 13-1. Sleep modes PBA,B Osc0,1 BOD & Voltage Index Sleep Mode CPU HSB GCLK PLL0,1 Osc32 RCOsc Bandgap Regulator 0 Idle Stop Run Run Run Run Run On Full power 1 Frozen Stop Stop Run Run Run Run On Full power 2 Standby Stop Stop Stop Run Run Run On Full power 3 Stop Stop Stop Stop Stop Run Run On Low power 4 DeepStop Stop Stop Stop Stop Run Run Off Low power 5 Static Stop Stop Stop Stop Stop Stop Off Low power 60 32058K AVR32-01/12
AT32UC3A The power level of the internal voltage regulator is also adjusted according to the sleep mode to reduce the internal regulator power consumption. 13.5.7.3 Precautions when entering sleep mode Modules communicating with external circuits should normally be disabled before entering a sleep mode that will stop the module operation. This prevents erratic behavior when entering or exiting sleep mode. Please refer to the relevant module documentation for recommended actions. Communication between the synchronous clock domains is disturbed when entering and exiting sleep modes. This means that bus transactions are not allowed between clock domains affected by the sleep mode. The system may hang if the bus clocks are stopped in the middle of a bus transaction. The CPU is automatically stopped in a safe state to ensure that all CPU bus operations are com- plete when the sleep mode goes into effect. Thus, when entering Idle mode, no further action is necessary. When entering a sleep mode (except Idle mode), all HSB masters must be stopped before entering the sleep mode. Also, if there is a chance that any PB write operations are incomplete, the CPU should perform a read operation from any register on the PB bus before executing the sleep instruction. This will stall the CPU while waiting for any pending PB operations to complete. 13.5.7.4 Wake up The USB can be used to wake up the part from sleep modes through register PM_AWEN of the Power Manager. 13.5.8 Generic clocks Timers, communication modules, and other modules connected to external circuitry may require specific clock frequencies to operate correctly. The Power Manager contains an implementation defined number of generic clocks that can provide a wide range of accurate clock frequencies. Each generic clock module runs from either Oscillator 0 or 1, or PLL0 or 1. The selected source can optionally be divided by any even integer up to 512. Each clock can be independently enabled and disabled, and is also automatically disabled along with peripheral clocks by the Sleep Controller. 61 32058K AVR32-01/12
AT32UC3A Sleep Controller 0 Osc0 clock 0 Mask Generic Clock Osc1 clock Divider 1 PLL0 clock PLL1 clock 1 PLLSEL DIVEN CEN DIV OSCSEL Figure 13-5. Generic clock generation 13.5.8.1 Enabling a generic clock A generic clock is enabled by writing the CEN bit in GCCTRL to 1. Each generic clock can use either Oscillator 0 or 1 or PLL0 or 1 as source, as selected by the PLLSEL and OSCSEL bits. The source clock can optionally be divided by writing DIVEN to 1 and the division factor to DIV, resulting in the output frequency: f = f / (2*(DIV+1)) GCLK SRC 13.5.8.2 Disabling a generic clock The generic clock can be disabled by writing CEN to 0 or entering a sleep mode that disables the PB clocks. In either case, the generic clock will be switched off on the first falling edge after the disabling event, to ensure that no glitches occur. If CEN is written to 0, the bit will still read as 1 until the next falling edge occurs, and the clock is actually switched off. When writing CEN to 0, the other bits in GCCTRL should not be changed until CEN reads as 0, to avoid glitches on the generic clock. When the clock is disabled, both the prescaler and output are reset. 13.5.8.3 Changing clock frequency When changing generic clock frequency by writing GCCTRL, the clock should be switched off by the procedure above, before being re-enabled with the new clock source or division setting. This prevents glitches during the transition. 62 32058K AVR32-01/12
AT32UC3A 13.5.8.4 Generic clock implementation In AT32UC3A, there are 6 generic clocks. These are allocated to different functions as shown in Table 13-2. Table 13-2. Generic clock allocation Clock number Function 0 GCLK0 pin 1 GCLK1 pin 2 GCLK2 pin 3 GCLK3 pin 4 USBB 5 ABDAC 13.5.9 Divided PB clocks The clock generator in the Power Manager provides divided PBA and PBB clocks for use by peripherals that require a prescaled PBx clock. This is described in the documentation for the relevant modules. The divided clocks are not directly maskable, but are stopped in sleep modes where the PBx clocks are stopped. 13.5.10 Debug operation During a debug session, the user may need to halt the system to inspect memory and CPU reg- isters. The clocks normally keep running during this debug operation, but some peripherals may require the clocks to be stopped, e.g. to prevent timer overflow, which would cause the program to fail. For this reason, peripherals on the PBA and PBB buses may use “debug qualified” PBx clocks. This is described in the documentation for the relevant modules. The divided PBx clocks are always debug qualified clocks. Debug qualified PB clocks are stopped during debug operation. The debug system can option- ally keep these clocks running during the debug operation. This is described in the documentation for the On-Chip Debug system. 13.5.11 Reset Controller The Reset Controller collects the various reset sources in the system and generates hard and soft resets for the digital logic. The device contains a Power-On Detector, which keeps the system reset until power is stable. This eliminates the need for external reset circuitry to guarantee stable operation when powering up the device. 63 32058K AVR32-01/12
AT32UC3A It is also possible to reset the device by asserting the RESET_N pin. This pin has an internal pul- lup, and does not need to be driven externally when negated. Table 13-4 lists these and other reset sources supported by the Reset Controller. RC_RCAUSE RESET_N Power-O n CPU, HSB, Detector PBA, PBB Reset Browno ut Controller OC D, RTC/ WDT Detector Clo ck Generato JTAG OCD Watchdog Reset Figure 13-6. Reset Controller block diagram In addition to the listed reset types, the JTAG can keep parts of the device statically reset through the JTAG Reset Register. See JTAG documentation for details. Table 13-3. Reset description Reset source Description Power-on Reset Supply voltage below the power-on reset detector threshold voltage External Reset RESET_N pin asserted Brownout Reset Supply voltage below the brownout reset detector threshold voltage CPU Error Caused by an illegal CPU access to external memory while in Supervisor mode Watchdog Timer See watchdog timer documentation. OCD See On-Chip Debug documentation When a Reset occurs, some parts of the chip are not necessarily reset, depending on the reset source. Only the Power On Reset (POR) will force a reset of the whole chip. 64 32058K AVR32-01/12
AT32UC3A Table 13-4 lists parts of the device that are reset, depending on the reset source. Table 13-4. Effect of the different reset events Power-On External Watchdog BOD CPU Error OCD Reset Reset Reset Reset Reset Reset CPU/HSB/PBA/PBB Y Y Y Y Y Y (excluding Power Manager) 32KHz oscillator Y N N N N N RTC control register Y N N N N N GPLP registers Y N N N N N Watchdog control register Y Y N Y Y Y Voltage Calibration register Y N N N N N RC Oscillator Calibration register Y N N N N N BOD control register Y Y N N N N Bandgap control register Y Y N N N N Clock control registers Y Y Y Y Y Y Osc0/Osc1 and control registers Y Y Y Y Y Y PLL0/PLL1 and control registers Y Y Y Y Y Y OCD system and OCD registers Y Y N Y Y N The cause of the last reset can be read from the RCAUSE register. This register contains one bit for each reset source, and can be read during the boot sequence of an application to determine the proper action to be taken. 13.5.11.1 Power-On Detector The Power-On Detector monitors the VDDCORE supply pin and generates a reset when the device is powered on. The reset is active until the supply voltage from the linear regulator is above the power-on threshold level. The reset will be re-activated if the voltage drops below the power-on threshold level. See Electrical Characteristics for parametric details. 13.5.11.2 Brown-Out Detector The Brown-Out Detector (BOD) monitors the VDDCORE supply pin and compares the supply voltage to the brown-out detection level, as set in BOD:LEVEL. The BOD is disabled by default, but can be enabled either by software or by flash fuses. The Brown-Out Detector can either gen- erate an interrupt or a reset when the supply voltage is below the brown-out detection level. In any case, the BOD output is available in bit POSCR:BODET bit. Note that any change to the BOD:LEVEL field of the BOD register should be done with the BOD deactivated to avoid spurious reset or interrupt. See Electrical Characteristics for parametric details. 65 32058K AVR32-01/12
AT32UC3A 13.5.11.3 External Reset The external reset detector monitors the state of the RESET_N pin. By default, a low level on this pin will generate a reset. 13.5.12 Calibration registers The Power Manager controls the calibration of the RC oscillator, voltage regulator, bandgap voltage reference through several calibrations registers. Those calibration registers are loaded after a Power On Reset with default values stored in fac- tory-programmed flash fuses. Although it is not recommended to override default factory settings, it is still possible to override these default values by writing to those registers. To prevent unexpected writes due to software bugs, write access to these registers is protected by a “key”. First, a write to the register must be made with the field “KEY” equal to 0x55 then a second write must be issued with the “KEY” field equal to 0xAA 13.6 User Interface Offset Register Name Access Reset State 0x0000 Main Clock Control MCCTRL Read/Write 0x00000000 0x0004 Clock Select CKSEL Read/Write 0x00000000 0x0008 CPU Mask CPUMASK Read/Write 0x00000003 0x000C HSB Mask HSBMASK Read/Write 0x0000007F 0x0010 PBA Mask PBAMASK Read/Write 0x0000FFFF 0x0014 PBB Mask PBBMASK Read/Write 0x0000003F 0x0018 - 0x001C Reserved 0x0020 PLL0 Control PLL0 Read/Write 0x00000000 0x0024 PLL1 Control PLL1 Read/Write 0x00000000 0x0028 Oscillator 0 Control Register OSCCTRL0 Read/Write 0x00000000 0x002C Oscillator 1 Control Register OSCCTRL1 Read/Write 0x00000000 0x0030 Oscillator 32 Control Register OSCCTRL32 Read/Write 0x00000000 0x0034 Reserved 0x0038 Reserved 0x003C Reserved 0x0040 PM Interrupt Enable Register IER Write Only 0x00000000 0x0044 PM Interrupt Disable Register IDR Write Only 0x00000000 0x0048 PM Interrupt Mask Register IMR Read Only 0x00000000 0x004C PM Interrupt Status Register ISR Read Only 0x00000000 0x0050 PM Interrupt Clear Register ICR Write Only 0x00000000 0x0054 Power and Oscillators Status Register POSCSR Read/Write 0x00000000 0x0058 - 0x005C Reserved 66 32058K AVR32-01/12
AT32UC3A 0x0060 Generic Clock Control GCCTRL Read/Write 0x00000000 0x0064 - 0x00BC Reserved 0x00C0 RC Oscillator Calibration Register RCCR Read/Write Factory settings 0x00C4 Bandgap Calibration Register BGCR Read/Write Factory settings 0x00C8 Linear Regulator Calibration Register VREGCR Read/Write Factory settings 0x00CC Reserved 0x00D0 BOD Level Register BOD Read/Write BOD fuses in Flash 0x00D4 - 0x013C Reserved 0x0140 Reset Cause Register RCAUSE Read Only Latest Reset Source 0x0144 - 0x01FC Reserved 0x0200 General Purpose Low-Power register 0 GPLP0 Read/Write 0x00000000 0x0204 General Purpose Low-Power register 1 GPLP1 Read/Write 0x00000000 67 32058K AVR32-01/12
AT32UC3A 13.6.1 Main Clock Control Name: MCCTRL Access Type: Read/Write 31 30 29 28 27 26 25 24 - - - - - - - - 23 22 21 20 19 18 17 16 - - - - - - - - 15 14 13 12 11 10 9 8 - - - - - - - - 7 6 5 4 3 2 1 0 - - OSC1EN OSC0EN MCSEL (cid:129) MCSEL: Main Clock Select 0: The slow clock is the source for the main clock 1: Oscillator 0 is source for the main clock 2: PLL0 is source for the main clock 3: Reserved (cid:129) OSC0EN: Oscillator 0 Enable 0: Oscillator 0 is disabled 1: Oscillator 0 is enabled (cid:129) OSC1EN: Oscillator 1 Enable 0: Oscillator 1is disabled 1: Oscillator 1is enabled 68 32058K AVR32-01/12
AT32UC3A 13.6.2 Clock Select Name: CKSEL Access Type: Read/Write 31 30 29 28 27 26 25 24 PBBDIV - - - - PBBSEL 23 22 21 20 19 18 17 16 PBADIV - - - - PBASEL 15 14 13 12 11 10 9 8 HSBDIV - - - - HSBSEL 7 6 5 4 3 2 1 0 CPUDIV - - - - CPUSEL (cid:129) PBBDIV, PBBSEL: PBB Division and Clock Select PBBDIV = 0: PBB clock equals main clock. PBBDIV = 1: PBB clock equals main clock divided by 2(PBBSEL+1). (cid:129) PBADIV, PBASEL: PBA Division and Clock Select PBADIV = 0: PBA clock equals main clock. PBADIV = 1: PBA clock equals main clock divided by 2(PBASEL+1). (cid:129) HSBDIV, HSBSEL: HSB Division and Clock Select For the AT32UC3A, HSBDIV always equals CPUDIV, and HSBSEL always equals CPUSEL, as the HSB clock is always equal to the CPU clock. (cid:129) CPUDIV, CPUSEL: CPU Division and Clock Select CPUDIV = 0: CPU clock equals main clock. CPUDIV = 1: CPU clock equals main clock divided by 2(CPUSEL+1). Note that if xxxDIV is written to 0, xxxSEL should also be written to 0 to ensure correct operation. Also note that writing this register clears POSCSR:CKRDY. The register must not be re-written until CKRDY goes high. 69 32058K AVR32-01/12
AT32UC3A 13.6.3 Clock Mask Name: CPU/HSB/PBA/PBBMASK Access Type: Read/Write 31 30 29 28 27 26 25 24 MASK[31:24] 23 22 21 20 19 18 17 16 MASK[23:16] 15 14 13 12 11 10 9 8 MASK[15:8] 7 6 5 4 3 2 1 0 MASK[7:0] (cid:129) MASK: Clock Mask If bit n is cleared, the clock for module n is stopped. If bit n is set, the clock for module n is enabled according to the current power mode. The number of implemented bits in each mask register, as well as which module clock is controlled by each bit, is shown in Table 13-5. Table 13-5. Maskable module clocks in AT32UC3A. Bit CPUMASK HSBMASK PBAMASK PBBMASK 0 - FLASHC INTC HMATRIX 1 OCD PBA bridge GPIO USBB 2 - PBB bridge PDCA FLASHC 3 - USBB PM/RTC/EIC MACB 4 - MACB ADC SMC 5 - PDCA SPI0 SDRAMC 6 - EBI SPI1 - 7 - - TWI - 8 - - USART0 - 9 - - USART1 - 10 - - USART2 - 11 - - USART3 - 12 - - PWM - 13 - - SSC - 70 32058K AVR32-01/12
AT32UC3A Table 13-5. Maskable module clocks in AT32UC3A. Bit CPUMASK HSBMASK PBAMASK PBBMASK 14 - - TC - 15 - - ABDAC - 16 SYSTIMER - - - (COMPARE/COUNT REGISTERS CLK) 31: - - - - 17 71 32058K AVR32-01/12
AT32UC3A 13.6.4 PLL Control Name: PLL0,1 Access Type: Read/Write 31 30 29 28 27 26 25 24 RESERVED PLLCOUNT 23 22 21 20 19 18 17 16 RESERVED PLLMUL 15 14 13 12 11 10 9 8 RESERVED PLLDIV 7 6 5 4 3 2 1 0 - - - PLLOPT PLLOSC PLLEN (cid:129) RESERVED: Reserved bitfields Reserved for internal use. Always write to 0. (cid:129) PLLCOUNT: PLL Count Specifies the number of slow clock cycles before ISR:LOCKn will be set after PLLn has been written, or after PLLn has been automatically re-enabled after exiting a sleep mode. (cid:129) PLLMUL: PLL Multiply Factor (cid:129) PLLDIV: PLL Division Factor These bitfields determine the ratio of the PLL output frequency (voltage controlled oscillator frequency f ) to the source VCO oscillator frequency: f = (PLLMUL+1)/(PLLDIV) (cid:129) f if PLLDIV > 0. VCO OSC f = 2*(PLLMUL+1) (cid:129) f if PLLDIV = 0. VCO OSC If PLLOPT[1] field is set to 0: f = f PLL VCO. If PLLOPT[1] field is set to 1: f = f / 2 PLL VCO . Note that the MUL field cannot be equal to 0 or 1, or the behavior of the PLL will be undefined. (cid:129) PLLOPT: PLL Option Select the operating range for the PLL. PLLOPT[0]: Select the VCO frequency range. PLLOPT[1]: Enable the extra output divider. PLLOPT[2]: Disable the Wide-Bandwidth mode (Wide-Bandwidth mode allows a faster startup time and out-of-lock time). 72 32058K AVR32-01/12
AT32UC3A Table 13-6. PLLOPT Fields Description in AT32UC3A Description PLLOPT[0]: VCO frequency 0 160MHz<f <240MHz vco 1 80MHz<f <180MHz vco PLLOPT[1]: Output divider 0 f = f PLL vco 1 f = f /2 PLL vco PLLOPT[2] 0 Wide Bandwidth Mode enabled 1 Wide Bandwidth Mode disabled (cid:129) PLLOSC: PLL Oscillator Select 0: Oscillator 0 is the source for the PLL. 1: Oscillator 1 is the source for the PLL. (cid:129) PLLEN: PLL Enable 0: PLL is disabled. 1: PLL is enabled. 73 32058K AVR32-01/12
AT32UC3A 13.6.5 PM Oscillator 0/1 Control Register name OSCCTRL0,1 Register access Read/Write 31 30 29 28 27 26 25 24 - - - - - - - - 23 22 21 20 19 18 17 16 - - - - - - - - 15 14 13 12 11 10 9 8 - - - - - STARTUP 7 6 5 4 3 2 1 0 - - - - - MODE (cid:129) MODE: Oscillator Mode Choose between crystal, or external clock 0: External clock connected on XIN, XOUT can be used as an I/O (no crystal) 1 to 3: reserved 4: Crystal is connected to XIN/XOUT - Oscillator is used with gain G0 ( XIN from 0.4 MHz to 0.9 MHz ). 5: Crystal is connected to XIN/XOUT - Oscillator is used with gain G1 ( XIN from 0.9 MHz to 3.0 MHz ). 6: Crystal is connected to XIN/XOUT - Oscillator is used with gain G2 ( XIN from 3.0 MHz to 8.0 MHz ). 7: Crystal is connected to XIN/XOUT - Oscillator is used with gain G3 ( XIN from 8.0 Mhz). (cid:129) STARTUP: Oscillator Startup Time Select startup time for the oscillator. Table 13-7. Startup time for oscillators 0 and 1 Number of RC oscillator Approximative Equivalent time STARTUP clock cycle (RCOsc = 115kHz) 0 0 0 1 64 560us 2 128 1.1ms 3 2048 18ms 4 4096 36ms 5 8192 71ms 6 16384 142ms 7 Reserved Reserved 74 32058K AVR32-01/12
AT32UC3A 13.6.6 PM 32KHz Oscillator Control Register Register name OSCCTRL32 Register access Read/Write 31 30 29 28 27 26 25 24 - - - - - - - - 23 22 21 20 19 18 17 16 - - - - - STARTUP 15 14 13 12 11 10 9 8 - - - - - MODE 7 6 5 4 3 2 1 0 - - - - - - - OSC32EN Note: This register is only reset by Power-On Reset (cid:129) OSC32EN: Enable the 32KHz oscillator 0: 32KHz Oscillator is disabled 1: 32KHz Oscillator is enabled (cid:129) MODE: Oscillator Mode Choose between crystal, or external clock 0: External clock connected on XIN32, XOUT32 can be used as a I/O (no crystal) 1: Crystal is connected to XIN32/XOUT32 2 to 7: reserved (cid:129) STARTUP: Oscillator Startup Time Select startup time for 32KHz oscillator Table 13-8. Startup time for 32KHz oscillator Number of RC oscillator Approximative Equivalent time STARTUP clock cycle (RCOsc = 115kHz) 0 0 0 1 128 1.1ms 2 8192 72.3ms 3 16384 143ms 4 65536 570ms 5 131072 1.1s 6 262144 2.3s 7 524288 4.6s 75 32058K AVR32-01/12
AT32UC3A 13.6.7 Interrupt Enable/Disable/Mask/Status/Clear Name: IER/IDR/IMR/ISR/ICR Access Type: IER/IDR/ICR: Write-only IMR/ISR: Read-only 31 30 29 28 27 26 25 24 - - - - - - - - 23 22 21 20 19 18 17 16 - - - - - - - BODDET 15 14 13 12 11 10 9 8 - - - - - - OSC32RDY OSC1RDY 7 6 5 4 3 2 1 0 OSC0RDY MSKRDY CKRDY - - - LOCK1 LOCK0 (cid:129) BODDET: Brown out detection Set to 1 when 0 to 1 transition on POSCSR:BODDET bit is detected: BOD has detected that power supply is going below BOD reference value. (cid:129) OSC32RDY: 32KHz oscillator Ready Set to 1 when 0 to 1 transition on the POSCSR:OSC32RDY bit is detected: The 32KHz oscillator is stable and ready to be used as clock source. (cid:129) OSC1RDY: Oscillator 1 Ready Set to 1 when 0 to 1 transition on the POSCSR:OSC1RDY bit is detected: Oscillator 1 is stable and ready to be used as clock source. (cid:129) OSC0RDY: Oscillator 0 Ready Set to 1 when 0 to 1 transition on the POSCSR:OSC1RDY bit is detected: Oscillator 1 is stable and ready to be used as clock source. (cid:129) MSKRDY: Mask Ready Set to 1 when 0 to 1 transition on the POSCSR:MSKRDY bit is detected: Clocks are now masked according to the (CPU/HSB/PBA/PBB)_MASK registers. (cid:129) CKRDY: Clock Ready 0: The CKSEL register has been written, and the new clock setting is not yet effective. 1: The synchronous clocks have frequencies as indicated in the CKSEL register. Note: Writing ICR:CKRDY to 1 has no effect. (cid:129) LOCK1: PLL1 locked Set to 1 when 0 to 1 transition on the POSCSR:LOCK1 bit is detected: PLL 1 is locked and ready to be selected as clock source. (cid:129) LOCK0: PLL0 locked Set to 1 when 0 to 1 transition on the POSCSR:LOCK0 bit is detected: PLL 0 is locked and ready to be selected as clock source. 76 32058K AVR32-01/12
AT32UC3A The effect of writing or reading the bits listed above depends on which register is being accessed: (cid:129) IER (Write-only) 0: No effect 1: Enable Interrupt (cid:129) IDR (Write-only) 0: No effect 1: Disable Interrupt (cid:129) IMR (Read-only) 0: Interrupt is disabled 1: Interrupt is enabled (cid:129) ISR (Read-only) 0: An interrupt event has not occurred or has been previously cleared 1: An interrupt event has not occurred (cid:129) ICR (Write-only) 0: No effect 1: Clear corresponding event 77 32058K AVR32-01/12
AT32UC3A 13.6.8 Power and Oscillators Status Name: POSCSR Access Type: Read-only 31 30 29 28 27 26 25 24 - - - - - - - - 23 22 21 20 19 18 17 16 - - - - - - - BODDET 15 14 13 12 11 10 9 8 - - - - - - OSC32RDY OSC1RDY 7 6 5 4 3 2 1 0 OSC0RDY MSKRDY CKRDY - - - LOCK1 LOCK0 (cid:129) BODDET: Brown out detection 0: No BOD event 1: BOD has detected that power supply is going below BOD reference value. (cid:129) OSC32RDY: 32KHz oscillator Ready 0: The 32KHz oscillator is not enabled or not ready. 1: The 32KHz oscillator is stable and ready to be used as clock source. (cid:129) OSC1RDY: OSC1 ready 0: Oscillator 1 not enabled or not ready. 1: Oscillator 1 is stable and ready to be used as clock source. (cid:129) OSC0RDY: OSC0 ready 0: Oscillator 0 not enabled or not ready. 1: Oscillator 0 is stable and ready to be used as clock source. (cid:129) MSKRDY: Mask ready 0: Mask register has been changed, masking in progress. 1: Clock are masked according to xxx_MASK (cid:129) CKRDY: 0: The CKSEL register has been written, and the new clock setting is not yet effective. 1: The synchronous clocks have frequencies as indicated in the CKSEL register. (cid:129) LOCK1: PLL 1 locked 0:PLL 1 is unlocked 1:PLL 1 is locked, and ready to be selected as clock source. (cid:129) LOCK0: PLL 0 locked 0: PLL 0 is unlocked 1: PLL 0 is locked, and ready to be selected as clock source. 78 32058K AVR32-01/12
AT32UC3A 13.6.9 Generic Clock Control Name: GCCTRL Access Type: Read/Write 31 30 29 28 27 26 25 24 - - - - - - - - 23 22 21 20 19 18 17 16 - - - - - - - - 15 14 13 12 11 10 9 8 DIV[7:0] 7 6 5 4 3 2 1 0 - - - DIVEN - CEN PLLSEL OSCSEL There is one GCCTRL register per generic clock in the design. (cid:129) DIV: Division Factor (cid:129) DIVEN: Divide Enable 0: The generic clock equals the undivided source clock. 1: The generic clock equals the source clock divided by 2*(DIV+1). (cid:129) CEN: Clock Enable 0: Clock is stopped. 1: Clock is running. (cid:129) PLLSEL: PLL Select 0: Oscillator is source for the generic clock. 1: PLL is source for the generic clock. (cid:129) OSCSEL: Oscillator Select 0: Oscillator (or PLL) 0 is source for the generic clock. 1: Oscillator (or PLL) 1 is source for the generic clock. 79 32058K AVR32-01/12
AT32UC3A 13.6.10 Reset Cause Name: RCAUSE Access Type: Read-only 31 30 29 28 27 26 25 24 - - - - - - - - 23 22 21 20 19 18 17 16 - - - - - - - - 15 14 13 12 11 10 9 8 - - - - - - JTAGHARD OCDRST 7 6 5 4 3 2 1 0 CPUERR - - JTAG WDT EXT BOD POR (cid:129) POR Power-on Reset The CPU was reset due to the supply voltage being lower than the power-on threshold level. (cid:129) BOD: Brown-out Reset The CPU was reset due to the supply voltage being lower than the brown-out threshold level. (cid:129) EXT: External Reset Pin The CPU was reset due to the RESET pin being asserted. (cid:129) WDT: Watchdog Reset The CPU was reset because of a watchdog timeout. (cid:129) JTAG: JTAGr eset The CPU was reset by setting the bit RC_CPU in the JTAG reset register. (cid:129) CPUERR: CPU Error The CPU was reset because it had detected an illegal access. (cid:129) OCDRST: OCD Reset The CPU was reset because the RES strobe in the OCD Development Control register has been written to one. (cid:129) JTAGHARD: JTAG Hard Reset The chip was reset by setting the bit RC_OCD in the JTAG reset register or by using the JTAG HALT instruction. 80 32058K AVR32-01/12
AT32UC3A 13.6.11 BOD Control BOD Level register Register name BOD Register access Read/Write 31 30 29 28 27 26 25 24 KEY 23 22 21 20 19 18 17 16 - - - - - - - FCD 15 14 13 12 11 10 9 8 - - - - - - CTRL 7 6 5 4 3 2 1 0 - HYST LEVEL (cid:129) KEY: Register Write protection This field must be written twice, first with key value 0x55, then 0xAA, for a write operation to have an effect. (cid:129) FCD: BOD Fuse calibration done Set to 1 when CTRL, HYST and LEVEL fields has been updated by the Flash fuses after power-on reset or Flash fuses update If one, the CTRL, HYST and LEVEL values will not be updated again by Flash fuses Can be cleared to allow subsequent overwriting of the value by Flash fuses (cid:129) CTRL: BOD Control 0: BOD is off 1: BOD is enabled and can reset the chip 2: BOD is enabled and but cannot reset the chip. Only interrupt will be sent to interrupt controller, if enabled in the IMR register. 3: BOD is off (cid:129) HYST: BOD Hysteresis 0: No hysteresis 1: Hysteresis On (cid:129) LEVEL: BOD Level This field sets the triggering threshold of the BOD. See Electrical Characteristics for actual voltage levels. Note that any change to the LEVEL field of the BOD register should be done with the BOD deactivated to avoid spurious reset or interrupt. 81 32058K AVR32-01/12
AT32UC3A 13.6.12 RC Oscillator Calibration Register name RCCR Register access Read/Write 31 30 29 28 27 26 25 24 KEY 23 22 21 20 19 18 17 16 - - - - - - - FCD 15 14 13 12 11 10 9 8 - - - - - - CALIB 7 6 5 4 3 2 1 0 CALIB (cid:129) CALIB: Calibration Value Calibration Value for the RC oscillator. (cid:129) FCD: Flash Calibration Done Set to 1 when CTRL, HYST, and LEVEL fields have been updated by the Flash fuses after power-on reset, or after Flash fuses are reprogrammed. The CTRL, HYST and LEVEL values will not be updated again by the Flash fuses until a new power-on reset or the FCD field is written to zero. (cid:129) KEY: Register Write protection This field must be written twice, first with key value 0x55, then 0xAA, for a write operation to have an effect. 82 32058K AVR32-01/12
AT32UC3A 13.6.13 Bandgap Calibration Register name BGCR Register access Read/Write 31 30 29 28 27 26 25 24 KEY 23 22 21 20 19 18 17 16 - - - - - - - FCD 15 14 13 12 11 10 9 8 - - - - - - - - 7 6 5 4 3 2 1 0 - - - - - CALIB (cid:129) KEY: Register Write protection This field must be written twice, first with key value 0x55, then 0xAA, for a write operation to have an effect. (cid:129) CALIB: Calibration value Calibration value for Bandgap. See Electrical Characteristics for voltage values. (cid:129) FCD: Flash Calibration Done Set to 1 when the CALIB field has been updated by the Flash fuses after power-on reset or when the Flash fuses are reprogrammed. The CALIB field will not be updated again by the Flash fuses until a new power-on reset or the FCD field is written to zero. 83 32058K AVR32-01/12
AT32UC3A 13.6.14 PM Voltage Regulator Calibration Register Register name VREGCR Register access Read/Write 31 30 29 28 27 26 25 24 KEY 23 22 21 20 19 18 17 16 - - - - - - - FCD 15 14 13 12 11 10 9 8 - - - - - - - - 7 6 5 4 3 2 1 0 - - - - - CALIB (cid:129) KEY: Register Write protection This field must be written twice, first with key value 0x55, then 0xAA, for a write operation to have an effect. (cid:129) CALIB: Calibration value Calibration value for Voltage Regulator. See Electrical Characteristics for voltage values. (cid:129) FCD: Flash Calibration Done Set to 1 when the CALIB field has been updated by the Flash fuses after power-on reset or when the Flash fuses are reprogrammed. The CALIB field will not be updated again by the Flash fuses until a new power-on reset or the FCD field is written to zero. 84 32058K AVR32-01/12
AT32UC3A 13.6.15 General Purpose Low-power register 0/1 Register name GPLP0,1 Register access Read/Write 31 30 29 28 27 26 25 24 GPLP 23 22 21 20 19 18 17 16 GPLP 15 14 13 12 11 10 9 8 GPLP 7 6 5 4 3 2 1 0 GPLP These registers are general purpose 32-bit registers that are reset only by power-on-reset. Any other reset will keep the content of these registers untouched. 85 32058K AVR32-01/12
AT32UC3A 14. Real Time Counter (RTC) Rev: 2.3.0.1 14.1 Features (cid:129) 32-bit real-time counter with 16-bit prescaler (cid:129) Clocked from RC oscillator or 32 KHz oscillator (cid:129) High resolution: Max count frequency 16 KHz (cid:129) Long delays – Max timeout 272 years (cid:129) Extremely low power consumption (cid:129) Available in all sleep modes except Static (cid:129) Interrupt on wrap 14.2 Description The Real Time Counter (RTC) enables periodic interrupts at long intervals, or accurate mea- surement of real-time sequences. The RTC is fed from a 16-bit prescaler, which is clocked from the RC oscillator or the 32 KHz oscillator. Any tapping of the prescaler can be selected as clock source for the RTC, enabling both high resolution and long timeouts. The prescaler cannot be written directly, but can be cleared by the user. The RTC can generate an interrupt when the counter wraps around the value stored in the top register, producing accurate periodic interrupts. 86 32058K AVR32-01/12
AT32UC3A 14.3 Block Diagram Figure 14-1. Real Time Counter module block diagram RTC_CTRL RTC_TOP CLK32 EN PCLR 32 kHz 1 16-bit Prescaler 32-bit counter TOPI IRQ RC OSC 0 RTC_VAL 14.4 Product Dependencies 14.4.1 Power Management The RTC is continuously clocked, and remains operating in all sleep modes except Static. Inter- rupts are not available in DeepStop mode. 14.4.2 Interrupt The RTC interrupt line is connected to one of the internal sources of the interrupt controller. Using the RTC interrupt requires the interrupt controller to be programmed first. 14.4.3 Debug Operation The RTC prescaler is frozen during debug operation, unless the OCD system keeps peripherals running in debug operation. 14.4.4 Clocks The RTC can use the internal RC oscillator as clock source. This oscillator is always enabled whenever these modules are active. Please refer to the Electrical Characteristics chapter for the characteristic frequency of this oscillator (f ). RC The RTC can also use the 32 KHz crystal oscillator as clock source. This oscillator must be enabled before use. Please refer to the Power Manager chapter for details. 14.5 Functional Description 14.5.1 RTC operation 14.5.1.1 Source clock The RTC is enabled by writing the EN bit in the CTRL register to 1. The 16-bit prescaler will then increment on the selected clock. The prescaler cannot be read or written, but it can be reset by writing the PCLR strobe. 87 32058K AVR32-01/12
AT32UC3A The CLK32 bit selects either the RC oscillator or the 32 KHz oscillator as clock source for the prescaler. The PSEL bitfield selects the prescaler tapping, selecting the source clock for the RTC: f = 2-(PSEL+1) * (f or 32 KHz) RTC RC 14.5.1.2 Counter operation When enabled, the RTC will increment until it reaches TOP, and then wrap to 0x0. The status bit TOPI in ISR is set when this occurs. From 0x0 the counter will count TOP+1 cycles of the source clock before it wraps back to 0x0. The RTC count value can be read from or written to the register VAL. Due to synchronization, continuous reading of the VAL with the lowest prescaler setting will skip every other value. 14.5.1.3 RTC Interrupt Writing the TOPI bit in IER enables the RTC interrupt, while writing the corresponding bit in IDR disables the RTC interrupt. IMR can be read to see whether or not the interrupt is enabled. If enabled, an interrupt will be generated if the TOPI flag in ISR is set. The flag can be cleared by writing TOPI in ICR to one. The RTC interrupt can wake the CPU from all sleep modes except DeepStop and Static mode. 14.5.1.4 RTC wakeup The RTC can also wake up the CPU directly without triggering an interrupt when the TOPI flag in ISR is set. In this case, the CPU will continue executing from the instruction following the sleep instruction. This direct RTC wakeup is enabled by writing the WAKE_EN bit in the CTRL register to one. When the CPU wakes from sleep, the WAKE_EN bit must be written to zero to clear the internal wake signal to the sleep controller, otherwise a new sleep instruction will have no effect. The RTC wakeup is available in all sleep modes except Static mode. The RTC wakeup can be configured independently of the RTC interrupt. 14.5.1.5 Busy bit Due to the crossing of clock domains, the RTC uses a few clock cycles to propagate the values stored in CTRL, TOP, and VAL to the RTC. The BUSY bit in CTRL indicates that a register write is still going on and all writes to TOP, CTRL, and VAL will be discarded until BUSY goes low again. 88 32058K AVR32-01/12
AT32UC3A 14.6 User Interface Offset Register Register Name Access Reset 0x00 RTC Control CTRL Read/Write 0x0 0x04 RTC Value VAL Read/Write 0x0 0x08 RTC Top TOP Read/Write 0x0 0x10 RTC Interrupt Enable IER Write-only 0x0 0x14 RTC Interrupt Disable IDR Write-only 0x0 0x18 RTC Interrupt Mask IMR Read-only 0x0 0x1C RTC Interrupt Status ISR Read-only 0x0 0x20 RTC Interrupt Clear ICR Write-only 0x0 14.6.1 RTC Control Name: CTRL Access Type: Read/Write 31 30 29 28 27 26 25 24 - - - - - - - - 23 22 21 20 19 18 17 16 - - - - - - - CLKEN 15 14 13 12 11 10 9 8 - - - - PSEL 7 6 5 4 3 2 1 0 - - - BUSY CLK32 WAKE_EN PCLR EN (cid:129) CLKEN: Clock enable 0: The clock is disabled 1: The clockis enabled (cid:129) PSEL: Prescale Select Selects prescaler bit PSEL as source clock for the RTC. (cid:129) BUSY: RTC busy 0: The RTC accepts writes to TOP, VAL, and CTRL. 1: The RTC is busy and will discard writes to TOP, VAL, and CTRL. (cid:129) CLK32: 32 KHz oscillator select 0: The RTC uses the RC oscillator as clock source 1: The RTC uses the 32 KHz oscillator as clock source 89 32058K AVR32-01/12
AT32UC3A (cid:129) WAKE_EN: Wakeup enable 0: The RTC does not wake up the CPU from sleep modes 1: The RTC wakes up the CPU from sleep modes. (cid:129) PCLR: Prescaler Clear Writing 1 to this strobe clears the prescaler. (cid:129) EN: Enable 0: The RTC is disabled 1: The RTC is enabled 90 32058K AVR32-01/12
AT32UC3A 14.6.2 RTC Value Name: VAL Access Type: Read/Write 31 30 29 28 27 26 25 24 VAL[31:24] 23 22 21 20 19 18 17 16 VAL[23:16] 15 14 13 12 11 10 9 8 VAL[15:8] 7 6 5 4 3 2 1 0 VAL[7:0] (cid:129) VAL: RTC Value This value is incremented on every rising edge of the source clock. 91 32058K AVR32-01/12
AT32UC3A 14.6.3 RTC Top Name: TOP Access Type: Read/Write 31 30 29 28 27 26 25 24 TOP[31:24] 23 22 21 20 19 18 17 16 TOP[23:16] 15 14 13 12 11 10 9 8 TOP[15:8] 7 6 5 4 3 2 1 0 TOP[7:0] (cid:129) TOP: RTC Top Value VAL wraps at this value. 92 32058K AVR32-01/12
AT32UC3A 14.6.4 RTC Interrupt Enable/Disable/Mask/Status/Clear Name: IER/IDR/IMR/ISR/ICR Access Type: IER/IDR/ICR: Write-only IMR/ISR: Read-only 31 30 29 28 27 26 25 24 - - - - - - - - 23 22 21 20 19 18 17 16 - - - - - - - - 15 14 13 12 11 10 9 8 - - - - - - - - 7 6 5 4 3 2 1 0 - - - - - - - TOPI (cid:129) TOPI: Top Interrupt VAL has wrapped at its top value. The effect of writing or reading this bit depends on which register is being accessed: (cid:129) IER (Write-only) 0: No effect 1: Enable Interrupt (cid:129) IDR (Write-only) 0: No effect 1: Disable Interrupt (cid:129) IMR (Read-only) 0: Interrupt is disabled 1: Interrupt is enabled (cid:129) ISR (Read-only) 0: An interrupt event has occurred 1: An interrupt even has not occurred (cid:129) ICR (Write-only) 0: No effect 1: Clear interrupt even 93 32058K AVR32-01/12
AT32UC3A 15. Watchdog Timer (WDT) Rev: 2.3.0.1 15.1 Features (cid:129) Watchdog Timer counter with 16-bit prescaler (cid:129) Clocked from RC oscillator 15.2 Description The Watchdog Timer (WDT) has a prescaler generating a timeout period. This prescaler is clocked from the RC oscillator. The watchdog timer must be periodically reset by software within the timeout period, otherwise, the device is reset and starts executing from the boot vector. This allows the device to recover from a condition that has caused the system to be unstable. 15.3 Block Diagram Figure 15-1. Watchdog Timer module block diagram WDT_CLR 32-bit Watchdog RCOSC Watchdog Reset Prescaler Detector EN WDT_CTRL 15.4 Product Dependencies 15.4.1 Power Management When the WDT is enabled, the WDT remains clocked in all sleep modes, and it is not possible to enter Static mode. 15.4.2 Debug Operation The WDT prescaler is frozen during debug operation, unless the OCD system keeps peripherals running in debug operation. 15.4.3 Clocks The WDT can use the internal RC oscillator as clock source. This oscillator is always enabled whenever these modules are active. Please refer to the Electrical Characteristics chapter for the characteristic frequency of this oscillator (f ). RC 94 32058K AVR32-01/12
AT32UC3A 15.5 Functional Description The WDT is enabled by writing the EN bit in the CTRL register to one. This also enables the RC clock for the prescaler. The PSEL bitfield in the same register selects the watchdog timeout period: T = 2(PSEL+1) / f WDT RC The next timeout period will begin as soon as the watchdog reset has occured and count down during the reset sequence. Care must be taken when selecting the PSEL value so that the time- out period is greater than the startup time of the chip, otherwise a watchdog reset can reset the chip before any code has been run. To avoid accidental disabling of the watchdog, the CTRL register must be written twice, first with the KEY field set to 0x55, then 0xAA without changing the other bitfields. Failure to do so will cause the write operation to be ignored, and CTRL does not change value. The CLR register must be written with any value with regular intervals shorter than the watchdog timeout period. Otherwise, the device will receive a soft reset, and the code will start executing from the boot vector. When the WDT is enabled, it is not possible to enter Static mode. Attempting to do so will result in entering Shutdown mode, leaving the WDT operational. 95 32058K AVR32-01/12
AT32UC3A 15.6 User Interface Offset Register Register Name Access Reset 0x00 WDT Control CTRL Read/Write 0x0 0x04 WDT Clear CLR Write-only 0x0 96 32058K AVR32-01/12
AT32UC3A 15.6.1 WDT Control Name: CTRL Access Type: Read/Write 31 30 29 28 27 26 25 24 KEY[7:0] 23 22 21 20 19 18 17 16 - - - - - - - - 15 14 13 12 11 10 9 8 - - - PSEL 7 6 5 4 3 2 1 0 - - - - - - - EN (cid:129) KEY This bitfield must be written twice, first with key value 0x55, then 0xAA, for a write operation to be effective. This bitfield always reads as zero. (cid:129) PSEL: Prescale Select Prescaler bit PSEL is used as watchdog timeout period. (cid:129) EN: WDT Enable 0: WDT is disabled. 1: WDT is enabled. 97 32058K AVR32-01/12
AT32UC3A 15.6.2 WDT Clear Name: CLR Access Type: Write-only When the watchdog timer is enabled, this register must be periodically written, with any value, within the watchdog timeout period, to prevent a watchdog reset. 98 32058K AVR32-01/12
AT32UC3A 16. Interrupt Controller (INTC) Rev: 1.0.1.1 16.1 Description The INTC collects interrupt requests from the peripherals, prioritizes them, and delivers an inter- rupt request and an autovector to the CPU. The AVR32 architecture supports 4 priority levels for regular, maskable interrupts, and a Non-Maskable Interrupt (NMI). The INTC supports up to 64 groups of interrupts. Each group can have up to 32 interrupt request lines, these lines are connected to the peripherals. Each group has an Interrupt Priority Register (IPR) and an Interrupt Request Register (IRR). The IPRs are used to assign a priority level and an autovector to each group, and the IRRs are used to identify the active interrupt request within each group. If a group has only one interrupt request line, an active interrupt group uniquely identifies the active interrupt request line, and the corresponding IRR is not needed. The INTC also provides one Interrupt Cause Register (ICR) per priority level. These registers identify the group that has a pending interrupt of the corresponding priority level. If several groups have an pending interrupt of the same level, the group with the lowest number takes priority. 16.2 Block Diagram Figure 16-1 on page 99 gives an overview of the INTC. The grey boxes represent registers that can be accessed via the Peripheral Bus (PB). The interrupt requests from the peripherals (IREQn) and the NMI are input on the left side of the figure. Signals to and from the CPU are on the right side of the figure. Figure 16-1. Overview of the Interrupt Controller Interrupt Controller CPU NMIREQ Masks SREG masks I[3-0]M GM GrpReqN ValReqN OR IPRn INT_level, offset IRRn INTLEVEL Request P IREQ63 masking rio IREQ34 OR GrpReq1 ValReq1 ritize IREQ33 r IREQ32 IPR1 INT_level, offset AUTOVECTOR IRR1 IREQ31 ValReq0 GrpReq0 OR IREQ2 IREQ1 IREQ0 IPR0 INT_level, offset IRR0 IRR registers IPR registers ICR registers 16.3 Operation All of the incoming interrupt requests (IREQs) are sampled into the corresponding Interrupt Request Register (IRR). The IRRs must be accessed to identify which IREQ within a group that is active. If several IREQs within the same group is active, the interrupt service routine must pri- 99 32058K AVR32-01/12
AT32UC3A oritize between them. All of the input lines in each group are logically-ORed together to form the GrpReqN lines, indicating if there is a pending interrupt in the corresponding group. The Request Masking hardware maps each of the GrpReq lines to a priority level from INT0 to INT3 by associating each group with the INTLEVEL field in the corresponding IPR register. The GrpReq inputs are then masked by the I0M, I1M, I2M, I3M and GM mask bits from the CPU sta- tus register. Any interrupt group that has a pending interrupt of a priority level that is not masked by the CPU status register, gets its corresponding ValReq line asserted. The Prioritizer hardware uses the ValReq lines and the INTLEVEL field in the IPRs to select the pending interrupt of the highest priority. If a NMI interrupt is pending, it automatically gets high- est priority of any pending interrupt. If several interrupt groups of the highest pending interrupt level have pending interrupts, the interrupt group with the highest number is selected. Interrupt level (INTLEVEL) and handler autovector offset (AUTOVECTOR) of the selected inter- rupt are transmitted to the CPU for interrupt handling and context switching. The CPU doesn't need to know which interrupt is requesting handling, but only the level and the offset of the han- dler address. The IRR registers contain the interrupt request lines of the groups and can be read via PB for checking which interrupts of the group are actually active. Masking of the interrupt requests is done based on five interrupt mask bits of the CPU status register, namely interrupt level 3 mask (I3M) to interrupt level 0 mask (I0M), and Global interrupt mask (GM). An interrupt request is masked if either the Global interrupt mask or the correspond- ing interrupt level mask bit is set. 16.3.1 Non maskable interrupts A NMI request has priority over all other interrupt requests. NMI has a dedicated exception vec- tor address defined by the AVR32 architecture, so AUTOVECTOR is undefined when INTLEVEL indicates that an NMI is pending. 16.3.2 CPU response When the CPU receives an interrupt request it checks if any other exceptions are pending. If no exceptions of higher priority are pending, interrupt handling is initiated. When initiating interrupt handling, the corresponding interrupt mask bit is set automatically for this and lower levels in sta- tus register. E.g, if interrupt on level 3 is approved for handling the interrupt mask bits I3M, I2M, I1M, and I0M are set in status register. If interrupt on level 1 is approved the masking bits I1M, and I0M are set in status register. The handler offset is calculated from AUTOVECTOR and EVBA and a change-of-flow to this address is performed. Setting of the interrupt mask bits prevents the interrupts from the same and lower levels to be passed trough the interrupt controller. Setting of the same level mask bit prevents also multiple request of the same interrupt to happen. It is the responsibility of the handler software to clear the interrupt request that caused the inter- rupt before returning from the interrupt handler. If the conditions that caused the interrupt are not cleared, the interrupt request remains active. 16.3.3 Clearing an interrupt request Clearing of the interrupt request is done by writing to registers in the corresponding peripheral module, which then clears the corresponding NMIREQ/IREQ signal. The recommended way of clearing an interrupt request is a store operation to the controlling peripheral register, followed by a dummy load operation from the same register. This causes a 100 32058K AVR32-01/12
AT32UC3A pipeline stall, which prevents the interrupt from accidentally re-triggering in case the handler is exited and the interrupt mask is cleared before the interrupt request is cleared. 16.4 User Interface This chapter lists the INTC registers are accessible through the PB bus. The registers are used to control the behaviour and read the status of the INTC. 16.4.1 Memory Map The following table shows the address map of the INTC registers, relative to the base address of the INTC. Table 16-1. INTC address map Offset Register Name Access Reset Value 0 Interrupt Priority Register 0 IPR0 Read/Write 0x0000_0000 4 Interrupt Priority Register 1 IPR1 Read/Write 0x0000_0000 ... ... ... ... ... 252 Interrupt Priority Register 63 IPR63 Read/Write 0x0000_0000 256 Interrupt Request Register 0 IRR0 Read-only N/A 260 Interrupt Request Register 1 IRR1 Read-only N/A ... ... ... ... ... 508 Interrupt Request Register 63 IRR63 Read-only N/A 512 Interrupt Cause Register 3 ICR3 Read-only N/A 516 Interrupt Cause Register 2 ICR2 Read-only N/A 520 Interrupt Cause Register 1 ICR1 Read-only N/A 524 Interrupt Cause Register 0 ICR0 Read-only N/A 16.4.2 Interrupt Request Map The mapping of interrupt requests from peripherals to INTREQs is presented in the Peripherals Section. 101 32058K AVR32-01/12
AT32UC3A 16.4.3 Interrupt Request Registers Register Name: IRR0...IRR63 Access Type: Read-only 31 30 29 28 27 26 25 24 IRR(32*x+31) IRR(32*x+30) IRR(32*x+29) IRR(32*x+28) IRR(32*x+27) IRR(32*x+26) IRR(32*x+25) IRR(32*x+24) 23 22 21 20 19 18 17 16 IRR(32*x+23) IRR(32*x+22) IRR(32*x+21) IRR(32*x+20) IRR(32*x+19) IRR(32*x+18) IRR(32*x+17) IRR(32*x+16) 15 14 13 12 11 10 9 8 IRR(32*x+15) IRR(32*x+14) IRR(32*x+13) IRR(32*x+12) IRR(32*x+11) IRR(32*x+10) IRR(32*x+9) IRR(32*x+8) 7 6 5 4 3 2 1 0 IRR(32*x+7) IRR(32*x+6) IRR(32*x+5) IRR(32*x+4) IRR(32*x+3) IRR(32*x+2) IRR(32*x+1) IRR(32*x+0) (cid:129) IRR: Interrupt Request line 0 = No interrupt request is pending on this input request input. 1 = An interrupt request is pending on this input request input. The are 64 IRRs, one for each group. Each IRR has 32 bits, one for each possible interrupt request, for a total of 2048 pos- sible input lines. The IRRs are read by the software interrupt handler in order to determine which interrupt request is pending. The IRRs are sampled continuously, and are read-only. 102 32058K AVR32-01/12
AT32UC3A 16.4.4 Interrupt Priority Registers Register Name: IPR0...IPR63 Access Type: Read/Write 31 30 29 28 27 26 25 24 INTLEVEL[1:0] - - - - - - 23 22 21 20 19 18 17 16 - - - - - - - - 15 14 13 12 11 10 9 8 - - AUTOVECTOR[13:8] 7 6 5 4 3 2 1 0 AUTOVECTOR[7:0] (cid:129) IN TLEVEL: Interrupt level associated with this group Indicates the EVBA-relative offset of the interrupt handler of the corresponding group: INTLEVEL[1:0] Priority 0 0 INT0 0 1 INT1 1 0 INT2 1 1 INT3 (cid:129) AUTOVECTOR: Autovector address for this group Handler offset is used to give the address of the interrupt handler. The least significant bit should be written to zero to give halfword alignment 103 32058K AVR32-01/12
AT32UC3A 16.4.5 Interrupt Cause Registers Register Name: ICR0...ICR3 Access Type: Read-only 31 30 29 28 27 26 25 24 - - - - - - - - 23 22 21 20 19 18 17 16 - - - - - - - - 15 14 13 12 11 10 9 8 - - - - - - - - 7 6 5 4 3 2 1 0 - - CAUSE (cid:129) CAUSE: Interrupt group causing interrupt of priority n ICRn identifies the group with the highest priority that has a pending interrupt of level n. If no interrupts of level n are pend- ing, or the priority level is masked, the value of ICRn is UNDEFINED. 104 32058K AVR32-01/12
AT32UC3A 17. External Interrupts Controller (EIC) Rev: 2.3.0.2 17.1 Features (cid:129) Dedicated interrupt requests for each interrupt (cid:129) Individually maskable interrupts (cid:129) Interrupt on rising or falling edge (cid:129) Interrupt on high or low level (cid:129) Asynchronous interrupts for sleep modes without clock (cid:129) Filtering of interrupt lines (cid:129) Keypad scan support (cid:129) Maskable NMI interrupt 17.2 Description The External Interrupt Module allows pins to be configured as external interrupts. Each pin has its own interrupt request and can be individually masked. Each pin can generate an interrupt on rising or falling edge, or high or low level. Every line has a configurable filter too remove spikes on the interrupt lines. Every interrupt pin can also be configured to be asynchronous to wake up the part from sleep modes where the clock has been disabled. A Non-Maskable Interrupt (NMI) is also supported. This has the same properties as the other external interrupts, but is connected to the NMI request of the CPU, enabling it to interrupt any other interrupt mode. The External Interrupt Module has support for keypad scanning for keypads laid out in rows and columns. Columns are driven by a separate set of scanning outputs, while rows are sensed by the external interrupt lines. The pressed key will trigger an interrupt, which can be identified through the user registers of the module. The External Interrupt Module can wake up the part from sleep modes without triggering an interrupt. In this mode, code execution starts from the instruction following the sleep instruction. 105 32058K AVR32-01/12
AT32UC3A 17.3 Block Diagram Figure 17-1. External Interrupt Module block diagram EIM_LEVEL EIM_MODE EIM_EDGE EIM_EN Polarity Asynchronus EIM_IER EIM_ICR EIM_DIS control detector EIM_IDR EXTINTn Wake Enable EIM_LEVEL INTn Mask IRQn NMI EIM_FILTER EIM_MODE detect EIM_EDGE EIM_CTRL Edge/Level EIM_ISR EIM_IMR Filter Detector EIM_WAKE RC clk Prescaler Shifter SCAN PRESC EN PIN EIM_SCAN 17.4 Product Dependencies 17.4.1 I/O Lines The External Interrupt and keypad scan pins are multiplexed with PIO lines. To act as external interrupts, these pins must be configured as inputs pins by the PIO controller. It is also possible to trigger the interrupt by driving these pins from registers in the PIO controller, or another peripheral output connected to the same pin. 17.4.2 Power Management All interrupts are available in every sleep mode. However, in sleep modes where the clock is stopped, asynchronous interrupts must be selected. 17.4.3 Interrupt The external interrupt lines are connected to internal sources of the interrupt controller. Using the external interrutps requires the interrupt controller to be programmed first. Using the Non-Maskable Interrupt does not require the interrupt controller to be programmed. 106 32058K AVR32-01/12
AT32UC3A 17.5 Functional Description 17.5.1 External Interrupts To enable an external interrupt EXTINTn must be written to 1 in register EN. Similarly, writing EXTINTn to 1 in register DIS disables the interrupt. The status of each Interrupt line can be observed in the CTRL register. Each external interrupt pin EXTINTn can be configured to produce an interrupt on rising or fall- ing edge, or high or low level. External interrupts are configured by the MODE, EDGE, and LEVEL registers. Each interrupt n has a bit INTn in each of these registers. Similarly, each interrupt has a corresponding bit in each of the interrupt control and status regis- ters. Writing 1 to the INTn strobe in IER enables the external interrupt on pin EXTINTn, while writing 1 to INTn in IDR disables the external interrupt. IMR can be read to check which inter- rupts are enabled. When the interrupt triggers, the corresponding bit in ISR will be set. The flag remains set until the corresponding strobe bit in ICR is written to 1. Writing INTn in MODE to 0 enables edge triggered interrupts, while writing the bit to 1 enables level triggered interrupts. If EXTINTn is configured as an edge triggered interrupt, writing INTn in EDGE to 0 will trigger the interrupt on falling edge, while writing the bit to 1 will trigger the interrupt on rising edge. If EXTINTn is configured as a level triggered interrupt, writing INTn in LEVEL to 0 will trigger the interrupt on low level, while writing the bit to 1 will trigger the interrupt on high level. To remove spikes that are longer than the clock period in the current mode each external inter- rupt contains a filter that can be enabled by writing 1 to INTn to FILTER. Each interrupt line can be made asynchronous by writing 1 to INTn in the ASYNC register. This will route the interrupt signal through the asynchronous path of the module. All edge interrupts will be interpreted as level interrupts and the filter is disabled. 17.5.1.1 Synchronization of external interrupts The pin value of the EXTINTn pins is normally synchronized to the CPU clock, so spikes shorter than a CPU clock cycle are not guaranteed to produce an interrupt. In Stop mode, spikes shorter than a 32 KHz clock cycle are not guaranteed to produce an interrupt. In Static mode, only unsynchronized interrupts remain active, and any short spike on this inter- rupt will wake up the device. 17.5.1.2 Wakeup The External interrupts can be used to wake up the part from sleep modes. The wakeup can be interpreted in two ways. If the corresponding bit in IMR is set, then the execution starts at the interrupt handler for this interrupt. If the bit in IMR is not set, then the execution starts from the next instruction after the sleep instruction. 17.5.2 Non-Maskable Interrupt The NMI supports the same features as the external interrupts, and is accessed through the same registers. The description in Section 17.5.1 should be followed, accessing the NMI bit instead of the INTn bits. 107 32058K AVR32-01/12
AT32UC3A The NMI is non-maskable within the CPU in the sense that it can interrupt any other execution mode. Still, as for the other external interrupts, the actual NMI input line can be enabled and dis- abled by accessing the registers in the External Interrupt Module. These interrupts are not enabled by default, allowing the proper interrupt vectors to be set up by the CPU before the interrupts are enabled. 17.5.3 Keypad scan support The External Interrupt Module also includes support for keypad scanning. The keypad scan fea- ture is compatible with keypads organized as rows and columns, where a row is shorted against a column when a key is pressed. The rows should be connected to the external interrupt pins with pullups enabled in the GPIO module. These external interrupts should be enabled as low level or falling edge interrupts. The columns should be connected to the available scan pins. The GPIO must be configured to let the required scan pins be controlled by the EIC module. Unused external interrupt or scan pins can be left controlled by the GPIO or other peripherals. The Keypad Scan function is enabled by writing :EN to 1, which starts the keypad scan counter. The SCAN outputs are tristated, except SCAN[0], which is driven to zero. After 2(SCAN:PRESC+1) RC clock cycles this pattern is left shifted, so that SCAN[1] is driven to zero while the other out- puts are tristated. This sequence repeats infinitely, wrapping from the most significant SCAN pin to SCAN[0]. When a key is pressed, the pulled-up row is driven to zero by the column, and an external inter- rupt triggers. The scanning stops, and the software can then identify the key pressed by the interrupt status register and the SCAN:PINS value. The scanning stops whenever there is an active interrupt request from the EIC to the CPU. When the CPU clears the interrupt flags, scanning resumes. 108 32058K AVR32-01/12
AT32UC3A 17.6 User Interface Offset Register Register Name Access Reset 0x00 EIC Interrupt Enable IER Write-only 0x0 0x04 EIC Interrupt Disable IDR Write-only 0x0 0x08 EIC Interrupt Mask IMR Read-only 0x0 0x0C EIC Interrupt Status ISR Read-only 0x0 0x10 EIC Interrupt Clear ICR Write-only 0x0 0x14 External Interrupt Mode MODE Read/Write 0x0 0x18 External Interrupt Edge EDGE Read/Write 0x0 0x1C External Interrupt Level LEVEL Read/Write 0x0 0x20 External Interrupt Filter FILTER Read/Write 0x0 0x24 External Interrupt Test TEST Read/Write 0x0 0x28 External Interrupt Asynchronous ASYNC Read/Write 0x0 0x2C External Interrupt Scan SCAN Read/Write 0x0 0x30 External Interrupt Enable EN Write-only 0x0 0x34 External Interrupt Disable DIS Write-only 0x0 0x38 External Interrupt Control CTRL Read/Write 0x0 109 32058K AVR32-01/12
AT32UC3A 17.6.1 EIC Interrupt Enable/Disable/Mask/Status/Clear Name: IER/IDR/IMR/ISR/ICR Access Type: IER/IDR/ICR: Write-only IMR/ISR: Read-only 31 30 29 28 27 26 25 24 - - - - - - - - 23 22 21 20 19 18 17 16 - - - - - - - - 15 14 13 12 11 10 9 8 - - - - - - - NMI 7 6 5 4 3 2 1 0 INT7 INT6 INT5 INT4 INT3 INT2 INT1 INT0 The effect of writing or reading the bits listed above depends on which register is being accessed: (cid:129) IER (Write-only) 0: No effect 1: Enable Interrupt (cid:129) IDR (Write-only) 0: No effect 1: Disable Interrupt (cid:129) IMR (Read-only) 0: Interrupt is disabled 1: Interrupt is enabled (cid:129) ISR (Read-only) 0: An interrupt event has occurred 1: An interrupt even has not occurred (cid:129) ICR (Write-only) 0: No effect 1: Clear interrupt event 110 32058K AVR32-01/12
AT32UC3A 17.6.2 External Interrupt Mode/Edge/Level/Filter/Async Name: MODE/EDGE/LEVEL/FILTER/A SYNC Access Type: Read/Write 31 30 29 28 27 26 25 24 - - - - - - - - 23 22 21 20 19 18 17 16 - - - - - - - - 15 14 13 12 11 10 9 8 - - - - - - - NMI 7 6 5 4 3 2 1 0 INT7 INT6 INT5 INT4 INT3 INT2 INT1 INT0 The bit interpretation is register specific: (cid:129) MODE 0: Interrupt is edge triggered 1: Interrupt is level triggered (cid:129) EDGE 0: Interrupt triggers on falling edge 1: Interrupt triggers on rising edge (cid:129) LEVEL 0: Interrupt triggers on low level 1: Interrupt triggers on high level (cid:129) FILTER 0: Interrupt is not filtered 1: Interrupt is filtered (cid:129) ASYNC 0: Interrupt is synchronized to the clock 1: Interrupt is asynchronous 111 32058K AVR32-01/12
AT32UC3A 17.6.3 External Interrupt Test Name: TEST Access Type: Read/Write 31 30 29 28 27 26 25 24 TEST_EN - - - - - - - 23 22 21 20 19 18 17 16 - - - - - - - - 15 14 13 12 11 10 9 8 - - - - - - - NMI 7 6 5 4 3 2 1 0 INT7 INT6 INT5 INT4 INT3 INT2 INT1 INT0 (cid:129) NMI If TEST_EN is 1, the value of this bit will be the value to the interrupt detector and the value on the pad will be ignored. (cid:129) INTn If TEST_EN is 1, the value of this bit will be the value to the interrupt detector and the value on the pad will be ignored. (cid:129) TEST_EN 0: External interrupt test is disabled 1: External interrupt test is enabled 112 32058K AVR32-01/12
AT32UC3A 17.6.4 External Interrupt Scan Name: SCAN Access Type: Read/Write 31 30 29 28 27 26 25 24 - - - - - PIN[2:0] 23 22 21 20 19 18 17 16 - - - - - - - - 15 14 13 12 11 10 9 8 - - - PRESC[4:0] 7 6 5 4 3 2 1 0 - - - - - - - EN (cid:129) EN 0: Keypad scanning is disabled 1: Keypad scanning is enabled (cid:129) PRESC Prescale select for the keypad scan rate: Scan rate = 2(SCAN:PRESC+1) T RC The RC clock period can be found in the Electrical Characteristics section. (cid:129) PIN The index of the currently active scan pin. Writing to this bitfield has no effect. 113 32058K AVR32-01/12
AT32UC3A 17.6.5 External Interrupt Enable/Disable/Control Name: EN/DIS/CTRL Access Type: EN/DIS: Write-only CTRL: Read-only 31 30 29 28 27 26 25 24 - - - - - - - - 23 22 21 20 19 18 17 16 - - - - - - - - 15 14 13 12 11 10 9 8 - - - - - - - NMI 7 6 5 4 3 2 1 0 INT7 INT6 INT5 INT4 INT3 INT2 INT1 INT0 The bit interpretation is register specific: (cid:129) EN 0: No effect 1: Interrupt is enabled (cid:129) DIS 0: No effect 1: Interrupt is disabled (cid:129) CTRL 0: Interrupt is disabled 1: Interrupt is enabled 114 32058K AVR32-01/12
AT32UC3A 18. Flash Controller (FLASHC) Rev: 2.0.0.2 18.1 Features (cid:129) Controls flash block with dual read ports allowing staggered reads. (cid:129) Supports 0 and 1 wait state bus access. (cid:129) Allows interleaved burst reads for systems with one wait state, outputting one 32-bit word per clock cycle. (cid:129) 32-bit HSB interface for reads from flash array and writes to page buffer. (cid:129) 32-bit PB interface for issuing commands to and configuration of the controller. (cid:129) 16 lock bits, each protecting a region consisting of (total number of pages in the flash block / 16) pages. (cid:129) Regions can be individually protected or unprotected. (cid:129) Additional protection of the Boot Loader pages. (cid:129) Supports reads and writes of general-purpose NVM bits. (cid:129) Supports reads and writes of additional NVM pages. (cid:129) Supports device protection through a security bit. (cid:129) Dedicated command for chip-erase, first erasing all on-chip volatile memories before erasing flash and clearing security bit. (cid:129) Interface to Power Manager for power-down of flash-blocks in sleep mode. 18.2 Description The flash controller (FLASHC) interfaces a flash block with the 32-bit internal HSB bus. Perfor- mance for uncached systems with high clock-frequency and one wait state is increased by placing words with sequential addresses in alternating flash subblocks. Having one read inter- face per subblock allows them to be read in parallel. While data from one flash subblock is being output on the bus, the sequential address is being read from the other flash subblock and will be ready in the next clock cycle. The controller also manages the programming, erasing, locking and unlocking sequences with dedicated commands. 18.3 Product dependencies 18.3.1 Power management The HFLASHC has two bus clocks connected: One High speed bus clock (CLK_FLASHC_HSB) and one Peripheral bus clock (CLK_FLASHC_PB). These clocks are generated by the Power manager. Both clocks are turned on by default, but the user has to ensure that CLK_FLASHC_HSB is not turned off before reading the flash or writing the page- buffer and that CLK_FLASHC_PB is not turned of before accessing the FLASHC configuration and control registers. 18.3.2 Interrupt The FLASHC interrupt lines are connected to internal sources of the interrupt controller. Using FLASHC interrutps requires the interrupt controller to be programmed first. 115 32058K AVR32-01/12
AT32UC3A 18.4 Functional description 18.4.1 Bus interfaces The FLASHC has two bus interfaces, one High-Speed Bus (HSB) interface for reads from the flash array and writes to the page buffer, and one Peripheral Bus (PB) interface for writing commands and control to and reading status from the controller. 18.4.2 Memory organization To maximize performance for high clock-frequency systems, FLASHC interfaces to a flash block with two read ports. The flash block has several parameters, given by the design of the flash block. Refer to the “Memories” chapter for the device-specific values of the parameters. (cid:129) p pages (FLASH_P) (cid:129) w words in each page and in the page buffer (FLASH_W) (cid:129) pw words in total (FLASH_PW) (cid:129) f general-purpose fuse bits (FLASH_F) (cid:129) 1 security fuse bit (cid:129) 1 User Page 18.4.3 User page The User page is an additional page, outside the regular flash array, that can be used to store various data, like calibration data and serial numbers. This page is not erased by regular chip erase. The User page can only be written and erased by proprietary commands. Read accesses to the User page is performed just as any other read access to the flash. The address map of the User page is given in Figure 18-1. 18.4.4 Read operations The FLASHC provides two different read modes: (cid:129) 0 wait state (0ws) for clock frequencies < (access time of the flash plus the bus delay) (cid:129) 1 wait state (1ws) for clock frequencies < (access time of the flash plus the bus delay)/2 Higher clock frequencies that would require more wait states are not supported by the flash controller. The programmer can select the wait states required by writing to the FWS field in the flash control register (FCR). It is the responsibility of the programmer to select a number of wait states compatible with the clock frequency and timing characteristics of the flash block. In 0ws mode, only one of the two flash read ports is accessed. The other flash read port is idle. In 1ws mode, both flash read ports are active. One read port reading the addressed word, and the other reading the next sequential word. If the clock frequency allows, the user should use 0ws mode, because this gives the lowest power consumption for low-frequency systems as only one flash read port is read. Using 1ws mode has a power/performance ratio approaching 0ws mode as the clock frequency approaches twice the max frequency of 0ws mode. Using two flash read ports use twice the power, but also give twice the performance. 116 32058K AVR32-01/12
AT32UC3A The flash controller supports flash blocks with up to 2^21 word addresses, as displayed in Fig- ure 18-1. Reading the memory space between address pw and 2^21-1 returns an undefined result. The User page is permanently mapped to word address 2^21. Table 18-1. User row addresses Memory type Start address, byte sized Size Main array 0 pw words = 4pw bytes User 2^23 = 8388608 128 words = 512 bytes Figure 18-1. Memory map for the Flash memories All addresses are word addresses 2^21+128 Unused 2^21 User page d e s u n U pw pw -1 y a r r a a t a d h s a Fl 0 Flash with ex tra page 18.4.5 Quick Page Read A dedicated command, Quick Page Read (QPR), is provided to read all words in an addressed page. All bits in all words in this page are AND’ed together, returning a 1-bit result. This result is placed in the Quick Page Read Result (QPRR) bit in Flash Status Register (FSR). The QPR command is useful to check that a page is in an erased state. The QPR instruction is much faster than performing the erased-page check using a regular software subroutine. 18.4.6 Write page buffer operations The internal memory area reserved for the embedded flash can also be written through a write-only page buffer. The page buffer is addressed only by the address bits required to address w words (since the page buffer is word addressable) and thus wrap around within the internal memory area address space and appear to be repeated within it. When writing to the page buffer, the PAGEN field in the FCMD register is updated with the page number corresponding to page address of the latest word written into the page buffer. 117 32058K AVR32-01/12
AT32UC3A The page buffer is also used for writes to the User page. Write operations can be prevented by programming the Memory Protection Unit of the CPU. Writing 8-bit and 16-bit data to the page buffer is not allowed and may lead to unpredictable data corruption. Page buffer write operations are performed with 4 wait states. Writing to the page buffer can only change page buffer bits from one to zero, ie writing 0xaaaaaaaa to a page buffer location that has the value 0x00000000, will not change the page buffer value. The only way to change a bit from zero to one, is to reset the entire page buffer with the Clear Page Buffer command. The page buffer is not automatically reset after a page write. The programmer should do this manually by issuing the Clear Page Buffer flash command. This can be done after a page write, or before the page buffer is loaded with data to be stored to the flash page. Example: Writing a word into word address 130 of a flash with 128 words in the page buffer. PAGEN will be updated with the value 1, and the word will be written into word 2 in the page buffer. 18.4.7 Writing words to a page that is not completely erased This can be used for EEPROM emulation, i.e. writes with granularity of one word instead of an entire page. Only words that are in an completely erased state (0xFFFFFFFF) can be changed. The procedure is as follows: 1. Clear page buffer 2. Write to the page buffer the result of the logical bitwise AND operation between the contents of the flash page and the new data to write. Only words that were in an erased state can be changed from the original page. 3. Write Page. 18.5 Flash commands The FLASHC offers a command set to manage programming of the flash memory, locking and unlocking of regions, and full flash erasing. See chapter 18.8.3 for a complete list of commands. To run a command, the field CMD of the Flash Command Register (FCMD) has to be written with the command number. As soon as the FCMD register is written, the FRDY flag is auto- matically cleared. Once the current command is complete, the FRDY flag is automatically set. If an interrupt has been enabled by setting the bit FRDY in FCR, the interrupt line of the flash controller is activated. All flash commands except for Quick Page Read (QPR) will generate an interrupt request upon completion if FRDY is set. After a command has been written to FCMD, the programming algorithm should wait until the command has been executed before attempting to read instructions or data from the flash or writing to the page buffer, as the flash will be busy. The waiting can be performed either by polling the Flash Status Register (FSR) or by waiting for the flash ready interrupt. The com- mand written to FCMD is initiated on the first clock cycle where the HSB bus interface in FLASHC is IDLE. The user must make sure that the access pattern to the FLASHC HSB inter- face contains an IDLE cycle so that the command is allowed to start. Make sure that no bus masters such as DMA controllers are performing endless burst transfers from the flash. Also, make sure that the CPU does not perform endless burst transfers from flash. This is done by 118 32058K AVR32-01/12
AT32UC3A letting the CPU enter sleep mode after writing to FCMD, or by polling FSR for command com- pletion. This polling will result in an access pattern with IDLE HSB cycles. All the commands are protected by the same keyword, which has to be written in the eight highest bits of the FCMD register. Writing FCMD with data that does not contain the correct key and/or with an invalid command has no effect on the flash memory; however, the PROGE flag is set in the Flash Status Register (FSR). This flag is automatically cleared by a read access to the FSR register. Writing a command to FCMD while another command is being executed has no effect on the flash memory; however, the PROGE flag is set in the Flash Status Register (FSR). This flag is automatically cleared by a read access to the FSR register. If the current command writes or erases a page in a locked region, or a page protected by the BOOTPROT fuses, the command has no effect on the flash memory; however, the LOCKE flag is set in the FSR register. This flag is automatically cleared by a read access to the FSR register. 18.5.1 Write/erase page operation Flash technology requires that an erase must be done before programming. The entire flash can be erased by an Erase All command. Alternatively, pages can be individually erased by the Erase Page command. The User page can be written and erased using the mechanisms described in this chapter. After programming, the page can be locked to prevent miscellaneous write or erase sequences. Locking is performed on a per-region basis, so locking a region locks all pages inside the region. Additional protection is provided for the lowermost address space of the flash. This address space is allocated for the Boot Loader, and is protected both by the lock bit(s) corresponding to this address space, and the BOOTPROT[2:0] fuses. Data to be written are stored in an internal buffer called page buffer. The page buffer contains w words. The page buffer wraps around within the internal memory area address space and appears to be repeated by the number of pages in it. Writing of 8-bit and 16-bit data to the page buffer is not allowed and may lead to unpredictable data corruption. Data must be written to the page buffer before the programming command is written to the Flash Command Register FCMD. The sequence is as follows: (cid:129) Reset the page buffer with the Clear Page Buffer command. (cid:129) Fill the page buffer with the desired contents, using only 32-bit access. (cid:129) Programming starts as soon as the programming key and the programming command are written to the Flash Command Register. The PAGEN field in the Flash Command Register (FCMD) must contain the address of the page to write. PAGEN is automatically updated when writing to the page buffer, but can also be written to directly. The FRDY bit in the Flash Status Register (FSR) is automatically cleared when the page write operation starts. (cid:129) When programming is completed, the bit FRDY in the Flash Status Register (FSR) is set. If an interrupt was enabled by setting the bit FRDY in FCR, the interrupt line of the flash controller is set. Two errors can be detected in the FSR register after a programming sequence: (cid:129) Programming Error: A bad keyword and/or an invalid command have been written in the FCMD register. 119 32058K AVR32-01/12
AT32UC3A (cid:129) Lock Error: The page to be programmed belongs to a locked region. A command must be executed to unlock the corresponding region before programming can start. 18.5.2 Erase All operation The entire memory is erased if the Erase All command (EA) is written to the Flash Command Register (FCMD). Erase All erases all bits in the flash array. The User page is not erased. All flash memory locations, the general-purpose fuse bits, and the security bit are erased (reset to 0xFF) after an Erase All. The EA command also ensures that all volatile memories, such as register file and RAMs, are erased before the security bit is erased. Erase All operation is allowed only if no regions are locked, and the BOOTPROT fuses are programmed with a region size of 0. Thus, if at least one region is locked, the bit LOCKE in FSR is set and the command is cancelled. If the bit LOCKE has been written to 1 in FCR, the interrupt line rises. When the command is complete, the bit FRDY bit in the Flash Status Register (FSR) is set. If an interrupt has been enabled by setting the bit FRDY in FCR, the interrupt line of the flash controller is set. Two errors can be detected in the FSR register after issuing the command: (cid:129) Programming Error: A bad keyword and/or an invalid command have been written in the FCMD register. (cid:129) Lock Error: At least one lock region to be erased is protected, or BOOTPROT is different from 0. The erase command has been refused and no page has been erased. A Clear Lock Bit command must be executed previously to unlock the corresponding lock regions. 18.5.3 Region lock bits The flash block has p pages, and these pages are grouped into 16 lock regions, each region containing p/16 pages. Each region has a dedicated lock bit preventing writing and erasing pages in the region. After production, the device may have some regions locked. These locked regions are reserved for a boot or default application. Locked regions can be unlocked to be erased and then programmed with another application or other data. To lock or unlock a region, the commands Lock Region Containing Page (LP) and Unlock Region Containing Page (UP) are provided. Writing one of these commands, together with the number of the page whose region should be locked/unlocked, performs the desired operation. One error can be detected in the FSR register after issuing the command: (cid:129) Programming Error: A bad keyword and/or an invalid command have been written in the FCMD register. The lock bits are implemented using the lowest 16 general-purpose fuse bits. This means that lock bits can also be set/cleared using the commands for writing/erasing general-purpose fuse bits, see chapter 18.6. The general-purpose bit being in an erased (1) state means that the region is unlocked. The lowermost pages in the Flash can additionally be protected by the BOOTPROT fuses, see Section 18.6. 18.6 General-purpose fuse bits Each flash block has a number of general-purpose fuse bits that the application programmer can use freely. The fuse bits can be written and erased using dedicated commands, and read 120 32058K AVR32-01/12
AT32UC3A through a dedicated Peripheral Bus address. Some of the general-purpose fuse bits are reserved for special purposes, and should not be used for other functions.: Table 18-2. General-purpose fuses with special functions General- Purpose fuse number Name Usage 15:0 LOCK Region lock bits. External Privileged Fetch Lock. Used to prevent the CPU from fetching instructions from external memories when in privileged mode. This bit can only be changed when the security bit is cleared. The address range corresponding to external memories is device-specific, and not known to the flash controller. This fuse bit is simply routed out of the CPU or bus system, the flash controller does not treat this fuse in any special way, except that it can not be altered when the security 16 EPFL bit is set. If the security bit is set, only an external JTAG Chip Erase can clear EPFL. No internal commands can alter EPFL if the security bit is set. When the fuse is erased (i.e. "1"), the CPU can execute instructions fetched from external memories. When the fuse is programmed (i.e. "0"), instructions can not be executed from external memories. Used to select one of four different bootloader sizes. Pages included in the bootloader area can not be erased or programmed except by a JTAG chip erase. BOOTPROT can only be changed when the security bit is cleared. 19:17 BOOTPROT If the security bit is set, only an external JTAG Chip Erase can clear BOOTPROT, and thereby allow the pages protected by BOOTPROT to be programmed. No internal commands can alter BOOTPROT or the pages protected by BOOTPROT if the security bit is set. The BOOTPROT fuses protects the following address space for the Boot Loader: Table 18-3. Boot Loader area specified by BOOTPROT Pages protected by Size of protected BOOTPROT BOOTPROT memory 7 None 0 6 0-1 1kByte 5 0-3 2kByte 4 0-7 4kByte 3 0-15 8kByte 2 0-31 16kByte 1 0-63 32kByte 0 0-127 64kByte To erase or write a general-purpose fuse bit, the commands Write General-Purpose Fuse Bit (WGPB) and Erase General-Purpose Fuse Bit (EGPB) are provided. Writing one of these 121 32058K AVR32-01/12
AT32UC3A commands, together with the number of the fuse to write/erase, performs the desired operation. An entire General-Purpose Fuse byte can be written at a time by using the Program GP Fuse Byte (PGPFB) instruction. A PGPFB to GP fuse byte 2 is not allowed if the flash is locked by the security bit. The PFB command is issued with a parameter in the PAGEN field: (cid:129) PAGEN[2:0] - byte to write (cid:129) PAGEN[10:3] - Fuse value to write All General-Purpose fuses can be erased by the Erase All General-Purpose fuses (EAGP) command. An EAGP command is not allowed if the flash is locked by the security bit. Two errors can be detected in the FSR register after issuing these commands: (cid:129) Programming Error: A bad keyword and/or an invalid command have been written in the FCMD register. (cid:129) Lock Error: A write or erase of any of the special-function fuse bits in Table 18-3 was attempted while the flash is locked by the security bit. The lock bits are implemented using the lowest 16 general-purpose fuse bits. This means that the 16 lowest general-purpose fuse bits can also be written/erased using the commands for locking/unlocking regions, see Section 18.5.3. 18.7 Security bit The security bit allows the entire chip to be locked from external JTAG or other debug access for code security. The security bit can be written by a dedicated command, Set Security Bit (SSB). Once set, the only way to clear the security bit is through the JTAG Chip Erase command. Once the Security bit is set, the following Flash controller commands will be unavailable and return a lock error if attempted: (cid:129) Write General-Purpose Fuse Bit (WGPB) to BOOTPROT or EPFL fuses (cid:129) Erase General-Purpose Fuse Bit (EGPB) to BOOTPROT or EPFL fuses (cid:129) Program General-Purpose Fuse Byte (PGPFB) of fuse byte 2 (cid:129) Erase All General-Purpose Fuses (EAGPF) One error can be detected in the FSR register after issuing the command: (cid:129) Programming Error: A bad keyword and/or an invalid command have been written in the FCMD register. 122 32058K AVR32-01/12
AT32UC3A 18.8 User interface 18.8.1 Address map The following addresses are used by the FLASHC. All offsets are relative to the base address allocated to the flash controller. Table 18-4. Flash controller register mapping Reset Offset Register Name Access state 0x0 Flash Control Register FCR R/W 0 0x4 Flash Command Register FCMD R/W 0 0x8 Flash Status Register FSR R/W 0 (*) 0xc Flash General Purpose Fuse Register Hi FGPFRHI R NA (*) 0x10 Flash General Purpose Fuse Register Lo FGPFRLO R NA (*) (*) The value of the Lock bits is dependent of their programmed state. All other bits in FSR are 0. All bits in FGPFR and FCFR are dependent on the programmed state of the fuses they map to. Any bits in these registers not mapped to a fuse read 0. 123 32058K AVR32-01/12
AT32UC3A 18.8.2 Flash Control Register (FCR) Offset: 0x0 31 30 29 28 27 26 25 24 - - - - - - - - 23 22 21 20 19 18 17 16 - - - - - - - - 15 14 13 12 11 10 9 8 - - - - - - - SASD 7 6 5 4 3 2 1 0 - FWS - - PROGE LOCKE - FRDY FRDY: Flash Ready Interrupt Enable 0: Flash Ready does not generate an interrupt. 1: Flash Ready generates an interrupt. LOCKE: Lock Error Interrupt Enable 0: Lock Error does not generate an interrupt. 1: Lock Error generates an interrupt. PROGE: Programming Error Interrupt Enable 0: Programming Error does not generate an interrupt. 1: Programming Error generates an interrupt. FWS: Flash Wait State 0: The flash is read with 0 wait states. 1: The flash is read with 1 wait state. SASD: Sense Amplifier Sample Disable 0: The sense amplifiers in the flash are in sampling mode. 1: The sense amplifiers in the flash are permanently enabled. Consumes more power. 124 32058K AVR32-01/12
AT32UC3A 18.8.3 Flash Command Register (FCMD) Offset: 0x4 The FCMD can not be written if the flash is in the process of performing a flash command. Doing so will cause the FCR write to be ignored, and the PROGE bit to be set. 31 30 29 28 27 26 25 24 KEY 23 22 21 20 19 18 17 16 PAGEN [15:8] 15 14 13 12 11 10 9 8 PAGEN [7:0] 7 6 5 4 3 2 1 0 - - CMD CMD: Command This field defines the flash command. Issuing any unused command will cause the Program- ming Error flag to be set, and the corresponding interrupt to be requested if the PROGE bit in FCR is set. Table 18-5. Set of commands Command Value Mnemonic No operation 0 NOP Write Page 1 WP Erase Page 2 EP Clear Page Buffer 3 CPB Lock region containing given Page 4 LP Unlock region containing given Page 5 UP Erase All 6 EA Write General-Purpose Fuse Bit 7 WGPB Erase General-Purpose Fuse Bit 8 EGPB Set Security Bit 9 SSB Program GP Fuse Byte 10 PGPFB Erase All GPFuses 11 EAGPF Quick Page Read 12 QPR Write User Page 13 WUP Erase User Page 14 EUP Quick Page Read User Page 15 QPRUP 125 32058K AVR32-01/12
AT32UC3A PAGEN: Page number The PAGEN field is used to address a page or fuse bit for certain operations. In order to sim- plify programming, the PAGEN field is automatically updated every time the page buffer is written to. For every page buffer write, the PAGEN field is updated with the page number of the address being written to. Hardware automatically masks writes to the PAGEN field so that only bits representing valid page numbers can be written, all other bits in PAGEN are always 0. As an example, in a flash with 1024 pages (page 0 - page 1023), bits 15:10 will always be 0. Table 18-6. Semantic of PAGEN field in different commands Command PAGEN description No operation Not used Write Page The number of the page to write Clear Page Buffer Not used Lock region containing given Page Page number whose region should be locked Unlock region containing given Page Page number whose region should be unlocked Erase All Not used Write General-Purpose Fuse Bit GPFUSE # Erase General-Purpose Fuse Bit GPFUSE # Set Security Bit Not used Program GP Fuse Byte WriteData[7:0], ByteAddress[2:0] Erase All GP Fuses Not used Quick Page Read Page number Write User Page Not used Erase User Page Not used Quick Page Read User Page Not used KEY: Write protection key This field should be written with the value 0xA5 to enable the command defined by the bits of the register. If the field is written with a different value, the write is not performed and no action is started. This field always reads as 0. 126 32058K AVR32-01/12
AT32UC3A 18.8.4 Flash Status Register (FSR) Offset: 0x08 31 30 29 28 27 26 25 24 LOCK15 LOCK14 LOCK13 LOCK12 LOCK11 LOCK10 LOCK9 LOCK8 23 22 21 20 19 18 17 16 LOCK7 LOCK6 LOCK5 LOCK4 LOCK3 LOCK2 LOCK1 LOCK0 15 14 13 12 11 10 9 8 FSZ - - - - 7 6 5 4 3 2 1 0 - - QPRR SECURITY PROGE LOCKE - FRDY FRDY: Flash Ready Status 0: The flash controller is busy and the application must wait before running a new command. 1: The flash controller is ready to run a new command. LOCKE: Lock Error Status Automatically cleared when FSR is read. 0: No programming of at least one locked lock region has happened since the last read of FSR. 1: Programming of at least one locked lock region has happened since the last read of FSR. PROGE: Programming Error Status Automatically cleared when FSR is read. 0: No invalid commands and no bad keywords were written in the Flash Command Register FCMD. 1: An invalid command and/or a bad keyword was/were written in the Flash Command Regis- ter FCMD. SECURITY: Security Bit Status 0: The security bit is inactive. 1: The security bit is active. QPRR: Quick Page Read Result 0: The result is zero, i.e. the page is not erased. 1: The result is one, i.e. the page is erased. Automatically cleared when FSR is read. 127 32058K AVR32-01/12
AT32UC3A FSZ: Flash Size The size of the flash. Not all device families will provide all flash sizes indicated in the table. Table 18-7. Flash size FSZ Flash Size 0 32 KByte 1 64 kByte 2 128 kByte 3 256 kByte 4 384 kByte 5 512 kByte 6 768 kByte 7 1024 kByte LOCKx: Lock Region x Lock Status 0: The corresponding lock region is not locked. 1: The corresponding lock region is locked. 128 32058K AVR32-01/12
AT32UC3A 18.8.5 Flash General Purpose Fuse Register High (FGPFRHI) Offset: 0x0C 31 30 29 28 27 26 25 24 GPF63 GPF62 GPF61 GPF60 GPF59 GPF58 GPF57 GPF56 23 22 21 20 19 18 17 16 GPF55 GPF54 GPF53 GPF52 GPF51 GPF50 GPF49 GPF48 15 14 13 12 11 10 9 8 GPF47 GPF46 GPF45 GPF44 GPF43 GPF42 GPF41 GPF40 7 6 5 4 3 2 1 0 GPF39 GPF38 GPF37 GPF36 GPF35 GPF34 GPF33 GPF32 This register is only used in systems with more than 32 GP fuses. GPFxx: General Purpose Fuse xx 0: The fuse has a written/programmed state. 1: The fuse has an erased state. 129 32058K AVR32-01/12
AT32UC3A 18.8.6 Flash General Purpose Fuse Register Low (FGPFRLO) Offset: 0x10 31 30 29 28 27 26 25 24 GPF31 GPF30 GPF29 GPF28 GPF27 GPF26 GPF25 GPF24 23 22 21 20 19 18 17 16 GPF23 GPF22 GPF21 GPF20 GPF19 GPF18 GPF17 GPF16 15 14 13 12 11 10 9 8 GPF15 GPF14 GPF13 GPF12 GPF11 GPF10 GPF09 GPF08 7 6 5 4 3 2 1 0 GPF07 GPF06 GPF05 GPF04 GPF03 GPF02 GPF01 GPF00 GPFxx: General Purpose Fuse xx 0: The fuse has a written/programmed state. 1: The fuse has an erased state. 130 32058K AVR32-01/12
AT32UC3A 131 32058K AVR32-01/12
AT32UC3A 19. HSB Bus Matrix (HMATRIX) Rev: 2.3.0.1 19.1 Features (cid:129) User Interface on peripheral bus (cid:129) Configurable Number of Masters (Up to sixteen) (cid:129) Configurable Number of Slaves (Up to sixteen) (cid:129) One Decoder for Each Master (cid:129) Three Different Memory Mappings for Each Master (Internal and External boot, Remap) (cid:129) One Remap Function for Each Master (cid:129) Programmable Arbitration for Each Slave – Round-Robin – Fixed Priority (cid:129) Programmable Default Master for Each Slave – No Default Master – Last Accessed Default Master – Fixed Default Master (cid:129) One Cycle Latency for the First Access of a Burst (cid:129) Zero Cycle Latency for Default Master (cid:129) One Special Function Register for Each Slave (Not dedicated) 19.2 Description The Bus Matrix implements a multi-layer bus structure, that enables parallel access paths between multiple High Speed Bus (HSB) masters and slaves in a system, thus increasing the overall bandwidth. The Bus Matrix interconnects up to 16 HSB Masters to up to 16 HSB Slaves. The normal latency to connect a master to a slave is one cycle except for the default master of the accessed slave which is connected directly (zero cycle latency). The Bus Matrix provides 16 Special Function Registers (SFR ) that allow the Bus Matrix to support application specific features. 19.3 Memory Mapping The Bus Matrix provides one decoder for every HSB Master Interface. The decoder offers each HSB Master several memory mappings. In fact, depending on the product, each memory area may be assigned to several slaves. Booting at the same address while using different HSB slaves (i.e. external RAM, internal ROM or internal Flash, etc.) becomes possible. The Bus Matrix user interface provides Master Remap Control Register (MRCR) that performs remap action for every master independently. 19.4 Special Bus Granting Mechanism The Bus Matrix provides some speculative bus granting techniques in order to anticipate access requests from some masters. This mechanism reduces latency at first access of a burst or single transfer. This bus granting mechanism sets a different default master for every slave. At the end of the current access, if no other request is pending, the slave remains connected to its associated default master. A slave can be associated with three kinds of default masters: no default master, last access master and fixed default master. 132 32058K AVR32-01/12
AT32UC3A 19.4.1 No Default Master At the end of the current access, if no other request is pending, the slave is disconnected from all masters. No Default Master suits low-power mode. 19.4.2 Last Access Master At the end of the current access, if no other request is pending, the slave remains connected to the last master that performed an access request. 19.4.3 Fixed Default Master At the end of the current access, if no other request is pending, the slave connects to its fixed default master. Unlike last access master, the fixed master does not change unless the user modifies it by a software action (field FIXED_DEFMSTR of the related SCFG). To change from one kind of default master to another, the Bus Matrix user interface provides the Slave Configuration Registers, one for each slave, that set a default master for each slave. The Slave Configuration Register contains two fields: DEFMSTR_TYPE and FIXED_DEFMSTR. The 2-bit DEFMSTR_TYPE field selects the default master type (no default, last access master, fixed default master), whereas the 4-bit FIXED_DEFMSTR field selects a fixed default master pro- vided that DEFMSTR_TYPE is set to fixed default master. Please refer to the Bus Matrix user interface description. 19.5 Arbitration The Bus Matrix provides an arbitration mechanism that reduces latency when conflict cases occur, i.e. when two or more masters try to access the same slave at the same time. One arbiter per HSB slave is provided, thus arbitrating each slave differently. The Bus Matrix provides the user with the possibility of choosing between 2 arbitration types for each slave: 1. Round-Robin Arbitration (default) 2. Fixed Priority Arbitration This choice is made via the field ARBT of the Slave Configuration Registers (SCFG). Each algorithm may be complemented by selecting a default master configuration for each slave. When a re-arbitration must be done, specific conditions apply. See Section 19.5.1 ”Arbitration Rules” on page 133. 19.5.1 Arbitration Rules Each arbiter has the ability to arbitrate between two or more different master requests. In order to avoid burst breaking and also to provide the maximum throughput for slave interfaces, arbitra- tion may only take place during the following cycles: 1. Idle Cycles: When a slave is not connected to any master or is connected to a master which is not currently accessing it. 2. Single Cycles: When a slave is currently doing a single access. 3. End of Burst Cycles: When the current cycle is the last cycle of a burst transfer. For defined length burst, predicted end of burst matches the size of the transfer but is man- aged differently for undefined length burst. See Section “19.5.1.1” on page 134. 133 32058K AVR32-01/12
AT32UC3A 4. Slot Cycle Limit: When the slot cycle counter has reached the limit value indicating that the current master access is too long and must be broken. See Section “19.5.1.2” on page 134. 19.5.1.1 Undefined Length Burst Arbitration In order to avoid long slave handling during undefined length bursts (INCR), the Bus Matrix pro- vides specific logic in order to re-arbitrate before the end of the INCR transfer. A predicted end of burst is used as a defined length burst transfer and can be selected from among the following five possibilities: 1. Infinite: No predicted end of burst is generated and therefore INCR burst transfer will never be broken. 2. One beat bursts: Predicted end of burst is generated at each single transfer inside the INCP transfer. 3. Four beat bursts: Predicted end of burst is generated at the end of each four beat boundary inside INCR transfer. 4. Eight beat bursts: Predicted end of burst is generated at the end of each eight beat boundary inside INCR transfer. 5. Sixteen beat bursts: Predicted end of burst is generated at the end of each sixteen beat boundary inside INCR transfer. This selection can be done through the field ULBT of the Master Configuration Registers (MCFG). 19.5.1.2 Slot Cycle Limit Arbitration The Bus Matrix contains specific logic to break long accesses, such as very long bursts on a very slow slave (e.g., an external low speed memory). At the beginning of the burst access, a counter is loaded with the value previously written in the SLOT_CYCLE field of the related Slave Configuration Register (SCFG) and decreased at each clock cycle. When the counter reaches zero, the arbiter has the ability to re-arbitrate at the end of the current byte, half word or word transfer. 19.5.2 Round-Robin Arbitration This algorithm allows the Bus Matrix arbiters to dispatch the requests from different masters to the same slave in a round-robin manner. If two or more master requests arise at the same time, the master with the lowest number is first serviced, then the others are serviced in a round-robin manner. There are three round-robin algorithms implemented: (cid:129) Round-Robin arbitration without default master (cid:129) Round-Robin arbitration with last default master (cid:129) Round-Robin arbitration with fixed default master 19.5.2.1 Round-Robin Arbitration without Default Master This is the main algorithm used by Bus Matrix arbiters. It allows the Bus Matrix to dispatch requests from different masters to the same slave in a pure round-robin manner. At the end of the current access, if no other request is pending, the slave is disconnected from all masters. This configuration incurs one latency cycle for the first access of a burst. Arbitration without default master can be used for masters that perform significant bursts. 134 32058K AVR32-01/12
AT32UC3A 19.5.2.2 Round-Robin Arbitration with Last Default Master This is a biased round-robin algorithm used by Bus Matrix arbiters. It allows the Bus Matrix to remove the one latency cycle for the last master that accessed the slave. In fact, at the end of the current transfer, if no other master request is pending, the slave remains connected to the last master that performed the access. Other non privileged masters still get one latency cycle if they want to access the same slave. This technique can be used for masters that mainly perform single accesses. 19.5.2.3 Round-Robin Arbitration with Fixed Default Master This is another biased round-robin algorithm. It allows the Bus Matrix arbiters to remove the one latency cycle for the fixed default master per slave. At the end of the current access, the slave remains connected to its fixed default master. Every request attempted by this fixed default mas- ter will not cause any latency whereas other non privileged masters will still get one latency cycle. This technique can be used for masters that mainly perform single accesses. 19.5.3 Fixed Priority Arbitration This algorithm allows the Bus Matrix arbiters to dispatch the requests from different masters to the same slave by using the fixed priority defined by the user. If two or more master requests are active at the same time, the master with the highest priority number is serviced first. If two or more master requests with the same priority are active at the same time, the master with the highest number is serviced first. For each slave, the priority of each master may be defined through the Priority Registers for Slaves (PRAS and PRBS). 19.6 Slave and Master assignation The index number assigned to Bus Matrix slaves and masters are described in Memories chapter. 135 32058K AVR32-01/12
AT32UC3A 19.7 User Interface Table 19-1. Register Mapping Offset Register Name Access Reset Value 0x0000 Master Configuration Register 0 MCFG0 Read/Write 0x00000002 0x0004 Master Configuration Register 1 MCFG1 Read/Write 0x00000002 0x0008 Master Configuration Register 2 MCFG2 Read/Write 0x00000002 0x000C Master Configuration Register 3 MCFG3 Read/Write 0x00000002 0x0010 Master Configuration Register 4 MCFG4 Read/Write 0x00000002 0x0014 Master Configuration Register 5 MCFG5 Read/Write 0x00000002 0x0018 Master Configuration Register 6 MCFG6 Read/Write 0x00000002 0x001C Master Configuration Register 7 MCFG7 Read/Write 0x00000002 0x0020 Master Configuration Register 8 MCFG8 Read/Write 0x00000002 0x0024 Master Configuration Register 9 MCFG9 Read/Write 0x00000002 0x0028 Master Configuration Register 10 MCFG10 Read/Write 0x00000002 0x002C Master Configuration Register 11 MCFG11 Read/Write 0x00000002 0x0030 Master Configuration Register 12 MCFG12 Read/Write 0x00000002 0x0034 Master Configuration Register 13 MCFG13 Read/Write 0x00000002 0x0038 Master Configuration Register 14 MCFG14 Read/Write 0x00000002 0x003C Master Configuration Register 15 MCFG15 Read/Write 0x00000002 0x0040 Slave Configuration Register 0 SCFG0 Read/Write 0x00000010 0x0044 Slave Configuration Register 1 SCFG1 Read/Write 0x00000010 0x0048 Slave Configuration Register 2 SCFG2 Read/Write 0x00000010 0x004C Slave Configuration Register 3 SCFG3 Read/Write 0x00000010 0x0050 Slave Configuration Register 4 SCFG4 Read/Write 0x00000010 0x0054 Slave Configuration Register 5 SCFG5 Read/Write 0x00000010 0x0058 Slave Configuration Register 6 SCFG6 Read/Write 0x00000010 0x005C Slave Configuration Register 7 SCFG7 Read/Write 0x00000010 0x0060 Slave Configuration Register 8 SCFG8 Read/Write 0x00000010 0x0064 Slave Configuration Register 9 SCFG9 Read/Write 0x00000010 0x0068 Slave Configuration Register 10 SCFG10 Read/Write 0x00000010 0x006C Slave Configuration Register 11 SCFG11 Read/Write 0x00000010 0x0070 Slave Configuration Register 12 SCFG12 Read/Write 0x00000010 0x0074 Slave Configuration Register 13 SCFG13 Read/Write 0x00000010 0x0078 Slave Configuration Register 14 SCFG14 Read/Write 0x00000010 0x007C Slave Configuration Register 15 SCFG15 Read/Write 0x00000010 0x0080 Priority Register A for Slave 0 PRAS0 Read/Write 0x00000000 0x0084 Priority Register B for Slave 0 PRBS0 Read/Write 0x00000000 0x0088 Priority Register A for Slave 1 PRAS1 Read/Write 0x00000000 136 32058K AVR32-01/12
AT32UC3A Table 19-1. Register Mapping (Continued) Offset Register Name Access Reset Value 0x008C Priority Register B for Slave 1 PRBS1 Read/Write 0x00000000 0x0090 Priority Register A for Slave 2 PRAS2 Read/Write 0x00000000 0x0094 Priority Register B for Slave 2 PRBS2 Read/Write 0x00000000 0x0098 Priority Register A for Slave 3 PRAS3 Read/Write 0x00000000 0x009C Priority Register B for Slave 3 PRBS3 Read/Write 0x00000000 0x00A0 Priority Register A for Slave 4 PRAS4 Read/Write 0x00000000 0x00A4 Priority Register B for Slave 4 PRBS4 Read/Write 0x00000000 0x00A8 Priority Register A for Slave 5 PRAS5 Read/Write 0x00000000 0x00AC Priority Register B for Slave 5 PRBS5 Read/Write 0x00000000 0x00B0 Priority Register A for Slave 6 PRAS6 Read/Write 0x00000000 0x00B4 Priority Register B for Slave 6 PRBS6 Read/Write 0x00000000 0x00B8 Priority Register A for Slave 7 PRAS7 Read/Write 0x00000000 0x00BC Priority Register B for Slave 7 PRBS7 Read/Write 0x00000000 0x00C0 Priority Register A for Slave 8 PRAS8 Read/Write 0x00000000 0x00C4 Priority Register B for Slave 8 PRBS8 Read/Write 0x00000000 0x00C8 Priority Register A for Slave 9 PRAS9 Read/Write 0x00000000 0x00CC Priority Register B for Slave 9 PRBS9 Read/Write 0x00000000 0x00D0 Priority Register A for Slave 10 PRAS10 Read/Write 0x00000000 0x00D4 Priority Register B for Slave 10 PRBS10 Read/Write 0x00000000 0x00D8 Priority Register A for Slave 11 PRAS11 Read/Write 0x00000000 0x00DC Priority Register B for Slave 11 PRBS11 Read/Write 0x00000000 0x00E0 Priority Register A for Slave 12 PRAS12 Read/Write 0x00000000 0x00E4 Priority Register B for Slave 12 PRBS12 Read/Write 0x00000000 0x00E8 Priority Register A for Slave 13 PRAS13 Read/Write 0x00000000 0x00EC Priority Register B for Slave 13 PRBS13 Read/Write 0x00000000 0x00F0 Priority Register A for Slave 14 PRAS14 Read/Write 0x00000000 0x00F4 Priority Register B for Slave 14 PRBS14 Read/Write 0x00000000 0x00F8 Priority Register A for Slave 15 PRAS15 Read/Write 0x00000000 0x00FC Priority Register B for Slave 15 PRBS15 Read/Write 0x00000000 0x0100 Master Remap Control Register MRCR Read/Write 0x00000000 0x0104 - 0x010C Reserved – – – 0x0110 Special Function Register 0 SFR0 Read/Write – 0x0114 Special Function Register 1 SFR1 Read/Write – 0x0118 Special Function Register 2 SFR2 Read/Write – 0x011C Special Function Register 3 SFR3 Read/Write – 0x0120 Special Function Register 4 SFR4 Read/Write – 137 32058K AVR32-01/12
AT32UC3A Table 19-1. Register Mapping (Continued) Offset Register Name Access Reset Value 0x0124 Special Function Register 5 SFR5 Read/Write – 0x0128 Special Function Register 6 SFR6 Read/Write – 0x012C Special Function Register 7 SFR7 Read/Write – 0x0130 Special Function Register 8 SFR8 Read/Write – 0x0134 Special Function Register 9 SFR9 Read/Write – 0x0138 Special Function Register 10 SFR10 Read/Write – 0x013C Special Function Register 11 SFR11 Read/Write – 0x0140 Special Function Register 12 SFR12 Read/Write – 0x0144 Special Function Register 13 SFR13 Read/Write – 0x0148 Special Function Register 14 SFR14 Read/Write – 0x014C Special Function Register 15 SFR15 Read/Write – 0x0150 - 0x01F8 Reserved – – – 138 32058K AVR32-01/12
AT32UC3A 19.7.1 Bus Matrix Master Configuration Registers Register Name: MCFG0...MCFG15 Access Type: Read/Write 31 30 29 28 27 26 25 24 – – – – – – – – 23 22 21 20 19 18 17 16 – – – – – – – – 15 14 13 12 11 10 9 8 – – – – – – – – 7 6 5 4 3 2 1 0 – – – – – ULBT (cid:129) ULBT: Undefined Length Burst Type 0: Infinite Length Burst No predicted end of burst is generated and therefore INCR bursts coming from this master cannot be broken. 1: Single Access The undefined length burst is treated as a succession of single accesses, allowing re-arbitration at each beat of the INCR burst. 2: Four Beat Burst The undefined length burst is split into a four-beat burst, allowing re-arbitration at each four-beat burst end. 3: Eight Beat Burst The undefined length burst is split into an eight-beat burst, allowing re-arbitration at each eight-beat burst end. 4: Sixteen Beat Burst The undefined length burst is split into a sixteen-beat burst, allowing re-arbitration at each sixteen-beat burst end. 139 32058K AVR32-01/12
AT32UC3A 19.7.2 Bus Matrix Slave Configuration Registers Register Name: SCFG0...SCFG15 Access Type: Read/Write 31 30 29 28 27 26 25 24 – – – – – – – ARBT 23 22 21 20 19 18 17 16 – – FIXED_DEFMSTR DEFMSTR_TYPE 15 14 13 12 11 10 9 8 – – – – – – – – 7 6 5 4 3 2 1 0 SLOT_CYCLE (cid:129) SLOT_CYCLE: Maximum Number of Allowed Cycles for a Burst When the SLOT_CYCLE limit is reached for a burst, it may be broken by another master trying to access this slave. This limit has been placed to avoid locking a very slow slave when very long bursts are used. This limit must not be very small. Unreasonably small values break every burst and the Bus Matrix arbitrates without per- forming any data transfer. 16 cycles is a reasonable value for SLOT_CYCLE. (cid:129) DEFMSTR_TYPE: Default Master Type 0: No Default Master At the end of the current slave access, if no other master request is pending, the slave is disconnected from all masters. This results in a one cycle latency for the first access of a burst transfer or for a single access. 1: Last Default Master At the end of the current slave access, if no other master request is pending, the slave stays connected to the last master having accessed it. This results in not having one cycle latency when the last master tries to access the slave again. 2: Fixed Default Master At the end of the current slave access, if no other master request is pending, the slave connects to the fixed master the number that has been written in the FIXED_DEFMSTR field. This results in not having one cycle latency when the fixed master tries to access the slave again. (cid:129) FIXED_DEFMSTR: Fixed Default Master This is the number of the Default Master for this slave. Only used if DEFMSTR_TYPE is 2. Specifying the number of a mas- ter which is not connected to the selected slave is equivalent to setting DEFMSTR_TYPE to 0. (cid:129) ARBT: Arbitration Type 0:Round-Robin Arbitration 1:Fixed Priority Arbitration 140 32058K AVR32-01/12
AT32UC3A 19.7.3 Bus Matrix Priority Registers A For Slaves Register Name: PRAS0...PRAS15 Access Type: Read/Write 31 30 29 28 27 26 25 24 M7PR M6PR 23 22 21 20 19 18 17 16 M5PR M4PR 15 14 13 12 11 10 9 8 M3PR M2PR 7 6 5 4 3 2 1 0 M1PR M0PR (cid:129) MxPR: Master x Priority Fixed priority of Master x for accessing the selected slave. The higher the number, the higher the priority. 141 32058K AVR32-01/12
AT32UC3A 19.7.4 Bus Matrix Priority Registers B For Slaves Register Name: PRBS0...PRBS15 Access Type: Read/Write 31 30 29 28 27 26 25 24 M15PR M14PR 23 22 21 20 19 18 17 16 M13PR M12PR 15 14 13 12 11 10 9 8 M11PR M10PR 7 6 5 4 3 2 1 0 M9PR M8PR (cid:129) MxPR: Master x Priority Fixed priority of Master x for accessing the selected slave. The higher the number, the higher the priority. 142 32058K AVR32-01/12
AT32UC3A 19.7.5 Bus Matrix Master Remap Control Register Register Name: MRCR Access Type: Read/Write Reset: 0x0000_0000 31 30 29 28 27 26 25 24 – – – – – – – – 23 22 21 20 19 18 17 16 – – – – – – – – 15 14 13 12 11 10 9 8 RCB15 RCB14 RCB13 RCB12 RCB11 RCB10 RCB9 RCB8 7 6 5 4 3 2 1 0 RCB7 RCB6 RCB5 RCB4 RCB3 RCB2 RCB1 RCB0 (cid:129) RCB: Remap Command Bit for Master x 0:Disable remapped address decoding for the selected Master 1:Enable remapped address decoding for the selected Master 143 32058K AVR32-01/12
AT32UC3A 19.7.6 Bus Matrix Special Function Registers Register Name: SFR0...SFR15 Access Type: Read/Write Reset: 31 30 29 28 27 26 25 24 SFR 23 22 21 20 19 18 17 16 SFR 15 14 13 12 11 10 9 8 SFR 7 6 5 4 3 2 1 0 SFR (cid:129) SFR: Special Function Register Fields The bitfields of these registers are described in the Peripherals chapter. 144 32058K AVR32-01/12
AT32UC3A 20. External Bus Interface (EBI) Rev: 1.0.0.1 20.1 Features (cid:129) Present only on AT32UC3A0512 and AT32UC3A0256 (cid:129) Optimized for Application Memory Space support (cid:129) Integrates Two External Memory Controllers: – Static Memory Controller – SDRAM Controller (cid:129) Optimized External Bus: –16-bit Data Bus – 24-bit Address Bus, Up to 16-Mbytes Addressable – Optimized pin multiplexing to reduce latencies on External Memories (cid:129) 4 SRAM Chip Selects, 1 SDRAM Chip Selects: – Static Memory Controller on NCS0 – SDRAM Controller or Static Memory Controller on NCS1 – Static Memory Controller on NCS2 – Static Memory Controller on NCS3 20.2 Description The External Bus Interface (EBI) is designed to ensure the successful data transfer between several external devices and the AT32UC3A device. The Static Memory and SDRAM Control- lers are all featured external Memory Controllers on the EBI. These external Memory Controllers are capable of handling several types of external memory and peripheral devices, such as SRAM, PROM, EPROM, EEPROM, Flash, and SDRAM. The EBI handles data transfers with up to five external devices, each assigned to five address spaces defined by the embedded Memory Controller. Data transfers are performed through a 16-bit data bus, an address bus of up to 24 bits, up to four chip select lines (NCS[3:0]) and sev- eral control pins that are generally multiplexed between the diff erent external Memory Controllers. 145 32058K AVR32-01/12
AT32UC3A 20.3 Block Diagram 20.3.1 External Bus Interface Figure 20-1 shows the organization of the External Bus Interface. Figure 20-1. Organization of the External Bus Interface 146 32058K AVR32-01/12
AT32UC3A 20.4 I/O Lines Description Table 20-1. EBI I/O Lines Description Name Function Type Active Level EBI D0 - D15 Data Bus I/O A0 - A23 Address Bus Output NWAIT External Wait Signal Input Low SMC NCS0 - NCS3 Chip Select Lines Output Low NWR0 - NWR3 Write Signals Output Low NOE Output Enable Output Low NRD Read Signal Output Low NWE Write Enable Output Low NBS0 - NBS3 Byte Mask Signals Output Low SDRAM Controller SDCK SDRAM Clock Output SDCKE SDRAM Clock Enable Output High BA0 - BA1 Bank Select Output SDWE SDRAM Write Enable Output Low RAS - CAS Row and Column Signal Output Low NWR0 - NWR3 Write Signals Output Low NBS0 - NBS3 Byte Mask Signals Output Low SDA10 SDRAM Address 10 Line Output Depending on the Memory Controller in use, all signals are not connected directly through the Mux Logic. Table 20-2 on page 147 details the connections between the two Memory Controllers and the EBI pins. Table 20-2. EBI Pins and Memory Controllers I/O Lines Connections EBI Pins SDRAMC I/O Lines SMC I/O Lines NWR1/NBS1 NBS1 NWR1/NUB A0/NBS0 Not Supported SMC_A0/NLB A1/NBS2/NWR2 Not Supported SMC_A1 A[11:2] SDRAMC_A[9:0] SMC_A[11:2] SDA10 SDRAMC_A10 Not Supported A12 Not Supported SMC_A12 A[14:13] SDRAMC_A[12:11] SMC_A[14:13] 147 32058K AVR32-01/12
AT32UC3A Table 20-2. EBI Pins and Memory Controllers I/O Lines Connections EBI Pins SDRAMC I/O Lines SMC I/O Lines A[22:15] Not Supported SMC_A[22:15] A[23] Not Supported SMC_A[23] D[15:0] D[15:0] D[15:0] 20.5 Application Example 20.5.1 Hardware Interface Table 20-3 on page 148 details the connections to be applied between the EBI pins and the external devices for each Memory Controller. Table 20-3. EBI Pins and External Static Devices Connections Signals Pins of the Interfaced Device 2 x 8-bit 8-bit Static 16-bit Static Static Device Device Devices Controller SMC D0 - D7 D0 - D7 D0 - D7 D0 - D7 D8 - D15 – D8 - D15 D8 - D15 A0/NBS0 A0 – NLB A1/NWR2/NBS2 A1 A0 A0 A2 - A22 A[2:22] A[1:21] A[1:21] A23 A[23] A[22] A[22] NCS0 CS CS CS NCS1/SDCS0 CS CS CS NCS2 CS CS CS NCS3 CS CS CS NRD/NOE OE OE OE NWR0/NWE WE WE(1) WE NWR1/NBS1 – WE(1) NUB NWR3/NBS3 – – – Notes: 1. NWR1 enables upper byte writes. NWR0 enables lower byte writes. 2. NWRx enables corresponding byte x writes. (x = 0,1,2 or 3) 3. NBS0 and NBS1 enable respectively lower and upper bytes of the lower 16-bit word. 4. NBS2 and NBS3 enable respectively lower and upper bytes of the upper 16-bit word. 5. BEx: Byte x Enable (x = 0,1,2 or 3) 148 32058K AVR32-01/12
AT32UC3A Table 20-4. EBI Pins and External SDRAM Devices Connections Pins of the Interfaced Device Signals SDRAM Controller SDRAMC D0 - D15 D0 - D15 A0/NBS0 DQM0 A1/NWR2/NBS2 DQM2 A2 - A10 A[0:8] A11 A9 SDA10 A10 A12 – A13 - A14 A[11:12] A15 – A16/BA0 BA0 A17/BA1 BA1 A18 - A23 – NCS0 – NCS1/SDCS0 CS[0] NCS2 – NCS2 – NCS3 – NRD/NOE – NWR0/NWE – NWR1/NBS1 DQM1 NWR3/NBS3 DQM3 SDCK CLK SDCKE CKE RAS RAS CAS CAS SDWE WE NWAIT – 149 32058K AVR32-01/12
AT32UC3A 20.5.2 Connection Examples Figure 20-2 shows an example of connections between the EBI and external devices. Figure 20-2. EBI Connections to Memory Devices EBI D0-D15 RAS 2M x 8 2M x 8 CAS SDCK SDRAM SDRAM SDCKE D0-D7 D0-D7 D8-D15 D0-D7 SDWE A0/NBS0 CS CS A1/NNNNWWWWNRRRRR2130D////NNN/NNBBBWOSSSEE231 SDWE RCCCWKAALEKSES A0-A9, BBAAAA111001 SAAA11D267-AA//BB110AA1 10, A13 SDWE RCCCWKAALEKSES A0-A9, BBAAAA111001 ASAA11D267-AA//BB110AA1 10, A13 NBS0 DQM NBS1 DQM SDA10 A2-A15 A16/BA0 A17/BA1 A18-A23 NCS0 NCS1/SDCS NCS2 NCS3 128K x 8 128K x 8 SRAM SRAM D0-D7 D0-D7 A0-A16 A1-A17 D8-D15 D0-D7 A0-A16 A1-A17 CS CS NRD/NOE OWEE NRD/NOE OWEE A0/NWR0/NBS0 NWR1/NBS1 150 32058K AVR32-01/12
AT32UC3A 20.6 Product Dependencies 20.6.1 I/O Lines The pins used for interfacing the External Bus Interface may be multiplexed with the GPIO lines. The programmer must first program the GPIO controller to assign the External Bus Interface pins to their peripheral function. If I/O lines of the External Bus Interface are not used by the application, they can be used for other purposes by the GPIO Controller. 20.6.2 Power Management The EBI HSB clock and SDRAMC, SMC and ECC PB clocks are generated by the Power Man- ager. Before using the EBI, the programmer must ensure that these clocks are enabled in the Power Manager. To prevent bus errors EBI operation must be terminated before entering sleep mode 20.6.3 Interrupt The EBI interface has an interrupt line connected to the Interrupt Controller. Handling the EBI interrupt requires programming the interrupt controller before configuring the EBI. 20.7 Functional Description The EBI transfers data between the internal HSB Bus (handled by the HMatrix) and the external memories or peripheral devices. It controls the waveforms and the parameters of the external address, data and control busses and is composed of the following elements: (cid:129) The Static Memory Controller (SMC) (cid:129) The SDRAM Controller (SDRAMC) (cid:129) A chip select assignment feature that assigns an HSB address space to the external devices (cid:129) A multiplex controller circuit that shares the pins between the different Memory Controllers 20.7.1 Bus Multiplexing The EBI offers a complete set of control signals that share the 16-bit data lines, the address lines of up to 24 bits and the control signals through a multiplex logic operating in function of the memory area requests. Multiplexing is specifically organized in order to guarantee the maintenance of the address and output control lines at a stable state while no external access is being performed. Multiplexing is also designed to respect the data float times defined in the Memory Controllers. Furthermore, refresh cycles of the SDRAM are executed independently by the SDRAM Controller without delaying the other external Memory Controller accesses. 20.7.2 Pull-up Control A specific HMATRIX_SFR register in the Matrix User Interface permit enabling of on-chip pull-up resistors on the data bus lines not multiplexed with the GPIO Controller lines. For details on this register, refer to the Peripherals Section. The pull-up resistors are enabled after reset. Setting the EBI_DBPUC bit disables the pull-up resistors on lines not muxed with GPIO. Enabling the pull-up resistor on lines multiplexed with GPIO lines can be performed by programming the appropriate GPIO controller. 151 32058K AVR32-01/12
AT32UC3A 20.7.3 Static Memory Controller For information on the Static Memory Controller, refer to the Static Memory Controller Section. 20.7.4 SDRAM Controller For information on the SDRAM Controller, refer to the SDRAM Section. 152 32058K AVR32-01/12
AT32UC3A 21. Peripheral DMA Controller (PDCA) rev: 1.0.0.0 21.1 Features (cid:129) Generates Transfers to/from Peripherals such as USART, SSC and SPI (cid:129) Two address pointers/counters per channel allowing double buffering 21.2 Overview The Peripheral DMA controller (PDCA) transfers data between on-chip peripheral modules such as USART, SPI, SSC and on- and off-chip memories. Using the PDCA avoids CPU intervention for data transfers, improving the performance of the microcontroller. The PDCA can transfer data from memory to a peripheral or from a peripheral to memory. The PDCA consists of a number of DMA channels. Each channel has: (cid:129) A 32-bit memory pointer (cid:129) A 16-bit transfer counter (cid:129) A 32-bit memory pointer reload value (cid:129) A 16-bit transfer counter reload value The PDCA communicates with the peripheral modules over a number of handshake interfaces. The peripheral signals to the PDCA when it is ready to receive or transmit data. The PDCA acknowledges the request when the transmission has started. The number of handshake-interfaces may be higher than the number of DMA channels. If this is the case, the DMA channel must be programmed to use the desired interface. When a transmit buffer is empty or a receive buffer is full, an interrupt request can be signalled. 153 32058K AVR32-01/12
AT32UC3A 21.3 Block Diagram Peripheral 0 HSB to PB Bridge HSB Peripheral 1 s u B al Bus Matrix er h p eri HSB P Peripheral 2 Peripheral DMA Controller (PDCA) Interrupt IRQ Peripheral Controller (n-1) Handshake interfaces 21.4 Functional Description 21.4.1 Configuration Each channel in the PDCA has a set of configuration registers. Among these are the Memory Address Register (MAR), the Peripheral Select Register (PSR) and the Transfer Counter Regis- ter (TCR). The 32-bit Memory Address Register must be programmed with the start address of the memory buffer. The register will be automatically updated after each transfer to point to the next location in memory. The Peripheral Select Register must be programmed to select the desired peripheral/handshake interface. The Transfer Counter Register determines the number of data items to be transferred. The counter will be decreased by one for each data item that has been transferred. Both the Memory Address Register and the Transfer Counter Register can be read at any time to check the progress of the transfer. Each channel has also reload registers for the Memory Address Register and the Transfer Counter Register. When the TCR reaches zero, the values in the reload registers are loaded into MAR and TCR. In this way, the PDCA can operate on two buffers for each channel. 21.4.2 Memory Pointer Each channel has a 32-bit Memory Pointer Register (MAR). This register holds the memory address for the next transfer to be performed. The register is automatically updated after each 154 32058K AVR32-01/12
AT32UC3A transfer. The address will be increased by either 1, 2 or 4 depending on the size of the DMA transfer (Byte, Half-Word or Word). The Memory Address Register can be read at any time dur- ing transfer. 21.4.3 Transfer Counter Each channel has a 16-bit Transfer Counter Register (TCR). This register must be programmed with the number of transferred to be performed. TCR should contain the number of data items to be transferred independently of the transfer size. The Transfer Counter Register can be read at any time during transfer to see the number of remaining transfers. 21.4.4 Reload Registers Both the Memory Address Register and the Transfer Counter Register have a reload register, respectively Memory Address Reload Register (MARR) and Transfer Counter Reload Register (TCRR). These registers provide the possibility for the PDCA to work on two memory buffers for each channel. When one buffer has completed, MAR and TCR will be reloaded with the values in MARR and TCRR. The reload logic is always enabled and will trigger if the TCR reaches zero while TCRR holds a non-zero value. 21.4.5 Peripheral Selection The Peripheral Select Register decides which peripheral should be connected to the PDCA channel. Configuring PSR will both select the direction of the transfer (memory to peripheral or peripheral to memory), which handshake interface to use, and the address of the peripheral holding register. 21.4.6 Transfer Size The transfer size can be set individually for each channel to be either Byte, Half-Word or Word (8-bit, 16-bit or 32-bit respectively). Transfer size is set by programming the SIZE bit-field in the Mode Register (MR). 21.4.7 Enabling and Disabling Each DMA channel is enabled by writing ‘1’ to the Transfer Enable bit (TEN) in the Control Reg- ister (CR) and disabled by writing ‘1’ to the Transfer Disable bit (TDIS). The current status can be read from the Status Register (SR). 21.4.8 Interrupts Interrupts can be enabled by writing to the Interrupt Enable Register (IER) and disabled by writ- ing to Interrupt Disable Register (IDR). The Interrupt Mask Register (IMR) can be read to see whether an interrupt is enabled or not. The current status of an interrupt source can be read through the Interrupt Status Register (ISR). The PDCA has three interrupt sources: (cid:129) Reload Counter Zero - The Transfer Counter Reload Register is zero. (cid:129) Transfer Finished - Both the Transfer Counter Register and Transfer Counter Reload Register are zero. (cid:129) Transfer Error - An error has occurred in accessing memory. 155 32058K AVR32-01/12
AT32UC3A 21.4.9 Priority If more then one PDCA channel is requesting transfer at a given time, the PDCA channels are prioritized by their channel number. Channels with lower numbers have priority over channels with higher numbers, giving channel 0 the highest priority. 21.4.10 Error Handling If the memory address is set to point to an invalid location in memory, an error will occur when the PDCA tries to perform a transfer. When an error occurs, the Transfer Error flag (TERR) in the Interrupt Status Register will be set and the DMA channel that caused the error will be stopped. In order to restart the channel, the user must program the Memory Address Register to a valid address and then write the Error Clear bit (ECLR) in the Control Register (CR) to ‘1’. An interrupt can optionally be triggered on errors by writing the TERR-bit in the Interrupt Enable Register (IER) to ‘1’. 21.5 User Interface 21.5.1 Memory Map Overview Table 21-1. Register Map Overview Address Range Contents 0x0000 - 0x003F DMA channel 0 configuration registers 0x0040 - 0x007F DMA channel 1 configuration registers 0x0080 - 0x00BF DMA channel 2 configuration registers 0x00C0 - 0x00FF DMA channel 3 configuration registers 0x0100 - 0x013F DMA channel 4 configuration registers - - - DMA channel n-1 configuration registers Note: The number of channels is implementation specific. See part documentation for details. 21.5.2 Channel Memory Map Offset Register Register Name Access Reset 0x00 Memory Address Register MAR Read/Write 0x00000000 0x04 Peripheral Select Register PSR Read/Write * 0x08 Transfer Counter Register TCR Read/Write 0x00000000 0x0C Memory Address Reload Register MARR Read/Write 0x00000000 0x10 Transfer Counter Reload Register TCRR Read/Write 0x00000000 0x14 Control Register CR Write-only - 0x18 Mode Register MR Read/Write 0x00000000 0x1C Status Register SR Read-only 0x00000000 0x20 Interrupt Enable Register IER Write-only - 156 32058K AVR32-01/12
AT32UC3A Offset Register Register Name Access Reset 0x24 Interrupt Disable Register IDR Write-only - 0x28 Interrupt Mask Register IMR Read-only 0x00000000 0x2C Interrupt Status Register ISR Read-only 0x00000000 157 32058K AVR32-01/12
AT32UC3A 21.5.3 PDCA Memory Address Register Name: MAR Access Type: Read/Write 31 30 29 28 27 26 25 24 MADDR 23 22 21 20 19 18 17 16 MADDR 15 14 13 12 11 10 9 8 MADDR 7 6 5 4 3 2 1 0 MADDR (cid:129) MADDR: Memory Address Address of memory buffer. MADDR should be programmed to point to the start of the memory buffer when configuring the PDCA. During transfer, MADDR will point to the next memory location to be read/written. 158 32058K AVR32-01/12
AT32UC3A 21.5.4 PDCA Peripheral Select Register Name: PSR Access Type: Read/Write 31 30 29 28 27 26 25 24 - - - - - - - - 23 22 21 20 19 18 17 16 - - - - - - - - 15 14 13 12 11 10 9 8 - - - - - - - - 7 6 5 4 3 2 1 0 PID (cid:129) PID: Peripheral Identifier The Peripheral Identifier selects which peripheral should be connected to the DMA channel. Programming PID will select both which handshake interface to use, the direction of the transfer and also the address of the Receive/Transfer Holding Register for the peripheral. The PID values for the different peripheral modules are implementation specific. See the part specific documentation for details. The width of the PID bitfield is implementation specific and dependent on the number of peripheral modules in the microcontroller. 159 32058K AVR32-01/12
AT32UC3A 21.5.5PDCA Transfer Counter Register Name: TCR Access Type: Read/Write 31 30 29 28 27 26 25 24 - - - - - - - - 23 22 21 20 19 18 17 16 - - - - - - - - 15 14 13 12 11 10 9 8 TCV 7 6 5 4 3 2 1 0 TCV (cid:129) TCV: Transfer Counter Value Number of data items to be transferred by PDCA. TCV must be programmed with the total number of transfers to be made. During transfer, TCV contains the number of remaining transfers to be done. 160 32058K AVR32-01/12
AT32UC3A 21.5.6 PDCA Memory Address Reload Register Name: MARR Access Type: Read/Write 31 30 29 28 27 26 25 24 MARV 23 22 21 20 19 18 17 16 MARV 15 14 13 12 11 10 9 8 MARV 7 6 5 4 3 2 1 0 MARV (cid:129) MARV: Memory Address Reload Value Reload Value for the Memory Address Register (MAR). This value will be loaded into MAR when TCR reaches zero if the TCRR has a non-zero value. 161 32058K AVR32-01/12
AT32UC3A 21.5.7 PDCA Transfer Counter Reload Register Name: TCRR Access Type: Read/Write 31 30 29 28 27 26 25 24 - - - - - - - - 23 22 21 20 19 18 17 16 - - - - - - - - 15 14 13 12 11 10 9 8 TCRV 7 6 5 4 3 2 1 0 TCRV (cid:129) TCRV: Transfer Counter Reload Value Reload value for the Transfer Counter Register (TCR). When TCR reaches zero, it will be reloaded with TCRV if TCRV has a positive value. If TCRV is zero, no more transfers will be performed for the channel. When TCR is realoaded, the Transfer Counter Reload Register is cleared. 162 32058K AVR32-01/12
AT32UC3A 21.5.8 PDCA Control Register Name: CR Access Type: Write-only 31 30 29 28 27 26 25 24 - - - - - - - - 23 22 21 20 19 18 17 16 - - - - - - - - 15 14 13 12 11 10 9 8 - - - - - - - ECLR 7 6 5 4 3 2 1 0 - - - - - - TDIS TEN (cid:129) ECLR: Error Clear 0 = No Effect. 1 = Clear Transfer Error (TERR) flag in the Status Register (SR). Clearing the Transfer Error flag will allow the channel to transmit data. The memory address must first be set to point to a valid location. (cid:129) TEN: Transfer Enable 0 = No Effect. 1 = Enable transfer for DMA channel. (cid:129) TDIS: Transfer Disable 0 = No Effect. 1 = Disable transfer for DMA channel. 163 32058K AVR32-01/12
AT32UC3A 21.5.9 PDCA Mode Register Name: MR Access Type: Read/Write 31 30 29 28 27 26 25 24 - - - - - - - - 23 22 21 20 19 18 17 16 - - - - - - - - 15 14 13 12 11 10 9 8 - - - - - - - - 7 6 5 4 3 2 1 0 - - - - - - SIZE (cid:129) SIZE: Size of transfer SIZE Size of Transfer 0 0 Byte 0 1 Half-Word 1 0 Word 1 1 Reserved 164 32058K AVR32-01/12
AT32UC3A 21.5.10 PDCA Status Register Name: SR Access Type: Read 31 30 29 28 27 26 25 24 - - - - - - - - 23 22 21 20 19 18 17 16 - - - - - - - - 15 14 13 12 11 10 9 8 - - - - - - - - 7 6 5 4 3 2 1 0 - - - - - - - TEN (cid:129) TEN: Transfer Enabled 0 = Transfer is disabled for the DMA channel 1 = Transfer is enabled for the DMA channel. 165 32058K AVR32-01/12
AT32UC3A 21.5.11 PDCA Interrupt Enable Register Name: IER Access Type: Write-only 31 30 29 28 27 26 25 24 - - - - - - - - 23 22 21 20 19 18 17 16 - - - - - - - - 15 14 13 12 11 10 9 8 - - - - - - - - 7 6 5 4 3 2 1 0 - - - - - TERR TRC RCZ (cid:129) TERR: Transfer Error 0 = No effect. 1 = Enable Transfer Error interrupt. (cid:129) TRC: Transfer Complete 0 = No effect. 1 = Enable Transfer Complete interrupt. (cid:129) RCZ: Reload Counter Zero 0 = No effect. 1 = Enable Reload Counter Zero interrupt. 166 32058K AVR32-01/12
AT32UC3A 21.5.12 PDCA Interrupt Disable Register Name: IDR Access Type: Write-only 31 30 29 28 27 26 25 24 - - - - - - - - 23 22 21 20 19 18 17 16 - - - - - - - - 15 14 13 12 11 10 9 8 - - - - - - - - 7 6 5 4 3 2 1 0 - - - - - TERR TRC RCZ (cid:129) TERR: Transfer Error 0 = No effect. 1 = Disable Transfer Error interrupt. (cid:129) TRC: Transfer Complete 0 = No effect. 1 = Disable Transfer Complete interrupt. (cid:129) RCZ: Reload Counter Zero 0 = No effect. 1 = Disable Reload Counter Zero interrupt. 167 32058K AVR32-01/12
AT32UC3A 21.5.13 PDCA Interrupt Mask Register Name: IMR Access Type: Read-only 31 30 29 28 27 26 25 24 - - - - - - - - 23 22 21 20 19 18 17 16 - - - - - - - - 15 14 13 12 11 10 9 8 - - - - - - - - 7 6 5 4 3 2 1 0 - - - - - TERR TRC RCZ (cid:129) TERR: Transfer Error 0 = Transfer Error interrupt is disabled. 1 = Transfer Error interrupt is enabled. (cid:129) TRC: Transfer Complete 0 = Transfer Complete interrupt is disabled. 1 = Transfer Complete interrupt is enabled. (cid:129) RCZ: Reload Counter Zero 0 = Reload Counter Zero interrupt is disabled. 1 = Reload Counter Zero interrupt is enabled. 168 32058K AVR32-01/12
AT32UC3A 21.5.14 PDCA Interrupt Status Register Name: ISR Access Type: Read-only 31 30 29 28 27 26 25 24 - - - - - - - - 23 22 21 20 19 18 17 16 - - - - - - - - 15 14 13 12 11 10 9 8 - - - - - - - - 7 6 5 4 3 2 1 0 - - - - - TERR TRC RCZ (cid:129) TERR: Transfer Error 0 = No transfer errors have occurred. 1 = A transfer error has occurred. (cid:129) TRC: Transfer Complete 0 = The Transfer Counter Register (TCR) and/or the Transfer Counter Reload Register (TCRR) hold a non-zero value. 1 = Both the Transfer Counter Register (TCR) and the Transfer Counter Reload Register (TCRR) are zero. (cid:129) RCZ: Reload Counter Zero 0 = The Transfer Counter Reload Register (TCRR) holds a non-zero value. 1 = The Transfer Counter Reload Register (TCRR) is zero. 169 32058K AVR32-01/12
AT32UC3A 22. General-Purpose Input/Output Controller (GPIO) Rev. 1.1.0.2 22.1 Features Each I/O line of the GPIO features: (cid:129) Configurable pin-change, rising-edge or falling-edge interrupt on any I/O line. (cid:129) A glitch filter providing rejection of pulses shorter than one clock cycle. (cid:129) Open Drain mode enabling sharing of an I/O line between the MCU and external components. (cid:129) Input visibility and output control. (cid:129) Multiplexing of up to four peripheral functions per I/O line. (cid:129) Programmable internal pull-up resistor. 22.2 Overview The General Purpose Input/Output manages the I/O pins of the microcontroller. Each I/O line may be dedicated as a general-purpose I/O or be assigned to a function of an embedded periph- eral. This assures effective optimization of the pins of a product. Table 22-1. Overview of the GPIO system PBA Configuration Interface GPIO Interrupt Request Interrupt Controller PIN PIN General Purpose Input/Output - GPIO PIN MCU I/O Pins GPIO Clock PIN Power Manager PIN Embedded Pin Control Peripheral Signals 22.3 Product dependencies 22.3.1 Module Configuration Most of the features of the GPIO are configurable for each product. The programmer must refer to the Peripherals Section for these settings. Product specific settings includes: 170 32058K AVR32-01/12
AT32UC3A (cid:129) Number of I/O pins. (cid:129) Functions implemented on each pin. (cid:129) Peripheral function(s) multiplexed on each I/O pin. (cid:129) Reset state of registers. 22.3.2 Interrupt Lines The GPIO interrupt line s are connected to the interrupt controller. Using the GPIO interrupt requires the interrupt controller to be programmed first. 22.3.3 Power and Clock Management The clock for the GPIO is controlled by the power manager. The programmer must ensure that the GPIO clock is enabled in the power manager before using the GPIO. The clock must be enabled in order to access the configuration registers of the GPIO and when interrupts are enabled. After configuring the GPIO, the clock can be disabled if interrupts are not enabled. 22.4 Functional Description The GPIO controls the I/O lines of the microcontroller. The control logic associated with each pin is represented in the figure below: Figure 22-1. Overview of the GPIO pad connections GPIO_ODER GPIO_PUER 1 Periph. A output enable 0 Periph. B output enable 0 Periph. C output enable Periph. D output enable 1 GPIO_PMR1 GPIO_GPER GPIO_PMR0 GPIO_ODMER Periph. A output data Periph. B output data Periph. C output data 0 Periph. D output data 0 GPIO_OVR 1 PAD 1 Periph. A input data Periph. B input data Periph. C input data GPIO_PVR Periph. D input data GPIO_IER 0 Edge Detector 1 Glitch Filter 1 GPIO_IMR1 0 Interrupt Request GPIO_GFER GPIO_IMR0 22.4.1 Pull-up Resistor Control Each I/O line is designed with an embedded pull-up resistor. The pull-up resistor can be enabled or disabled by accessing the corresponding bit in PUER (Pull-up Enable Register). Control of the pull-up resistor is possible whether an I/O line is controlled by a peripheral or the GPIO. 171 32058K AVR32-01/12
AT32UC3A 22.4.2 I/O Line or Peripheral Function Selection When a pin is multiplexed with one or more peripheral functions, the selection is controlled with the register GPER. If a bit in the register is set, the corresponding pin is controlled by the GPIO. If a bit is cleared, the corresponding pin is controlled by a peripheral function. 22.4.3 Peripheral Selection The GPIO provides multiplexing of up to four peripheral functions on a single pin. The selection is performed by accessing PMR0 (Peripheral Mux Register 0) and PMR1 (Peripheral Mux Regis- ter 1). 22.4.4 Output Control When the I/O line is assigned to a peripheral function, i.e. the corresponding bit in GPER is at 0, the drive of the I/O line is controlled by the peripheral. The peripheral, depending on the value in PMR0 and PMR1, determines whether the pin is driven or not. When the I/O line is controlled by the GPIO, the value of ODER (Output Driver Enable Register) determines if the pin is driven or not. When a bit in this register is at 1, the corresponding I/O line is driven by the GPIO. When the bit is at 0, the GPIO does not drive the line. The level driven on an I/O line can be determined by writing OVR (Output Value Register). 22.4.5 Open Drain Mode Each I/O line can be independently programmed to operate in open drain mode. This feature permits several drivers to be connected on the I/O line. The drivers should only actively drive the line low. An external pull-up resistor (or enabling the internal one) is generally required to guar- antee a high level on the line when no driver is active. The Open Drain feature is controlled by ODMER (Open Drain Mode Enable Register). The Open Drain mode can be selected whether the I/O line is controlled by the GPIO or assigned to a peripheral function. 22.4.6 Inputs The level on each I/O line can be read through PVR (Pin Value Register). This register indicates the level of the I/O lines regardless of whether the lines are driven by the GPIO or by an external component. Note that due to power saving measures, PVR register can only be read when GPER is set for the corresponding pin or if interrupt is enabled for the pin. Output Line Timings The figure below shows the timing of the I/O line when setting and clearing the Output Value Register by accessing OVR. The same timing applies when performing a ‘set’ or ‘clear’ access i.e. writing to OVRS or OVRC. The timing of PVR (Pin Value Register) is also shown. 172 32058K AVR32-01/12
AT32UC3A Figure 22-2. Output line timings clock Write GPIO_OVR to 1 PBA Access Write GPIO_OVR to 0 PBA Access GPIO_OVR / I/O Line GPIO_PVR 22.4.7 Interrupts The GPIO can be programmed to generate an interrupt when it detects an input change on an I/O line. The module can be configured to signal an interrupt whenever a pin changes value or only to trigger on rising edges or falling edges. Interrupt is enabled on a pin by setting the corre- sponding bit in IER (Interrupt Enable Register). The interrupt mode is set by accessing IMR0 (Interrupt Mode Register 0) and IMR1 (Interrupt Mode Register 1). Interrupt can be enabled on a pin, regardless of the configuration the I/O line, i.e. controlled by the GPIO or assigned to a peripheral function. In every port there are four interrupt lines connected to the interrupt controller. Every eigth inter- rupts in the port are ored together to form an interrupt line. When an interrupt event is detected on an I/O line, and the corresponding bit in IER is set, the GPIO interrupt request line is asserted. A number of interrupt signals are ORed-wired together to generate a single interrupt signal to the interrupt controller. IFR (Interrupt Flag Register) can by read by software to determine which pin(s) caused the inter- rupt. The interrupt flag must be manually cleared by writing to IFR. GPIO interrupts can only be triggered when the GPIO clock is enabled. 22.4.8 Input Glitch Filter Optional input glitch filters can be enabled on each I/O line. When the glitch filter is enabled, a glitch with duration of less than 1 clock cycle is automatically rejected, while a pulse with dura- tion of 2 clock cycles or more is accepted. For pulse durations between 1 clock cycle and 2 clock cycles, the pulse may or may not be taken into account, depending on the precise timing of its occurrence. Thus for a pulse to be guaranteed visible it must exceed 2 clock cycles, whereas for a glitch to be reliably filtered out, its duration must not exceed 1 clock cycle. The filter introduces 2 clock cycles latency. The glitch filters are controlled by the register GFER (Glitch Filter Enable Register). When a bit is set in GFER, the glitch filter on the corresponding pin is enabled. The glitch filter affects only interrupt inputs. Inputs to peripherals or the value read through PVR are not affected by the glitch filters. 22.4.9 Interrupt Timings The figure below shows the timing for rising edge (or pin-change) interrupts when the glitch filter is disabled. For the pulse to be registered, it must be sampled at the rising edge of the clock. In this example, this is not the case for the first pulse. The second pulse is however sampled on a rising edge and will trigger an interrupt request. 173 32058K AVR32-01/12
AT32UC3A Figure 22-3. Interrupt timing with glitch filter disabled clock Pin Level GPIO_IFR The figure below shows the timing for rising edge (or pin-change) interrupts when the glitch filter is enabled. For the pulse to be registered, it must be sampled on two subsequent rising edges. In the example, the first pulse is rejected while the second pulse is accepted and causes an interrupt request. Figure 22-4. Interrupt timing with glitch filter enabled clock Pin Level GPIO_IFR 174 32058K AVR32-01/12
AT32UC3A 22.5 General Purpose Input/Output (GPIO) User Interface The GPIO controls all the I/O pins on the AVR32 microcontroller. The pins are managed as 32- bit ports that are configurable through an PB interface. Each port has a set of configuration reg- isters. The overall memory map of the GPIO is shown below. The number of pins and hence the number of ports is product specific. 0x0000 Port 0 Configuration Registers 0x0100 Port 1 Configuration Registers 0x0200 Port 2 Configuration Registers 0x0300 Port 3 Configuration Registers 0x0400 Port 4 Configuration Registers In the Peripheral muxing table in the Peripherals chapter each GPIO line has a unique number. Note that the PA, PB, PC and PX ports do not directly correspond to the GPIO ports. To find the corresponding port and pin the following formulas can be used: GPIO port = floor((GPIO number) / 32), example: floor((36)/32) = 1 GPIO pin = GPIO number mod 32, example: 36 mod 32 = 4 The table below shows the configuration registers for one port. Addresses shown are relative to the port address offset. The specific address of a configuration register is found by adding the register offset and the port offset to the GPIO start address. One bit in each of the configuration registers corresponds to an I/O pin. Table 22-2. GPIO Register Map Offset Register Function Name Access Reset value 1b for each 0x00 GPIO Enable Register Read/Write GPER Read/Write implemented GPIO pin in port 0x04 GPIO Enable Register Set GPERS Write-Only 0x08 GPIO Enable Register Clear GPERC Write-Only 0x0C GPIO Enable Register Toggle GPERT Write-Only 0x10 Peripheral Mux Register 0 Read/Write PMR0 Read/Write 0x00000000 175 32058K AVR32-01/12
AT32UC3A Table 22-2. GPIO Register Map Offset Register Function Name Access Reset value 0x14 Peripheral Mux Register 0 Set PMR0S Write-Only 0x18 Peripheral Mux Register 0 Clear PMR0C Write-Only 0x1C Peripheral Mux Register 0 Toggle PMR0T Write-Only 0x20 Peripheral Mux Register 1 Read/Write PMR1 Read/Write 0x00000000 0x24 Peripheral Mux Register 1 Set PMR1S Write-Only 0x28 Peripheral Mux Register 1 Clear PMR1C Write-Only 0x2C Peripheral Mux Register 1 Toggle PMR1T Write-Only 0x30 RESERVED - - - 0x34 RESERVED - - - 0x38 RESERVED - - - 0x3C RESERVED - - - 0x40 Output Driver Enable Register Read/Write ODER Read/Write 0x00000000 0x44 Output Driver Enable Register Set ODERS Write-Only 0x48 Output Driver Enable Register Clear ODERC Write-Only 0x4C Output Driver Enable Register Toggle ODERT Write-Only 0x50 Output Value Register Read/Write OVR Read/Write 0x00000000 0x54 Output Value Register Set OVRS Write-Only 0x58 Output Value Register Clear OVRC Write-Only 0x5c Output Value Register Toggle OVRT Write-Only depending on 0x60 Pin Value Register Read PVR Read-Only pin states 0x64 Pin Value Register - - - 0x68 Pin Value Register - - - 0x6c Pin Value Register - - - 0x70 Pull-up Enable Register Read/Write PUER Read/Write 0x00000000 0x74 Pull-up Enable Register Set PUERS Write-Only 0x78 Pull-up Enable Register Clear PUERC Write-Only 0x7C Pull-up Enable Register Toggle PUERT Write-Only 0x80 Open Drain Mode Enable Register Read/Write ODMER Read/Write 0x00000000 0x84 Open Drain Mode Enable Register Set ODMERS Write-Only 0x88 Open Drain Mode Enable Register Clear ODMERC Write-Only 0x8C Open Drain Mode Enable Register Toggle ODMERT Write-Only 0x90 Interrupt Enable Register Read/Write IER Read/Write 0x00000000 0x94 Interrupt Enable Register Set IERS Write-Only 0x98 Interrupt Enable Register Clear IERC Write-Only 0x9C Interrupt Enable Register Toggle IERT Write-Only 176 32058K AVR32-01/12
AT32UC3A Table 22-2. GPIO Register Map Offset Register Function Name Access Reset value 0xA0 Interrupt Mode Register 0 Read/Write IMR0 Read/Write 0x00000000 0xA4 Interrupt Mode Register 0 Set IMR0S Write-Only 0xA8 Interrupt Mode Register 0 Clear IMR0C Write-Only 0xAC Interrupt Mode Register 0 Toggle IMR0T Write-Only 0xB0 Interrupt Mode Register 1 Read/Write IMR1 Read/Write 0x00000000 0xB4 Interrupt Mode Register 1 Set IMR1S Write-Only 0xB8 Interrupt Mode Register 1 Clear IMR1C Write-Only 0xBC Interrupt Mode Register 1 Toggle IMR1T Write-Only 1b for each 0xC0 Glitch Filter Enable Register Read/Write GFER Read/Write implemented GPIO pin in port 0xC4 Glitch Filter Enable Register Set GFERS Write-Only 0xC8 Glitch Filter Enable Register Clear GFERC Write-Only 0xCC Glitch Filter Enable Register Toggle GFERT Write-Only 0xD0 Interrupt Flag Register Read IFR Read-Only 0x00000000 0xD4 Interrupt Flag Register - - - 0xD8 Interrupt Flag Register Clear IFRC Write-Only 0xDC Interrupt Flag Register - - - 0xE0- RESERVED - - - 0xFF 22.5.1 Access Types Each configuration register can be accessed in four different ways. The first address location can be used to write the register directly. This address can also be used to read the register value. The following addresses facilitate three different types of write access to the register. Per- forming a “set” access, all bits written to ‘1’ will be set. Bits written to ‘0’ will be unchanged by the operation. Performing a “clear” access, all bits written to ‘1’ will be cleared. Bits written to ‘0’ will be unchanged by the operation. Finally, a toggle access will toggle the value of all bits written to ‘1’. Again all bits written to ‘0’ remain unchanged. Note that for some registers (e.g. IFR), not all access methods are permitted. Note that for ports with less than 32 bits, the corresponding control registers will have unused bits. This is also the case for features that are not implemented for a specific pin. Writing to an unused bit will have no effect. Reading unused bits will always return 0. 177 32058K AVR32-01/12
AT32UC3A 22.5.2 GPIO Enable Register Name: GPER Access: Read, Write, Set, Clear, Toggle 31 30 29 28 27 26 25 24 P31 P30 P29 P28 P27 P26 P25 P24 23 22 21 20 19 18 17 16 P23 P22 P21 P20 P19 P18 P17 P16 15 14 13 12 11 10 9 8 P15 P14 P13 P12 P11 P10 P9 P8 7 6 5 4 3 2 1 0 P7 P6 P5 P4 P3 P2 P1 P0 (cid:129) P0-P31: GPIO Enable 0 = A peripheral function controls the corresponding pin. 1 = The GPIO controls the corresponding pin. 178 32058K AVR32-01/12
AT32UC3A 22.5.3 Peripheral Mux Register 0 Name: PMR0 Access: Read, Write, Set, Clear, Toggle 31 30 29 28 27 26 25 24 P31 P30 P29 P28 P27 P26 P25 P24 23 22 21 20 19 18 17 16 P23 P22 P21 P20 P19 P18 P17 P16 15 14 13 12 11 10 9 8 P15 P14 P13 P12 P11 P10 P9 P8 7 6 5 4 3 2 1 0 P7 P6 P5 P4 P3 P2 P1 P0 (cid:129) P0-31: Peripheral Multiplexer Select bit 0 22.5.4 Peripheral Mux Register 1 Name: PMR1 Access: Read, Write, Set, Clear, Toggle 31 30 29 28 27 26 25 24 P31 P30 P29 P28 P27 P26 P25 P24 23 22 21 20 19 18 17 16 P23 P22 P21 P20 P19 P18 P17 P16 15 14 13 12 11 10 9 8 P15 P14 P13 P12 P11 P10 P9 P8 7 6 5 4 3 2 1 0 P7 P6 P5 P4 P3 P2 P1 P0 (cid:129) P0-31: Peripheral Multiplexer Select bit 1 {PMR1, PMR0} Selected Peripheral Function 00 A 01 B 10 C 11 D 179 32058K AVR32-01/12
AT32UC3A 22.5.5 Output Driver Enable Register Name: ODER Access: Read, Write, Set, Clear, Toggle 31 30 29 28 27 26 25 24 P31 P30 P29 P28 P27 P26 P25 P24 23 22 21 20 19 18 17 16 P23 P22 P21 P20 P19 P18 P17 P16 15 14 13 12 11 10 9 8 P15 P14 P13 P12 P11 P10 P9 P8 7 6 5 4 3 2 1 0 P7 P6 P5 P4 P3 P2 P1 P0 (cid:129) P0-31: Output Driver Enable 0 = The output driver is disabled for the corresponding pin. 1 = The output driver is enabled for the corresponding pin. 180 32058K AVR32-01/12
AT32UC3A 22.5.6 Output Value Register Name: OVR Access: Read, Write, Set, Clear, Toggle 31 30 29 28 27 26 25 24 P31 P30 P29 P28 P27 P26 P25 P24 23 22 21 20 19 18 17 16 P23 P22 P21 P20 P19 P18 P17 P16 15 14 13 12 11 10 9 8 P15 P14 P13 P12 P11 P10 P9 P8 7 6 5 4 3 2 1 0 P7 P6 P5 P4 P3 P2 P1 P0 (cid:129) P0-31: Output Value 0 = The value to be driven on the I/O line is 0. 1 = The value to be driven on the I/O line is 1. 181 32058K AVR32-01/12
AT32UC3A 22.5.7 Pin Value Register Name: PVR Access: Read 31 30 29 28 27 26 25 24 P31 P30 P29 P28 P27 P26 P25 P24 23 22 21 20 19 18 17 16 P23 P22 P21 P20 P19 P18 P17 P16 15 14 13 12 11 10 9 8 P15 P14 P13 P12 P11 P10 P9 P8 7 6 5 4 3 2 1 0 P7 P6 P5 P4 P3 P2 P1 P0 (cid:129) P0-31: Pin Value 0 = The I/O line is at level ‘0’. 1 = The I/O line is at level ‘1’. Note that the level of a pin can only be read when GPER is set or interrupt is enabled for the pin. 182 32058K AVR32-01/12
AT32UC3A 22.5.8 Pull-up Enable Register Name: PUER Access: Read, Write, Set, Clear, Toggle 31 30 29 28 27 26 25 24 P31 P30 P29 P28 P27 P26 P25 P24 23 22 21 20 19 18 17 16 P23 P22 P21 P20 P19 P18 P17 P16 15 14 13 12 11 10 9 8 P15 P14 P13 P12 P11 P10 P9 P8 7 6 5 4 3 2 1 0 P7 P6 P5 P4 P3 P2 P1 P0 (cid:129) P0-31: Pull-up Enable 0 = The internal pull-up resistor is disabled for the corresponding pin. 1 = The internal pull-up resistor is enabled for the corresponding pin. 183 32058K AVR32-01/12
AT32UC3A 22.5.9 Open Drain Mode Enable Register Name: ODMER Access: Read, Write, Set, Clear, Toggle 31 30 29 28 27 26 25 24 P31 P30 P29 P28 P27 P26 P25 P24 23 22 21 20 19 18 17 16 P23 P22 P21 P20 P19 P18 P17 P16 15 14 13 12 11 10 9 8 P15 P14 P13 P12 P11 P10 P9 P8 7 6 5 4 3 2 1 0 P7 P6 P5 P4 P3 P2 P1 P0 (cid:129) P0-31: Open Drain Mode Enable 0 = Open drain mode is disabled for the corresponding pin. 1 = Open drain mode is enabled for the corresponding pin. 184 32058K AVR32-01/12
AT32UC3A 22.5.10 Interrupt Enable Register Name: IER Access: Read, Write, Set, Clear, Toggle 31 30 29 28 27 26 25 24 P31 P30 P29 P28 P27 P26 P25 P24 23 22 21 20 19 18 17 16 P23 P22 P21 P20 P19 P18 P17 P16 15 14 13 12 11 10 9 8 P15 P14 P13 P12 P11 P10 P9 P8 7 6 5 4 3 2 1 0 P7 P6 P5 P4 P3 P2 P1 P0 (cid:129) P0-31: Interrupt Enable 0 = Interrupt is disabled for the corresponding pin. 1 = Interrupt is enabled for the corresponding pin. 185 32058K AVR32-01/12
AT32UC3A 22.5.11 Interrupt Mode Register 0 Name: IMR0 Access: Read, Write, Set, Clear, Toggle 31 30 29 28 27 26 25 24 P31 P30 P29 P28 P27 P26 P25 P24 23 22 21 20 19 18 17 16 P23 P22 P21 P20 P19 P18 P17 P16 15 14 13 12 11 10 9 8 P15 P14 P13 P12 P11 P10 P9 P8 7 6 5 4 3 2 1 0 P7 P6 P5 P4 P3 P2 P1 P0 (cid:129) P0-31: Interrupt Mode Bit 0 22.5.12 Interrupt Mode Register 1 Name: IMR1 Access: Read, Write, Set, Clear, Toggle 31 30 29 28 27 26 25 24 P31 P30 P29 P28 P27 P26 P25 P24 23 22 21 20 19 18 17 16 P23 P22 P21 P20 P19 P18 P17 P16 15 14 13 12 11 10 9 8 P15 P14 P13 P12 P11 P10 P9 P8 7 6 5 4 3 2 1 0 P7 P6 P5 P4 P3 P2 P1 P0 (cid:129) P0-31: Interrupt Mode Bit 1 {IMR1, IMR0} Interrupt Mode 00 Pin Change 01 Rising Edge 10 Falling Edge 11 Reserved 186 32058K AVR32-01/12
AT32UC3A 22.5.13 Glitch Filter Enable Register Name: GFER Access: Read, Write, Set, Clear, Toggle 31 30 29 28 27 26 25 24 P31 P30 P29 P28 P27 P26 P25 P24 23 22 21 20 19 18 17 16 P23 P22 P21 P20 P19 P18 P17 P16 15 14 13 12 11 10 9 8 P15 P14 P13 P12 P11 P10 P9 P8 7 6 5 4 3 2 1 0 P7 P6 P5 P4 P3 P2 P1 P0 (cid:129) P0-31: Glitch Filter Enable 0 = Glitch filter is disabled for the corresponding pin. 1 = Glitch filter is enabled for the corresponding pin. NOTE! The value of this register should only be changed when IER is ‘0’. Updating this GFER while interrupt on the corre- sponding pin is enabled can cause an unintentional interrupt to be triggered. 187 32058K AVR32-01/12
AT32UC3A 22.5.14 Interrupt Flag Register Name: IFR Access: Read, Clear 31 30 29 28 27 26 25 24 P31 P30 P29 P28 P27 P26 P25 P24 23 22 21 20 19 18 17 16 P23 P22 P21 P20 P19 P18 P17 P16 15 14 13 12 11 10 9 8 P15 P14 P13 P12 P11 P10 P9 P8 7 6 5 4 3 2 1 0 P7 P6 P5 P4 P3 P2 P1 P0 (cid:129) P0-31: Interrupt Flag 0 = An interrupt condition has been detected on the corresponding pin. 1 = No interrupt condition has been detected on the corresponding pin. The number of interrupt request lines is dependant on the number of I/O pins on the MCU. Refer to the product specific data for details. Note also that a bit in the Interrupt Flag register is only valid if the corresponding bit in IER is set. 188 32058K AVR32-01/12
AT32UC3A 22.6 Programming Examples 22.6.1 8-bit LED-Chaser // Set R0 to GPIO base address mov R0, LO(AVR32_GPIO_BASE_ADDRESS) orh R0, HI(AVR32_GPIO_BASE_ADDRESS) // Enable GPIO control of pin 0-8 mov R1, 0xFF st.w R0[AVR32_GPIO_GPERS], R1 // Set initial value of port mov R2, 0x01 st.w R0[AVR32_GPIO_OVRS], R2 // Set up toggle value. Two pins are toggled // in each round. The bit that is currently set, // and the next bit to be set. mov R2, 0x0303 orh R2, 0x0303 loop: // Only change 8 LSB mov R3, 0x00FF and R3, R2 st.w R0[AVR32_GPIO_OVRT], R3 rol R2 rcall delay rjmp loop It is assumed in this example that a subroutine "delay" exists that returns after a given time. 22.6.2 Configuration of USART pins The example below shows how to configure a peripheral module to control I/O pins. It assumed in this example that the USART receive pin (RXD) is connected to PC16 and that the USART transmit pin (TXD) is connected to PC17. For both pins, the USART is peripheral B. In this example, the state of the GPIO registers is assumed to be unknown. The two USART pins are therefore first set to be controlled by the GPIO with output drivers disabled. The pins can then be assured to be tri-stated while changing the Peripheral Mux Registers. // Set up pointer to GPIO, PORTC mov R0, LO(AVR32_GPIO_BASE_ADDRESS + PORTC_OFFSET) orh R0, HI(AVR32_GPIO_BASE_ADDRESS + PORTC_OFFSET) // Disable output drivers 189 32058K AVR32-01/12
AT32UC3A mov R1, 0x0000 orh R1, 0x0003 st.w R0[AVR32_GPIO_ODERC], R1 // Make the GPIO control the pins st.w R0[AVR32_GPIO_GPERS], R1 // Select peripheral B on PC16-PC17 st.w R0[AVR32_GPIO_PMR0S], R1 st.w R0[GPIO_PMR1C], R1 // Enable peripheral control st.w R0[AVR32_GPIO_GPERC], R1 190 32058K AVR32-01/12
AT32UC3A 23. Serial Peripheral Interface (SPI) Rev: 1.9.9.3 23.1 Features (cid:129) Supports Communication with Serial External Devices – Four Chip Selects with External Decoder Support Allow Communication with Up to 15 Peripherals – Serial Memories, such as DataFlash and 3-wire EEPROMs – Serial Peripherals, such as ADCs, DACs, LCD Controllers, CAN Controllers and Sensors – External Co-processors (cid:129) Master or Slave Serial Peripheral Bus Interface – 8- to 16-bit Programmable Data Length Per Chip Select – Programmable Phase and Polarity Per Chip Select – Programmable Transfer Delays Between Consecutive Transfers and Between Clock and Data Per Chip Select – Programmable Delay Between Consecutive Transfers – Selectable Mode Fault Detection (cid:129) Connection to PDC Channel Capabilities Optimizes Data Transfers – One Channel for the Receiver, One Channel for the Transmitter – Next Buffer Support 23.2 Description The Serial Peripheral Interface (SPI) circuit is a synchronous serial data link that provides com- munication with external devices in Master or Slave Mode. It also enables communication between processors if an external processor is connected to the system. The Serial Peripheral Interface is essentially a shift register that serially transmits data bits to other SPIs. During a data transfer, one SPI system acts as the “master”' which controls the data flow, while the other devices act as “slaves'' which have data shifted into and out by the master. Different CPUs can take turn being masters (Multiple Master Protocol opposite to Single Master Protocol where one CPU is always the master while all of the others are always slaves) and one master may simultaneously shift data into multiple slaves. However, only one slave may drive its output to write data back to the master at any given time. A slave device is selected when the master asserts its NSS signal. If multiple slave devices exist, the master generates a separate slave select signal for each slave (NPCS). The SPI system consists of two data lines and two control lines: (cid:129) Master Out Slave In (MOSI): This data line supplies the output data from the master shifted into the input(s) of the slave(s). (cid:129) Master In Slave Out (MISO): This data line supplies the output data from a slave to the input of the master. There may be no more than one slave transmitting data during any particular transfer. (cid:129) Serial Clock (SPCK): This control line is driven by the master and regulates the flow of the data bits. The master may transmit data at a variety of baud rates; the SPCK line cycles once for each bit that is transmitted. (cid:129) Slave Select (NSS): This control line allows slaves to be turned on and off by hardware. 191 32058K AVR32-01/12
AT32UC3A 23.3 Block Diagram Figure 23-1. Block Diagram PDC eral Bus SPCK MISO MOSI Power MCK Manager SPI Interface PIO NPCS0/NSS NPCS1 DIV NPCS2 Interrupt Control MCK(1) NPCS3 32 SPI Interrupt 192 32058K AVR32-01/12
AT32UC3A 23.4 Application Block Diagram Figure 23-2. Application Block Diagram: Single Master/Multiple Slave Implementation SPCK SPCK MISO MISO Slave 0 MOSI MOSI SPI Master NPCS0 NSS SPCK NPCS1 MISO NPCS2 NC Slave 1 NPCS3 MOSI NSS SPCK MISO Slave 2 MOSI NSS 193 32058K AVR32-01/12
AT32UC3A 23.5 Signal Description Table 23-1. Signal Description Type Pin Name Pin Description Master Slave MISO Master In Slave Out Input Output MOSI Master Out Slave In Output Input SPCK Serial Clock Output Input NPCS1-NPCS3 Peripheral Chip Selects Output Unused NPCS0/NSS Peripheral Chip Select/Slave Select Output Input 194 32058K AVR32-01/12
AT32UC3A 23.6 Product Dependencies 23.6.1 I/O Lines The pins used for interfacing the compliant external devices may be multiplexed with PIO lines. The programmer must first program the PIO controllers to assign the SPI pins to their peripheral functions. To use the local loopback function the SPI pins must be controlled by the SPI. 23.6.2 Power Management The SPI clock is generated by the Power Manager. Before using the SPI, the programmer must ensure that the SPI clock is enabled in the Power Manager. In the SPI description, Master Clock (MCK) is the clock of the peripheral bus to which the SPI is connected. 23.6.3 Interrupt The SPI interface has an interrupt line connected to the Interrupt Controller. Handling the SPI interrupt requires programming the interrupt controller before configuring the SPI. 195 32058K AVR32-01/12
AT32UC3A 23.7 Functional Description 23.7.1 Modes of Operation The SPI operates in Master Mode or in Slave Mode. Operation in Master Mode is programmed by writing at 1 the MSTR bit in the Mode Register. The pins NPCS0 to NPCS3 are all configured as outputs, the SPCK pin is driven, the MISO line is wired on the receiver input and the MOSI line driven as an output by the transmitter. If the MSTR bit is written at 0, the SPI operates in Slave Mode. The MISO line is driven by the transmitter output, the MOSI line is wired on the receiver input, the SPCK pin is driven by the transmitter to synchronize the receiver. The NPCS0 pin becomes an input, and is used as a Slave Select signal (NSS). The pins NPCS1 to NPCS3 are not driven and can be used for other purposes. The data transfers are identically programmable for both modes of operations. The baud rate generator is activated only in Master Mode. 23.7.2 Data Transfer Four combinations of polarity and phase are available for data transfers. The clock polarity is programmed with the CPOL bit in the Chip Select Register. The clock phase is programmed with the NCPHA bit. These two parameters determine the edges of the clock signal on which data is driven and sampled. Each of the two parameters has two possible states, resulting in four possi- ble combinations that are incompatible with one another. Thus, a master/slave pair must use the same parameter pair values to communicate. If multiple slaves are used and fixed in different configurations, the master must reconfigure itself each time it needs to communicate with a dif- ferent slave. Table 23-2 shows the four modes and corresponding parameter settings. Table 23-2. SPI Bus Protocol Mode SPI Mode CPOL NCPHA 0 0 1 1 0 0 2 1 1 3 1 0 Figure 23-3 and Figure 23-4 show examples of data transfers. 196 32058K AVR32-01/12
AT32UC3A Figure 23-3. SPI Transfer Format (NCPHA = 1, 8 bits per transfer) SPCK cycle (for reference) 1 2 3 4 5 66 7 8 SPCK (CPOL = 0) SPCK (CPOL = 1) MOSI MSB 6 5 4 3 2 1 LSB (from master) MISO MSB 6 5 4 3 2 1 LSB * (from slave) NSS (to slave) * Not defined, but normally MSB of previous character received. Figure 23-4. SPI Transfer Format (NCPHA = 0, 8 bits per transfer) SPCK cycle (for reference) 1 2 3 4 5 6 7 8 SPCK (CPOL = 0) SPCK (CPOL = 1) MOSI MSB 6 5 4 3 2 1 LSB (from master) MISO (from slave) * MSB 6 5 4 3 2 1 LSB NSS (to slave) * Not defined but normally LSB of previous character transmitted. 197 32058K AVR32-01/12
AT32UC3A 23.7.3 Master Mode Operations When configured in Master Mode, the SPI uses the internal programmable baud rate generator as clock source. It fully controls the data transfers to and from the slave(s) connected to the SPI bus. The SPI drives the chip select line to the slave and the serial clock signal (SPCK). The SPI features two holding registers, the Transmit Data Register and the Receive Data Regis- ter, and a single Shift Register. The holding registers maintain the data flow at a constant rate. After enabling the SPI, a data transfer begins when the processor writes to the TDR (Transmit Data Register). The written data is immediately transferred in the Shift Register and transfer on the SPI bus starts. While the data in the Shift Register is shifted on the MOSI line, the MISO line is sampled and shifted in the Shift Register. Transmission cannot occur without reception. Before writing the TDR, the PCS field must be set in order to select a slave. If new data is written in TDR during the transfer, it stays in it until the current transfer is com- pleted. Then, the received data is transferred from the Shift Register to RDR, the data in TDR is loaded in the Shift Register and a new transfer starts. The transfer of a data written in TDR in the Shift Register is indicated by the TDRE bit (Transmit Data Register Empty) in the Status Register (SR). When new data is written in TDR, this bit is cleared. The TDRE bit is used to trigger the Transmit PDC channel. The end of transfer is indicated by the TXEMPTY flag in the SR register. If a transfer delay (DLY- BCT) is greater than 0 for the last transfer, TXEMPTY is set after the completion of said delay. The master clock (MCK) can be switched off at this time. The transfer of received data from the Shift Register in RDR is indicated by the RDRF bit (Receive Data Register Full) in the Status Register (SR). When the received data is read, the RDRF bit is cleared. If the RDR (Receive Data Register) has not been read before new data is received, the Overrun Error bit (OVRES) in SR is set. When this bit is set the SPI will continue to update RDR when data is received, overwriting the previously received data. The user has to read the status regis- ter to clear the OVRES bit. Figure 23-5 on page 199 shows a block diagram of the SPI when operating in Master Mode. Fig- ure 23-6 on page 200 shows a flow chart describing how transfers are handled. 198 32058K AVR32-01/12
AT32UC3A 23.7.3.1 Master Mode Block Diagram Figure 23-5. Master Mode Block Diagram FDIV SPI_CSR0..3 SCBR MCK 0 Baud Rate Generator SPCK MCK/N 1 SPI Clock SPI_CSR0..3 SPI_RDR RDRF BITS RD OVRES NCPHA CPOL LSB MSB MISO Shift Register MOSI SPI_TDR TD TDRE SPI_CSR0..3 SPI_RDR CSAAT PCS PS NPCS3 PCSDEC SPI_MR PCS Current NPCS2 0 Peripheral NPCS1 SPI_TDR PCS NPCS0 1 MSTR MODF NPCS0 MODFDIS 199 32058K AVR32-01/12
AT32UC3A 23.7.3.2 Master Mode Flow Diagram Figure 23-6. Master Mode Flow Diagram S SPI Enable - NPCS defines the current Chip Select - CSAAT, DLYBS, DLYBCT refer to the fields of the Chip Select Register corresponding to the Current Chip Select - When NPCS is 0xF, CSAAT is 0. 1 TDRE ? 0 Fixed 1 0 peripheral CSAAT ? PS ? Variable 0 1 peripheral Fixed 0 peripheral yes PS ? SPI_TDR(PCS) SPI_MR(PCS) = NPCS ? = NPCS ? Variable 1 peripheral no no NPCS = SPI_TDR(PCS) NPCS = SPI_MR(PCS) NPCS = 0xF NPCS = 0xF Delay DLYBCS Delay DLYBCS NPCS = SPI_TDR(PCS) NPCS = SPI_MR(PCS), SPI_TDR(PCS) Delay DLYBS Serializer = SPI_TDR(TD) TDRE = 1 Data Transfer SPI_RDR(RD) = Serializer RDRF = 1 Delay DLYBCT 0 TDRE ? 1 1 CSAAT ? 0 NPCS = 0xF Delay DLYBCS 200 32058K AVR32-01/12
AT32UC3A 23.7.3.3 Clock Generation The SPI Baud rate clock is generated by dividing the Master Clock (MCK) or the Master Clock divided by 32, by a value between 1 and 255. The selection between Master Clock or Master Clock divided by 32 is done by the FDIV value set in the Mode Register This allows a maximum operating baud rate at up to Master Clock and a minimum operating baud rate of MCK divided by 255*32. Programming the SCBR field at 0 is forbidden. Triggering a transfer while SCBR is at 0 can lead to unpredictable results. At reset, SCBR is 0 and the user has to program it at a valid value before performing the first transfer. The divisor can be defined independently for each chip select, as it has to be programmed in the SCBR field of the Chip Select Registers. This allows the SPI to automatically adapt the baud rate for each interfaced peripheral without reprogramming. 23.7.3.4 Transfer Delays Figure 23-7 shows a chip select transfer change and consecutive transfers on the same chip select. Three delays can be programmed to modify the transfer waveforms: (cid:129) The delay between chip selects, programmable only once for all the chip selects by writing the DLYBCS field in the Mode Register. Allows insertion of a delay between release of one chip select and before assertion of a new one. (cid:129) The delay before SPCK, independently programmable for each chip select by writing the field DLYBS. Allows the start of SPCK to be delayed after the chip select has been asserted. (cid:129) The delay between consecutive transfers, independently programmable for each chip select by writing the DLYBCT field. Allows insertion of a delay between two transfers occurring on the same chip select These delays allow the SPI to be adapted to the interfaced peripherals and their speed and bus release time. Figure 23-7. Programmable Delays Chip Select 1 Chip Select 2 SPCK DLYBCS DLYBS DLYBCT DLYBCT 201 32058K AVR32-01/12
AT32UC3A 23.7.3.5 Peripheral Selection The serial peripherals are selected through the assertion of the NPCS0 to NPCS3 signals. By default, all the NPCS signals are high before and after each transfer. The peripheral selection can be performed in two different ways: (cid:129) Fixed Peripheral Select: SPI exchanges data with only one peripheral (cid:129) Variable Peripheral Select: Data can be exchanged with more than one peripheral Fixed Peripheral Select is activated by writing the PS bit to zero in MR (Mode Register). In this case, the current peripheral is defined by the PCS field in MR and the PCS field in TDR have no effect. Variable Peripheral Select is activated by setting PS bit to one. The PCS field in TDR is used to select the current peripheral. This means that the peripheral selection can be defined for each new data. The Fixed Peripheral Selection allows buffer transfers with a single peripheral. Using the PDC is an optimal means, as the size of the data transfer between the memory and the SPI is either 8 bits or 16 bits. However, changing the peripheral selection requires the Mode Register to be reprogrammed. The Variable Peripheral Selection allows buffer transfers with multiple peripherals without repro- gramming the Mode Register. Data written in TDR is 32 bits wide and defines the real data to be transmitted and the peripheral it is destined to. Using the PDC in this mode requires 32-bit wide buffers, with the data in the LSBs and the PCS and LASTXFER fields in the MSBs, however the SPI still controls the number of bits (8 to16) to be transferred through MISO and MOSI lines with the chip select configuration registers. This is not the optimal means in term of memory size for the buffers, but it provides a very effective means to exchange data with several peripherals without any intervention of the processor. 23.7.3.6 Peripheral Chip Select Decoding The user can program the SPI to operate with up to 15 peripherals by decoding the four Chip Select lines, NPCS0 to NPCS3 with an external logic. This can be enabled by writing the PCS- DEC bit at 1 in the Mode Register (MR). When operating without decoding, the SPI makes sure that in any case only one chip select line is activated, i.e. driven low at a time. If two bits are defined low in a PCS field, only the lowest numbered chip select is driven low. When operating with decoding, the SPI directly outputs the value defined by the PCS field of either the Mode Register or the Transmit Data Register (depending on PS). As the SPI sets a default value of 0xF on the chip select lines (i.e. all chip select lines at 1) when not processing any transfer, only 15 peripherals can be decoded. The SPI has only four Chip Select Registers, not 15. As a result, when decoding is activated, each chip select defines the characteristics of up to four peripherals. As an example, CRS0 defines the characteristics of the externally decoded peripherals 0 to 3, corresponding to the PCS values 0x0 to 0x3. Thus, the user has to make sure to connect compatible peripherals on the decoded chip select lines 0 to 3, 4 to 7, 8 to 11 and 12 to 14. 202 32058K AVR32-01/12
AT32UC3A 23.7.3.7 Peripheral Deselection When operating normally, as soon as the transfer of the last data written in TDR is completed, the NPCS lines all rise. This might lead to runtime error if the processor is too long in responding to an interrupt, and thus might lead to difficulties for interfacing with some serial peripherals requiring the chip select line to remain active during a full set of transfers. To facilitate interfacing with such devices, the Chip Select Register can be programmed with the CSAAT bit (Chip Select Active After Transfer) at 1. This allows the chip select lines to remain in their current state (low = active) until transfer to another peripheral is required. Figure 23-8 shows different peripheral deselection cases and the effect of the CSAAT bit. Figure 23-8. Peripheral Deselection CSAAT = 0 CSAAT = 1 TDRE DLYBCT DLYBCT NPCS[0..3] A A A A A DLYBCS DLYBCS PCS = A PCS = A Write SPI_TDR TDRE DLYBCT DLYBCT NPCS[0..3] A A A A A DLYBCS DLYBCS PCS=A PCS = A Write SPI_TDR TDRE DLYBCT DLYBCT NPCS[0..3] A B A B DLYBCS DLYBCS PCS = B PCS = B Write SPI_TDR 203 32058K AVR32-01/12
AT32UC3A 23.7.3.8 Mode Fault Detection A mode fault is detected when the SPI is programmed in Master Mode and a low level is driven by an external master on the NPCS0/NSS signal. NPCS0, MOSI, MISO and SPCK must be con- figured in open-drain through the PIO controller, so that external pull up resistors are needed to guarantee high level. When a mode fault is detected, the MODF bit in the SR is set until the SR is read and the SPI is automatically disabled until re-enabled by writing the SPIEN bit in the CR (Control Register) at 1. By default, the Mode Fault detection circuitry is enabled. The user can disable Mode Fault detection by setting the MODFDIS bit in the SPI Mode Register (MR). 23.7.4 SPI Slave Mode When operating in Slave Mode, the SPI processes data bits on the clock provided on the SPI clock pin (SPCK). The SPI waits for NSS to go active before receiving the serial clock from an external master. When NSS falls, the clock is validated on the serializer, which processes the number of bits defined by the BITS field of the Chip Select Register 0 (CSR0). These bits are processed follow- ing a phase and a polarity defined respectively by the NCPHA and CPOL bits of the CSR0. Note that BITS, CPOL and NCPHA of the other Chip Select Registers have no effect when the SPI is programmed in Slave Mode. The bits are shifted out on the MISO line and sampled on the MOSI line. When all the bits are processed, the received data is transferred in the Receive Data Register and the RDRF bit rises. If RDRF is already high when the data is transferred, the Overrun bit rises and the data transfer to RDR is aborted. When a transfer starts, the data shifted out is the data present in the Shift Register. If no data has been written in the Transmit Data Register (TDR), the last data received is transferred. If no data has been received since the last reset, all bits are transmitted low, as the Shift Register resets at 0. When a first data is written in TDR, it is transferred immediately in the Shift Register and the TDRE bit rises. If new data is written, it remains in TDR until a transfer occurs, i.e. NSS falls and there is a valid clock on the SPCK pin. When the transfer occurs, the last data written in TDR is transferred in the Shift Register and the TDRE bit rises. This enables frequent updates of critical variables with single transfers. Then, a new data is loaded in the Shift Register from the Transmit Data Register. In case no character is ready to be transmitted, i.e. no character has been written in TDR since the last load from TDR to the Shift Register, the Shift Register is not modified and the last received character is retransmitted. Figure 23-9 shows a block diagram of the SPI when operating in Slave Mode. 204 32058K AVR32-01/12
AT32UC3A Figure 23-9. Slave Mode Functional Block Diagram SPCK NSS SPI Clock SPIEN SPIENS SPIDIS SPI_CSR0 SPI_RDR RDRF BITS NCPHA RD OVRES CPOL LSB MSB MOSI Shift Register MISO SPI_TDR FLOAD TD TDRE 205 32058K AVR32-01/12
AT32UC3A 23.8 Serial Peripheral Interface (SPI) User Interface Table 23-3. SPI Register Mapping Offset Register Register Name Access Reset 0x00 Control Register CR Write-only --- 0x04 Mode Register MR Read/Write 0x0 0x08 Receive Data Register RDR Read-only 0x0 0x0C Transmit Data Register TDR Write-only --- 0x10 Status Register SR Read-only 0x000000F0 0x14 Interrupt Enable Register IER Write-only --- 0x18 Interrupt Disable Register IDR Write-only --- 0x1C Interrupt Mask Register IMR Read-only 0x0 0x20 - 0x2C Reserved 0x30 Chip Select Register 0 CSR0 Read/Write 0x0 0x34 Chip Select Register 1 CSR1 Read/Write 0x0 0x38 Chip Select Register 2 CSR2 Read/Write 0x0 0x3C Chip Select Register 3 CSR3 Read/Write 0x0 206 32058K AVR32-01/12
AT32UC3A 23.8.1 SPI Control Register Name: CR Access Type: Write-only 31 30 29 28 27 26 25 24 – – – – – – – LASTXFER 23 22 21 20 19 18 17 16 – – – – – – – – 15 14 13 12 11 10 9 8 – – – – – – – – 7 6 5 4 3 2 1 0 SWRST – – – – – SPIDIS SPIEN (cid:129) SPIEN: SPI Enable 0 = No effect. 1 = Enables the SPI to transfer and receive data. (cid:129) SPIDIS: SPI Disable 0 = No effect. 1 = Disables the SPI. As soon as SPDIS is set, SPI finishes its transfer. All pins are set in input mode and no data is received or transmitted. If a transfer is in progress, the transfer is finished before the SPI is disabled. If both SPIEN and SPIDIS are equal to one when the control register is written, the SPI is disabled. (cid:129) SWRST: SPI Software Reset 0 = No effect. 1 = Reset the SPI. A software-triggered hardware reset of the SPI interface is performed. The SPI is in slave mode after a software reset. PDC channels are not affected by software reset. (cid:129) LASTXFER: Last Transfer 0 = No effect. 1 = The current NPCS will be deasserted after the character written in TD has been transferred. When CSAAT is set, this allows to close the communication with the current serial peripheral by raising the corresponding NPCS line as soon as TD transfer has completed. 207 32058K AVR32-01/12
AT32UC3A 23.8.2 SPI Mode Register Name: MR Access Type: Read/Write 31 30 29 28 27 26 25 24 DLYBCS 23 22 21 20 19 18 17 16 – – – – PCS 15 14 13 12 11 10 9 8 – – – – – – – – 7 6 5 4 3 2 1 0 LLB – – MODFDIS FDIV PCSDEC PS MSTR (cid:129) MSTR: Master/Slave Mode 0 = SPI is in Slave mode. 1 = SPI is in Master mode. (cid:129) PS: Peripheral Select 0 = Fixed Peripheral Select. 1 = Variable Peripheral Select. (cid:129) PCSDEC: Chip Select Decode 0 = The chip selects are directly connected to a peripheral device. 1 = The four chip select lines are connected to a 4- to 16-bit decoder. When PCSDEC equals one, up to 15 Chip Select signals can be generated with the four lines using an external 4- to 16-bit decoder. The Chip Select Registers define the characteristics of the 15 chip selects according to the following rules: CSR0 defines peripheral chip select signals 0 to 3. CSR1 defines peripheral chip select signals 4 to 7. CSR2 defines peripheral chip select signals 8 to 11. CSR3 defines peripheral chip select signals 12 to 14. (cid:129) FDIV: Clock Selection 0 = The SPI operates at MCK. 1 = The SPI operates at MCK/32. (cid:129) MODFDIS: Mode Fault Detection 0 = Mode fault detection is enabled. 1 = Mode fault detection is disabled. (cid:129) LLB: Local Loopback Enable 0 = Local loopback path disabled. 1 = Local loopback path enabled. LLB controls the local loopback on the data serializer for testing in Master Mode only. MISO is internally connected to MOSI. 208 32058K AVR32-01/12
AT32UC3A (cid:129) PCS: Peripheral Chip Select This field is only used if Fixed Peripheral Select is active (PS = 0). If PCSDEC = 0: PCS = xxx0 NPCS[3:0] = 1110 PCS = xx01 NPCS[3:0] = 1101 PCS = x011 NPCS[3:0] = 1011 PCS = 0111 NPCS[3:0] = 0111 PCS = 1111 forbidden (no peripheral is selected) (x = don’t care) If PCSDEC = 1: NPCS[3:0] output signals = PCS. (cid:129) DLYBCS: Delay Between Chip Selects This field defines the delay from NPCS inactive to the activation of another NPCS. The DLYBCS time guarantees non-over- lapping chip selects and solves bus contentions in case of peripherals having long data float times. If DLYBCS is less than or equal to six, six MCK periods (or 6*N MCK periods if FDIV is set) will be inserted by default. Otherwise, the following equation determines the delay: If FDIV is 0: DLYBCS Delay Between Chip Selects = ------------------------ MCK If FDIV is 1: DLYBCS ×N Delay Between Chip Selects = --------------------------------- MCK 209 32058K AVR32-01/12
AT32UC3A 23.8.3 SPI Receive Data Register Name: RDR Access Type: Read-only 31 30 29 28 27 26 25 24 – – – – – – – – 23 22 21 20 19 18 17 16 – – – – PCS 15 14 13 12 11 10 9 8 RD 7 6 5 4 3 2 1 0 RD (cid:129) RD: Receive Data Data received by the SPI Interface is stored in this register right-justified. Unused bits read zero. (cid:129) PCS: Peripheral Chip Select In Master Mode only, these bits indicate the value on the NPCS pins at the end of a transfer. Otherwise, these bits read zero. 210 32058K AVR32-01/12
AT32UC3A 23.8.4 SPI Transmit Data Register Name: TDR Access Type: Write-only 31 30 29 28 27 26 25 24 – – – – – – – LASTXFER 23 22 21 20 19 18 17 16 – – – – PCS 15 14 13 12 11 10 9 8 TD 7 6 5 4 3 2 1 0 TD (cid:129) TD: Transmit Data Data to be transmitted by the SPI Interface is stored in this register. Information to be transmitted must be written to the transmit data register in a right-justified format. PCS: Peripheral Chip Select This field is only used if Variable Peripheral Select is active (PS = 1). If PCSDEC = 0: PCS = xxx0 NPCS[3:0] = 1110 PCS = xx01 NPCS[3:0] = 1101 PCS = x011 NPCS[3:0] = 1011 PCS = 0111 NPCS[3:0] = 0111 PCS = 1111 forbidden (no peripheral is selected) (x = don’t care) If PCSDEC = 1: NPCS[3:0] output signals = PCS (cid:129) LASTXFER: Last Transfer 0 = No effect. 1 = The current NPCS will be deasserted after the character written in TD has been transferred. When CSAAT is set, this allows to close the communication with the current serial peripheral by raising the corresponding NPCS line as soon as TD transfer has completed. This field is only used if Variable Peripheral Select is active (PS = 1). 211 32058K AVR32-01/12
AT32UC3A 23.8.5 SPI Status Register Name: SR Access Type: Read-only 31 30 29 28 27 26 25 24 – – – – – – – – 23 22 21 20 19 18 17 16 – – – – – – – SPIENS 15 14 13 12 11 10 9 8 – – – – – – TXEMPTY NSSR 7 6 5 4 3 2 1 0 TXBUFE RXBUFF ENDTX ENDRX OVRES MODF TDRE RDRF (cid:129) RDRF: Receive Data Register Full 0 = No data has been received since the last read of RDR 1 = Data has been received and the received data has been transferred from the serializer to RDR since the last read of RDR. (cid:129) TDRE: Transmit Data Register Empty 0 = Data has been written to TDR and not yet transferred to the serializer. 1 = The last data written in the Transmit Data Register has been transferred to the serializer. TDRE equals zero when the SPI is disabled or at reset. The SPI enable command sets this bit to one. (cid:129) MODF: Mode Fault Error 0 = No Mode Fault has been detected since the last read of SR. 1 = A Mode Fault occurred since the last read of the SR. (cid:129) OVRES: Overrun Error Status 0 = No overrun has been detected since the last read of SR. 1 = An overrun has occurred since the last read of SR. An overrun occurs when RDR is loaded at least twice from the serializer since the last read of the RDR. (cid:129) ENDRX: End of RX buffer 0 = The Receive Counter Register has not reached 0 since the last write in RCR or RNCR. 1 = The Receive Counter Register has reached 0 since the last write in RCR or RNCR. (cid:129) ENDTX: End of TX buffer 0 = The Transmit Counter Register has not reached 0 since the last write in TCR or TNCR. 1 = The Transmit Counter Register has reached 0 since the last write in TCR or TNCR. (cid:129) RXBUFF: RX Buffer Full 0 = RCR or RNCR has a value other than 0. 1 = Both RCR and RNCR has a value of 0. (cid:129) TXBUFE: TX Buffer Empty 0 = TCR or TNCR has a value other than 0. 212 32058K AVR32-01/12
AT32UC3A 1 = Both TCR and TNCR has a value of 0. (cid:129) NSSR: NSS Rising 0 = No rising edge detected on NSS pin since last read. 1 = A rising edge occurred on NSS pin since last read. (cid:129) TXEMPTY: Transmission Registers Empty 0 = As soon as data is written in TDR. 1 = TDR and internal shifter are empty. If a transfer delay has been defined, TXEMPTY is set after the completion of such delay. (cid:129) SPIENS: SPI Enable Status 0 = SPI is disabled. 1 = SPI is enabled. 213 32058K AVR32-01/12
AT32UC3A 23.8.6 SPI Interrupt Enable Register Name: IER Access Type: Write-only 31 30 29 28 27 26 25 24 – – – – – – – – 23 22 21 20 19 18 17 16 – – – – – – – – 15 14 13 12 11 10 9 8 – – – – – – TXEMPTY NSSR 7 6 5 4 3 2 1 0 TXBUFE RXBUFF ENDTX ENDRX OVRES MODF TDRE RDRF (cid:129) RDRF: Receive Data Register Full Interrupt Enable (cid:129) TDRE: SPI Transmit Data Register Empty Interrupt Enable (cid:129) MODF: Mode Fault Error Interrupt Enable (cid:129) OVRES: Overrun Error Interrupt Enable (cid:129) ENDRX: End of Receive Buffer Interrupt Enable (cid:129) ENDTX: End of Transmit Buffer Interrupt Enable (cid:129) RXBUFF: Receive Buffer Full Interrupt Enable (cid:129) TXBUFE: Transmit Buffer Empty Interrupt Enable (cid:129) TXEMPTY: Transmission Registers Empty Enable (cid:129) NSSR: NSS Rising Interrupt Enable 0 = No effect. 1 = Enables the corresponding interrupt. 214 32058K AVR32-01/12
AT32UC3A 23.8.7 SPI Interrupt Disable Register Name: IDR Access Type: Write-only 31 30 29 28 27 26 25 24 – – – – – – – – 23 22 21 20 19 18 17 16 – – – – – – – – 15 14 13 12 11 10 9 8 – – – – – – TXEMPTY NSSR 7 6 5 4 3 2 1 0 TXBUFE RXBUFF ENDTX ENDRX OVRES MODF TDRE RDRF (cid:129) RDRF: Receive Data Register Full Interrupt Disable (cid:129) TDRE: SPI Transmit Data Register Empty Interrupt Disable (cid:129) MODF: Mode Fault Error Interrupt Disable (cid:129) OVRES: Overrun Error Interrupt Disable (cid:129) ENDRX: End of Receive Buffer Interrupt Disable (cid:129) ENDTX: End of Transmit Buffer Interrupt Disable (cid:129) RXBUFF: Receive Buffer Full Interrupt Disable (cid:129) TXBUFE: Transmit Buffer Empty Interrupt Disable (cid:129) TXEMPTY: Transmission Registers Empty Disable (cid:129) NSSR: NSS Rising Interrupt Disable 0 = No effect. 1 = Disables the corresponding interrupt. 215 32058K AVR32-01/12
AT32UC3A 23.8.8 SPI Interrupt Mask Register Name: IMR Access Type: Read-only 31 30 29 28 27 26 25 24 – – – – – – – – 23 22 21 20 19 18 17 16 – – – – – – – – 15 14 13 12 11 10 9 8 – – – – – – TXEMPTY NSSR 7 6 5 4 3 2 1 0 TXBUFE RXBUFF ENDTX ENDRX OVRES MODF TDRE RDRF (cid:129) RDRF: Receive Data Register Full Interrupt Mask (cid:129) TDRE: SPI Transmit Data Register Empty Interrupt Mask (cid:129) MODF: Mode Fault Error Interrupt Mask (cid:129) OVRES: Overrun Error Interrupt Mask (cid:129) ENDRX: End of Receive Buffer Interrupt Mask (cid:129) ENDTX: End of Transmit Buffer Interrupt Mask (cid:129) RXBUFF: Receive Buffer Full Interrupt Mask (cid:129) TXBUFE: Transmit Buffer Empty Interrupt Mask (cid:129) TXEMPTY: Transmission Registers Empty Mask (cid:129) NSSR: NSS Rising Interrupt Mask 0 = The corresponding interrupt is not enabled. 1 = The corresponding interrupt is enabled. 216 32058K AVR32-01/12
AT32UC3A 23.8.9 SPI Chip Select Register Name: CSR0... CSR3 Access Type: Read/Write 31 30 29 28 27 26 25 24 DLYBCT 23 22 21 20 19 18 17 16 DLYBS 15 14 13 12 11 10 9 8 SCBR 7 6 5 4 3 2 1 0 BITS CSAAT CSNAAT NCPHA CPOL (cid:129) CPOL: Clock Polarity 0 = The inactive state value of SPCK is logic level zero. 1 = The inactive state value of SPCK is logic level one. CPOL is used to determine the inactive state value of the serial clock (SPCK). It is used with NCPHA to produce the required clock/data relationship between master and slave devices. (cid:129) NCPHA: Clock Phase 0 = Data is changed on the leading edge of SPCK and captured on the following edge of SPCK. 1 = Data is captured on the leading edge of SPCK and changed on the following edge of SPCK. NCPHA determines which edge of SPCK causes data to change and which edge causes data to be captured. NCPHA is used with CPOL to produce the required clock/data relationship between master and slave devices. (cid:129) CSNAAT: Chip Select Not Active After Transfer 0 = The Peripheral Chip Select Line rises as soon as the last transfer is acheived 1 = The Peripheral Chip Select Line rises after every transfer CSNAAT can be used to force the Peripheral Chip Select Line to go inactive after every transfer. This allows successful interfacing to SPI slave devices that require this behavior. (cid:129) CSAAT: Chip Select Active After Transfer 0 = The Peripheral Chip Select Line rises as soon as the last transfer is achieved. 1 = The Peripheral Chip Select does not rise after the last transfer is achieved. It remains active until a new transfer is requested on a different chip select. (cid:129) BITS: Bits Per Transfer The BITS field determines the number of data bits transferred. Reserved values should not be used, see Table 23-4 on page 218. 217 32058K AVR32-01/12
AT32UC3A . Table 23-4. BITS, Bits Per Transfer BITS Bits Per Transfer 0000 8 0001 9 0010 10 0011 11 0100 12 0101 13 0110 14 0111 15 1000 16 1001 Reserved 1010 Reserved 1011 Reserved 1100 Reserved 1101 Reserved 1110 Reserved 1111 Reserved (cid:129) SCBR: Serial Clock Baud Rate In Master Mode, the SPI Interface uses a modulus counter to derive the SPCK baud rate from the Master Clock MCK. The Baud rate is selected by writing a value from 1 to 255 in the SCBR field. The following equations determine the SPCK baud rate: If FDIV is 0: MCK SPCK Baudrate = ---------------- SCBR If FDIV is 1: MCK SPCK Baudrate = ------------------------------ (N×SCBR) Note: N = 32 Programming the SCBR field at 0 is forbidden. Triggering a transfer while SCBR is at 0 can lead to unpredictable results. At reset, SCBR is 0 and the user has to program it at a valid value before performing the first transfer. (cid:129) DLYBS: Delay Before SPCK This field defines the delay from NPCS valid to the first valid SPCK transition. When DLYBS equals zero, the NPCS valid to SPCK transition is 1/2 the SPCK clock period. 218 32058K AVR32-01/12
AT32UC3A Otherwise, the following equations determine the delay: If FDIV is 0: DLYBS Delay Before SPCK = -------------------- MCK If FDIV is 1: N×DLYBS Delay Before SPCK = ------------------------------ MCK Note: N = 32 (cid:129) DLYBCT: Delay Between Consecutive Transfers This field defines the delay between two consecutive transfers with the same peripheral without removing the chip select. The delay is always inserted after each transfer and before removing the chip select if needed. When DLYBCT equals zero, no delay between consecutive transfers is inserted and the clock keeps its duty cycle over the character transfers. Otherwise, the following equation determines the delay: If FDIV is 0: 32×DLYBCT SCBR Delay Between Consecutive Transfers = --------------------------+---------------------------- MCK 2MCK If FDIV is 1: 32×N×DLYBCT N×SCBR Delay Between Consecutive Transfers = --------------------------------+----------------------------------------- MCK 2MCK N = 32 219 32058K AVR32-01/12
AT32UC3A 24. Two-Wire Interface (TWI) 2.1.1.0 24.1 Features (cid:129) Compatible with Atmel Two-wire Interface Serial Memory and I²C Compatible Devices(1) (cid:129) One, Two or Three Bytes for Slave Address (cid:129) Sequential Read-write Operations (cid:129) Master, Multi-master and Slave Mode Operation (cid:129) Bit Rate: Up to 400 Kbits (cid:129) General Call Supported in Slave mode (cid:129) Connection to Peripheral DMA Controller (PDC) Channel Capabilities Optimizes Data Transfers in Master Mode Only – One Channel for the Receiver, One Channel for the Transmitter – Next Buffer Support Note: 1. See Table 24-1 below for details on compatibility with I²C Standard. 24.2 Overview The Atmel Two-wire Interface (TWI) interconnects components on a unique two-wire bus, made up of one clock line and one data line with speeds of up to 400 Kbits per second, based on a byte-oriented transfer format. It can be used with any Atmel Two-wire Interface bus Serial EEPROM and I²C compatible device such as Real Time Clock (RTC), Dot Matrix/Graphic LCD Controllers and Temperature Sensor, to name but a few. The TWI is programmable as a master or a slave with sequential or single-byte access. Multiple master capability is supported. Arbitra- tion of the bus is performed internally and puts the TWI in slave mode automatically if the bus arbitration is lost. A configurable baud rate generator permits the output data rate to be adapted to a wide range of core clock frequencies. Below, Table 24-1 lists the compatibility level of the Atmel Two-wire Interface in Master Mode and a full I2C compatible device. Table 24-1. Atmel TWI compatibility with I2C Standard I2C Standard Atmel TWI Standard Mode Speed (100 KHz) Supported Fast Mode Speed (400 KHz) Supported 7 or 10 bits Slave Addressing Supported START BYTE(1) Not Supported Repeated Start (Sr) Condition Supported ACK and NACK Management Supported Slope control and input filtering (Fast mode) Not Supported Clock stretching Supported Note: 1. START + b000000001 + Ack + Sr 220 32058K AVR32-01/12
AT32UC3A 24.3 List of Abbreviations Table 24-2. Abbreviations Abbreviation Description TWI Two-wire Interface A Acknowledge NA Non Acknowledge P Stop S Start Sr Repeated Start SADR Slave Address ADR Any address except SADR R Read W Write 24.4 Block Diagram Figure 24-1. Block Diagram Peripheral Bus Bridge TWCK PIO TWD Two-wire Interface MCK PM TWI Interrupt INTC 221 32058K AVR32-01/12
AT32UC3A 24.5 Application Block Diagram Figure 24-2. Application Block Diagram VDD Rp Rp TWD Host with TWI TWCK Interface Atmel TWI I²C LCD I²C Temp. I²C RTC Serial EEPROM Controller Sensor Slave 1 Slave 2 Slave 3 Slave 4 Rp: Pull up value as given by the I²C Standard 24.6 I/O Lines Description Table 24-3. I/O Lines Description Pin Name Pin Description Type TWD Two-wire Serial Data Input/Output TWCK Two-wire Serial Clock Input/Output 24.7 Product Dependencies 24.7.1 I/O Lines Both TWD and TWCK are bidirectional lines, connected to a positive supply voltage via a current source or pull-up resistor (see Figure 24-2 on page 222). When the bus is free, both lines are high. The output stages of devices connected to the bus must have an open-drain or open-col- lector to perform the wired-AND function. TWD and TWCK pins may be multiplexed with GPIO lines. To enable the TWI, the programmer must perform the following steps: (cid:129) Program the GPIO controller to: – Dedicate TWD and TWCK as peripheral lines. – Define TWD and TWCK as open-drain. 24.7.2 Power Management The TWI clock is generated by the Power Manager (PM). Before using the TWI, the programmer must ensure that the TWI clock is enabled in the PM. In the TWI description, Master Clock (MCK) is the clock of the peripheral bus to which the TWI is connected. 222 32058K AVR32-01/12
AT32UC3A 24.7.3 Interrupt The TWI interface has an interrupt line connected to the Interrupt Controller (INTC). In order to handle interrupts, the INTC must be programmed before configuring the TWI. 24.8 Functional Description 24.8.1 Transfer Format The data put on the TWD line must be 8 bits long. Data is transferred MSB first; each byte must be followed by an acknowledgement. The number of bytes per transfer is unlimited (see Figure 24-4). Each transfer begins with a START condition and terminates with a STOP condition (see Figure 24-3). (cid:129) A high-to-low transition on the TWD line while TWCK is high defines the START condition. (cid:129) A low-to-high transition on the TWD line while TWCK is high defines a STOP condition. Figure 24-3. START and STOP Conditions TWD TWCK Start Stop Figure 24-4. Transfer Format TWD TWCK Start Address R/W Ack Data Ack Data Ack Stop 24.9 Modes of Operation The TWI has six modes of operations: (cid:129) Master transmitter mode (cid:129) Master receiver mode (cid:129) Multi-master transmitter mode (cid:129) Multi-master receiver mode (cid:129) Slave transmitter mode (cid:129) Slave receiver mode These modes are described in the following chapters. 223 32058K AVR32-01/12
AT32UC3A 24.10 Master Mode 24.10.1 Definition The Master is the device which starts a transfer, generates a clock and stops it. 24.10.2 Application Block Diagram Figure 24-5. Master Mode Typical Application Block Diagram VDD Rp Rp TWD Host with TWI TWCK Interface Atmel TWI I²C LCD I²C Temp. I²C RTC Serial EEPROM Controller Sensor Slave 1 Slave 2 Slave 3 Slave 4 Rp: Pull up value as given by the I²C Standard 24.10.3 Programming Master Mode The following registers have to be programmed before entering Master mode: 1. DADR (+ IADRSZ + IADR if a 10 bit device is addressed): The device address is used to access slave devices in read or write mode. 2. CKDIV + CHDIV + CLDIV: Clock Waveform. 3. SVDIS: Disable the slave mode. 4. MSEN: Enable the master mode. 24.10.4 Master Transmitter Mode After the master initiates a Start condition when writing into the Transmit Holding Register, THR, it sends a 7-bit slave address, configured in the Master Mode register (DADR in MMR), to notify the slave device. The bit following the slave address indicates the transfer direction, 0 in this case (MREAD = 0 in MMR). The TWI transfers require the slave to acknowledge each received byte. During the acknowl- edge clock pulse (9th pulse), the master releases the data line (HIGH), enabling the slave to pull it down in order to generate the acknowledge. The master polls the data line during this clock pulse and sets the NACK in the status register if the slave does not acknowledge the byte. As with the other status bits, an interrupt can be generated if enabled in the interrupt enable register (IER). If the slave acknowledges the byte, the data written in the THR, is then shifted in the inter- nal shifter and transferred. When an acknowledge is detected, the TXRDY bit is set until a new write in the THR. When no more data is written into the THR, the master generates a stop condi- tion to end the transfer. The end of the complete transfer is marked by the TXCOMP bit set to one. See Figure 24-6, Figure 24-7, and Figure 24-8 on page 225. TXRDY is used as Transmit Ready for the PDC transmit channel. 224 32058K AVR32-01/12
AT32UC3A Figure 24-6. Master Write with One Data Byte TWD S DADR W A DATA A P TXCOMP TXRDY Write THR (DATA) STOP sent automaticaly (ACK received and TXRDY = 1) Figure 24-7. Master Write with Multiple Data Byte TWD S DADR W A DATA n A DATA n+5 A DATA n+x A P TXCOMP TXRDY Write THR (Data n) Write THR (Data n+1) Write THR (Data n+x) STOP sent automaticaly Last data sent (ACK received and TXRDY = 1) Figure 24-8. Master Write with One Byte Internal Address and Multiple Data Bytes TWD S DADR W A IADR(7:0) A DATA n A DATA n+5 A DATA n+x A P TXCOMP TXRDY Write THR (Data n) Write THR (Data n+1) Write THR (Data n+x) STOP sent automaticaly Last data sent (ACK received and TXRDY = 1) 24.10.5 Master Receiver Mode The read sequence begins by setting the START bit. After the start condition has been sent, the master sends a 7-bit slave address to notify the slave device. The bit following the slave address indicates the transfer direction, 1 in this case (MREAD = 1 in MMR). During the acknowledge clock pulse (9th pulse), the master releases the data line (HIGH), enabling the slave to pull it down in order to generate the acknowledge. The master polls the data line during this clock pulse and sets the NACK bit in the status register if the slave does not acknowledge the byte. If an acknowledge is received, the master is then ready to receive data from the slave. After data has been received, the master sends an acknowledge condition to notify the slave that the data has been received except for the last data, after the stop condition. See Figure 24-9. When the 225 32058K AVR32-01/12
AT32UC3A RXRDY bit is set in the status register, a character has been received in the receive-holding reg- ister (RHR). The RXRDY bit is reset when reading the RHR. When a single data byte read is performed, with or without internal address (IADR), the START and STOP bits must be set at the same time. See Figure 24-9. When a multiple data byte read is performed, with or without IADR, the STOP bit must be set after the next-to-last data received. See Figure 24-10. For Internal Address usage see ”Internal Address” on page 226. Figure 24-9. Master Read with One Data Byte TWD S DADR R A DATA N P TXCOMP Write START & STOP Bit RXRDY Read RHR Figure 24-10. Master Read with Multiple Data Bytes TWD S DADR R A DATA n A DATA (n+1) A DATA (n+m)-1 A DATA (n+m) N P TXCOMP Write START Bit RXRDY Read RHR Read RHR Read RHR Read RHR DATA n DATA (n+1) DATA (n+m)-1 DATA (n+m) Write STOP Bit after next-to-last data read RXRDY is used as Receive Ready for the PDC receive channel. 24.10.6 Internal Address The TWI interface can perform various transfer formats: Transfers with 7-bit slave address devices and 10-bit slave address devices. 24.10.6.1 7-bit Slave Addressing When Addressing 7-bit slave devices, the internal address bytes are used to perform random address (read or write) accesses to reach one or more data bytes, within a memory page loca- tion in a serial memory, for example. When performing read operations with an internal address, the TWI performs a write operation to set the internal address into the slave device, and then switch to Master Receiver mode. Note that the second start condition (after sending the IADR) is sometimes called “repeated start” (Sr) in I2C fully-compatible devices. See Figure 24-12. See Figure 24-11 and Figure 24.11 for Master Write operation with internal address. The three internal address bytes are configurable through the Master Mode register (MMR). 226 32058K AVR32-01/12
AT32UC3A If the slave device supports only a 7-bit address, i.e. no internal address, IADRSZ must be set to 0. n the figures below the following abbreviations are used:I (cid:129)S Start (cid:129)Sr Repeated Start (cid:129)P Stop (cid:129)W Write (cid:129)R Read (cid:129)A Acknowledge (cid:129)N Not Acknowledge (cid:129) DADR Device Address (cid:129)IADR Internal Address Figure 24-11. Master Write with One, Two or Three Bytes Internal Address and One Data Byte Three bytes internal address TWD S DADR W A IADR(23:16) A IADR(15:8) A IADR(7:0) A DATA A P Two bytes internal address TWD S DADR W A IADR(15:8) A IADR(7:0) A DATA A P One byte internal address TWD S DADR W A IADR(7:0) A DATA A P Figure 24-12. Master Read with One, Two or Three Bytes Internal Address and One Data Byte Three bytes internal address TWD S DADR W A IADR(23:16) A IADR(15:8) A IADR(7:0) A Sr DADR R A DATA N P Two bytes internal address TWD S DADR W A IADR(15:8) A IADR(7:0) A Sr DADR R A DATA N P One byte internal address TWD S DADR W A IADR(7:0) A Sr DADR R A DATA N P 227 32058K AVR32-01/12
AT32UC3A 24.10.6.2 10-bit Slave Addressing For a slave address higher than 7 bits, the user must configure the address size (IADRSZ) and set the other slave address bits in the internal address register (IADR). The two remaining Inter- nal address bytes, IADR[15:8] and IADR[23:16] can be used the same as in 7-bit Slave Addressing. Example: Address a 10-bit device: (10-bit device address is b1 b2 b3 b4 b5 b6 b7 b8 b9 b10) 1. Program IADRSZ = 1, 2. Program DADR with 1 1 1 1 0 b1 b2 (b1 is the MSB of the 10-bit address, b2, etc.) 3. Program IADR with b3 b4 b5 b6 b7 b8 b9 b10 (b10 is the LSB of the 10-bit address) Figure 24.11 below shows a byte write to an Atmel AT24LC512 EEPROM. This demonstrates the use of internal addresses to access the device. 24.11 Internal Address Usage Using the Peripheral DMA Controller (PDC) S W T R S A I T R Device T FIRST SECOND O T Address E WORD ADDRESS WORD ADDRESS DATA P 0 M LR A M A LA A S S / C S C SC C B BWK B K BK K The use of the PDC significantly reduces the CPU load. To assure correct implementation, respect the following programming sequences: 24.11.1 Data Transmit with the PDC 1. Initialize the transmit PDC (memory pointers, size, etc.). 2. Configure the master mode (DADR, CKDIV, etc.). 3. Start the transfer by setting the PDC TXTEN bit. 4. Wait for the PDC end TX flag. 5. Disable the PDC by setting the PDC TXDIS bit. 24.11.2 Data Receive with the PDC 1. Initialize the receive PDC (memory pointers, size - 1, etc.). 2. Configure the master mode (DADR, CKDIV, etc.). 3. Start the transfer by setting the PDC RXTEN bit. 4. Wait for the PDC end RX flag. 5. Disable the PDC by setting the PDC RXDIS bit. 228 32058K AVR32-01/12
AT32UC3A 24.11.3 Read-write Flowcharts The following flowcharts shown in Figure 24-13 to Figure 24-18 on page 234 give examples for read and write operations. A polling or interrupt method can be used to check the status bits. The interrupt method requires that the interrupt enable register (IER) be configured first. Figure 24-13. TWI Write Operation with Single Data Byte without Internal Address. BEGIN Set TWI clock (CLDIV, CHDIV, CKDIV) in TWI_CWGR (Needed only once) Set the Control register: - Master enable TWI_CR = MSEN + SVDIS Set the Master Mode register: - Device slave address (DADR) - Transfer direction bit Write ==> bit MREAD = 0 Load Transmit register TWI_THR = Data to send Read Status register No TXRDY = 1? Yes Read Status register No TXCOMP = 1? Yes Transfer finished 229 32058K AVR32-01/12
AT32UC3A Figure 24-14. TWI Write Operation with Single Data Byte and Internal Address BEGIN Set TWI clock (CLDIV, CHDIV, CKDIV) in TWI_CWGR (Needed only once) Set the Control register: - Master enable TWI_CR = MSEN + SVDIS Set the Master Mode register: - Device slave address (DADR) - Internal address size (IADRSZ) - Transfer direction bit Write ==> bit MREAD = 0 Set the internal address TWI_IADR = address Load transmit register TWI_THR = Data to send Read Status register No TXRDY = 1? Yes Read Status register TXCOMP = 1? No Yes Transfer finished 230 32058K AVR32-01/12
AT32UC3A Figure 24-15. TWI Write Operation with Multiple Data Bytes with or without Internal Address BEGIN Set TWI clock (CLDIV, CHDIV, CKDIV) in TWI_CWGR (Needed only once) Set the Control register: - Master enable TWI_CR = MSEN + SVDIS Set the Master Mode register: - Device slave address - Internal address size (if IADR used) - Transfer direction bit Write ==> bit MREAD = 0 No Internal address size = 0? Set the internal address TWI_IADR = address Yes Load Transmit register TWI_THR = Data to send Read Status register TWI_THR = data to send No TXRDY = 1? Yes Data to send? Yes Read Status register Yes No TXCOMP = 1? END 231 32058K AVR32-01/12
AT32UC3A Figure 24-16. TWI Read Operation with Single Data Byte without Internal Address BEGIN Set TWI clock (CLDIV, CHDIV, CKDIV) in TWI_CWGR (Needed only once) Set the Control register: - Master enable TWI_CR = MSEN + SVDIS Set the Master Mode register: - Device slave address - Transfer direction bit Read ==> bit MREAD = 1 Start the transfer TWI_CR = START | STOP Read status register No RXRDY = 1? Yes Read Receive Holding Register Read Status register No TXCOMP = 1? Yes END 232 32058K AVR32-01/12
AT32UC3A Figure 24-17. TWI Read Operation with Single Data Byte and Internal Address BEGIN Set TWI clock (CLDIV, CHDIV, CKDIV) in TWI_CWGR (Needed only once) Set the Control register: - Master enable TWI_CR = MSEN + SVDIS Set the Master Mode register: - Device slave address - Internal address size (IADRSZ) - Transfer direction bit Read ==> bit MREAD = 1 Set the internal address TWI_IADR = address Start the transfer TWI_CR = START | STOP Read Status register No RXRDY = 1? Yes Read Receive Holding register Read Status register No TXCOMP = 1? Yes END 233 32058K AVR32-01/12
AT32UC3A Figure 24-18. TWI Read Operation with Multiple Data Bytes with or without Internal Address BEGIN Set TWI clock (CLDIV, CHDIV, CKDIV) in TWI_CWGR (Needed only once) Set the Control register: - Master enable TWI_CR = MSEN + SVDIS Set the Master Mode register: - Device slave address - Internal address size (if IADR used) - Transfer direction bit Read ==> bit MREAD = 1 Internal address size = 0? Set the internal address TWI_IADR = address Yes Start the transfer TWI_CR = START Read Status register No RXRDY = 1? Yes Read Receive Holding register (TWI_RHR) No Last data to read but one? Yes Stop the transfer TWI_CR = STOP Read Status register No RXRDY = 1? Yes Read Receive Holding register (TWI_RHR) Read status register No TXCOMP = 1? Yes END 234 32058K AVR32-01/12
AT32UC3A 24.12 Multi-master Mode 24.12.1 Definition More than one master may handle the bus at the same time without data corruption by using arbitration. Arbitration starts as soon as two or more masters place information on the bus at the same time, and stops (arbitration is lost) for the master that intends to send a logical one while the other master sends a logical zero. As soon as arbitration is lost by a master, it stops sending data and listens to the bus in order to detect a stop. When the stop is detected, the master who has lost arbitration may put its data on the bus by respecting arbitration. Arbitration is illustrated in Figure 24-20 on page 236. 24.12.2 Different Multi-master Modes Two multi-master modes may be distinguished: 1. TWI is considered as a Master only and will never be addressed. 2. TWI may be either a Master or a Slave and may be addressed. Note: Arbitration is supported in both Multi-master modes. 24.12.2.1 TWI as Master Only In this mode, TWI is considered as a Master only (MSEN is always at one) and must be driven like a Master with the ARBLST (ARBitration Lost) flag in addition. If arbitration is lost (ARBLST = 1), the programmer must reinitiate the data transfer. If the user starts a transfer (ex.: DADR + START + W + Write in THR) and if the bus is busy, the TWI automatically waits for a STOP condition on the bus to initiate the transfer (see Figure 24- 19 on page 236). Note: The state of the bus (busy or free) is not indicated in the user interface. 24.12.2.2 TWI as Master or Slave The automatic reversal from Master to Slave is not supported in case of a lost arbitration. Then, in the case where TWI may be either a Master or a Slave, the programmer must manage the pseudo Multi-master mode described in the steps below. 1. Program TWI in Slave mode (SADR + MSDIS + SVEN) and perform Slave Access (if TWI is addressed). 2. If TWI has to be set in Master mode, wait until TXCOMP flag is at 1. 3. Program Master mode (DADR + SVDIS + MSEN) and start the transfer (ex: START + Write in THR). 4. As soon as the Master mode is enabled, TWI scans the bus in order to detect if it is busy or free. When the bus is considered as free, TWI initiates the transfer. 5. As soon as the transfer is initiated and until a STOP condition is sent, the arbitration becomes relevant and the user must monitor the ARBLST flag. 6. If the arbitration is lost (ARBLST is set to 1), the user must program the TWI in Slave mode in the case where the Master that won the arbitration wanted to access the TWI. 235 32058K AVR32-01/12
AT32UC3A 7. If TWI has to be set in Slave mode, wait until TXCOMP flag is at 1 and then program the Slave mode. Note: In the case where the arbitration is lost and TWI is addressed, TWI will not acknowledge even if it is programmed in Slave mode as soon as ARBLST is set to 1. Then, the Master must repeat SADR. Figure 24-19. Programmer Sends Data While the Bus is Busy TWCK STOP sent by the master START sent by the TWI TWD DATA sent by a master DATA sent by the TWI Bus is busy Bus is free TWI DATA transfer Transfer is kept A transfer is programmed Bus is considered as free (DADR + W + START + Write THR) Transfer is initiated Figure 24-20. Arbitration Cases TWCK TWD TWCK Arbitration is lost Data from a Master S 1 0 0 1 1 P S 1 0 1 The master stops sending data Arbitration is lost Data from TWI S 1 0 1 S 1 0 0 1 1 TWI stops sending data TWD S 1 0 0 1 1 Data from the master P S 1 0 0 1 1 Data from the TWI ARBLST Bus is busy Bus is free TWI DATA transfer Transfer is kept A transfer is programmed Transfer is stopped Bus is considered as free (DADR + W + START + Write THR) Transfer is programmed again Transfer is initiated (DADR + W + START + Write THR) The flowchart shown in Figure 24-21 on page 237 gives an example of read and write operations in Multi-master mode. 236 32058K AVR32-01/12
AT32UC3A Figure 24-21. Multi-master Flowchart START Programm the SLAVE mode: SADR + MSDIS + SVEN Read Status Register Yes SVACC = 1 ? GACC = 1 ? SVREAD = 0 ? EOSACC = 1 ? Yes TXRDY= 1 ? Yes Yes Write in TWI_THR TXCOMP = 1 ? RXRDY= 0 ? Yes Yes Need to perform Read TWI_RHR a master access ? GENERAL CALL TREATMENT Yes Decoding of the programming sequence Prog seq OK ? Change SADR Program the Master mode DADR + SVDIS + MSEN + CLK + R / W Read Status Register Yes ARBLST = 1 ? Yes MREAD = 1 ? Yes Yes RXRDY= 0 ? TXRDY= 0 ? Yes Yes Read TWI_RHR Data to read? Data to send ? Write in TWI_THR Stop transfer Read Status Register Yes TXCOMP = 0 ? 237 32058K AVR32-01/12
AT32UC3A 24.13 Slave Mode 24.13.1 Definition The Slave Mode is defined as a mode where the device receives the clock and the address from another device called the master. In this mode, the device never initiates and never completes the transmission (START, REPEATED_START and STOP conditions are always provided by the master). 24.13.2 Application Block Diagram Figure 24-22. Slave Mode Typical Application Block Diagram VDD R R Master TWD Host with TWI TWCK Interface Host with TWI Host with TWI LCD Controller Interface Interface Slave 1 Slave 2 Slave 3 24.13.3 Programming Slave Mode The following fields must be programmed before entering Slave mode: 1. SADR (SMR): The slave device address is used in order to be accessed by master devices in read or write mode. 2. MSDIS (CR): Disable the master mode. 3. SVEN (CR): Enable the slave mode. As the device receives the clock, values written in CWGR are not taken into account. 24.13.4 Receiving Data After a Start or Repeated Start condition is detected and if the address sent by the Master matches with the Slave address programmed in the SADR (Slave ADdress) field, SVACC (Slave ACCess) flag is set and SVREAD (Slave READ) indicates the direction of the transfer. SVACC remains high until a STOP condition or a repeated START is detected. When such a condition is detected, EOSACC (End Of Slave ACCess) flag is set. 24.13.4.1 Read Sequence In the case of a Read sequence (SVREAD is high), TWI transfers data written in the THR (TWI Transmit Holding Register) until a STOP condition or a REPEATED_START + an address differ- ent from SADR is detected. Note that at the end of the read sequence TXCOMP (Transmission Complete) flag is set and SVACC reset. 238 32058K AVR32-01/12
AT32UC3A As soon as data is written in the THR, TXRDY (Transmit Holding Register Ready) flag is reset, and it is set when the shift register is empty and the sent data acknowledged or not. If the data is not acknowledged, the NACK flag is set. Note that a STOP or a repeated START always follows a NACK. See Figure 24-23 on page 240. 24.13.4.2 Write Sequence In the case of a Write sequence (SVREAD is low), the RXRDY (Receive Holding Register Ready) flag is set as soon as a character has been received in the RHR (TWI Receive Holding Register). RXRDY is reset when reading the RHR. TWI continues receiving data until a STOP condition or a REPEATED_START + an address dif- ferent from SADR is detected. Note that at the end of the write sequence TXCOMP flag is set and SVACC reset. See Figure 24-24 on page 241. 24.13.4.3 Clock Synchronization Sequence In the case where THR or RHR is not written/read in time, TWI performs a clock synchronization. Clock stretching information is given by the SCLWS (Clock Wait state) bit. See Figure 24-26 on page 242 and Figure 24-27 on page 243. 24.13.4.4 General Call In the case where a GENERAL CALL is performed, GACC (General Call ACCess) flag is set. After GACC is set, it is up to the programmer to interpret the meaning of the GENERAL CALL and to decode the new address programming sequence. See Figure 24-25 on page 241. 24.13.4.5 PDC As it is impossible to know the exact number of data to receive/send, the use of PDC is NOT rec- ommended in SLAVE mode. 239 32058K AVR32-01/12
AT32UC3A As it is impossible to know the exact number of data to receive/send, the use of PDC is NOT rec- ommended in SLAVE mode. 24.13.5 Data Transfer 24.13.5.1 Read Operation The read mode is defined as a data requirement from the master. After a START or a REPEATED START condition is detected, the decoding of the address starts. If the slave address (SADR) is decoded, SVACC is set and SVREAD indicates the direc- tion of the transfer. Until a STOP or REPEATED START condition is detected, TWI continues sending data loaded in the THR register. If a STOP condition or a REPEATED START + an address different from SADR is detected, SVACC is reset. Figure 24-23 on page 240 describes the write operation. Figure 24-23. Read Access Ordered by a MASTER SADR does not match, SADR matches, TWI answers with a NACK TWI answers with an ACK ACK/NACK from the Master TWD S ADR R NA DATA NA P/S/Sr SADR R A DATA A A DATA NA S/Sr TXRDY Write THR Read RHR NACK SVACC SVREAD SVREAD has to be taken into account only while SVACC is active EOSVACC Notes: 1. When SVACC is low, the state of SVREAD becomes irrelevant. 2. TXRDY is reset when data has been transmitted from THR to the shift register and set when this data has been acknowledged or non acknowledged. 24.13.5.2 Write Operation The write mode is defined as a data transmission from the master. After a START or a REPEATED START, the decoding of the address starts. If the slave address is decoded, SVACC is set and SVREAD indicates the direction of the transfer (SVREAD is low in this case). Until a STOP or REPEATED START condition is detected, TWI stores the received data in the RHR register. If a STOP condition or a REPEATED START + an address different from SADR is detected, SVACC is reset. Figure 24-24 on page 241 describes the Write operation. 240 32058K AVR32-01/12
AT32UC3A Figure 24-24. Write Access Ordered by a Master SADR does not match, SADR matches, TWI answers with a NACK TWI answers with an ACK Read RHR TWD S ADR W NA DATA NA P/S/Sr SADR W A DATA A A DATA NA S/Sr RXRDY SVACC SVREAD SVREAD has to be taken into account only while SVACC is active EOSVACC Notes: 1. When SVACC is low, the state of SVREAD becomes irrelevant. 2. RXRDY is set when data has been transmitted from the shift register to the RHR and reset when this data is read. 24.13.5.3 General Call The general call is performed in order to change the address of the slave. If a GENERAL CALL is detected, GACC is set. After the detection of General Call, it is up to the programmer to decode the commands which come afterwards. In case of a WRITE command, the programmer has to decode the programming sequence and program a new SADR if the programming sequence matches. Figure 24-25 on page 241 describes the General Call access. Figure 24-25. Master Performs a General Call RESET command = 00000110X 0000000 + W WRITE command = 00000100X TXD S GGGEEENNNEEERRRAAALLL CCCAAALLLLLL A Reset or write DADD A DATA1 A DATA2 A New SADR A P New SADR Programming sequence GCACC Reset after read SVACC Note: 1. This method allows the user to create an own programming sequence by choosing the pro- gramming bytes and the number of them. The programming sequence has to be provided to the master. 241 32058K AVR32-01/12
AT32UC3A 24.13.6 Clock Synchronization In both read and write modes, it may happen that THR/RHR buffer is not filled /emptied before the emission/reception of a new character. In this case, to avoid sending/receiving undesired data, a clock stretching mechanism is implemented. 24.13.6.1 Clock Synchronization in Read Mode The clock is tied low if the shift register is empty and if a STOP or REPEATED START condition was not detected. It is tied low until the shift register is loaded. Figure 24-26 on page 242 describes the clock synchronization in Read mode. Figure 24-26. Clock Synchronization in Read Mode TWI_THR DDDAAATTTAAA000 1 DATA1 DATA2 SS SADR R A DATA0 A DATA1 A XXXXXXX DATA2 NA S 2 TWCK CLOCK is tied low by the TWI as long as THR is empty Write THR SCLWS TXRDY SVACC SVREAD As soon as a START is detected TXCOMP TWI_THR is transmitted to the shift register Ack or Nack from the master 1 The data is memorized in TWI_THR until a new value is written 2 The clock is stretched after the ACK, the state of TWD is undefined during clock stretching Notes: 1. TXRDY is reset when data has been written in the TH to the shift register and set when this data has been acknowledged or non acknowledged. 2. At the end of the read sequence, TXCOMP is set after a STOP or after a REPEATED_START + an address different from SADR. 3. SCLWS is automatically set when the clock synchronization mechanism is started. 242 32058K AVR32-01/12
AT32UC3A 24.13.6.2 Clock Synchronization in Write Mode The clock is tied low if the shift register and the RHR is full. If a STOP or REPEATED_START condition was not detected, it is tied low until RHR is read. Figure 24-27 on page 243 describes the clock synchronization in Read mode. Figure 24-27. Clock Synchronization in Write Mode TWCK CLOCK is tied low by the TWI as long as RHR is full TWD S SADR W A DATA0 A DATA1 A DATA2 NA S ADR TWI_RHR DATA0 is not read in the RHR DATA1 DATA2 SCLWS SCL is stretched on the last bit of DATA1 RXRDY Rd DATA0 Rd DATA1 Rd DATA2 SVACC SVREAD As soon as a START is detected TXCOMP Notes: 1. At the end of the read sequence, TXCOMP is set after a STOP or after a REPEATED_START + an address different from SADR. 2. SCLWS is automatically set when the clock synchronization mechanism is started and automatically reset when the mecha- nism is finished. 243 32058K AVR32-01/12
AT32UC3A 24.13.7 Reversal after a Repeated Start 24.13.7.1 Reversal of Read to Write The master initiates the communication by a read command and finishes it by a write command. Figure 24-28 on page 244 describes the repeated start + reversal from Read to Write mode. Figure 24-28. Repeated Start + Reversal from Read to Write Mode TWI_THR DATA0 DATA1 TWD S SADR R A DATA0 A DATA1 NA Sr SADR W A DATA2 A DATA3 A P TWI_RHR DATA2 DATA3 SVACC SVREAD TXRDY RXRDY EOSACC Cleared after read TXCOMP As soon as a START is detected 1. TXCOMP is only set at the end of the transmission because after the repeated start, SADR is detected again. 24.13.7.2 Reversal of Write to Read The master initiates the communication by a write command and finishes it by a read com- mand.Figure 24-29 on page 244 describes the repeated start + reversal from Write to Read mode. Figure 24-29. Repeated Start + Reversal from Write to Read Mode TWI_THR DATA2 DATA3 TWD S SADR W A DATA0 A DATA1 A Sr SADR R A DATA2 A DATA3 NA P TWI_RHR DATA0 DATA1 SVACC SVREAD TXRDY RXRDY Read TWI_RHR EOSACC Cleared after read TXCOMP As soon as a START is detected Notes: 1. In this case, if THR has not been written at the end of the read command, the clock is automatically stretched before the ACK. 2. TXCOMP is only set at the end of the transmission because after the repeated start, SADR is detected again. 244 32058K AVR32-01/12
AT32UC3A 24.13.8 Read Write Flowcharts The flowchart shown in Figure 24-30 on page 245 gives an example of read and write operations in Slave mode. A polling or interrupt method can be used to check the status bits. The interrupt method requires that the interrupt enable register (IER) be configured first. Figure 24-30. Read Write Flowchart in Slave Mode Set the SLAVE mode: SADR + MSDIS + SVEN Read Status Register SVACC = 1 ? GACC = 1 ? SVREAD = 0 ? EOSACC = 1 ? TXRDY= 1 ? Write in TWI_THR TXCOMP = 1 ? RXRDY= 0 ? END Read TWI_RHR GENERAL CALL TREATMENT Decoding of the programming sequence Prog seq OK ? Change SADR 245 32058K AVR32-01/12
AT32UC3A 24.14 Two-wire Interface (TWI) User Interface 24.14.1 Register Mapping Table 24-4. TWI User Interface Offset Register Name Access Reset 0x00 Control Register CR Write-only N / A 0x04 Master Mode Register MMR Read-write 0x00000000 0x08 Slave Mode Register SMR Read-write 0x00000000 0x0C Internal Address Register IADR Read-write 0x00000000 0x10 Clock Waveform Generator Register CWGR Read-write 0x00000000 0x20 Status Register SR Read-only 0x0000F009 0x24 Interrupt Enable Register IER Write-only N / A 0x28 Interrupt Disable Register IDR Write-only N / A 0x2C Interrupt Mask Register IMR Read-only 0x00000000 0x30 Receive Holding Register RHR Read-only 0x00000000 0x34 Transmit Holding Register THR Write-only 0x00000000 0x38 - 0xF8 Reserved – – – 0xFC Version Register TWI_VER Read-only 0x00000000(1) 0x38 - 0xFC Reserved – – – Note: 1. Values in the Version Register vary with the version of the IP block implementation. 24.14.2 TWI Control Register Name: CR Access: Write-only Reset Value: 0x00000000 31 30 29 28 27 26 25 24 – – – – – – – – 23 22 21 20 19 18 17 16 – – – – – – – – 15 14 13 12 11 10 9 8 – – – – – – – – 7 6 5 4 3 2 1 0 SWRST – SVDIS SVEN MSDIS MSEN STOP START (cid:129) START: Send a START Condition 0 = No effect. 1 = A frame beginning with a START bit is transmitted according to the features defined in the mode register. 246 32058K AVR32-01/12
AT32UC3A This action is necessary when the TWI peripheral wants to read data from a slave. When configured in Master Mode with a write operation, a frame is sent as soon as the user writes a character in the Transmit Holding Register (THR). (cid:129) STOP: Send a STOP Condition 0 = No effect. 1 = STOP Condition is sent just after completing the current byte transmission in master read mode. - In single data byte master read, the START and STOP must both be set. - In multiple data bytes master read, the STOP must be set after the last data received but one. - In master read mode, if a NACK bit is received, the STOP is automatically performed. - In multiple data write operation, when both THR and shift register are empty, a STOP condition is automatically sent. (cid:129) MSEN: TWI Master Mode Enabled 0 = No effect. 1 = If MSDIS = 0, the master mode is enabled. Note: Switching from Slave to Master mode is only permitted when TXCOMP = 1. (cid:129) MSDIS: TWI Master Mode Disabled 0 = No effect. 1 = The master mode is disabled, all pending data is transmitted. The shifter and holding characters (if it contains data) are transmitted in case of write operation. In read operation, the character being transferred must be completely received before disabling. (cid:129) SVEN: TWI Slave Mode Enabled 0 = No effect. 1 = If SVDIS = 0, the slave mode is enabled. Note: Switching from Master to Slave mode is only permitted when TXCOMP = 1. (cid:129) SVDIS: TWI Slave Mode Disabled 0 = No effect. 1 = The slave mode is disabled. The shifter and holding characters (if it contains data) are transmitted in case of read oper- ation. In write operation, the character being transferred must be completely received before disabling. (cid:129) SWRST: Software Reset 0 = No effect. 1 = Equivalent to a system reset. 247 32058K AVR32-01/12
AT32UC3A 24.14.3 TWI Master Mode Register Name: MMR Access: Read-write Reset Value: 0x00000000 31 30 29 28 27 26 25 24 – – – – – – – – 23 22 21 20 19 18 17 16 – DADR 15 14 13 12 11 10 9 8 – – – MREAD – – IADRSZ 7 6 5 4 3 2 1 0 – – – – – – – – (cid:129) IADRSZ: Internal Device Address Size IADRSZ[9:8] Description 0 0 No internal device address 0 1 One-byte internal device address 1 0 Two-byte internal device address 1 1 Three-byte internal device address (cid:129) MREAD: Master Read Direction 0 = Master write direction. 1 = Master read direction. (cid:129) DADR: Device Address The device address is used to access slave devices in read or write mode. Those bits are only used in Master mode. 248 32058K AVR32-01/12
AT32UC3A 24.14.4 TWI Slave Mode Register Name: SMR Access: Read-write Reset Value: 0x00000000 31 30 29 28 27 26 25 24 – – – – – – – – 23 22 21 20 19 18 17 16 – SADR 15 14 13 12 11 10 9 8 – – – – – – 7 6 5 4 3 2 1 0 – – – – – – – – (cid:129) SADR: Slave Address The slave device address is used in Slave mode in order to be accessed by master devices in read or write mode. SADR must be programmed before enabling the Slave mode or after a general call. Writes at other times have no effect. 249 32058K AVR32-01/12
AT32UC3A 24.14.5 TWI Internal Address Register Name: IADR Access: Read-write Reset Value: 0x00000000 31 30 29 28 27 26 25 24 – – – – – – – – 23 22 21 20 19 18 17 16 IADR 15 14 13 12 11 10 9 8 IADR 7 6 5 4 3 2 1 0 IADR (cid:129) IA DR: Internal Address 0, 1, 2 or 3 bytes depending on IADRSZ. 250 32058K AVR32-01/12
AT32UC3A 24.14.6 TWI Clock Waveform Generator Register Name: CWGR Access: Read-write Reset Value: 0x00000000 31 30 29 28 27 26 25 24 – – – – – – – – 23 22 21 20 19 18 17 16 CKDIV 15 14 13 12 11 10 9 8 CHDIV 7 6 5 4 3 2 1 0 CLDIV CWGR is only used in Master mode. (cid:129) CLDIV: Clock Low Divider The SCL low period is defined as follows: T = ((CLDIV×2CKDIV)+4)×T low MCK (cid:129) CHDIV: Clock High Divider The SCL high period is defined as follows: T = ((CHDIV×2CKDIV)+4)×T high MCK (cid:129) CKDIV: Clock Divider The CKDIV is used to increase both SCL high and low periods. 251 32058K AVR32-01/12
AT32UC3A 24.14.7 TWI Status Register Name: SR Access: Read-only Reset Value: 0x0000F009 31 30 29 28 27 26 25 24 – – – – – – – – 23 22 21 20 19 18 17 16 – – – – – – – – 15 14 13 12 11 10 9 8 TXBUFE RXBUFF ENDTX ENDRX EOSACC SCLWS ARBLST NACK 7 6 5 4 3 2 1 0 – OVRE GACC SVACC SVREAD TXRDY RXRDY TXCOMP (cid:129) TXCOMP: Transmission Completed (automatically set / reset) TXCOMP used in Master mode: 0 = During the length of the current frame. 1 = When both holding and shifter registers are empty and STOP condition has been sent. TXCOMP behavior in Master mode can be seen in Figure 24-8 on page 225 and in Figure 24-10 on page 226. TXCOMP used in Slave mode: 0 = As soon as a Start is detected. 1 = After a Stop or a Repeated Start + an address different from SADR is detected. TXCOMP behavior in Slave mode can be seen in Figure 24-26 on page 242, Figure 24-27 on page 243, Figure 24-28 on page 244 and Figure 24-29 on page 244. (cid:129) RXRDY: Receive Holding Register Ready (automatically set / reset) 0 = No character has been received since the last RHR read operation. 1 = A byte has been received in the RHR since the last read. RXRDY behavior in Master mode can be seen in Figure 24-10 on page 226. RXRDY behavior in Slave mode can be seen in Figure 24-24 on page 241, Figure 24-27 on page 243, Figure 24-28 on page 244 and Figure 24-29 on page 244. (cid:129) TXRDY: Transmit Holding Register Ready (automatically set / reset) TXRDY used in Master mode: 0 = The transmit holding register has not been transferred into shift register. Set to 0 when writing into THR register. 1 = As soon as a data byte is transferred from THR to internal shifter or if a NACK error is detected, TXRDY is set at the same time as TXCOMP and NACK. TXRDY is also set when MSEN is set (enable TWI). TXRDY behavior in Master mode can be seen in Figure 24-8 on page 225. 252 32058K AVR32-01/12
AT32UC3A TXRDY used in Slave mode: 0 = As soon as data is written in the THR, until this data has been transmitted and acknowledged (ACK or NACK). 1 = It indicates that the THR is empty and that data has been transmitted and acknowledged. If TXRDY is high and if a NACK has been detected, the transmission will be stopped. Thus when TRDY = NACK = 1, the programmer must not fill THR to avoid losing it. TXRDY behavior in Slave mode can be seen in Figure 24-23 on page 240, Figure 24-26 on page 242, Figure 24-28 on page 244 and Figure 24-29 on page 244. (cid:129) SVREAD: Slave Read (automatically set / reset) This bit is only used in Slave mode. When SVACC is low (no Slave access has been detected) SVREAD is irrelevant. 0 = Indicates that a write access is performed by a Master. 1 = Indicates that a read access is performed by a Master. SVREAD behavior can be seen in Figure 24-23 on page 240, Figure 24-24 on page 241, Figure 24-28 on page 244 and Figure 24-29 on page 244. (cid:129) SVACC: Slave Access (automatically set / reset) This bit is only used in Slave mode. 0 = TWI is not addressed. SVACC is automatically cleared after a NACK or a STOP condition is detected. 1 = Indicates that the address decoding sequence has matched (A Master has sent SADR). SVACC remains high until a NACK or a STOP condition is detected. SVACC behavior can be seen in Figure 24-23 on page 240, Figure 24-24 on page 241, Figure 24-28 on page 244 and Fig- ure 24-29 on page 244. (cid:129) GACC: General Call Access (clear on read) This bit is only used in Slave mode. 0 = No General Call has been detected. 1 = A General Call has been detected. After the detection of General Call, the programmer decoded the commands that fol- low and the programming sequence. GACC behavior can be seen in Figure 24-25 on page 241. (cid:129) OVRE: Overrun Error (clear on read) This bit is only used in Master mode. 0 = RHR has not been loaded while RXRDY was set 1 = RHR has been loaded while RXRDY was set. Reset by read in SR when TXCOMP is set. (cid:129) NACK: Not Acknowledged (clear on read) NACK used in Master mode: 0 = Each data byte has been correctly received by the far-end side TWI slave component. 1 = A data byte has not been acknowledged by the slave component. Set at the same time as TXCOMP. 253 32058K AVR32-01/12
AT32UC3A NACK used in Slave Read mode: 0 = Each data byte has been correctly received by the Master. 1 = In read mode, a data byte has not been acknowledged by the Master. When NACK is set the programmer must not fill THR even if TXRDY is set, because it means that the Master will stop the data transfer or re initiate it. Note that in Slave Write mode all data are acknowledged by the TWI. (cid:129) ARBLST: Arbitration Lost (clear on read) This bit is only used in Master mode. 0 = Arbitration won. 1 = Arbitration lost. Another master of the TWI bus has won the multi-master arbitration. TXCOMP is set at the same time. (cid:129) SCLWS: Clock Wait State (automatically set / reset) This bit is only used in Slave mode. 0 = The clock is not stretched. 1 = The clock is stretched. THR / RHR buffer is not filled / emptied before the emission / reception of a new character. SCLWS behavior can be seen in Figure 24-26 on page 242 and Figure 24-27 on page 243. (cid:129) EOSACC: End Of Slave Access (clear on read) This bit is only used in Slave mode. 0 = A slave access is being performing. 1 = The Slave Access is finished. End Of Slave Access is automatically set as soon as SVACC is reset. EOSACC behavior can be seen in Figure 24-28 on page 244 and Figure 24-29 on page 244 (cid:129) ENDRX: End of RX buffer This bit is only used in Master mode. 0 = The Receive Counter Register has not reached 0 since the last write in RCR or RNCR. 1 = The Receive Counter Register has reached 0 since the last write in RCR or RNCR. (cid:129) ENDTX: End of TX buffer This bit is only used in Master mode. 0 = The Transmit Counter Register has not reached 0 since the last write in TCR or TNCR. 1 = The Transmit Counter Register has reached 0 since the last write in TCR or TNCR. (cid:129) RXBUFF: RX Buffer Full This bit is only used in Master mode. 0 = RCR or RNCR have a value other than 0. 1 = Both RCR and RNCR have a value of 0. (cid:129) TXBUFE: TX Buffer Empty This bit is only used in Master mode. 0 = TCR or TNCR have a value other than 0. 254 32058K AVR32-01/12
AT32UC3A 1 = Both TCR and TNCR have a value of 0. 24.14.8 TWI Interrupt Enable Register Name: IER Access: Write-only Reset Value: 0x00000000 31 30 29 28 27 26 25 24 – – – – – – – – 23 22 21 20 19 18 17 16 – – – – – – – – 15 14 13 12 11 10 9 8 TXBUFE RXBUFF ENDTX ENDRX EOSACC SCL_WS ARBLST NACK 7 6 5 4 3 2 1 0 – OVRE GACC SVACC – TXRDY RXRDY TXCOMP (cid:129) TXCOMP: Transmission Completed Interrupt Enable (cid:129) RXRDY: Receive Holding Register Ready Interrupt Enable (cid:129) TXRDY: Transmit Holding Register Ready Interrupt Enable (cid:129) SVACC: Slave Access Interrupt Enable (cid:129) GACC: General Call Access Interrupt Enable (cid:129) OVRE: Overrun Error Interrupt Enable (cid:129) NACK: Not Acknowledge Interrupt Enable (cid:129) ARBLST: Arbitration Lost Interrupt Enable (cid:129) SCL_WS: Clock Wait State Interrupt Enable (cid:129) EOSACC: End Of Slave Access Interrupt Enable (cid:129) ENDRX: End of Receive Buffer Interrupt Enable (cid:129) ENDTX: End of Transmit Buffer Interrupt Enable (cid:129) RXBUFF: Receive Buffer Full Interrupt Enable (cid:129) TXBUFE: Transmit Buffer Empty Interrupt Enable 0 = No effect. 255 32058K AVR32-01/12
AT32UC3A 1 = Enables the corresponding interrupt. 24.14.9 TWI Interrupt Disable Register Name: IDR Access: Write-only Reset Value: 0x00000000 31 30 29 28 27 26 25 24 – – – – – – – – 23 22 21 20 19 18 17 16 – – – – – – – – 15 14 13 12 11 10 9 8 TXBUFE RXBUFF ENDTX ENDRX EOSACC SCL_WS ARBLST NACK 7 6 5 4 3 2 1 0 – OVRE GACC SVACC – TXRDY RXRDY TXCOMP (cid:129) TXCOMP: Transmission Completed Interrupt Disable (cid:129) RXRDY: Receive Holding Register Ready Interrupt Disable (cid:129) TXRDY: Transmit Holding Register Ready Interrupt Disable (cid:129) SVACC: Slave Access Interrupt Disable (cid:129) GACC: General Call Access Interrupt Disable (cid:129) OVRE: Overrun Error Interrupt Disable (cid:129) NACK: Not Acknowledge Interrupt Disable (cid:129) ARBLST: Arbitration Lost Interrupt Disable (cid:129) SCL_WS: Clock Wait State Interrupt Disable (cid:129) EOSACC: End Of Slave Access Interrupt Disable (cid:129) ENDRX: End of Receive Buffer Interrupt Disable (cid:129) ENDTX: End of Transmit Buffer Interrupt Disable (cid:129) RXBUFF: Receive Buffer Full Interrupt Disable (cid:129) TXBUFE: Transmit Buffer Empty Interrupt Disable 0 = No effect. 1 = Disables the corresponding interrupt. 256 32058K AVR32-01/12
AT32UC3A 24.14.10 TWI Interrupt Mask Register Name: IMR Access: Read-only Reset Value: 0x00000000 31 30 29 28 27 26 25 24 – – – – – – – – 23 22 21 20 19 18 17 16 – – – – – – – – 15 14 13 12 11 10 9 8 TXBUFE RXBUFF ENDTX ENDRX EOSACC SCL_WS ARBLST NACK 7 6 5 4 3 2 1 0 – OVRE GACC SVACC – TXRDY RXRDY TXCOMP (cid:129) TXCOMP: Transmission Completed Interrupt Mask (cid:129) RXRDY: Receive Holding Register Ready Interrupt Mask (cid:129) TXRDY: Transmit Holding Register Ready Interrupt Mask (cid:129) SVACC: Slave Access Interrupt Mask (cid:129) GACC: General Call Access Interrupt Mask (cid:129) OVRE: Overrun Error Interrupt Mask (cid:129) NACK: Not Acknowledge Interrupt Mask (cid:129) ARBLST: Arbitration Lost Interrupt Mask (cid:129) SCL_WS: Clock Wait State Interrupt Mask (cid:129) EOSACC: End Of Slave Access Interrupt Mask (cid:129) ENDRX: End of Receive Buffer Interrupt Mask (cid:129) ENDTX: End of Transmit Buffer Interrupt Mask (cid:129) RXBUFF: Receive Buffer Full Interrupt Mask (cid:129) TXBUFE: Transmit Buffer Empty Interrupt Mask 0 = The corresponding interrupt is disabled. 1 = The corresponding interrupt is enabled. 24.14.11 TWI Receive Holding Register Name: RHR 257 32058K AVR32-01/12
AT32UC3A Access: Read-only Reset Value: 0x00000000 31 30 29 28 27 26 25 24 – – – – – – – – 23 22 21 20 19 18 17 16 – – – – – – – – 15 14 13 12 11 10 9 8 – – – – – – – – 7 6 5 4 3 2 1 0 RXDATA (cid:129) RXDATA: Master or Slave Receive Holding Data 24.14.12 TWI Transmit Holding Register Name: THR Access: Read-write Reset Value: 0x00000000 31 30 29 28 27 26 25 24 – – – – – – – – 23 22 21 20 19 18 17 16 – – – – – – – – 15 14 13 12 11 10 9 8 – – – – – – – – 7 6 5 4 3 2 1 0 TXDATA (cid:129) TXDATA: Master or Slave Transmit Holding Data 258 32058K AVR32-01/12
AT32UC3A 25. Synchronous Serial Controller (SSC) Rev: 3.0.0.2 25.1 Features (cid:129) Provides Serial Synchronous Communication Links Used in Audio and Telecom Applications (cid:129) Contains an Independent Receiver and Transmitter and a Common Clock Divider (cid:129) Interfaced with Two PDCA Channels (DMA Access) to Reduce Processor Overhead (cid:129) Offers a Configurable Frame Sync and Data Length (cid:129) Receiver and Transmitter Can be Programmed to Start Automatically or on Detection of Different Events on the Frame Sync Signal (cid:129) Receiver and Transmitter Include a Data Signal, a Clock Signal and a Frame Synchronization Signal 25.2 Overview The Atmel Synchronous Serial Controller (SSC) provides a synchronous communication link with external devices. It supports many serial synchronous communication protocols generally used in audio and telecom applications such as I2S, Short Frame Sync, Long Frame Sync, etc. The SSC contains an independent receiver and transmitter and a common clock divider. The receiver and the transmitter each interface with three signals: the TX_DATA/RX_DATA signal for data, the TX_CLOCK/RX_CLOCK signal for the clock and the TX_FRAME_SYNC/RX_FRAME_SYNC signal for the Frame Sync. The transfers can be pro- grammed to start automatically or on different events detected on the Frame Sync signal. The SSC’s high-level of programmability and its two dedicated PDCA channels of up to 32 bits permit a continuous high bit rate data transfer without processor intervention. Featuring connection to two PDCA channels, the SSC permits interfacing with low processor overhead to the following: (cid:129) CODEC’s in master or slave mode (cid:129) DAC through dedicated serial interface, particularly I2S (cid:129) Magnetic card reader 259 32058K AVR32-01/12
AT32UC3A 25.3 Block Diagram Figure 25-1. Block Diagram High Speed Bus PeripheraBl us Bridge PDCA Peripheral Bus TX_FRAME_SYNC TX_CLOCK TX_DATA Power CLK_SSC Manager SSCI nterface PIO RX_FRAME_SYNC RX_CLOCK Interrupt Control RX_DATA SSCI nterrupt 25.4 Application Block Diagram Figure 25-2. Application Block Diagram Power Interrupt Test OS or RTOS Driver Management Management Management SSC Time Slot Frame Serial AUDIO Codec Line Interface Management Management 260 32058K AVR32-01/12
AT32UC3A 25.5 I/O Lines Description Table 25-1. I/O Lines Description Pin Name Pin Description Type RX_FRAME_SYNC Receiver Frame Synchro Input/Output RX_CLOCK Receiver Clock Input/Output RX_DATA Receiver Data Input TX_FRAME_SYNC Transmitter Frame Synchro Input/Output TX_CLOCK Transmitter Clock Input/Output TX_DATA Transmitter Data Output 25.6 Product Dependencies 25.6.1 I/O Lines The pins used for interfacing the compliant external devices may be multiplexed with PIO lines. Before using the SSC receiver, the PIO controller must be configured to dedicate the SSC receiver I/O lines to the SSC peripheral mode. Before using the SSC transmitter, the PIO controller must be configured to dedicate the SSC transmitter I/O lines to the SSC peripheral mode. 25.6.2 Power Management The SSC clock is generated by the power manager. Before using the SSC, the programmer must ensure that the SSC clock is enabled in the power manager. In the SSC description, Master Clock (CLK_SSC) is the bus clock of the peripheral bus to which the SSC is connected. 25.6.3 Interrupt The SSC interface has an interrupt line connected to the interrupt controller. Handling interrupts requires programming the interrupt controller before configuring the SSC. All SSC interrupts can be enabled/disabled configuring the SSC Interrupt mask register. Each pending and unmasked SSC interrupt will assert the SSC interrupt line. The SSC interrupt ser- vice routine can get the interrupt origin by reading the SSC interrupt status register. 25.7 Functional Description This chapter contains the functional description of the following: SSC Functional Block, Clock Management, Data format, Start, Transmitter, Receiver and Frame Sync. The receiver and transmitter operate separately. However, they can work synchronously by pro- gramming the receiver to use the transmit clock and/or to start a data transfer when transmission starts. Alternatively, this can be done by programming the transmitter to use the receive clock and/or to start a data transfer when reception starts. The transmitter and the receiver can be pro- grammed to operate with the clock signals provided on either the TX_CLOCK or RX_CLOCK pins. This allows the SSC to support many slave-mode data transfers. The maximum clock speed allowed on the TX_CLOCK and RX_CLOCK pins is the master clock divided by 2. 261 32058K AVR32-01/12
AT32UC3A Figure 25-3. SSC Functional Block Diagram Transmitter Clock Output TX_CLOCK Controller TX_CLOCKI nput CLK_SSC Clock Transmit ClockTX clock FrameS ync TX_FRAME_SYNC Divider Controller Controller RX clock TX_FRAME_SYNC Start RX_FRAME_SYNC Transmit Shift Register TX_DATA Selector TX_PDCA TransmitH olding TransmitS ync Peripheral Register HoldingR egister Bus Load Shift User Interface Receiver Clock Output RX_CLOCK Controller RX_CLOCK Input ReceiveC lockRX clock FrameS ync RX_FRAME_SYNC Controller Controller TX clock TX_FRAME_SYNC Start ReceiveS hift Register RX_DATA RX_FRAME_SYNC Selector RX_PDCA ReceiveH olding ReceiveS ync Register Holding Register PDCA InterruptC ontrol Load Shift Interrupt Controller 25.7.1 Clock Management The transmitter clock can be generated by: (cid:129) an external clock received on the TX_CLOCK I/O pad (cid:129) the receiver clock (cid:129) the internal clock divider The receiver clock can be generated by: (cid:129) an external clock received on the RX_CLOCK I/O pad (cid:129) the transmitter clock (cid:129) the internal clock divider Furthermore, the transmitter block can generate an external clock on the TX_CLOCK I/O pad, and the receiver block can generate an external clock on the RX_CLOCK I/O pad. This allows the SSC to support many Master and Slave Mode data transfers. 262 32058K AVR32-01/12
AT32UC3A 25.7.1.1 Clock Divider Figure 25-4. Divided Clock Block Diagram ClockD ivider CMR CLK_SSC DividedC lock / 2 12-bit Counter The Master Clock divider is determined by the 12-bit field DIV counter and comparator (so its maximal value is 4095) in the Clock Mode Register CMR, allowing a Master Clock division by up to 8190. The Divided Clock is provided to both the Receiver and Transmitter. When this field is programmed to 0, the Clock Divider is not used and remains inactive. When DIV is set to a value equal to or greater than 1, the Divided Clock has a frequency of Mas- ter Clock divided by 2 times DIV. Each level of the Divided Clock has a duration of the Master Clock multiplied by DIV. This ensures a 50% duty cycle for the Divided Clock regardless of whether the DIV value is even or odd. Figure 25-5. Divided Clock Generation Master Clock Divided Clock DIV = 1 Divided Clock Frequency = CLK_SSC/2 Master Clock Divided Clock DIV = 3 Divided Clock Frequency = CLK_SSC/6 Table 25-2. Maximum Minimum CLK_SSC / 2 CLK_SSC / 8190 25.7.1.2 Transmitter Clock Management The transmitter clock is generated from the receiver clock or the divider clock or an external clock scanned on the TX_CLOCK I/O pad. The transmitter clock is selected by the CKS field in TCMR (Transmit Clock Mode Register). Transmit Clock can be inverted independently by the CKI bits in TCMR. 263 32058K AVR32-01/12
AT32UC3A The transmitter can also drive the TX_CLOCK I/O pad continuously or be limited to the actual data transfer. The clock output is configured by the TCMR register. The Transmit Clock Inver- sion (CKI) bits have no effect on the clock outputs. Programming the TCMR register to select TX_CLOCK pin (CKS field) and at the same time Continuous Transmit Clock (CKO field) might lead to unpredictable results. Figure 25-6. Transmitter Clock Management TX_CLOCK(pin) MUX Tri-state Clock Controller Output Receiver Clock Divider Clock CKO Data Transfer CKS INV Tri-state Transmitter MUX Controller Clock CKI CKG 25.7.1.3 Receiver Clock Management The receiver clock is generated from the transmitter clock or the divider clock or an external clock scanned on the RX_CLOCK I/O pad. The Receive Clock is selected by the CKS field in RCMR (Receive Clock Mode Register). Receive Clocks can be inverted independently by the CKI bits in RCMR. The receiver can also drive the RX_CLOCK I/O pad continuously or be limited to the actual data transfer. The clock output is configured by the RCMR register. The Receive Clock Inversion (CKI) bits have no effect on the clock outputs. Programming the RCMR register to select RX_CLOCK pin (CKS field) and at the same time Continuous Receive Clock (CKO field) can lead to unpredictable results. 264 32058K AVR32-01/12
AT32UC3A Figure 25-7. Receiver Clock Management RX_CLOCK( pin) MUX Tri-state Clock Controller Output Transmitter Clock Divider Clock CKO Data Transfer CKS INV Tri-state MUX Controller Receiver Clock CKI CKG 25.7.1.4 Serial Clock Ratio Considerations The Transmitter and the Receiver can be programmed to operate with the clock signals provided on either the TX_CLOCK or RX_CLOCK pins. This allows the SSC to support many slave-mode data transfers. In this case, the maximum clock speed allowed on the RX_CLOCK pin is: – Master Clock divided by 2 if Receiver Frame Synchro is input – Master Clock divided by 3 if Receiver Frame Synchro is output In addition, the maximum clock speed allowed on the TX_CLOCK pin is: – Master Clock divided by 6 if Transmit Frame Synchro is input – Master Clock divided by 2 if Transmit Frame Synchro is output 25.7.2 Transmitter Operations A transmitted frame is triggered by a start event and can be followed by synchronization data before data transmission. The start event is configured by setting the Transmit Clock Mode Register (TCMR). See Section “25.7.4” on page 267. The frame synchronization is configured setting the Transmit Frame Mode Register (TFMR). See Section “25.7.5” on page 269. To transmit data, the transmitter uses a shift register clocked by the transmitter clock signal and the start mode selected in the TCMR. Data is written by the application to the THR register then transferred to the shift register according to the data format selected. When both the THR and the transmit shift register are empty, the status flag TXEMPTY is set in SR. When the Transmit Holding register is transferred in the Transmit shift register, the status flag TXRDY is set in SR and additional data can be loaded in the holding register. 265 32058K AVR32-01/12
AT32UC3A Figure 25-8. Transmitter Block Diagram CR.TXEN SR.TXEN CR.TXDIS TFMR.DATDEF TCMR.STTDLY TFMR.FSDEN TFMR.DATNB 1 TX_FRAME_SYNC TFMR.MSBF 0 TX_DATA RX_FRAME_SYNC Transmitter Clock Start Transmit Shift Register Selector TFMR.FSDEN 0 1 TCMR.STTDLY TFMR.DATLEN THR TSHR TFMR.FSLEN 25.7.3 Receiver Operations A received frame is triggered by a start event and can be followed by synchronization data before data transmission. The start event is configured setting the Receive Clock Mode Register (RCMR). See Section “25.7.4” on page 267. The frame synchronization is configured setting the Receive Frame Mode Register (RFMR). See Section “25.7.5” on page 269. The receiver uses a shift register clocked by the receiver clock signal and the start mode selected in the RCMR. The data is transferred from the shift register depending on the data for- mat selected. When the receiver shift register is full, the SSC transfers this data in the holding register, the sta- tus flag RXRDY is set in SR and the data can be read in the receiver holding register. If another transfer occurs before read of the RHR register, the status flag OVERUN is set in SR and the receiver shift register is transferred in the RHR register. 266 32058K AVR32-01/12
AT32UC3A Figure 25-9. Receiver Block Diagram RX_CLO CK (pin) MUX Tri-state Clock Controller Output Transm itter Clock Divider Clock CKO Data Transfer CKS INV Tri-state MUX Controller Receiver Clock CKI CKG 25.7.4 Start The transmitter and receiver can both be programmed to start their operations when an event occurs, respectively in the Transmit Start Selection (START) field of TCMR and in the Receive Start Selection (START) field of RCMR. Under the following conditions the start event is independently programmable: (cid:129) Continuous. In this case, the transmission starts as soon as a word is written in THR and the reception starts as soon as the Receiver is enabled. (cid:129) Synchronously with the transmitter/receiver (cid:129) On detection of a falling/rising edge on TX_FRAME_SYNC/RX_FRAME_SYNC (cid:129) On detection of a low level/high level on TX_FRAME_SYNC/RX_FRAME_SYNC (cid:129) On detection of a level change or an edge on TX_FRAME_SYNC/RX_FRAME_SYNC A start can be programmed in the same manner on either side of the Transmit/Receive Clock Register (RCMR/TCMR). Thus, the start could be on TX_FRAME_SYNC (Transmit) or RX_FRAME_SYNC (Receive). Moreover, the Receiver can start when data is detected in the bit stream with the Compare Functions. Detection on TX_FRAME_SYNC/RX_FRAME_SYNC input/output is done by the field FSOS of the Transmit/Receive Frame Mode Register (TFMR/RFMR). 267 32058K AVR32-01/12
AT32UC3A Figure 25-10. Transmit Start Mode TX_CLOCK (Input) TX_FRAME_SYNC (Input) TX_DATA (Output) Start= Low Level on TX_FRAME_SYNC X B0 B1 STTDLY TX_DATA (Output) X B0 B1 Start= Falling Edge on TX_FRAME_SYNC STTDLY TX_DATA (Output) X B0 B1 Start= High Level on TX_FRAME_SYNC STTDLY TX_DATA (Output) X B0 B1 Start= Rising Edge on TX_FRAME_SYNC STTDLY TX_DATA (Output) Start= Level Change on TX_FRAME _SYNC X B0 B1 B0 B1 STTDLY TX_DATA (Output) X B0 B1 B0 B1 Start= Any Edge on TX_FRAME_SYNC STTDLY Figure 25-11. Receive Pulse/Edge Start Modes RX_CLOCK RX_FRAME_SYNC (Input) RX_DATA (Input) X Start = Low Level on RX_FRAME_SYNC STTDLY RX_DATA (Input) X B0 B1 Start = Falling Edge on RX_FRAME_SYNC STTDLY RX_DATA (Input) X B0 B1 Start = High Level on RX_FRAME_SYNC STTDLY RX_DATA (Input) X B0 B1 Start = Rising Edge on RX_FRAME_SYNC STTDLY RX_DATA (Input) X B0 B1 B0 B1 Start = Level Change on RX_FRAME_SYNC STTDLY RX_DATA (Input) X B0 B1 B0 B1 Start = Any Edge on RX_FRAME_SYNC STTDLY 268 32058K AVR32-01/12
AT32UC3A 25.7.5 Frame Sync The Transmitter and Receiver Frame Sync pins, TX_FRAME_SYNC and RX_FRAME_SYNC, can be programmed to generate different kinds of frame synchronization signals. The Frame Sync Output Selection (FSOS) field in the Receive Frame Mode Register (RFMR) and in the Transmit Frame Mode Register (TFMR) are used to select the required waveform. (cid:129) Programmable low or high levels during data transfer are supported. (cid:129) Programmable high levels before the start of data transfers or toggling are also supported. If a pulse waveform is selected, the Frame Sync Length (FSLEN) field in RFMR and TFMR pro- grams the length of the pulse, from 1 bit time up to 16 bit time. The periodicity of the Receive and Transmit Frame Sync pulse output can be programmed through the Period Divider Selection (PERIOD) field in RCMR and TCMR. 25.7.5.1 Frame Sync Data Frame Sync Data transmits or receives a specific tag during the Frame Sync signal. During the Frame Sync signal, the Receiver can sample the RX_DATA line and store the data in the Receive Sync Holding Register and the transmitter can transfer Transmit Sync Holding Reg- ister in the Shifter Register. The data length to be sampled/shifted out during the Frame Sync signal is programmed by the FSLEN field in RFMR/TFMR. Concerning the Receive Frame Sync Data operation, if the Frame Sync Length is equal to or lower than the delay between the start event and the actual data reception, the data sampling operation is performed in the Receive Sync Holding Register through the Receive Shift Register. The Transmit Frame Sync Operation is performed by the transmitter only if the bit Frame Sync Data Enable (FSDEN) in TFMR is set. If the Frame Sync length is equal to or lower than the delay between the start event and the actual data transmission, the normal transmission has pri- ority and the data contained in the Transmit Sync Holding Register is transferred in the Transmit Register, then shifted out. 25.7.5.2 Frame Sync Edge Detection The Frame Sync Edge detection is programmed by the FSEDGE field in RFMR/TFMR. This sets the corresponding flags RXSYN/TXSYN in the SSC Status Register (SR) on frame synchro edge detection (signals RX_FRAME_SYNC/TX_FRAME_SYNC). 269 32058K AVR32-01/12
AT32UC3A 25.7.6 Receive Compare Modes Figure 25-12. Receive Compare Modes RX_CLOCK RX_DATA CMP0 CMP1 CMP2 CMP3 Ignored B0 B1 B2 (Input) Start FSLEN STTDLY DATLEN Up to 16 Bits (4 in This Example) 25.7.6.1 Compare Functions Compare 0 can be one start event of the Receiver. In this case, the receiver compares at each new sample the last FSLEN bits received at the FSLEN lower bit of the data contained in the Compare 0 Register (RC0R). When this start event is selected, the user can program the Receiver to start a new data transfer either by writing a new Compare 0, or by receiving continu- ously until Compare 1 occurs. This selection is done with the bit (STOP) in RCMR. 25.7.7 Data Format The data framing format of both the transmitter and the receiver are programmable through the Transmitter Frame Mode Register (TFMR) and the Receiver Frame Mode Register (RFMR). In either case, the user can independently select: (cid:129) the event that starts the data transfer (START) (cid:129) the delay in number of bit periods between the start event and the first data bit (STTDLY) (cid:129) the length of the data (DATLEN) (cid:129) the number of data to be transferred for each start event (DATNB). (cid:129) the length of synchronization transferred for each start event (FSLEN) (cid:129) the bit sense: most or lowest significant bit first (MSBF). Additionally, the transmitter can be used to transfer synchronization and select the level driven on the TX_DATA pin while not in data transfer operation. This is done respectively by the Frame Sync Data Enable (FSDEN) and by the Data Default Value (DATDEF) bits in TFMR. 270 32058K AVR32-01/12
AT32UC3A Table 25-3. Data Frame Registers Transmitter Receiver Field Length Comment TFMR RFMR DATLEN Up to 32 Size of word TFMR RFMR DATNB Up to 16 Number of words transmitted in frame TFMR RFMR MSBF Most significant bit first TFMR RFMR FSLEN Up to 16 Size of Synchro data register TFMR DATDEF 0 or 1 Data default value ended TFMR FSDEN Enable send TSHR TCMR RCMR PERIOD Up to 512 Frame size TCMR RCMR STTDLY Up to 255 Size of transmit start delay Figure 25-13. Transmit and Receive Frame Format in Edge/Pulse Start Modes Start Start PERIOD TX_FRAME_SYNC / (1) RX_FRAME_SYNC FSLEN TX_DATA Sync Data Default Data Data Default Sync Data (If FSDEN = 1) From TSHR From DATDEF From THR From THR From DATDEF TX_DATA Default Data Data Default (If FSDEN = 0) From DATDEF From THR From THR From DATDEF RX_DATA Sync Data Ignored Data Data Ignored Sync Data To RSHR To RHR To RHR STTDLY DATLEN DATLEN DATNB Note: 1. Example of input on falling edge of TX_FRAME_SYNC/RX_FRAME_SYNC. 271 32058K AVR32-01/12
AT32UC3A Figure 25-14. Transmit Frame Format in Continuous Mode Start TX_DATA Data Data Default From THR From THR DATLEN DATLEN Start: 1. TXEMPTY set to 1 2. Write into the THR Note: 1. STTDLY is set to 0. In this example, THR is loaded twice. FSDEN value has no effect on the transmission. SyncData cannot be output in continuous mode. Figure 25-15. Receive Frame Format in Continuous Mode Start = Enable Receiver RX_DATA Data Data To RHR To RHR DATLEN DATLEN Note: 1. STTDLY is set to 0. 25.7.8 Loop Mode The receiver can be programmed to receive transmissions from the transmitter. This is done by setting the Loop Mode (LOOP) bit in RFMR. In this case, RX_DATA is connected to TX_DATA, RX_FRAME_SYNC is connected to TX_FRAME_SYNC and RX_CLOCK is connected to TX_CLOCK. 25.7.9 Interrupt Most bits in SR have a corresponding bit in interrupt management registers. The SSC can be programmed to generate an interrupt when it detects an event. The interrupt is controlled by writing IER (Interrupt Enable Register) and IDR (Interrupt Disable Register) These registers enable and disable, respectively, the corresponding interrupt by setting and clearing the corresponding bit in IMR (Interrupt Mask Register), which controls the generation of inter- rupts by asserting the SSC interrupt line connected to the interrupt controller. 272 32058K AVR32-01/12
AT32UC3A Figure 25-16. Interrupt Block Diagram IMR IER IDR PDCA Set Clear TXBUFE ENDTX Transmitter TXRDY TXEMPTY TXSYNC SSC Interrupt Interrupt RXBUFF Control ENDRX Receiver RXRDY OVRUN RXSYNC 25.8 SSC Application Examples The SSC can support several serial communication modes used in audio or high speed serial links. Some standard applications are shown in the following figures. All serial link applications supported by the SSC are not listed here. Figure 25-17. Audio Application Block Diagram Clock SCK TX_CLOCK Word Select WS I2S TX_FRAME_SYNC RECEIVER Data SD TX_DATA SSC RX_DATA Clock SCK RX_FRAME_SYNC Word Select WS RX_CLOCK Data SD MSB LSB MSB Left Channel Right Channel 273 32058K AVR32-01/12
AT32UC3A Figure 25-18. Codec Application Block Diagram Serial Data Clock (SCLK) TX_CLOCK Frame sync (FSYNC) TX_FRAME_SYNC CODEC Serial Data Out TX_DATA SSC Serial Data In RX_DATA RX_FRAME_SYNC Serial Data Clock (SCLK) RX_CLOCK Frame sync (FSYNC) First Time Slot Dstart Dend Serial Data Out Serial Data In Figure 25-19. Time Slot Application Block Diagram SCLK TX_CLOCK FSYNC TX_FRAME_SYNC CODEC First Data Out TX_DATA Time Slot SSC Data in RX_DATA RX_FRAME_SYNC RX_CLOCK CODEC Second Time Slot Serial Data Clock (SCLK) Frame sync (FSYNC) First Time Slot Second Time Slot Dstart Dend Serial Data Out Serial Data In 274 32058K AVR32-01/12
AT32UC3A 25.9 User Interface Table 25-4. Register Mapping Offset Register Register Name Access Reset 0x0 Control Register CR Write – 0x4 Clock Mode Register CMR Read/Write 0x0 0x8 Reserved – – – 0xC Reserved – – – 0x10 Receive Clock Mode Register RCMR Read/Write 0x0 0x14 Receive Frame Mode Register RFMR Read/Write 0x0 0x18 Transmit Clock Mode Register TCMR Read/Write 0x0 0x1C Transmit Frame Mode Register TFMR Read/Write 0x0 0x20 Receive Holding Register RHR Read 0x0 0x24 Transmit Holding Register THR Write – 0x28 Reserved – – – 0x2C Reserved – – – 0x30 Receive Sync. Holding Register RSHR Read 0x0 0x34 Transmit Sync. Holding Register TSHR Read/Write 0x0 0x38 Receive Compare 0 Register RC0R Read/Write 0x0 0x3C Receive Compare 1 Register RC1R Read/Write 0x0 0x40 Status Register SR Read 0x000000CC 0x44 Interrupt Enable Register IER Write – 0x48 Interrupt Disable Register IDR Write – 0x4C Interrupt Mask Register IMR Read 0x0 0x50-0xFC Reserved – – – 275 32058K AVR32-01/12
AT32UC3A 25.9.1 Control Register Name: CR Access Type: Write-only Offset: 0x00 Reset value: - 31 30 29 28 27 26 25 24 – – – – – – – – 23 22 21 20 19 18 17 16 – – – – – – – – 15 14 13 12 11 10 9 8 SWRST – – – – – TXDIS TXEN 7 6 5 4 3 2 1 0 – – – – – – RXDIS RXEN (cid:129) SWRST: Software Reset 0:No effect. 1:Performs a software reset. Has priority on any other bit in CR. (cid:129) TXDIS: Transmit Disable 0:No effect. 1:Disables Transmit. If a character is currently being transmitted, disables at end of current character transmission. (cid:129) TXEN: Transmit Enable 0:No effect. 1:Enables Transmit if TXDIS is not set. (cid:129) RXDIS: Receive Disable 0:No effect. 1:Disables Receive. If a character is currently being received, disables at end of current character reception. (cid:129) RXEN: Receive Enable 0:No effect. 1:Enables Receive if RXDIS is not set. 276 32058K AVR32-01/12
AT32UC3A 25.9.2 Clock Mode Register Name: CMR Access Type: Read/Write Offset: 0x04 Reset value: 0x00000000 31 30 29 28 27 26 25 24 – – – – – – – – 23 22 21 20 19 18 17 16 – – – – – – – – 15 14 13 12 11 10 9 8 – – – – DIV 7 6 5 4 3 2 1 0 DIV (cid:129) DIV: Clock Divider 0: The Clock Divider is not active. Any Other Value: The Divided Clock equals the Master Clock divided by 2 times DIV. The maximum bit rate is CLK_SSC/2. The minimum bit rate is CLK_SSC/2 x 4095 = CLK_SSC/8190. 277 32058K AVR32-01/12
AT32UC3A 25.9.3 Receive Clock Mode Register Name: RCMR Access Type: Read/Write Offset: 0x10 Reset value: 0x00000000 31 30 29 28 27 26 25 24 PERIOD 23 22 21 20 19 18 17 16 STTDLY 15 14 13 12 11 10 9 8 – – – STOP START 7 6 5 4 3 2 1 0 CKG CKI CKO CKS (cid:129) PERIOD: Receive Period Divider Selection This field selects the divider to apply to the selected Receive Clock in order to generate a new Frame Sync Signal. If 0, no PERIOD signal is generated. If not 0, a PERIOD signal is generated each 2 x (PERIOD+1) Receive Clock. (cid:129) STTDLY: Receive Start Delay If STTDLY is not 0, a delay of STTDLY clock cycles is inserted between the start event and the actual start of reception. When the Receiver is programmed to start synchronously with the Transmitter, the delay is also applied. Note: It is very important that STTDLY be set carefully. If STTDLY must be set, it should be done in relation to TAG (Receive Sync Data) reception. (cid:129) STOP: Receive Stop Selection 0: After completion of a data transfer when starting with a Compare 0, the receiver stops the data transfer and waits for a new compare 0. 1: After starting a receive with a Compare 0, the receiver operates in a continuous mode until a Compare 1 is detected. (cid:129) START: Receive Start Selection START Receive Start Continuous, as soon as the receiver is enabled, and immediately after the end of 0x0 transfer of the previous data. 0x1 Transmit start 0x2 Detection of a low level on RX_FRAME_SYNC signal 0x3 Detection of a high level on RX_FRAME_SYNC signal 0x4 Detection of a falling edge on RX_FRAME_SYNC signal 0x5 Detection of a rising edge on RX_FRAME_SYNC signal 0x6 Detection of any level change on RX_FRAME_SYNC signal 0x7 Detection of any edge on RX_FRAME_SYNC signal 0x8 Compare 0 0x9-0xF Reserved 278 32058K AVR32-01/12
AT32UC3A (cid:129) CKG: Receive Clock Gating Selection CKG Receive Clock Gating 0x0 None, continuous clock 0x1 Receive Clock enabled only if RX_FRAME_SYNC Low 0x2 Receive Clock enabled only if RX_FRAME_SYNC High 0x3 Reserved (cid:129) CKI: Receive Clock Inversion 0: The data inputs (Data and Frame Sync signals) are sampled on Receive Clock falling edge. The Frame Sync signal out- put is shifted out on Receive Clock rising edge. 1: The data inputs (Data and Frame Sync signals) are sampled on Receive Clock rising edge. The Frame Sync signal out- put is shifted out on Receive Clock falling edge. CKI affects only the Receive Clock and not the output clock signal. (cid:129) CKO: Receive Clock Output Mode Selection CKO Receive Clock Output Mode RX_CLOCK pin 0x0 None Input-only 0x1 Continuous Receive Clock Output 0x2 Receive Clock only during data transfers Output 0x3-0x7 Reserved (cid:129) CKS: Receive Clock Selection CKS Selected Receive Clock 0x0 Divided Clock 0x1 TX_CLOCK Clock signal 0x2 RX_CLOCK pin 0x3 Reserved 279 32058K AVR32-01/12
AT32UC3A 25.9.4 Receive Frame Mode Register Name: RFMR Access Type: Read/Write Offset: 0x14 Reset value: 0x00000000 31 30 29 28 27 26 25 24 FSLENHI – – – FSEDGE 23 22 21 20 19 18 17 16 – FSOS FSLEN 15 14 13 12 11 10 9 8 – – – – DATNB 7 6 5 4 3 2 1 0 MSBF – LOOP DATLEN (cid:129) FSLENHI: Receive Frame Sync Length High part The four MSB of the FSLEN bitfield. (cid:129) FSEDGE: Frame Sync Edge Detection Determines which edge on Frame Sync will generate the interrupt RXSYN in the SSC Status Register. FSEDGE Frame Sync Edge Detection 0x0 Positive Edge Detection 0x1 Negative Edge Detection (cid:129) FSOS: Receive Frame Sync Output Selection FSOS Selected Receive Frame Sync Signal RX_FRAME_SYNC Pin 0x0 None Input-only 0x1 Negative Pulse Output 0x2 Positive Pulse Output 0x3 Driven Low during data transfer Output 0x4 Driven High during data transfer Output 0x5 Toggling at each start of data transfer Output 0x6-0x7 Reserved Undefined (cid:129) FSLEN: Receive Frame Sync Length This field defines the length of the Receive Frame Sync Signal and the number of bits sampled and stored in the Receive Sync Data Register. When this mode is selected by the START field in the Receive Clock Mode Register, it also deter- mines the length of the sampled data to be compared to the Compare 0 or Compare 1 register. Note: The four most significant bits fo this bitfield are in the FSLENHI bitfield. Pulse length is equal to ({FSLENHI,FSLEN} + 1) Receive Clock periods. Thus, if {FSLENHI,FSLEN} is 0, the Receive Frame Sync signal is generated during one Receive Clock period. (cid:129) DATNB: Data Number per Frame 280 32058K AVR32-01/12
AT32UC3A This field defines the number of data words to be received after each transfer start, which is equal to (DATNB + 1). (cid:129) MSBF: Most Significant Bit First 0:The lowest significant bit of the data register is sampled first in the bit stream. 1:The most significant bit of the data register is sampled first in the bit stream. (cid:129) LOOP: Loop Mode 0:Normal operating mode. 1: RX_DATA is driven by TX_DATA, RX_FRAME_SYNC is driven by TX_FRAME_SYNC and TX_CLOCK drives RX_CLOCK. (cid:129) DATLEN: Data Length 0: Forbidden value (1-bit data length not supported). Any other value: The bit stream contains DATLEN + 1 data bits. Moreover, it defines the transfer size performed by the PDCA assigned to the Receiver. If DATLEN is lower or equal to 7, data transfers are in bytes. If DATLEN is between 8 and 15 (included), half-words are transferred, and for any other value, 32-bit words are transferred. 281 32058K AVR32-01/12
AT32UC3A 25.9.5 Transmit Clock Mode Register Name: TCMR Access Type: Read/Write Offset: 0x18 Reset value: 0x00000000 31 30 29 28 27 26 25 24 PERIOD 23 22 21 20 19 18 17 16 STTDLY 15 14 13 12 11 10 9 8 – – – – START 7 6 5 4 3 2 1 0 CKG CKI CKO CKS (cid:129) PERIOD: Transmit Period Divider Selection This field selects the divider to apply to the selected Transmit Clock to generate a new Frame Sync Signal. If 0, no period signal is generated. If not 0, a period signal is generated at each 2 x (PERIOD+1) Transmit Clock. (cid:129) STTDLY: Transmit Start Delay If STTDLY is not 0, a delay of STTDLY clock cycles is inserted between the start event and the actual start of transmission of data. When the Transmitter is programmed to start synchronously with the Receiver, the delay is also applied. Note: STTDLY must be set carefully. If STTDLY is too short in respect to TAG (Transmit Sync Data) emission, data is emit- ted instead of the end of TAG. (cid:129) START: Transmit Start Selection START Transmit Start Continuous, as soon as a word is written in the THR Register (if Transmit is enabled), and immediately 0x0 after the end of transfer of the previous data. 0x1 Receive start 0x2 Detection of a low level on TX_FRAME_SYNC signal 0x3 Detection of a high level on TX_FRAME_SYNC signal 0x4 Detection of a falling edge on TX_FRAME_SYNC signal 0x5 Detection of a rising edge on TX_FRAME_SYNC signal 0x6 Detection of any level change on TX_FRAME_SYNC signal 0x7 Detection of any edge on TX_FRAME_SYNC signal 0x8 - 0xF Reserved 282 32058K AVR32-01/12
AT32UC3A (cid:129) CKG: Transmit Clock Gating Selection CKG Transmit Clock Gating 0x0 None, continuous clock 0x1 Transmit Clock enabled only if TX_FRAME_SYNC Low 0x2 Transmit Clock enabled only if TX_FRAME_SYNC High 0x3 Reserved (cid:129) CKI: Transmit Clock Inversion 0: The data outputs (Data and Frame Sync signals) are shifted out on Transmit Clock falling edge. The Frame sync signal input is sampled on Transmit clock rising edge. 1: The data outputs (Data and Frame Sync signals) are shifted out on Transmit Clock rising edge. The Frame sync signal input is sampled on Transmit clock falling edge. CKI affects only the Transmit Clock and not the output clock signal. (cid:129) CKO: Transmit Clock Output Mode Selection CKO Transmit Clock Output Mode TX_CLOCK pin 0x0 None Input-only 0x1 Continuous Transmit Clock Output 0x2 Transmit Clock only during data transfers Output 0x3-0x7 Reserved (cid:129) CKS: Transmit Clock Selection CKS Selected Transmit Clock 0x0 Divided Clock 0x1 RX_CLOCK Clock signal 0x2 TX_CLOCK Pin 0x3 Reserved 283 32058K AVR32-01/12
AT32UC3A 25.9.6 Transmit Frame Mode Register Name: TFMR Access Type: Read/Write Offset: 0x1C Reset value: 0x00000000 31 30 29 28 27 26 25 24 FSLENHI – – – FSEDGE 23 22 21 20 19 18 17 16 FSDEN FSOS FSLEN 15 14 13 12 11 10 9 8 – – – – DATNB 7 6 5 4 3 2 1 0 MSBF – DATDEF DATLEN (cid:129) FSLENHI: Transmit Frame Sync Length High part The four MSB of the FSLEN bitfield. (cid:129) FSEDGE: Frame Sync Edge Detection Determines which edge on frame sync will generate the interrupt TXSYN (Status Register). FSEDGE Frame Sync Edge Detection 0x0 Positive Edge Detection 0x1 Negative Edge Detection (cid:129) FSDEN: Frame Sync Data Enable 0:The TX_DATA line is driven with the default value during the Transmit Frame Sync signal. 1:TSHR value is shifted out during the transmission of the Transmit Frame Sync signal. (cid:129) FSOS: Transmit Frame Sync Output Selection FSOS Selected Transmit Frame Sync Signal TX_FRAME_SYNC Pin 0x0 None Input-only 0x1 Negative Pulse Output 0x2 Positive Pulse Output 0x3 Driven Low during data transfer Output 0x4 Driven High during data transfer Output 0x5 Toggling at each start of data transfer Output 0x6-0x7 Reserved Undefined (cid:129) FSLEN: Transmit Frame Sync Length This field defines the length of the Transmit Frame Sync signal and the number of bits shifted out from the Transmit Sync Data Register if FSDEN is 1. Note: The four most significant bits fo this bitfield are in the FSLENHI bitfield. 284 32058K AVR32-01/12
AT32UC3A Pulse length is equal to ({FSLENHI,FSLEN} + 1) Transmit Clock periods, i.e., the pulse length can range from 1 to 16 Transmit Clock periods. If {FSLENHI,FSLEN} is 0, the Transmit Frame Sync signal is generated during one Transmit Clock period. (cid:129) DATNB: Data Number per frame This field defines the number of data words to be transferred after each transfer start, which is equal to (DATNB +1). (cid:129) MSBF: Most Significant Bit First 0:The lowest significant bit of the data register is shifted out first in the bit stream. 1:The most significant bit of the data register is shifted out first in the bit stream. (cid:129) DATDEF: Data Default Value This bit defines the level driven on the TX_DATA pin while out of transmission. Note that if the pin is defined as multi-drive by the PIO Controller, the pin is enabled only if the SCC TX_DATA output is 1. (cid:129) DATLEN: Data Length 0: Forbidden value (1-bit data length not supported). Any other value: The bit stream contains DATLEN + 1 data bits. Moreover, it defines the transfer size performed by the PDCA assigned to the Transmit. If DATLEN is lower or equal to 7, data transfers are bytes, if DATLEN is between 8 and 15 (included), half-words are transferred, and for any other value, 32-bit words are transferred. 285 32058K AVR32-01/12
AT32UC3A 25.9.7 SSC Receive Holding Register Name: RHR Access Type: Read-only Offset: 0x20 Reset value: 0x00000000 31 30 29 28 27 26 25 24 RDAT 23 22 21 20 19 18 17 16 RDAT 15 14 13 12 11 10 9 8 RDAT 7 6 5 4 3 2 1 0 RDAT (cid:129) RDAT: Receive Data Right aligned regardless of the number of data bits defined by DATLEN in RFMR. 286 32058K AVR32-01/12
AT32UC3A 25.9.8 Transmit Holding Register Name: THR Access Type: Write-only Offset: 0x24 Reset value: - 31 30 29 28 27 26 25 24 TDAT 23 22 21 20 19 18 17 16 TDAT 15 14 13 12 11 10 9 8 TDAT 7 6 5 4 3 2 1 0 TDAT (cid:129) TDAT: Transmit Data Right aligned regardless of the number of data bits defined by DATLEN in TFMR. 287 32058K AVR32-01/12
AT32UC3A 25.9.9 Receive Synchronization Holding Register Name: RSHR Access Type: Read-only Offset: 0x30 Reset value: 0x00000000 31 30 29 28 27 26 25 24 – – – – – – – – 23 22 21 20 19 18 17 16 – – – – – – – – 15 14 13 12 11 10 9 8 RSDAT 7 6 5 4 3 2 1 0 RSDAT (cid:129) RSDAT: Receive Synchronization Data 288 32058K AVR32-01/12
AT32UC3A 25.9.10 Transmit Synchronization Holding Register Name: TSHR Access Type: Read/Write Offset: 0x34 Reset value: 0x00000000 31 30 29 28 27 26 25 24 – – – – – – – – 23 22 21 20 19 18 17 16 – – – – – – – – 15 14 13 12 11 10 9 8 TSDAT 7 6 5 4 3 2 1 0 TSDAT (cid:129) TSDAT: Transmit Synchronization Data 289 32058K AVR32-01/12
AT32UC3A 25.9.11 Receive Compare 0 Register Name: RC0R Access Type: Read/Write Offset: 0x38 Reset value: 0x00000000 31 30 29 28 27 26 25 24 – – – – – – – – 23 22 21 20 19 18 17 16 – – – – – – – – 15 14 13 12 11 10 9 8 CP0 7 6 5 4 3 2 1 0 CP0 (cid:129) CP0: Receive Compare Data 0 290 32058K AVR32-01/12
AT32UC3A 25.9.12 Receive Compare 1 Register Name: RC1R Access Type: Read/Write Offset: 0x3C Reset value: 0x00000000 31 30 29 28 27 26 25 24 – – – – – – – – 23 22 21 20 19 18 17 16 – – – – – – – – 15 14 13 12 11 10 9 8 CP1 7 6 5 4 3 2 1 0 CP1 (cid:129) CP1: Receive Compare Data 1 291 32058K AVR32-01/12
AT32UC3A 25.9.13 Status Register Name: SR Access Type: Read-only Offset: 0x40 Reset value: 0x000000CC 31 30 29 28 27 26 25 24 – – – – – – – – 23 22 21 20 19 18 17 16 – – – – – – RXEN TXEN 15 14 13 12 11 10 9 8 – – – – RXSYN TXSYN CP1 CP0 7 6 5 4 3 2 1 0 RXBUFF ENDRX OVRUN RXRDY TXBUFE ENDTX TXEMPTY TXRDY (cid:129) RXEN: Receive Enable 0:Receive is disabled. 1:Receive is enabled. (cid:129) TXEN: Transmit Enable 0:Transmit is disabled. 1:Transmit is enabled. (cid:129) RXSYN: Receive Sync 0:An Rx Sync has not occurred since the last read of the Status Register. 1:An Rx Sync has occurred since the last read of the Status Register. (cid:129) TXSYN: Transmit Sync 0:A Tx Sync has not occurred since the last read of the Status Register. 1:A Tx Sync has occurred since the last read of the Status Register. (cid:129) CP1: Compare 1 0:A compare 1 has not occurred since the last read of the Status Register. 1:A compare 1 has occurred since the last read of the Status Register. (cid:129) CP0: Compare 0 0:A compare 0 has not occurred since the last read of the Status Register. 1:A compare 0 has occurred since the last read of the Status Register. (cid:129) RXBUFF: Receive Buffer Full 0:RCR or RNCR have a value other than 0. 1:Both RCR and RNCR have a value of 0. (cid:129) ENDRX: End of Reception 0:Data is written on the Receive Counter Register or Receive Next Counter Register. 292 32058K AVR32-01/12
AT32UC3A 1: End of PDCA transfer when Receive Counter Register has arrived at zero. (cid:129) OVRUN: Receive Overrun 0:No data has been loaded in RHR while previous data has not been read since the last read of the Status Register. 1:Data has been loaded in RHR while previous data has not yet been read since the last read of the Status Register. (cid:129) RXRDY: Receive Ready 0:RHR is empty. 1:Data has been received and loaded in RHR. (cid:129) TXBUFE: Transmit Buffer Empty 0:TCR or TNCR have a value other than 0. 1:Both TCR and TNCR have a value of 0. (cid:129) ENDTX: End of Transmission 0:The register TCR has not reached 0 since the last write in TCR or TNCR. 1:The register TCR has reached 0 since the last write in TCR or TNCR. (cid:129) TXEMPTY: Transmit Empty 0:Data remains in THR or is currently transmitted from TSR. 1:Last data written in THR has been loaded in TSR and last data loaded in TSR has been transmitted. (cid:129) TXRDY: Transmit Ready 0:Data has been loaded in THR and is waiting to be loaded in the Transmit Shift Register (TSR). 1:THR is empty. 293 32058K AVR32-01/12
AT32UC3A 25.9.14 Interrupt Enable Register Name: IER Access Type: Write-only Offset: 0x44 Reset value: - 31 30 29 28 27 26 25 24 – – – – – – – – 23 22 21 20 19 18 17 16 – – – – – – – – 15 14 13 12 11 10 9 8 – – – – RXSYN TXSYN CP1 CP0 7 6 5 4 3 2 1 0 RXBUFF ENDRX OVRUN RXRDY TXBUFE ENDTX TXEMPTY TXRDY (cid:129) RXSYN: Rx Sync Interrupt Enable 0:No effect. 1:Enables the Rx Sync Interrupt. (cid:129) TXSYN: Tx Sync Interrupt Enable 0:No effect. 1:Enables the Tx Sync Interrupt. (cid:129) CP1: Compare 1 Interrupt Enable 0:No effect. 1:Enables the Compare 1 Interrupt. (cid:129) CP0: Compare 0 Interrupt Enable 0:No effect. 1:Enables the Compare 0 Interrupt. (cid:129) RXBUFF: Receive Buffer Full Interrupt Enable 0:No effect. 1:Enables the Receive Buffer Full Interrupt. (cid:129) ENDRX: End of Reception Interrupt Enable 0:No effect. 1:Enables the End of Reception Interrupt. (cid:129) OVRUN: Receive Overrun Interrupt Enable 0:No effect. 1:Enables the Receive Overrun Interrupt. (cid:129) RXRDY: Receive Ready Interrupt Enable 0:No effect. 294 32058K AVR32-01/12
AT32UC3A 1: Enables the Receive Ready Interrupt. (cid:129) TXBUFE: Transmit Buffer Empty Interrupt Enable 0:No effect. 1:Enables the Transmit Buffer Empty Interrupt (cid:129) ENDTX: End of Transmission Interrupt Enable 0:No effect. 1:Enables the End of Transmission Interrupt. (cid:129) TXEMPTY: Transmit Empty Interrupt Enable 0:No effect. 1:Enables the Transmit Empty Interrupt. (cid:129) TXRDY: Transmit Ready Interrupt Enable 0:No effect. 1:Enables the Transmit Ready Interrupt. 295 32058K AVR32-01/12
AT32UC3A 25.9.15 Interrupt Disable Register Name: IDR Access Type: Write-only Offset: 0x48 Reset value: - 31 30 29 28 27 26 25 24 – – – – – – – – 23 22 21 20 19 18 17 16 – – – – – – – – 15 14 13 12 11 10 9 8 – – – – RXSYN TXSYN CP1 CP0 7 6 5 4 3 2 1 0 RXBUFF ENDRX OVRUN RXRDY TXBUFE ENDTX TXEMPTY TXRDY (cid:129) RXSYN: Rx Sync Interrupt Enable 0:No effect. 1:Disables the Rx Sync Interrupt. (cid:129) TXSYN: Tx Sync Interrupt Enable 0:No effect. 1:Disables the Tx Sync Interrupt. (cid:129) CP1: Compare 1 Interrupt Disable 0:No effect. 1:Disables the Compare 1 Interrupt. (cid:129) CP0: Compare 0 Interrupt Disable 0:No effect. 1:Disables the Compare 0 Interrupt. (cid:129) RXBUFF: Receive Buffer Full Interrupt Disable 0:No effect. 1:Disables the Receive Buffer Full Interrupt. (cid:129) ENDRX: End of Reception Interrupt Disable 0:No effect. 1:Disables the End of Reception Interrupt. (cid:129) OVRUN: Receive Overrun Interrupt Disable 0:No effect. 1:Disables the Receive Overrun Interrupt. (cid:129) RXRDY: Receive Ready Interrupt Disable 0:No effect. 296 32058K AVR32-01/12
AT32UC3A 1: Disables the Receive Ready Interrupt. (cid:129) TXBUFE: Transmit Buffer Empty Interrupt Disable 0:No effect. 1:Disables the Transmit Buffer Empty Interrupt. (cid:129) ENDTX: End of Transmission Interrupt Disable 0:No effect. 1:Disables the End of Transmission Interrupt. (cid:129) TXEMPTY: Transmit Empty Interrupt Disable 0:No effect. 1:Disables the Transmit Empty Interrupt. (cid:129) TXRDY: Transmit Ready Interrupt Disable 0:No effect. 1:Disables the Transmit Ready Interrupt. 297 32058K AVR32-01/12
AT32UC3A 25.9.16 Interrupt Mask Register Name: IMR Access Type: Read-only Offset: 0x4C Reset value: 0x00000000 31 30 29 28 27 26 25 24 – – – – – – – – 23 22 21 20 19 18 17 16 – – – – – – – – 15 14 13 12 11 10 9 8 – – – – RXSYN TXSYN CP1 CP0 7 6 5 4 3 2 1 0 RXBUFF ENDRX OVRUN RXRDY TXBUFE ENDTX TXEMPTY TXRDY (cid:129) RXSYN: Rx Sync Interrupt Mask 0:The Rx Sync Interrupt is disabled. 1:The Rx Sync Interrupt is enabled. (cid:129) TXSYN: Tx Sync Interrupt Mask 0:The Tx Sync Interrupt is disabled. 1:The Tx Sync Interrupt is enabled. (cid:129) CP1: Compare 1 Interrupt Mask 0:The Compare 1 Interrupt is disabled. 1:The Compare 1 Interrupt is enabled. (cid:129) CP0: Compare 0 Interrupt Mask 0:The Compare 0 Interrupt is disabled. 1:The Compare 0 Interrupt is enabled. (cid:129) RXBUFF: Receive Buffer Full Interrupt Mask 0:The Receive Buffer Full Interrupt is disabled. 1:The Receive Buffer Full Interrupt is enabled. (cid:129) ENDRX: End of Reception Interrupt Mask 0:The End of Reception Interrupt is disabled. 1:The End of Reception Interrupt is enabled. (cid:129) OVRUN: Receive Overrun Interrupt Mask 0:The Receive Overrun Interrupt is disabled. 1:The Receive Overrun Interrupt is enabled. (cid:129) RXRDY: Receive Ready Interrupt Mask 0:The Receive Ready Interrupt is disabled. 298 32058K AVR32-01/12
AT32UC3A 26. Universal Synchronous/Asynchronous Receiver/Transmitter (USART) Rev. 4.0.0.2 26.1 Features (cid:129) Programmable Baud Rate Generator (cid:129) 5- to 9-bit Full-duplex Synchronous or Asynchronous Serial Communications – 1, 1.5 or 2 Stop Bits in Asynchronous Mode or 1 or 2 Stop Bits in Synchronous Mode – Parity Generation and Error Detection – Framing Error Detection, Overrun Error Detection – MSB- or LSB-first – Optional Break Generation and Detection – By 8 or by 16 Over-sampling Receiver Frequency – Optional Hardware Handshaking RTS-CTS – Receiver Time-out and Transmitter Timeguard – Optional Multidrop Mode with Address Generation and Detection (cid:129) RS485 with Driver Control Signal (cid:129) ISO7816, T = 0 or T = 1 Protocols for Interfacing with Smart Cards – NACK Handling, Error Counter with Repetition and Iteration Limit (cid:129) IrDA Modulation and Demodulation – Communication at up to 115.2 Kbps (cid:129) SPI Mode – Master or Slave – Serial Clock Programmable Phase and Polarity – SPI Serial Clock (CLK) Frequency up to Internal Clock Frequency CLK_USART/4 (cid:129) Test Modes – Remote Loopback, Local Loopback, Automatic Echo (cid:129) Supports Connection of Two Peripheral DMA Controller Channels (PDC) – Offers Buffer Transfer without Processor Intervention 26.2 Overview The Universal Synchronous Asynchronous Receiver Transceiver (USART) provides one full duplex universal synchronous asynchronous serial link. Data frame format is widely programma- ble (data length, parity, number of stop bits) to support a maximum of standards. The receiver implements parity error, framing error and overrun error detection. The receiver time-out enables handling variable-length frames and the transmitter timeguard facilitates communications with slow remote devices. Multidrop communications are also supported through address bit han- dling in reception and transmission. The USART features three test modes: remote loopback, local loopback and automatic echo. The USART supports specific operating modes providing interfaces on RS485 and SPI buses, with ISO7816 T = 0 or T = 1 smart card slots and infrared transceivers. The hardware handshak- ing feature enables an out-of-band flow control by automatic management of the pins RTS and CTS. The USART supports the connection to the Peripheral DMA Controller, which enables data transfers to the transmitter and from the receiver. The PDC provides chained buffer manage- ment without any intervention of the processor. 299 32058K AVR32-01/12
AT32UC3A 26.3 Block Diagram Figure 26-1. USART Block Diagram Peripheral DMA Controller Channel Channel USART PIO Controller RXD Receiver RTS USART TXD INTC Interrupt Transmitter CTS CLK_USART BaudRate CLK Generator CLK_USART/DIV Power DIV Manager User Interface Peripheral bus 300 32058K AVR32-01/12
AT32UC3A 26.4 Application Block Diagram Figure 26-2. Application Block Diagram PPP IrLAP Field Bus EMV SPI Modem Serial Driver Driver IrDA Driver Driver Driver Driver USART RS232 RS232 RS485 Smart IrDA SPI Drivers Drivers Drivers Card Transceivers Transceiver Slot Modem Serial Differential PSTN Port Bus 301 32058K AVR32-01/12
AT32UC3A 26.5 I/O Lines Description Table 26-1. I/O Line Description Name Description Type Active Level CLK Serial Clock I/O Transmit Serial Data TXD or Master Out Slave In (MOSI) in SPI Master Mode I/O or Master In Slave Out (MISO) in SPI Slave Mode Receive Serial Data RXD or Master In Slave Out (MISO) in SPI Master Mode Input or Master Out Slave In (MOSI) in SPI Slave Mode Clear to Send CTS Input Low or Slave Select (NSS) in SPI Slave Mode Request to Send RTS Output Low or Slave Select (NSS) in SPI Master Mode 302 32058K AVR32-01/12
AT32UC3A 26.6 Product Dependencies 26.6.1 I/O Lines The pins used for interfacing the USART may be multiplexed with the PIO lines. The program- mer must first program the PIO controller to assign the desired USART pins to their peripheral function. If I/O lines of the USART are not used by the application, they can be used for other purposes by the PIO Controller. To prevent the TXD line from falling when the USART is disabled, the use of an internal pull up is mandatory. If the hardware handshaking feature or Modem mode is used, the internal pull up on TXD must also be enabled. 26.6.2 Power Manager (PM) The USART is not continuously clocked. The programmer must first enable the USART Clock in the Power Manager (PM) before using the USART. However, if the application does not require USART operations, the USART clock can be stopped when not needed and be restarted later. In this case, the USART will resume its operations where it left off. Configuring the USART does not require the USART clock to be enabled. 26.6.3 Interrupt The USART interrupt line is connected on one of the internal sources of the Advanced Interrupt Controller. Using the USART interrupt requires the INTC to be programmed first. Note that it is not recommended to use the USART interrupt line in edge sensitive mode. 303 32058K AVR32-01/12
AT32UC3A 26.7 Functional Description The USART is capable of managing several types of serial synchron ous or asynchronous communications. It supports the following communication modes: (cid:129)5- to 9-bit full-duplex asynchronous serial communication –MSB- or LSB-first –1, 1.5 or 2 stop bits –Parity even, odd, marked, space or none –By 8 or by 16 over-sampling receiver frequency –Optional hardware handshaking –Optional break management –Optional multidrop serial communication (cid:129)High-speed 5- to 9-bit full-duplex synchronous serial communication –MSB- or LSB-first –1 or 2 stop bits –Parity even, odd, marked, space or none –By 8 or by 16 over-sampling frequency –Optional hardware handshaking –Optional break management –Optional multidrop serial communication (cid:129)RS485 with driver control signal (cid:129)ISO7816, T0 or T1 protocols for interfacing with smart cards –NACK handling, error counter with repetition and iteration limit (cid:129)InfraRed IrDA Modulation and Demodulation (cid:129) SPI Mode – Master or Slave – Serial Clock Programmable Phase and Polarity – SPI Serial Clock (CLK) Frequency up to Internal Clock Frequency CLK_USART/4 (cid:129)Test modes –Remote loopback, local loopback, automatic echo 304 32058K AVR32-01/12
AT32UC3A 26.7.1 Baud Rate Generator The Baud Rate Generator provides the bit period clock named the Baud Rate Clock to both the receiver and the transmitter. The Baud Rate Generator clock source can be selected by setting the USCLKS field in the Mode Register (MR) between: (cid:129)the CLK_USART (cid:129)a division of the CLK_USART, the divider being product dependent, but generally set to 8 (cid:129)the external clock, available on the CLK pin The Baud Rate Generator is based upon a 16-bit divider, which is programmed with the CD field of the Baud Rate Generator Register (BRGR). If CD is programmed at 0, the Baud Rate Gener- ator does not generate any clock. If CD is programmed at 1, the divider is bypassed and becomes inactive. If the external CLK clock is selected, the duration of the low and high levels of the signal pro- vided on the CLK pin must be longer than a CLK_USART period. The frequency of the signal provided on CLK must be at least 4.5 times lower than CLK_USART. Figure 26-3. Baud Rate Generator USCLKS CD CLK_USART CD 0 CLK CLK_USART/DIV 1 16-bit Counter Reserved CLK 2 >1 FIDI SYNC 3 OVER 1 0 0 0 Sampling 0 Divider BaudRate 1 Clock 1 SYNC Sampling USCLKS= 3 Clock 26.7.1.1 Baud Rate in Asynchronous Mode If the USART is programmed to operate in asynchronous mode, the selected clock is first divided by CD, which is field programmed in the Baud Rate Generator Register (BRGR). The resulting clock is provided to the receiver as a sampling clock and then divided by 16 or 8, depending on the programming of the OVER bit in MR. If OVER is set to 1, the receiver sampling is 8 times higher than the baud rate clock. If OVER is cleared, the sampling is performed at 16 times the baud rate clock. The following formula performs the calculation of the Baud Rate. SelectedClock Baudrate = -------------------------------------------- (82( –Over)CD) 305 32058K AVR32-01/12
AT32UC3A This gives a maximum baud rate of CLK_USART divided by 8, assuming that CLK_USART is the highest possible clock and that OVER is programmed at 1. 26.7.1.2 Baud Rate Calculation Example Table 26-2 on page 306 shows calculations of CD to obtain a baud rate at 38400 bauds for dif- ferent source clock frequencies. This table also shows the actual resulting baud rate and the error. Table 26-2. Baud Rate Example (OVER = 0) Expected Baud Source Clock Rate Calculation Result CD Actual Baud Rate Error MHz Bit/s Bit/s 3 686 400 38 400 6.00 6 38 400.00 0.00% 4 915 200 38 400 8.00 8 38 400.00 0.00% 5 000 000 38 400 8.14 8 39 062.50 1.70% 7 372 800 38 400 12.00 12 38 400.00 0.00% 8 000 000 38 400 13.02 13 38 461.54 0.16% 12 000 000 38 400 19.53 20 37 500.00 2.40% 12 288 000 38 400 20.00 20 38 400.00 0.00% 14 318 180 38 400 23.30 23 38 908.10 1.31% 14 745 600 38 400 24.00 24 38 400.00 0.00% 18 432 000 38 400 30.00 30 38 400.00 0.00% 24 000 000 38 400 39.06 39 38 461.54 0.16% 24 576 000 38 400 40.00 40 38 400.00 0.00% 25 000 000 38 400 40.69 40 38 109.76 0.76% 32 000 000 38 400 52.08 52 38 461.54 0.16% 32 768 000 38 400 53.33 53 38 641.51 0.63% 33 000 000 38 400 53.71 54 38 194.44 0.54% 40 000 000 38 400 65.10 65 38 461.54 0.16% 50 000 000 38 400 81.38 81 38 580.25 0.47% 60 000 000 38 400 97.66 98 38 265.31 0.35% 70 000 000 38 400 113.93 114 38 377.19 0.06% The baud rate is calculated with the following formula: BaudRate = (CLKUSART )⁄CD ×16 The baud rate error is calculated with the following formula. It is not recommended to work with an error higher than 5%. Error = 1–⎛E----x---p---e---c---t-e--d---B----a---u---d---R---a---t---e--⎞------ ⎝ ActualBaudRate ⎠ 306 32058K AVR32-01/12
AT32UC3A 26.7.1.3 Fractional Baud Rate in Asynchronous Mode The Baud Rate generator previously defined is subject to the following limitation: the output fre- quency changes by only integer multiples of the reference frequency. An approach to this problem is to integrate a fractional N clock generator that has a high resolution. The generator architecture is modified to obtain Baud Rate changes by a fraction of the reference source clock. This fractional part is programmed with the FP field in the Baud Rate Generator Register (BRGR). If FP is not 0, the fractional part is activated. The resolution is one eighth of the clock divider. This feature is only available when using USART normal mode. The fractional Baud Rate is calculated using the following formula: SelectedClock Baudrate = ------------------------------------------------------------------ ⎛ ⎛ FP⎞⎞ 82( –Over) CD+------- ⎝ ⎝ 8 ⎠⎠ The modified architecture is presented below: Figure 26-4. Fractional Baud Rate Generator FP USCLKS Modulus CD Control FP CLK_USART CD 0 CLK CLK_USART/DIV 1 CLKReserved 2 16-bit Counter glitch-free FIDI logic >1 SYNC 3 OVER 1 0 0 0 Sampling 0 Divider BaudRate 1 Clock 1 SYNC Sampling USCLKS = 3 Clock 26.7.1.4 Baud Rate in Synchronous Mode or SPI Mode If the USART is programmed to operate in synchronous mode, the selected clock is simply divided by the field CD in BRGR. SelectedClock BaudRate = --------------------------------------- CD In synchronous mode, if the external clock is selected (USCLKS = 3), the clock is provided directly by the signal on the USART CLK pin. No division is active. The value written in BRGR 307 32058K AVR32-01/12
AT32UC3A has no effect. The external clock frequency must be at least 4.5 times lower than the system clock. When either the external clock CLK or the internal clock divided (CLK_USART/DIV) is selected, the value programmed in CD must be even if the user has to ensure a 50:50 mark/space ratio on the CLK pin. If the internal clock CLK_USART is selected, the Baud Rate Generator ensures a 50:50 duty cycle on the CLK pin, even if the value programmed in CD is odd. 26.7.1.5 Baud Rate in ISO 7816 Mode The ISO7816 specification defines the bit rate with the following formula: Di B = -------×f Fi where: (cid:129)B is the bit rate (cid:129)Di is the bit-rate adjustment factor (cid:129)Fi is the clock frequency division factor (cid:129)f is the ISO7816 clock frequency (Hz) Di is a binary value encoded on a 4-bit field, named DI, as represented in Table 26-3 on page 308. Table 26-3. Binary and Decimal Values for Di DI field 0001 0010 0011 0100 0101 0110 1000 1001 Di (decimal) 1 2 4 8 16 32 12 20 Fi is a binary value encoded on a 4-bit field, named FI, as represented in Table 26-4 on page 308. Table 26-4. Binary and Decimal Values for Fi FI field 0000 0001 0010 0011 0100 0101 0110 1001 1010 1011 1100 1101 Fi (decimal 372 372 558 744 1116 1488 1860 512 768 1024 1536 2048 Table 26-5 on page 308 shows the resulting Fi/Di Ratio, which is the ratio between the ISO7816 clock and the baud rate clock. Table 26-5. Possible Values for the Fi/Di Ratio Fi/Di 372 558 774 1116 1488 1806 512 768 1024 1536 2048 1 372 558 744 1116 1488 1860 512 768 1024 1536 2048 2 186 279 372 558 744 930 256 384 512 768 1024 4 93 139.5 186 279 372 465 128 192 256 384 512 8 46.5 69.75 93 139.5 186 232.5 64 96 128 192 256 16 23.25 34.87 46.5 69.75 93 116.2 32 48 64 96 128 32 11.62 17.43 23.25 34.87 46.5 58.13 16 24 32 48 64 12 31 46.5 62 93 124 155 42.66 64 85.33 128 170.6 20 18.6 27.9 37.2 55.8 74.4 93 25.6 38.4 51.2 76.8 102.4 If the USART is configured in ISO7816 Mode, the clock selected by the USCLKS field in the Mode Register (MR) is first divided by the value programmed in the field CD in the Baud Rate 308 32058K AVR32-01/12
AT32UC3A Generator Register (BRGR). The resulting clock can be provided to the CLK pin to feed the smart card clock inputs. This means that the CLKO bit can be set in MR. This clock is then divided by the value programmed in the FI_DI_RATIO field in the FI_DI_Ratio register (FIDI). This is performed by the Sampling Divider, which performs a division by up to 2047 in ISO7816 Mode. The non-integer values of the Fi/Di Ratio are not supported and the user must program the FI_DI_RATIO field to a value as close as possible to the expected value. The FI_DI_RATIO field resets to the value 0x174 (372 in decimal) and is the most common divider between the ISO7816 clock and the bit rate (Fi = 372, Di = 1). Figure 26-5 on page 309 shows the relation between the Elementary Time Unit, corresponding to a bit time, and the ISO 7816 clock. Figure 26-5. Elementary Time Unit (ETU) FI_DI_RATIO ISO7816 Clock Cycles ISO7816 Clock on CLK ISO7816 I/O Line on TXD 1 ETU 26.7.2 Receiver and Transmitter Control After reset, the receiver is disabled. The user must enable the receiver by setting the RXEN bit in the Control Register (CR). However, the receiver registers can be programmed before the receiver clock is enabled. After reset, the transmitter is disabled. The user must enable it by setting the TXEN bit in the Control Register (CR). However, the transmitter registers can be programmed before being enabled. The Receiver and the Transmitter can be enabled together or independently. At any time, the software can perform a reset on the receiver or the transmitter of the USART by setting the corresponding bit, RSTRX and RSTTX respectively, in the Control Register (CR). The software resets clear the status flag and reset internal state machines but the user interface configuration registers hold the value configured prior to software reset. Regardless of what the receiver or the transmitter is performing, the communication is immediately stopped. The user can also independently disable the receiver or the transmitter by setting RXDIS and TXDIS respectively in CR. If the receiver is disabled during a character reception, the USART waits until the end of reception of the current character, then the reception is stopped. If the transmitter is disabled while it is operating, the USART waits the end of transmission of both the current character and character being stored in the Transmit Holding Register (THR). If a time- guard is programmed, it is handled normally. 309 32058K AVR32-01/12
AT32UC3A 26.7.3 Synchronous and Asynchronous Modes 26.7.3.1 Transmitter Operations The transmitter performs the same in both synchronous and asynchronous operating modes (SYNC = 0 or SYNC = 1). One start bit, up to 9 data bits, one optional parity bit and up to two stop bits are successively shifted out on the TXD pin at each falling edge of the programmed serial clock. The number of data bits is selected by the CHRL field and the MODE 9 bit in the Mode Register (MR). Nine bits are selected by setting the MODE 9 bit regardless of the CHRL field. The parity bit is set according to the PAR field in MR. The even, odd, space, marked or none parity bit can be configured. The MSBF field in MR configures which data bit is sent first. If written at 1, the most significant bit is sent first. At 0, the less significant bit is sent first. The number of stop bits is selected by the NBSTOP field in MR. The 1.5 stop bit is supported in asynchronous mode only. Figure 26-6. Character Transmit Example: 8-bit, Parity Enabled One Stop Baud Rate Clock TXD Start D0 D1 D2 D3 D4 D5 D6 D7 Parity Stop Bit Bit Bit The characters are sent by writing in the Transmit Holding Register (THR). The transmitter reports two status bits in the Channel Status Register (CSR): TXRDY (Transmitter Ready), which indicates that THR is empty and TXEMPTY, which indicates that all the characters written in THR have been processed. When the current character processing is completed, the last character written in THR is transferred into the Shift Register of the transmitter and THR becomes empty, thus TXRDY rises. Both TXRDY and TXEMPTY bits are low when the transmitter is disabled. Writing a character in THR while TXRDY is low has no effect and the written character is lost. Figure 26-7. Transmitter Status Baud Rate Clock TXD Start ParityStopStart ParityStop D0 D1 D2 D3 D4 D5 D6 D7 D0 D1 D2 D3 D4 D5 D6 D7 Bit Bit Bit Bit Bit Bit Write US_THR TXRDY TXEMPTY 310 32058K AVR32-01/12
AT32UC3A 26.7.3.2 Manchester Encoder When the Manchester encoder is in use, characters transmitted through the USART are encoded based on biphase Manchester II format. To enable this mode, set the MAN field in the MR register to 1. Depending on polarity configuration, a logic level (zero or one), is transmitted as a coded signal one-to-zero or zero-to-one. Thus, a transition always occurs at the midpoint of each bit time. It consumes more bandwidth than the original NRZ signal (2x) but the receiver has more error control since the expected input must show a change at the center of a bit cell. An example of Manchester encoded sequence is: the byte 0xB1 or 10110001 encodes to 10 01 10 10 01 01 01 10, assuming the default polarity of the encoder. Figure 26-8 on page 311 illustrates this coding scheme. Figure 26-8. NRZ to Manchester Encoding NRZ 1 0 1 1 0 0 0 1 encoded data Manchester encoded Txd data The Manchester encoded character can also be encapsulated by adding both a configurable preamble and a start frame delimiter pattern. Depending on the configuration, the preamble is a training sequence, composed of a pre-defined pattern with a programmable length from 1 to 15 bit times. If the preamble length is set to 0, the preamble waveform is not generated prior to any character. The preamble pattern is chosen among the following sequences: ALL_ONE, ALL_ZERO, ONE_ZERO or ZERO_ONE, writing the field TX_PP in the MAN register, the field TX_PL is used to configure the preamble length. Figure 26-9 on page 312 illustrates and defines the valid patterns. To improve flexibility, the encoding scheme can be configured using the TX_MPOL field in the MAN register. If the TX_MPOL field is set to zero (default), a logic zero is encoded with a zero-to-one transition and a logic one is encoded with a one-to-zero transition. If the TX_MPOL field is set to one, a logic one is encoded with a one-to-zero transition and a logic zero is encoded with a zero-to-one transition. 311 32058K AVR32-01/12
AT32UC3A Figure 26-9. Preamble Patterns, Default Polarity Assumed Manchester encoded SFD DATA Txd data 8 bit width "ALL_ONE" Preamble Manchester encoded SFD DATA Txd data 8 bit width "ALL_ZERO" Preamble Manchester encoded Txd SFD DATA data 8 bit width "ZERO_ONE" Preamble Manchester encoded SFD DATA Txd data 8 bit width "ONE_ZERO" Preamble A start frame delimiter is to be configured using the ONEBIT field in the MR register. It consists of a user-defined pattern that indicates the beginning of a valid data. Figure 26-10 on page 313 illustrates these patterns. If the start frame delimiter, also known as start bit, is one bit, (ONEBIT at 1), a logic zero is Manchester encoded and indicates that a new character is being sent seri- ally on the line. If the start frame delimiter is a synchronization pattern also referred to as sync (ONEBIT at 0), a sequence of 3 bit times is sent serially on the line to indicate the start of a new character. The sync waveform is in itself an invalid Manchester waveform as the transition occurs at the middle of the second bit time. Two distinct sync patterns are used: the command sync and the data sync. The command sync has a logic one level for one and a half bit times, then a transition to logic zero for the second one and a half bit times. If the MODSYNC field in the MR register is set to 1, the next character is a command. If it is set to 0, the next character is a data. When direct memory access is used, the MODSYNC field can be immediately updated with a modified character located in memory. To enable this mode, VAR_SYNC field in MR reg- ister must be set to 1. In this case, the MODSYNC field in MR is bypassed and the sync configuration is held in the TXSYNH in the THR register. The USART character format is modi- fied and includes sync information. 312 32058K AVR32-01/12
AT32UC3A Figure 26-10. Start Frame Delimiter Preamble Length is set to 0 SFD Manchester encoded DATA Txd data One bit start frame delimiter SFD Manchester encoded DATA Txd data Command Sync start frame delimiter SFD Manchester encoded DATA Txd data Data Sync start frame delimiter 26.7.3.3 Drift Compensation Drift compensation is available only in 16X oversampling mode. An hardware recovery system allows a larger clock drift. To enable the hardware system, the bit in the MAN register must be set. If the RXD edge is one 16X clock cycle from the expected edge, this is considered as nor- mal jitter and no corrective actions is taken. If the RXD event is between 4 and 2 clock cycles before the expected edge, then the current period is shortened by one clock cycle. If the RXD event is between 2 and 3 clock cycles after the expected edge, then the current period is length- ened by one clock cycle. These intervals are considered to be drift and so corrective actions are automatically taken. Figure 26-11. Bit Resynchronization Oversampling 16x Clock RXD Sampling point Expected edge Synchro. Tolerance Sync Synchro. Synchro. Jump Jump Error Error 26.7.3.4 Asynchronous Receiver If the USART is programmed in asynchronous operating mode (SYNC = 0), the receiver over- samples the RXD input line. The oversampling is either 16 or 8 times the Baud Rate clock, depending on the OVER bit in the Mode Register (MR). 313 32058K AVR32-01/12
AT32UC3A The receiver samples the RXD line. If the line is sampled during one half of a bit time at 0, a start bit is detected and data, parity and stop bits are successively sampled on the bit rate clock. If the oversampling is 16, (OVER at 0), a start is detected at the eighth sample at 0. Then, data bits, parity bit and stop bit are sampled on each 16 sampling clock cycle. If the oversampling is 8 (OVER at 1), a start bit is detected at the fourth sample at 0. Then, data bits, parity bit and stop bit are sampled on each 8 sampling clock cycle. The number of data bits, first bit sent and parity mode are selected by the same fields and bits as the transmitter, i.e. respectively CHRL, MODE9, MSBF and PAR. For the synchronization mechanism only, the number of stop bits has no effect on the receiver as it considers only one stop bit, regardless of the field NBSTOP, so that resynchronization between the receiver and the transmitter can occur. Moreover, as soon as the stop bit is sampled, the receiver starts looking for a new start bit so that resynchronization can also be accomplished when the transmitter is operating with one stop bit. Figure 26-12 on page 314 and Figure 26-13 on page 314 illustrate start detection and character reception when USART operates in asynchronous mode. Figure 26-12. Asynchronous Start Detection Baud Rate Clock Sampling Clock (x16) RXD Sampling 1 2 3 4 5 6 7 8 1 2 3 4 5 6 7 8 9 10 11 12 13 14 15 16 D0 Start Sampling Detection RXD Sampling 1 2 3 4 5 6 7 0 1 2 3 4 Start Rejection Figure 26-13. Asynchronous Character Reception Example: 8-bit, Parity Enabled Baud Rate Clock RXD Start 16 16 16 16 16 16 16 16 16 16 Detection samplessamplessamplessamplessamplessamplessamplessamplessamplessamples D0 D1 D2 D3 D4 D5 D6 D7 Parity Stop Bit Bit 314 32058K AVR32-01/12
AT32UC3A 26.7.3.5 Manchester Decoder When the MAN field in MR register is set to 1, the Manchester decoder is enabled. The decoder performs both preamble and start frame delimiter detection. One input line is dedicated to Man- chester encoded input data. An optional preamble sequence can be defined, its length is user-defined and totally indepen- dent of the emitter side. Use RX_PL in MAN register to configure the length of the preamble sequence. If the length is set to 0, no preamble is detected and the function is disabled. In addi- tion, the polarity of the input stream is programmable with RX_MPOL field in MAN register. Depending on the desired application the preamble pattern matching is to be defined via the RX_PP field in MAN. See Figure 26-9 on page 312 for available preamble patterns. Unlike preamble, the start frame delimiter is shared between Manchester Encoder and Decoder. So, if ONEBIT field is set to 1, only a zero encoded Manchester can be detected as a valid start frame delimiter. If ONEBIT is set to 0, only a sync pattern is detected as a valid start frame delimiter. Decoder operates by detecting transition on incoming stream. If RXD is sampled dur- ing one quarter of a bit time at zero, a start bit is detected. See Figure 26-14 on page 315.. The sample pulse rejection mechanism applies. Figure 26-14. Asynchronous Start Bit Detection Sampling Clock (16 x) Manchester encoded Txd data Start Detection 1 2 3 4 The receiver is activated and starts Preamble and Frame Delimiter detection, sampling the data at one quarter and then three quarters. If a valid preamble pattern or start frame delimiter is detected, the receiver continues decoding with the same synchronization. If the stream does not match a valid pattern or a valid start frame delimiter, the receiver re-synchronizes on the next valid edge.The minimum time threshold to estimate the bit value is three quarters of a bit time. If a valid preamble (if used) followed with a valid start frame delimiter is detected, the incoming stream is decoded into NRZ data and passed to USART for processing. Figure 26-15 on page 316 illustrates Manchester pattern mismatch. When incoming data stream is passed to the USART, the receiver is also able to detect Manchester code violation. A code violation is a lack of transition in the middle of a bit cell. In this case, MANE flag in CSR register is raised. It is cleared by writing the Control Register (CR) with the RSTSTA bit at 1. See Figure 26-16 on page 316 for an example of Manchester error detection during data phase. 315 32058K AVR32-01/12
AT32UC3A Figure 26-15. Preamble Pattern Mismatch Preamble Mismatch Preamble Mismatch Manchester coding error invalid pattern Manchester encoded SFD DATA Txd data Preamble Length is set to 8 Figure 26-16. Manchester Error Flag Preamble Length is set to 4 Elementary character bit time SFD Manchester encoded Txd data Entering USART character area sampling points Preamble subpacket Manchester and Start Frame Delimiter Coding Error were successfully detected decoded When the start frame delimiter is a sync pattern (ONEBIT field at 0), both command and data delimiter are supported. If a valid sync is detected, the received character is written as RXCHR field in the RHR register and the RXSYNH is updated. RXCHR is set to 1 when the received character is a command, and it is set to 0 if the received character is a data. This mechanism alleviates and simplifies the direct memory access as the character contains its own sync field in the same register. As the decoder is setup to be used in unipolar mode, the first bit of the frame has to be a zero-to- one transition. 26.7.3.6 Radio Interface: Manchester Encoded USART Application This section describes low data rate RF transmission systems and their integration with a Man- chester encoded USART. These systems are based on transmitter and receiver ICs that support ASK and FSK modulation schemes. The goal is to perform full duplex radio transmission of characters using two different frequency carriers. See the configuration in Figure 26-17 on page 317. 316 32058K AVR32-01/12
AT32UC3A Figure 26-17. Manchester Encoded Characters RF Transmission Fup frequency Carrier ASK/FSK Upstream Receiver Upstream Emitter LNA Serial VCO Configuration RF filter Interface Demod control Manchester USART Fdown frequency Carrier bi-dir decoder Receiver line ASK/FSK downstream transmitter Downstream Manchester USART encoder Emitter Receiver PA RF filter Mod VCO control The USART module is configured as a Manchester encoder/decoder. Looking at the down- stream communication channel, Manchester encoded characters are serially sent to the RF emitter. This may also include a user defined preamble and a start frame delimiter. Mostly, pre- amble is used in the RF receiver to distinguish between a valid data from a transmitter and signals due to noise. The Manchester stream is then modulated. See Figure 26-18 on page 317 for an example of ASK modulation scheme. When a logic one is sent to the ASK modulator, the power amplifier, referred to as PA, is enabled and transmits an RF signal at downstream fre- quency. When a logic zero is transmitted, the RF signal is turned off. If the FSK modulator is activated, two different frequencies are used to transmit data. When a logic 1 is sent, the modu- lator outputs an RF signal at frequency F0 and switches to F1 if the data sent is a 0. See Figure 26-19 on page 318. From the receiver side, another carrier frequency is used. The RF receiver performs a bit check operation examining demodulated data stream. If a valid pattern is detected, the receiver switches to receiving mode. The demodulated stream is sent to the Manchester decoder. Because of bit checking inside RF IC, the data transferred to the microcontroller is reduced by a user-defined number of bits. The Manchester preamble length is to be defined in accordance with the RF IC configuration. Figure 26-18. ASK Modulator Output 1 0 0 1 NRZ stream Manchester encoded data default polarity Txd unipolar output ASK Modulator Output Uptstream Frequency F0 317 32058K AVR32-01/12
AT32UC3A Figure 26-19. FSK Modulator Output 1 0 0 1 NRZ stream Manchester encoded data Txd default polarity unipolar output FSK Modulator Output Uptstream Frequencies [F0, F0+offset] 26.7.4 Synchronous Receiver In synchronous mode (SYNC = 1), the receiver samples the RXD signal on each rising edge of the Baud Rate Clock. If a low level is detected, it is considered as a start. All data bits, the parity bit and the stop bits are sampled and the receiver waits for the next start bit. Synchronous mode operations provide a high speed transfer capability. Configuration fields and bits are the same as in asynchronous mode. Figure 26-20 on page 318 illustrates a character reception in synchronous mode. Figure 26-20. Synchronous Mode Character Reception Example: 8-bit, Parity Enabled 1 Stop Baud Rate Clock RXD Sampling Start D0 D1 D2 D3 D4 D5 D6 D7 Stop Bit Parity Bit 26.7.4.1 Receiver Operations When a character reception is completed, it is transferred to the Receive Holding Register (RHR) and the RXRDY bit in the Status Register (CSR) rises. If a character is completed while the RXRDY is set, the OVRE (Overrun Error) bit is set. The last character is transferred into RHR and overwrites the previous one. The OVRE bit is cleared by writing the Control Register (CR) with the RSTSTA (Reset Status) bit at 1. 318 32058K AVR32-01/12
AT32UC3A Figure 26-21. Receiver Status Baud Rate Clock RXD Start ParityStopStart ParityStop D0 D1 D2 D3 D4 D5 D6 D7 D0 D1 D2 D3 D4 D5 D6 D7 Bit Bit Bit Bit Bit Bit RSTSTA = 1 Write US_CR Read US_RHR RXRDY OVRE 319 32058K AVR32-01/12
AT32UC3A 26.7.4.2 Parity The USART supports five parity modes selected by programming the PAR field in the Mode Register (MR). The PAR field also enables the Multidrop mode, see ”Multidrop Mode” on page 321. Even and odd parity bit generation and error detection are supported. If even parity is selected, the parity generator of the transmitter drives the parity bit at 0 if a num- ber of 1s in the character data bit is even, and at 1 if the number of 1s is odd. Accordingly, the receiver parity checker counts the number of received 1s and reports a parity error if the sam- pled parity bit does not correspond. If odd parity is selected, the parity generator of the transmitter drives the parity bit at 1 if a number of 1s in the character data bit is even, and at 0 if the number of 1s is odd. Accordingly, the receiver parity checker counts the number of received 1s and reports a parity error if the sampled parity bit does not correspond. If the mark parity is used, the parity generator of the transmitter drives the parity bit at 1 for all characters. The receiver parity checker reports an error if the parity bit is sampled at 0. If the space parity is used, the parity generator of the transmitter drives the parity bit at 0 for all characters. The receiver parity checker reports an error if the parity bit is sampled at 1. If parity is disabled, the transmitter does not generate any parity bit and the receiver does not report any parity error. Table 26-6 on page 320 shows an example of the parity bit for the character 0x41 (character ASCII “A”) depending on the configuration of the USART. Because there are two bits at 1, 1 bit is added when a parity is odd, or 0 is added when a parity is even. Table 26-6. Parity Bit Examples Character Hexa Binary Parity Bit Parity Mode A 0x41 0100 0001 1 Odd A 0x41 0100 0001 0 Even A 0x41 0100 0001 1 Mark A 0x41 0100 0001 0 Space A 0x41 0100 0001 None None When the receiver detects a parity error, it sets the PARE (Parity Error) bit in the Channel Status Register (CSR). The PARE bit can be cleared by writing the Control Register (CR) with the RST- STA bit at 1. Figure 26-22 on page 321 illustrates the parity bit status setting and clearing. 320 32058K AVR32-01/12
AT32UC3A Figure 26-22. Parity Error Baud Rate Clock RXD Start BadStop D0 D1 D2 D3 D4 D5 D6 D7 Bit Parity Bit Bit RSTSTA = 1 Write US_CR PARE RXRDY 26.7.4.3 Multidrop Mode If the PAR field in the Mode Register (MR) is programmed to the value 0x6 or 0x07, the USART runs in Multidrop Mode. This mode differentiates the data characters and the address charac- ters. Data is transmitted with the parity bit at 0 and addresses are transmitted with the parity bit at 1. If the USART is configured in multidrop mode, the receiver sets the PARE parity error bit when the parity bit is high and the transmitter is able to send a character with the parity bit high when the Control Register is written with the SENDA bit at 1. To handle parity error, the PARE bit is cleared when the Control Register is written with the bit RSTSTA at 1. The transmitter sends an address byte (parity bit set) when SENDA is written to CR. In this case, the next byte written to THR is transmitted as an address. Any character written in THR without having written the command SENDA is transmitted normally with the parity at 0. 26.7.4.4 Transmitter Timeguard The timeguard feature enables the USART interface with slow remote devices. The timeguard function enables the transmitter to insert an idle state on the TXD line between two characters. This idle state actually acts as a long stop bit. The duration of the idle state is programmed in the TG field of the Transmitter Timeguard Regis- ter (TTGR). When this field is programmed at zero no timeguard is generated. Otherwise, the transmitter holds a high level on TXD after each transmitted byte during the number of bit peri- ods programmed in TG in addition to the number of stop bits. As illustrated in Figure 26-23 on page 322, the behavior of TXRDY and TXEMPTY status bits is modified by the programming of a timeguard. TXRDY rises only when the start bit of the next character is sent, and thus remains at 0 during the timeguard transmission if a character has been written in THR. TXEMPTY remains low until the timeguard transmission is completed as the timeguard is part of the current character being transmitted. 321 32058K AVR32-01/12
AT32UC3A Figure 26-23. Timeguard Operations TG = 4 TG = 4 Baud Rate Clock TXD Start ParityStop Start ParityStop D0 D1 D2 D3 D4 D5 D6 D7 D0 D1 D2 D3 D4 D5 D6 D7 Bit Bit Bit Bit Bit Bit Write US_THR TXRDY TXEMPTY Table 26-7 on page 322 indicates the maximum length of a timeguard period that the transmitter can handle in relation to the function of the Baud Rate. Table 26-7. Maximum Timeguard Length Depending on Baud Rate Baud Rate Bit time Timeguard Bit/sec µs ms 1 200 833 212.50 9 600 104 26.56 14400 69.4 17.71 19200 52.1 13.28 28800 34.7 8.85 33400 29.9 7.63 56000 17.9 4.55 57600 17.4 4.43 115200 8.7 2.21 26.7.4.5 Receiver Time-out The Receiver Time-out provides support in handling variable-length frames. This feature detects an idle condition on the RXD line. When a time-out is detected, the bit TIMEOUT in the Channel Status Register (CSR) rises and can generate an interrupt, thus indicating to the driver an end of frame. The time-out delay period (during which the receiver waits for a new character) is programmed in the TO field of the Receiver Time-out Register (RTOR). If the TO field is programmed at 0, the Receiver Time-out is disabled and no time-out is detected. The TIMEOUT bit in CSR remains at 0. Otherwise, the receiver loads a 16-bit counter with the value programmed in TO. This counter is decremented at each bit period and reloaded each time a new character is received. If the counter reaches 0, the TIMEOUT bit in the Status Register rises. Then, the user can either: (cid:129) Stop the counter clock until a new character is received. This is performed by writing the Control Register (CR) with the STTTO (Start Time-out) bit at 1. In this case, the idle state on RXD before a new character is received will not provide a time-out. This prevents having to 322 32058K AVR32-01/12
AT32UC3A handle an interrupt before a character is received and allows waiting for the next idle state on RXD after a frame is received. (cid:129) Obtain an interrupt while no character is received. This is performed by writing CR with the RETTO (Reload and Start Time-out) bit at 1. If RETTO is performed, the counter starts counting down immediately from the value TO. This enables generation of a periodic interrupt so that a user time-out can be handled, for example when no key is pressed on a keyboard. If STTTO is performed, the counter clock is stopped until a first character is received. The idle state on RXD before the start of the frame does not provide a time-out. This prevents having to obtain a periodic interrupt and enables a wait of the end of frame when the idle state on RXD is detected. If RETTO is performed, the counter starts counting down immediately from the value TO. This enables generation of a periodic interrupt so that a user time-out can be handled, for example when no key is pressed on a keyboard. Figure 26-24 on page 323 shows the block diagram of the Receiver Time-out feature. Figure 26-24. Receiver Time-out Block Diagram Baud Rate TO Clock 16-bit Value 1 D Q Clock 16-bit Time-out Counter = TIMEOUT STTTO Load 0 Clear Character Received RETTO Table 26-8 on page 323 gives the maximum time-out period for some standard baud rates. Table 26-8. Maximum Time-out Period Baud Rate Bit Time Time-out bit/sec µs ms 600 1 667 109 225 1 200 833 54 613 2 400 417 27 306 4 800 208 13 653 9 600 104 6 827 14400 69 4 551 19200 52 3 413 28800 35 2 276 33400 30 1 962 56000 18 1 170 57600 17 1 138 200000 5 328 323 32058K AVR32-01/12
AT32UC3A 26.7.4.6 Framing Error The receiver is capable of detecting framing errors. A framing error happens when the stop bit of a received character is detected at level 0. This can occur if the receiver and the transmitter are fully desynchronized. A framing error is reported on the FRAME bit of the Channel Status Register (CSR). The FRAME bit is asserted in the middle of the stop bit as soon as the framing error is detected. It is cleared by writing the Control Register (CR) with the RSTSTA bit at 1. Figure 26-25. Framing Error Status Baud Rate Clock RXD Start ParityStop D0 D1 D2 D3 D4 D5 D6 D7 Bit Bit Bit RSTSTA = 1 Write US_CR FRAME RXRDY 26.7.4.7 Transmit Break The user can request the transmitter to generate a break condition on the TXD line. A break con- dition drives the TXD line low during at least one complete character. It appears the same as a 0x00 character sent with the parity and the stop bits at 0. However, the transmitter holds the TXD line at least during one character until the user requests the break condition to be removed. A break is transmitted by writing the Control Register (CR) with the STTBRK bit at 1. This can be performed at any time, either while the transmitter is empty (no character in either the Shift Reg- ister or in THR) or when a character is being transmitted. If a break is requested while a character is being shifted out, the character is first completed before the TXD line is held low. Once STTBRK command is requested further STTBRK commands are ignored until the end of the break is completed. The break condition is removed by writing CR with the STPBRK bit at 1. If the STPBRK is requested before the end of the minimum break duration (one character, including start, data, parity and stop bits), the transmitter ensures that the break condition completes. The transmitter considers the break as though it is a character, i.e. the STTBRK and STPBRK commands are taken into account only if the TXRDY bit in CSR is at 1 and the start of the break condition clears the TXRDY and TXEMPTY bits as if a character is processed. Writing CR with the both STTBRK and STPBRK bits at 1 can lead to an unpredictable result. All STPBRK commands requested without a previous STTBRK command are ignored. A byte writ- ten into the Transmit Holding Register while a break is pending, but not started, is ignored. 324 32058K AVR32-01/12
AT32UC3A After the break condition, the transmitter returns the TXD line to 1 for a minimum of 12 bit times. Thus, the transmitter ensures that the remote receiver detects correctly the end of break and the start of the next character. If the timeguard is programmed with a value higher than 12, the TXD line is held high for the timeguard period. After holding the TXD line for this period, the transmitter resumes normal operations. Figure 26-26 on page 325 illustrates the effect of both the Start Break (STTBRK) and Stop Break (STPBRK) commands on the TXD line. Figure 26-26. Break Transmission Baud Rate Clock TXD Start D0 D1 D2 D3 D4 D5 D6 D7ParityStop Break Transmission End of Break Bit Bit Bit STTBRK = 1 STPBRK = 1 Write US_CR TXRDY TXEMPTY 26.7.4.8 Receive Break The receiver detects a break condition when all data, parity and stop bits are low. This corre- sponds to detecting a framing error with data at 0x00, but FRAME remains low. When the low stop bit is detected, the receiver asserts the RXBRK bit in CSR. This bit may be cleared by writing the Control Register (CR) with the bit RSTSTA at 1. An end of receive break is detected by a high level for at least 2/16 of a bit period in asynchro- nous operating mode or one sample at high level in synchronous operating mode. The end of break detection also asserts the RXBRK bit. 26.7.4.9 Hardware Handshaking The USART features a hardware handshaking out-of-band flow control. The RTS and CTS pins are used to connect with the remote device, as shown in Figure 26-27 on page 325. Figure 26-27. Connection with a Remote Device for Hardware Handshaking USART Remote Device TXD RXD RXD TXD CTS RTS RTS CTS 325 32058K AVR32-01/12
AT32UC3A Setting the USART to operate with hardware handshaking is performed by writing the MODE field in the Mode Register (MR) to the value 0x2. The USART behavior when hardware handshaking is enabled is the same as the behavior in standard synchronous or asynchronous mode, except that the receiver drives the RTS pin as described below and the level on the CTS pin modifies the behavior of the transmitter as described below. Using this mode requires using the PDC channel for reception. The transmitter can handle hardware handshaking in any case. Figure 26-28 on page 326 shows how the receiver operates if hardware handshaking is enabled. The RTS pin is driven high if the receiver is disabled and if the status RXBUFF (Receive Buffer Full) coming from the PDC channel is high. Normally, the remote device does not start transmit- ting while its CTS pin (driven by RTS) is high. As soon as the Receiver is enabled, the RTS falls, indicating to the remote device that it can start transmitting. Defining a new buffer to the PDC clears the status bit RXBUFF and, as a result, asserts the pin RTS low. Figure 26-28. Receiver Behavior when Operating with Hardware Handshaking RXD RXEN = 1 RXDIS = 1 Write US_CR RTS RXBUFF Figure 26-29 on page 326 shows how the transmitter operates if hardware handshaking is enabled. The CTS pin disables the transmitter. If a character is being processing, the transmitter is disabled only after the completion of the current character and transmission of the next char- acter happens as soon as the pin CTS falls. Figure 26-29. Transmitter Behavior when Operating with Hardware Handshaking CTS TXD 26.7.5 ISO7816 Mode The USART features an ISO7816-compatible operating mode. This mode permits interfacing with smart cards and Security Access Modules (SAM) communicating through an ISO7816 link. Both T = 0 and T = 1 protocols defined by the ISO7816 specification are supported. Setting the USART in ISO7816 mode is performed by writing the MODE field in the Mode Regis- ter (MR) to the value 0x4 for protocol T = 0 and to the value 0x5 for protocol T = 1. 26.7.5.1 ISO7816 Mode Overview The ISO7816 is a half duplex communication on only one bidirectional line. The baud rate is determined by a division of the clock provided to the remote device (see ”Baud Rate Generator” on page 305). The USART connects to a smart card as shown in Figure 26-30 on page 327. The TXD line becomes bidirectional and the Baud Rate Generator feeds the ISO7816 clock on the CLK pin. 326 32058K AVR32-01/12
AT32UC3A As the TXD pin becomes bidirectional, its output remains driven by the output of the transmitter but only when the transmitter is active while its input is directed to the input of the receiver. The USART is considered as the master of the communication as it generates the clock. Figure 26-30. Connection of a Smart Card to the USART USART CLK CLK Smart Card I/O TXD When operating in ISO7816, either in T = 0 or T = 1 modes, the character format is fixed. The configuration is 8 data bits, even parity and 1 or 2 stop bits, regardless of the values pro- grammed in the CHRL, MODE9, PAR and CHMODE fields. MSBF can be used to transmit LSB or MSB first. Parity Bit (PAR) can be used to transmit in normal or inverse mode. Refer to ”USART Mode Register” on page 343 and ”PAR: Parity Type” on page 345. The USART cannot operate concurrently in both receiver and transmitter modes as the commu- nication is unidirectional at a time. It has to be configured according to the required mode by enabling or disabling either the receiver or the transmitter as desired. Enabling both the receiver and the transmitter at the same time in ISO7816 mode may lead to unpredictable results. The ISO7816 specification defines an inverse transmission format. Data bits of the character must be transmitted on the I/O line at their negative value. The USART does not support this for- mat and the user has to perform an exclusive OR on the data before writing it in the Transmit Holding Register (THR) or after reading it in the Receive Holding Register (RHR). 26.7.5.2 Protocol T = 0 In T = 0 protocol, a character is made up of one start bit, eight data bits, one parity bit and one guard time, which lasts two bit times. The transmitter shifts out the bits and does not drive the I/O line during the guard time. If no parity error is detected, the I/O line remains at 1 during the guard time and the transmitter can continue with the transmission of the next character, as shown in Figure 26-31 on page 328. If a parity error is detected by the receiver, it drives the I/O line at 0 during the guard time, as shown in Figure 26-32 on page 328. This error bit is also named NACK, for Non Acknowledge. In this case, the character lasts 1 bit time more, as the guard time length is the same and is added to the error bit time which lasts 1 bit time. When the USART is the receiver and it detects an error, it does not load the erroneous character in the Receive Holding Register (RHR). It appropriately sets the PARE bit in the Status Register (SR) so that the software can handle the error. 327 32058K AVR32-01/12
AT32UC3A Figure 26-31. T = 0 Protocol without Parity Error Baud Rate Clock RXD Start D0 D1 D2 D3 D4 D5 D6 D7 Parity Guard Guard Next Bit Bit Time 1 Time 2 Start Bit Figure 26-32. T = 0 Protocol with Parity Error Baud Rate Clock I/O Error Start D0 D1 D2 D3 D4 D5 D6 D7 Parity Guard Guard Start D0 D1 Bit Bit Time 1 Time 2 Bit Repetition 26.7.5.3 Receive Error Counter The USART receiver also records the total number of errors. This can be read in the Number of Error (NER) register. The NB_ERRORS field can record up to 255 errors. Reading NER auto- matically clears the NB_ERRORS field. 26.7.5.4 Receive NACK Inhibit The USART can also be configured to inhibit an error. This can be achieved by setting the INACK bit in the Mode Register (MR). If INACK is at 1, no error signal is driven on the I/O line even if a parity bit is detected, but the INACK bit is set in the Status Register (SR). The INACK bit can be cleared by writing the Control Register (CR) with the RSTNACK bit at 1. Moreover, if INACK is set, the erroneous received character is stored in the Receive Holding Register, as if no error occurred. However, the RXRDY bit does not raise. 26.7.5.5 Transmit Character Repetition When the USART is transmitting a character and gets a NACK, it can automatically repeat the character before moving on to the next one. Repetition i s enabled by writing the MAX_ITERATION field in the Mode Register (MR) at a value higher than 0. Each character can be transmitted up to eight times; the first transmission plus seven repetitions. If MAX_ITERATION does not equal zero, the USART repeats the character as many times as the value loaded in MAX_ITERATION. When the USART repetition number reaches MAX_ITERATION, the ITERATION bit is set in the Channel Status Register (CSR). If the repetition of the character is acknowledged by the receiver, the repetitions are stopped and the iteration counter is cleared. The ITERATION bit in CSR can be cleared by writing the Control Register with the RSIT bit at 1. 26.7.5.6 Disable Successive Receive NACK The receiver can limit the number of successive NACKs sent back to the remote transmitter. This is programmed by setting the bit DSNACK in the Mode Register (MR). The maximum num- ber of NACK transmitted is programmed in the MAX_ITERATION field. As soon as 328 32058K AVR32-01/12
AT32UC3A MAX_ITERATION is reached, the character is considered as correct, an acknowledge is sent on the line and the ITERATION bit in the Channel Status Register is set. 26.7.5.7 Protocol T = 1 When operating in ISO7816 protocol T = 1, the transmission is similar to an asynchronous for- mat with only one stop bit. The parity is generated when transmitting and checked when receiving. Parity error detection sets the PARE bit in the Channel Status Register (CSR). 26.7.6 IrDA Mode The USART features an IrDA mode supplying half-duplex point-to-point wireless communica- tion. It embeds the modulator and demodulator which allows a glueless connection to the infrared transceivers, as shown in Figure 26-33 on page 329. The modulator and demodulator are compliant with the IrDA specification version 1.1 and support data transfer speeds ranging from 2.4 Kb/s to 115.2 Kb/s. The USART IrDA mode is enabled by setting the MODE field in the Mode Register (MR) to the value 0x8. The IrDA Filter Register (IFR) allows configuring the demodulator filter. The USART transmitter and receiver operate in a normal asynchronous mode and all parameters are acces- sible. Note that the modulator and the demodulator are activated. Figure 26-33. Connection to IrDA Transceivers USART IrDA Transceivers Receiver Demodulator RXD RX TX Transmitter Modulator TXD The receiver and the transmitter must be enabled or disabled according to the direction of the transmission to be managed. 26.7.6.1 IrDA Modulation For baud rates up to and including 115.2 Kbits/sec, the RZI modulation scheme is used. “0” is represented by a light pulse of 3/16th of a bit time. Some examples of signal pulse duration are shown in Table 26-9 on page 329. Table 26-9. IrDA Pulse Duration Baud Rate Pulse Duration (3/16) 2.4 Kb/s 78.13 µs 9.6 Kb/s 19.53 µs 19.2 Kb/s 9.77 µs 329 32058K AVR32-01/12
AT32UC3A Table 26-9. IrDA Pulse Duration Baud Rate Pulse Duration (3/16) 38.4 Kb/s 4.88 µs 57.6 Kb/s 3.26 µs 115.2 Kb/s 1.63 µs Figure 26-34 on page 330 shows an example of character transmission. Figure 26-34. IrDA Modulation Start Data Bits Stop Bit Bit Transmitter 0 1 0 1 0 0 1 1 0 1 Output TXD 3 Bit Period Bit Period 16 26.7.6.2 IrDA Baud Rate Table 26-10 on page 330 gives some examples of CD values, baud rate error and pulse dura- tion. Note that the requirement on the maximum acceptable error of ±1.87% must be met. Table 26-10. IrDA Baud Rate Error Peripheral Clock Baud Rate CD Baud Rate Error Pulse Time 3 686 400 115 200 2 0.00% 1.63 20 000 000 115 200 11 1.38% 1.63 32 768 000 115 200 18 1.25% 1.63 40 000 000 115 200 22 1.38% 1.63 3 686 400 57 600 4 0.00% 3.26 20 000 000 57 600 22 1.38% 3.26 32 768 000 57 600 36 1.25% 3.26 40 000 000 57 600 43 0.93% 3.26 3 686 400 38 400 6 0.00% 4.88 20 000 000 38 400 33 1.38% 4.88 32 768 000 38 400 53 0.63% 4.88 40 000 000 38 400 65 0.16% 4.88 3 686 400 19 200 12 0.00% 9.77 20 000 000 19 200 65 0.16% 9.77 32 768 000 19 200 107 0.31% 9.77 40 000 000 19 200 130 0.16% 9.77 330 32058K AVR32-01/12
AT32UC3A Table 26-10. IrDA Baud Rate Error (Continued) Peripheral Clock Baud Rate CD Baud Rate Error Pulse Time 3 686 400 9 600 24 0.00% 19.53 20 000 000 9 600 130 0.16% 19.53 32 768 000 9 600 213 0.16% 19.53 40 000 000 9 600 260 0.16% 19.53 3 686 400 2 400 96 0.00% 78.13 20 000 000 2 400 521 0.03% 78.13 32 768 000 2 400 853 0.04% 78.13 26.7.6.3 IrDA Demodulator The demodulator is based on the IrDA Receive filter comprised of an 8-bit down counter which is loaded with the value programmed in IFR. When a falling edge is detected on the RXD pin, the Filter Counter starts counting down at the CLK_USART speed. If a rising edge is detected on the RXD pin, the counter stops and is reloaded with IFR. If no rising edge is detected when the counter reaches 0, the input of the receiver is driven low during one bit time. Figure 26-35 on page 331 illustrates the operations of the IrDA demodulator. Figure 26-35. IrDA Demodulator Operations CLK_USART RXD Counter Pulse Value 6 5 4 3 2 6 6 5 4 3 2 1 0 Accepted Pulse Rejected Receiver Driven Low During 16 Baud Rate Clock Cycles Input As the IrDA mode uses the same logic as the ISO7816, note that the FI_DI_RATIO field in FIDI must be set to a value higher than 0 in order to assure IrDA communications operate correctly. 331 32058K AVR32-01/12
AT32UC3A 26.7.7 RS485 Mode The USART features the RS485 mode to enable line driver control. While operating in RS485 mode, the USART behaves as though in asynchronous or synchronous mode and configuration of all the parameters is possible. The difference is that the RTS pin is driven high when the transmitter is operating. The behavior of the RTS pin is controlled by the TXEMPTY bit. A typical connection of the USART to a RS485 bus is shown in Figure 26-36 on page 332. Figure 26-36. Typical Connection to a RS485 Bus USART RXD Differential TXD Bus RTS The USART is set in RS485 mode by programming the MODE field in the Mode Register (MR) to the value 0x1. The RTS pin is at a level inverse to the TXEMPTY bit. Significantly, the RTS pin remains high when a timeguard is programmed so that the line can remain driven after the last character com- pletion. Figure 26-37 on page 332 gives an example of the RTS waveform during a character transmission when the timeguard is enabled. Figure 26-37. Example of RTS Drive with Timeguard TG = 4 Baud Rate Clock TXD Start ParityStop D0 D1 D2 D3 D4 D5 D6 D7 Bit Bit Bit Write US_THR TXRDY TXEMPTY RTS 332 32058K AVR32-01/12
AT32UC3A 26.7.8 SPI Mode The Serial Peripheral Interface (SPI) Mode is a synchronous serial data link that provides com- munication with external devices in Master or Slave Mode. It also enables communication between processors if an external processor is connected to the system. The Serial Peripheral Interface is essentially a shift register that serially transmits data bits to other SPIs. During a data transfer, one SPI system acts as the “master” which controls the data flow, while the other devices act as “slaves'' which have data shifted into and out by the master. Different CPUs can take turns being masters and one master may simultaneously shift data into multiple slaves. (Multiple Master Protocol is the opposite of Single Master Protocol, where one CPU is always the master while all of the others are always slaves.) However, only one slave may drive its output to write data back to the master at any given time. A slave device is selected when its NSS signal is asserted by the master. The USART in SPI Master mode can address only one SPI Slave because it can generate only one NSS signal. The SPI system consists of two data lines and two control lines: (cid:129) Master Out Slave In (MOSI): This data line supplies the output data from the master shifted into the input of the slave. (cid:129) Master In Slave Out (MISO): This data line supplies the output data from a slave to the input of the master. (cid:129) Serial Clock (CLK): This control line is driven by the master and regulates the flow of the data bits. The master may transmit data at a variety of baud rates. The CLK line cycles once for each bit that is transmitted. (cid:129) Slave Select (NSS): This control line allows the master to select or deselect the slave. 26.7.8.1 Modes of Operation The USART can operate in Master Mode or in Slave Mode. Operation in SPI Master Mode is programmed by writing at 0xE the MODE field in the Mode Register. In this case the SPI lines must be connected as described below: (cid:129) the MOSI line is driven by the output pin TXD (cid:129) the MISO line drives the input pin RXD (cid:129) the CLK line is driven by the output pin CLK (cid:129) the NSS line is driven by the output pin RTS Operation in SPI Slave Mode is programmed by writing at 0xF the MODE field in the Mode Reg- ister. In this case the SPI lines must be connected as described below: (cid:129) the MOSI line drives the input pin RXD (cid:129) the MISO line is driven by the output pin TXD (cid:129) the CLK line drives the input pin CLK (cid:129) the NSS line drives the input pin CTS In order to avoid unpredicted behavior, any change of the SPI Mode must be followed by a soft- ware reset of the transmitter and of the receiver (except the initial configuration after a hardware reset). 333 32058K AVR32-01/12
AT32UC3A 26.7.8.2 Baud Rate In SPI Mode, the baudrate generator operates in the same way as in USART synchronous mode: See Section “26.7.1.4” on page 307. However, there are some restrictions: In SPI Master Mode: (cid:129) the external clock CLK must not be selected (USCLKS … 0x3), and the bit CLKO must be set to “1” in the Mode Register (MR), in order to generate correctly the serial clock on the CLK pin. (cid:129) to obtain correct behavior of the receiver and the transmitter, the value programmed in CD of must be superior or equal to 4. (cid:129) if the internal clock divided (CLK_USART/DIV) is selected, the value programmed in CD must be even to ensure a 50:50 mark/space ratio on the CLK pin, this value can be odd if the internal clock is selected (CLK_USART). In SPI Slave Mode: (cid:129) the external clock (CLK) selection is forced regardless of the value of the USCLKS field in the Mode Register (MR). Likewise, the value written in BRGR has no effect, because the clock is provided directly by the signal on the USART CLK pin. (cid:129) to obtain correct behavior of the receiver and the transmitter, the external clock (CLK) frequency must be at least 4 times lower than the system clock. 26.7.8.3 Data Transfer Up to 9 data bits are successively shifted out on the TXD pin at each rising or falling edge (depending of CPOL and CPHA) of the programmed serial clock. There is no Start bit, no Parity bit and no Stop bit. The number of data bits is selected by the CHRL field and the MODE 9 bit in the Mode Register (MR). The 9 bits are selected by setting the MODE 9 bit regardless of the CHRL field. The MSB data bit is always sent first in SPI Mode (Master or Slave). Four combinations of polarity and phase are available for data transfers. The clock polarity is programmed with the CPOL bit in the Mode Register. The clock phase is programmed with the CPHA bit. These two parameters determine the edges of the clock signal upon which data is driven and sampled. Each of the two parameters has two possible states, resulting in four possi- ble combinations that are incompatible with one another. Thus, a master/slave pair must use the same parameter pair values to communicate. If multiple slaves are used and fixed in different configurations, the master must reconfigure itself each time it needs to communicate with a dif- ferent slave. Table 26-11. SPI Bus Protocol Mode SPI Bus Protocol Mode CPOL CPHA 0 0 1 1 0 0 2 1 1 3 1 0 334 32058K AVR32-01/12
AT32UC3A Figure 26-38. SPI Transfer Format (CPHA=1, 8 bits per transfer) CLK cycle (for reference) 1 2 3 4 5 6 7 8 CLK (CPOL= 0) CLK (CPOL= 1) MOSI SPI Master ->TXD MSB 6 5 4 3 2 1 LSB SPI Slave ->RXD MISO SPI Master ->RXD MSB 6 5 4 3 2 1 LSB SPI Slave ->TXD NSS SPI Master ->RTS SPI Slave ->CTS Figure 26-39. SPI Transfer Format (CPHA=0, 8 bits per transfer) CLK cycle (for reference) 1 2 3 4 5 6 7 8 CLK (CPOL= 0) CLK (CPOL= 1) MOSI SPI Master -> TXD MSB 6 5 4 3 2 1 LSB SPI Slave -> RXD MISO SPI Master -> RXD MSB 6 5 4 3 2 1 LSB SPI Slave -> TXD NSS SPI Master -> RTS SPI Slave -> CTS 26.7.8.4 Receiver and Transmitter Control See Section “26.7.2” on page 309. 335 32058K AVR32-01/12
AT32UC3A 26.7.8.5 Character Transmission The characters are sent by writing in the Transmit Holding Register (THR). The transmitter reports two status bits in the Channel Status Register (CSR): TXRDY (Transmitter Ready), which indicates that THR is empty and TXEMPTY, which indicates that all the characters written in THR have been processed. When the current character processing is completed, the last character written in THR is transferred into the Shift Register of the transmitter and THR becomes empty, thus TXRDY rises. Both TXRDY and TXEMPTY bits are low when the transmitter is disabled. Writing a character in THR while TXRDY is low has no effect and the written character is lost. If the USART is in SPI Slave Mode and if a character must be sent while the Transmit Holding Register (THR) is empty, the UNRE (Underrun Error) bit is set. The TXD transmission line stays at high level during all this time. The UNRE bit is cleared by writing the Control Register (CR) with the RSTSTA (Reset Status) bit at 1. In SPI Master Mode, the slave select line (NSS) is asserted at low level 1 Tbit before the trans- mission of the MSB bit and released at high level 1 Tbit after the transmission of the LSB bit. So, the slave select line (NSS) is always released between each character transmission and a mini- mum delay of 3 Tbits always inserted. However, in order to address slave devices supporting the CSAAT mode (Chip Select Active After Transfer), the slave select line (NSS) can be forced at low level by writing the Control Register (CR) with the RTSEN bit at 1. The slave select line (NSS) can be released at high level only by writing the Control Register (CR) with the RTSDIS bit at 1 (for example, when all data have been transferred to the slave device). In SPI Slave Mode, the transmitter does not require a falling edge of the slave select line (NSS) to initiate a character transmission but only a low level. However, this low level must be present on the slave select line (NSS) at least 1 Tbit before the first serial clock cycle corresponding to the MSB bit. 26.7.8.6 Character Reception When a character reception is completed, it is transferred to the Receive Holding Register (RHR) and the RXRDY bit in the Status Register (CSR) rises. If a character is completed while RXRDY is set, the OVRE (Overrun Error) bit is set. The last character is transferred into RHR and overwrites the previous one. The OVRE bit is cleared by writing the Control Register (CR) with the RSTSTA (Reset Status) bit at 1. To ensure correct behavior of the receiver in SPI Slave Mode, the master device sending the frame must ensure a minimum delay of 1 Tbit between each character transmission. The receiver does not require a falling edge of the slave select line (NSS) to initiate a character reception but only a low level. However, this low level must be present on the slave select line (NSS) at least 1 Tbit before the first serial clock cycle corresponding to the MSB bit. 26.7.8.7 Receiver Timeout Because the receiver baudrate clock is active only during data transfers in SPI Mode, a receiver timeout is impossible in this mode, whatever the Time-out value is (field TO) in the Time-out Register (RTOR). 336 32058K AVR32-01/12
AT32UC3A 26.7.9 Test Modes The USART can be programmed to operate in three different test modes. The internal loopback capability allows on-board diagnostics. In the loopback mode the USART interface pins are dis- connected or not and reconfigured for loopback internally or externally. 26.7.9.1 Normal Mode Normal mode connects the RXD pin on the receiver input and the transmitter output on the TXD pin. Figure 26-40. Normal Mode Configuration RXD Receiver TXD Transmitter 26.7.9.2 Automatic Echo Mode Automatic echo mode allows bit-by-bit retransmission. When a bit is received on the RXD pin, it is sent to the TXD pin, as shown in Figure 26-41 on page 337. Programming the transmitter has no effect on the TXD pin. The RXD pin is still connected to the receiver input, thus the receiver remains active. Figure 26-41. Automatic Echo Mode Configuration RXD Receiver TXD Transmitter 26.7.9.3 Local Loopback Mode Local loopback mode connects the output of the transmitter directly to the input of the receiver, as shown in Figure 26-42 on page 337. The TXD and RXD pins are not used. The RXD pin has no effect on the receiver and the TXD pin is continuously driven high, as in idle state. Figure 26-42. Local Loopback Mode Configuration RXD Receiver TXD 1 Transmitter 337 32058K AVR32-01/12
AT32UC3A 26.7.9.4 Remote Loopback Mode Remote loopback mode directly connects the RXD pin to the TXD pin, as shown in Figure 26-43 on page 338. The transmitter and the receiver are disabled and have no effect. This mode allows bit-by-bit retransmission. Figure 26-43. Remote Loopback Mode Configuration RXD 1 Receiver TXD Transmitter 338 32058K AVR32-01/12
AT32UC3A 26.8 Universal Synchronous/Asynchronous Receiver/Transmitter (USART) User Interface 26.8.1 Register Mapping Table 26-12. Register Mapping Offset Register Name Access Reset 0x0000 Control Register CR Write-only – 0x0004 Mode Register MR Read-write – 0x0008 Interrupt Enable Register IER Write-only – 0x000C Interrupt Disable Register IDR Write-only – 0x0010 Interrupt Mask Register IMR Read-only 0x0 0x0014 Channel Status Register CSR Read-only – 0x0018 Receiver Holding Register RHR Read-only 0x0 0x001C Transmitter Holding Register THR Write-only – 0x0020 Baud Rate Generator Register BRGR Read-write 0x0 0x0024 Receiver Time-out Register RTOR Read-write 0x0 0x0028 Transmitter Timeguard Register TTGR Read-write 0x0 0x2C - 0x3C Reserved – – – 0x0040 FI DI Ratio Register FIDI Read-write 0x174 0x0044 Number of Errors Register NER Read-only – 0x0048 Reserved – – – 0x004C IrDA Filter Register IFR Read-write 0x0 0x0050 Manchester Encoder Decoder Register MAN Read-write 0x30011004 0x5C - 0xF8 Reserved – – – 0xFC Version Register VERSION Read-only 0x–(3) 0x5C - 0xFC Reserved – – – 3. Values in the Version Register vary with the version of the IP block implementation. 339 32058K AVR32-01/12
AT32UC3A 26.8.2 USART Control Register Name: CR Access Type: Write-only Offset: 0x0 Reset Value: - 31 30 29 28 27 26 25 24 – – – – – – – – 23 22 21 20 19 18 17 16 – – – – RTSDIS/RCS RTSEN/FCS – – 15 14 13 12 11 10 9 8 RETTO RSTNACK RSTIT SENDA STTTO STPBRK STTBRK RSTSTA 7 6 5 4 3 2 1 0 TXDIS TXEN RXDIS RXEN RSTTX RSTRX – – (cid:129) RTSDIS/RCS: Request to Send Disable/Release SPI Chip Select – If USART does not operate in SPI Master Mode (MODE … 0xE): 0: No effect. 1: Drives the pin RTS to 1. – If USART operates in SPI Master Mode (MODE = 0xE): RCS = 0: No effect. RCS = 1: Releases the Slave Select Line NSS (RTS pin). (cid:129) RTSEN/FCS: Request to Send Enable/Force SPI Chip Select – If USART does not operate in SPI Master Mode (MODE … 0xE): 0: No effect. 1: Drives the pin RTS to 0. – If USART operates in SPI Master Mode (MODE = 0xE): FCS = 0: No effect. FCS = 1: Forces the Slave Select Line NSS (RTS pin) to 0, even if USART is no transmitting, in order to address SPI slave devices supporting the CSAAT Mode (Chip Select Active After Transfer). (cid:129) RETTO: Rearm Time-out 0:No effect 1:Restart Time-out (cid:129) RSTNACK: Reset Non Acknowledge 0:No effect 1:Resets NACK in CSR. 340 32058K AVR32-01/12
AT32UC3A (cid:129) RSTIT: Re set Iterations 0: No effect. 1: Resets ITERATION in CSR. No effect if the ISO7816 is not enabled. (cid:129) SENDA: Send Address 0: No effect. 1: In Multidrop Mode only, the next character written to the THR is sent with the address bit set. (cid:129) STTTO: Start Time-out 0: No effect. 1: Starts waiting for a character before clocking the time-out counter. Resets the status bit TIMEOUT in CSR. (cid:129) STPBRK: Stop Break 0: No effect. 1: Stops transmission of the break after a minimum of one character length and transmits a high level during 12-bit periods. No effect if no break is being transmitted. (cid:129) STTBRK: Start Break 0: No effect. 1: Starts transmission of a break after the characters present in THR and the Transmit Shift Register have been transmit- ted. No effect if a break is already being transmitted. (cid:129) RSTSTA: Reset Status Bits 0:No effect. 1:Resets the status bits PARE, FRAME, OVRE, MANERR and RXBRK in CSR. (cid:129) TXDIS: Transmitter Disable 0:No effect. 1:Disables the transmitter. (cid:129) TXEN: Transmitter Enable 0:No effect. 1:Enables the transmitter if TXDIS is 0. (cid:129) RXDIS: Receiver Disable 0:No effect. 1:Disables the receiver. (cid:129) RXEN: Receiver Enable 0:No effect. 1:Enables the receiver, if RXDIS is 0. (cid:129) RSTTX: Reset Transmitter 0:No effect. 341 32058K AVR32-01/12
AT32UC3A 1: Resets the transmitter. (cid:129) RSTRX: Reset Receiver 0:No effect. 1:Resets the receiver. 342 32058K AVR32-01/12
AT32UC3A 26.8.3 USART Mode Register Name: MR Access Type: Read-write Offset: 0x4 Reset Value: - 31 30 29 28 27 26 25 24 ONEBIT MODSYNC MAN FILTER – MAX_ITERATION 23 22 21 20 19 18 17 16 – VAR_SYNC DSNACK INACK OVER CLKO MODE9 MSBF/CPOL 15 14 13 12 11 10 9 8 CHMODE NBSTOP PAR SYNC/CPHA 7 6 5 4 3 2 1 0 CHRL USCLKS MODE (cid:129) ONEBIT: Start Frame Delimiter Selector 0:Start Frame delimiter is COMMAND or DATA SYNC. 1:Start Frame delimiter is One Bit. (cid:129) MODSYNC: Manchester Synchronization Mode 0:The Manchester Start bit is a 0 to 1 transition 1: The Manchester Start bit is a 1 to 0 transition. (cid:129) MAN: Manchester Encoder/Decoder Enable 0:Manchester Encoder/Decoder are disabled. 1:Manchester Encoder/Decoder are enabled. (cid:129) FILTER: Infrared Receive Line Filter 0:The USART does not filter the receive line. 1:The USART filters the receive line using a three-sample filter (1/16-bit clock) (2 over 3 majority). (cid:129) MAX_ITERATION Defines the maximum number of iterations in mode ISO7816, protocol T= 0. (cid:129) VAR_SYNC: Variable Synchronization of Command/Data Sync Start Frame Delimiter 0:User defined configuration of command or data sync field depending on SYNC value. 1:The sync field is updated when a character is written into THR register. (cid:129) DSNACK: Disable Successive NACK 0:NACK is sent on the ISO line as soon as a parity error occurs in the received character (unless INACK is set). 343 32058K AVR32-01/12
AT32UC3A 1: Successive parity errors are counted up to the value specified in the MAX_ITERATION field. These parity errors gener- ate a NACK on the ISO line. As soon as this value is reached, no additional NACK is sent on the ISO line. The flag ITERATION is asserted. (cid:129) INACK: Inhibit Non Acknowledge 0:The NACK is generated. 1:The NACK is not generated. (cid:129) OVER: Oversampling Mode 0:16x Oversampling. 1:8x Oversampling. (cid:129) CLKO: Clock Output Select 0:The USART does not drive the CLK pin. 1:The USART drives the CLK pin if USCLKS does not select the external clock CLK. (cid:129) MODE9: 9-bit Character Length 0:CHRL defines character length. 1:9-bit character length. (cid:129) MSBF/CPOL: Bit Order or SPI Clock Polarity – If USART does not operate in SPI Mode (MODE … 0xE and 0xF): MSBF = 0: Least Significant Bit is sent/received first. MSBF = 1: Most Significant Bit is sent/received first. – If USART operates in SPI Mode (Slave or Master, MODE = 0xE or 0xF): CPOL = 0: The inactive state value of SPCK is logic level zero. CPOL = 1: The inactive state value of SPCK is logic level one. CPOL is used to determine the inactive state value of the serial clock (SPCK). It is used with CPHA to produce the required clock/data relationship between master and slave devices. (cid:129) CHMODE: Channel Mode CHMODE Mode Description 0 0 Normal Mode 0 1 Automatic Echo. Receiver input is connected to the TXD pin. 1 0 Local Loopback. Transmitter output is connected to the Receiver Input.. 1 1 Remote Loopback. RXD pin is internally connected to the TXD pin. (cid:129) NBSTOP: Number of Stop Bits NBSTOP Asynchronous (SYNC = 0) Synchronous (SYNC = 1) 0 0 1 stop bit 1 stop bit 344 32058K AVR32-01/12
AT32UC3A 0 1 1.5 stop bits Reserved 1 0 2 stop bits 2 stop bits 1 1 Reserved Reserved (cid:129) PAR: Parity Type PAR Parity Type 0 0 0 Even parity 0 0 1 Odd parity 0 1 0 Parity forced to 0 (Space) 0 1 1 Parity forced to 1 (Mark) 1 0 x No parity 1 1 x Multidrop mode (cid:129) SYNC/CPHA: Synchronous Mode Select or SPI Clock Phase – If USART does not operate in SPI Mode (MODE is … 0xE and 0xF): SYNC = 0: USART operates in Asynchronous Mode. SYNC = 1: USART operates in Synchronous Mode. – If USART operates in SPI Mode (MODE = 0xE or 0xF): CPHA = 0: Data is changed on the leading edge of SPCK and captured on the following edge of SPCK. CPHA = 1: Data is captured on the leading edge of SPCK and changed on the following edge of SPCK. CPHA determines which edge of SPCK causes data to change and which edge causes data to be captured. CPHA is used with CPOL to produce the required clock/data relationship between master and slave devices. (cid:129) CHRL: Character Length. CHRL Character Length 0 0 5 bits 0 1 6 bits 1 0 7 bits 1 1 8 bits (cid:129) USCLKS: Clock Selection USCLKS Selected Clock 0 0 CLK_USART 0 1 CLK_USART/DIV (DIV = xx) 1 0 Reserved 1 1 CLK 345 32058K AVR32-01/12
AT32UC3A (cid:129) MODE MODE Mode of the USART 0 0 0 0 Normal 0 0 0 1 RS485 0 0 1 0 Hardware Handshaking 0 1 0 0 IS07816 Protocol: T = 0 0 1 1 0 IS07816 Protocol: T = 1 1 0 0 0 IrDA 1 1 1 0 SPI Master 1 1 1 1 SPI Slave Others Reserved 346 32058K AVR32-01/12
AT32UC3A 26.8.4 USART Interrupt Enable Register Name: IER Access Type: Write-only Offset: 0x8 Reset Value: - 31 30 29 28 27 26 25 24 – – – – – MANEA 23 22 21 20 19 18 17 16 – – – MANE CTSIC – – – 15 14 13 12 11 10 9 8 NACK RXBUFF TXBUFE ITER/UNRE TXEMPTY TIMEOUT 7 6 5 4 3 2 1 0 PARE FRAME OVRE ENDTX ENDRX RXBRK TXRDY RXRDY (cid:129) MANEA: Manchester Error Interrupt Enable (cid:129) MANE: Manchester Error Interrupt Enable (cid:129) CTSIC: Clear to Send Input Change Interrupt Enable (cid:129) NACK: Non Acknowledge Interrupt Enable (cid:129) RXBUFF: Buffer Full Interrupt Enable (cid:129) TXBUFE: Buffer Empty Interrupt Enable (cid:129) ITER/UNRE: Iteration or SPI Underrun Error Interrupt Enable (cid:129) TXEMPTY: TXEMPTY Interrupt Enable (cid:129) TIMEOUT: Time-out Interrupt Enable (cid:129) PARE: Parity Error Interrupt Enable (cid:129) FRAME: Framing Error Interrupt Enable (cid:129) OVRE: Overrun Error Interrupt Enable (cid:129) ENDTX: End of Transmit Interrupt Enable (cid:129) ENDRX: End of Receive Transfer Interrupt Enable (cid:129) RXBRK: Receiver Break Interrupt Enable (cid:129) TXRDY: TXRDY Interrupt Enable (cid:129) RXRDY: RXRDY Interrupt Enable 347 32058K AVR32-01/12
AT32UC3A 26.8.5 USART Interrupt Disable Register Name: IDR 348 32058K AVR32-01/12
AT32UC3A Access Type: Write-only Offset: 0xC Reset Value: - 31 30 29 28 27 26 25 24 – – MANEA 23 22 21 20 19 18 17 16 – – – MANE CTSIC – – – 15 14 13 12 11 10 9 8 NACK RXBUFF TXBUFE ITER/UNRE TXEMPTY TIMEOUT 7 6 5 4 3 2 1 0 PARE FRAME OVRE ENDTX ENDRX RXBRK TXRDY RXRDY (cid:129) MANEA: Manchester Error Interrupt Disable (cid:129) MANE: Manchester Error Interrupt Disable (cid:129) CTSIC: Clear to Send Input Change Interrupt Disable (cid:129) NACK: Non Acknowledge Interrupt Disable (cid:129) RXBUFF: Buffer Full Interrupt Disable (cid:129) TXBUFE: Buffer Empty Interrupt Disable (cid:129) ITER/UNRE: Iteration or SPI Underrun Error Interrupt Enable (cid:129) TXEMPTY: TXEMPTY Interrupt Disable (cid:129) TIMEOUT: Time-out Interrupt Disable (cid:129) PARE: Parity Error Interrupt Disable (cid:129) FRAME: Framing Error Interrupt Disable (cid:129) OVRE: Overrun Error Interrupt Disable (cid:129) ENDTX: End of Transmit Interrupt Disable (cid:129) ENDRX: End of Receive Transfer Interrupt Disable (cid:129) RXBRK: Receiver Break Interrupt Disable (cid:129) TXRDY: TXRDY Interrupt Disable (cid:129) RXRDY: RXRDY Interrupt Disable 349 32058K AVR32-01/12
AT32UC3A 26.8.6 USART Interrupt Mask Register Name: IMR Access Type: Read-only Offset: 0x10 Reset Value: 0x00000000 31 30 29 28 27 26 25 24 – – MANEA 23 22 21 20 19 18 17 16 – – – MANE CTSIC – – – 15 14 13 12 11 10 9 8 NACK RXBUFF TXBUFE ITER/UNRE TXEMPTY TIMEOUT 7 6 5 4 3 2 1 0 PARE FRAME OVRE ENDTX ENDRX RXBRK TXRDY RXRDY (cid:129) MANEA: Manchester Error Interrupt Mask (cid:129) MANE: Manchester Error Interrupt Mask (cid:129) CTSIC: Clear to Send Input Change Interrupt Mask (cid:129) NACK: Non Acknowledge Interrupt Mask (cid:129) RXBUFF: Buffer Full Interrupt Mask (cid:129) TXBUFE: Buffer Empty Interrupt Mask (cid:129) ITER/UNRE: Iteration or SPI Underrun Error Interrupt Enable (cid:129) TXEMPTY: TXEMPTY Interrupt Mask (cid:129) TIMEOUT: Time-out Interrupt Mask (cid:129) PARE: Parity Error Interrupt Mask (cid:129) FRAME: Framing Error Interrupt Mask (cid:129) OVRE: Overrun Error Interrupt Mask (cid:129) ENDTX: End of Transmit Interrupt Mask (cid:129) ENDRX: End of Receive Transfer Interrupt Mask (cid:129) RXBRK: Receiver Break Interrupt Mask (cid:129) TXRDY: TXRDY Interrupt Mask (cid:129) RXRDY: RXRDY Interrupt Mask 350 32058K AVR32-01/12
AT32UC3A 26.8.7 USART Channel Status Register Name: CSR 351 32058K AVR32-01/12
AT32UC3A Access Type: Read-only Offset: 0x14 Reset Value: - 31 30 29 28 27 26 25 24 – – MANERR 23 22 21 20 19 18 17 16 CTS – – – CTSIC – – – 15 14 13 12 11 10 9 8 NACK RXBUFF TXBUFE ITER/UNRE TXEMPTY TIMEOUT 7 6 5 4 3 2 1 0 PARE FRAME OVRE ENDTX ENDRX RXBRK TXRDY RXRDY (cid:129) MANERR: Manchester Error 0:No Manchester error has been detected since the last RSTSTA. 1:At least one Manchester error has been detected since the last RSTSTA. (cid:129) CTS: Image of CTS Input 0:CTS is at 0. 1:CTS is at 1. (cid:129) CTSIC: Clear to Send Input Change Flag 0:No input change has been detected on the CTS pin since the last read of CSR. 1:At least one input change has been detected on the CTS pin since the last read of CSR. (cid:129) NACK: Non Acknowledge 0:No Non Acknowledge has not been detected since the last RSTNACK. 1:At least one Non Acknowledge has been detected since the last RSTNACK. (cid:129) RXBUFF: Reception Buffer Full 0:The signal Buffer Full from the Receive PDC channel is inactive. 1:The signal Buffer Full from the Receive PDC channel is active. (cid:129) TXBUFE: Transmission Buffer Empty 0:The signal Buffer Empty from the Transmit PDC channel is inactive. 1:The signal Buffer Empty from the Transmit PDC channel is active. (cid:129) ITER/UNRE: Max number of Repetitions Reached or SPI Underrun Error – If USART does not operate in SPI Slave Mode (MODE … 0xF): ITER = 0: Maximum number of repetitions has not been reached since the last RSTSTA. ITER = 1: Maximum number of repetitions has been reached since the last RSTSTA. 352 32058K AVR32-01/12
AT32UC3A – If USART operates in SPI Slave Mode (MODE = 0xF): UNRE = 0: No SPI underrun error has occurred since the last RSTSTA. UNRE = 1: At least one SPI underrun error has occurred since the last RSTSTA. (cid:129) TXEMPTY: Transmitter Empty 0: There are characters in either THR or the Transmit Shift Register, or the transmitter is disabled. TXEMPTY == 1: Means that the Transmit Shift Register is empty and that there is no data in THR. (cid:129) TIMEOUT: Receiver Time-out 0:There has not been a time-out since the last Start Time-out command (STTTO in CR) or the Time-out Register is 0. 1:There has been a time-out since the last Start Time-out command (STTTO in CR). (cid:129) PARE: Parity Error 0:No parity error has been detected since the last RSTSTA. 1:At least one parity error has been detected since the last RSTSTA. (cid:129) FRAME: Framing Error 0:No stop bit has been detected low since the last RSTSTA. 1:At least one stop bit has been detected low since the last RSTSTA. (cid:129) OVRE: Overrun Error 0:No overrun error has occurred since the last RSTSTA. 1:At least one overrun error has occurred since the last RSTSTA. (cid:129) ENDTX: End of Transmitter Transfer 0:The End of Transfer signal from the Transmit PDC channel is inactive. 1:The End of Transfer signal from the Transmit PDC channel is active. (cid:129) ENDRX: End of Receiver Transfer 0:The End of Transfer signal from the Receive PDC channel is inactive. 1:The End of Transfer signal from the Receive PDC channel is active. (cid:129) RXBRK: Break Received/End of Break 0:No Break received or End of Break detected since the last RSTSTA. 1:Break Received or End of Break detected since the last RSTSTA. (cid:129) TXRDY: Transmitter Ready 0: A character is in the THR waiting to be transferred to the Transmit Shift Register, or an STTBRK command has been requested, or the transmitter is disabled. As soon as the transmitter is enabled, TXRDY becomes 1. 1: There is no character in the THR. (cid:129) RXRDY: Receiver Ready 0: No complete character has been received since the last read of RHR or the receiver is disabled. If characters were being received when the receiver was disabled, RXRDY changes to 1 when the receiver is enabled. 353 32058K AVR32-01/12
AT32UC3A 1: At least one complete character has been received and RHR has not yet been read. 354 32058K AVR32-01/12
AT32UC3A 26.8.8 USART Receive Holding Register Name: RHR Access Type: Read-only Offset: 0x18 Reset Value: 0x00000000 31 30 29 28 27 26 25 24 – – – – – – – – 23 22 21 20 19 18 17 16 – – – – – – – – 15 14 13 12 11 10 9 8 RXSYNH – – – – – – RXCHR 7 6 5 4 3 2 1 0 RXCHR (cid:129) RXSYNH: Received Sync 0:Last Character received is a Data. 1:Last Character received is a Command. (cid:129) RXCHR: Received Character Last character received if RXRDY is set. 355 32058K AVR32-01/12
AT32UC3A 26.8.9 USART Transmit Holding Register Name: THR Access Type: Write-only Offset: 0x1C Reset Value: - 31 30 29 28 27 26 25 24 – – – – – – – – 23 22 21 20 19 18 17 16 – – – – – – – – 15 14 13 12 11 10 9 8 TXSYNH – – – – – – TXCHR 7 6 5 4 3 2 1 0 TXCHR (cid:129) TXSYNH: Sync Field to be transmitted 0:The next character sent is encoded as a data. Start Frame Delimiter is DATA SYNC. 1:The next character sent is encoded as a command. Start Frame Delimiter is COMMAND SYNC. (cid:129) TXCHR: Character to be Transmitted Next character to be transmitted after the current character if TXRDY is not set. 356 32058K AVR32-01/12
AT32UC3A 26.8.10 USART Baud Rate Generator Register Name: BRGR Access Type: Read-write Offset: 0x20 Reset Value: 0x00000000 31 30 29 28 27 26 25 24 – – – – – – – – 23 22 21 20 19 18 17 16 – – – – – FP– 15 14 13 12 11 10 9 8 CD 7 6 5 4 3 2 1 0 CD (cid:129) FP: Fractional Part 0: Fractional divider is disabled. 1 - 7: Baudrate resolution, defined by FP x 1/8. (cid:129) CD: Clock Divider MODE ≠ ISO7816 SYNC = 1 or MODE = SPI SYNC = 0 (Master or Slave) CD OVER = 0 OVER = 1 MODE = ISO7816 0 Baud Rate Clock Disabled Baud Rate = Baud Rate = Baud Rate = Baud Rate = Selected 1 to 65535 Selected Clock/16/CD Selected Clock/8/CD Selected Clock /CD Clock/CD/FI_DI_RATIO 357 32058K AVR32-01/12
AT32UC3A 26.8.11 USART Receiver Time-out Register Name: RTOR Access Type: Read-write Offset: 0x24 Reset Value: 0x00000000 31 30 29 28 27 26 25 24 – – – – – – – – 23 22 21 20 19 18 17 16 – – – – – – – – 15 14 13 12 11 10 9 8 TO 7 6 5 4 3 2 1 0 TO (cid:129) TO: Time-out Value 0: The Receiver Time-out is disabled. 1 - 65535: The Receiver Time-out is enabled and the Time-out delay is TO x Bit Period. 358 32058K AVR32-01/12
AT32UC3A 26.8.12 USART Transmitter Timeguard Register Name: TTGR Access Type: Read-write Offset: 0x28 Reset Value: 0x00000000 31 30 29 28 27 26 25 24 – – – – – – – – 23 22 21 20 19 18 17 16 – – – – – – – – 15 14 13 12 11 10 9 8 – – – – – – – – 7 6 5 4 3 2 1 0 TG (cid:129) TG: Timeguard Value 0: The Transmitter Timeguard is disabled. 1 - 255: The Transmitter timeguard is enabled and the timeguard delay is TG x Bit Period. 359 32058K AVR32-01/12
AT32UC3A 26.8.13 USART FI DI RATIO Register Name: FIDI Access Type: Read-write Offset: 0x40 Reset Value: 0x00000174 31 30 29 28 27 26 25 24 – – – – – – – – 23 22 21 20 19 18 17 16 – – – – – – – – 15 14 13 12 11 10 9 8 – – – – – FI_DI_RATIO 7 6 5 4 3 2 1 0 FI_DI_RATIO (cid:129) FI_DI_RATIO: FI Over DI Ratio Value 0: If ISO7816 mode is selected, the Baud Rate Generator generates no signal. 1 - 2047: If ISO7816 mode is selected, the Baud Rate is the clock provided on CLK divided by FI_DI_RATIO. 360 32058K AVR32-01/12
AT32UC3A 26.8.14 USART Number of Errors Register Name: NER Access Type: Read-only Offset: 0x44 Reset Value: - 31 30 29 28 27 26 25 24 – – – – – – – – 23 22 21 20 19 18 17 16 – – – – – – – – 15 14 13 12 11 10 9 8 – – – – – – – – 7 6 5 4 3 2 1 0 NB_ERRORS (cid:129) NB_ERRORS: Number of Errors Total number of errors that occurred during an ISO7816 transfer. This register automatically clears when read. 361 32058K AVR32-01/12
AT32UC3A 26.8.15 USART IrDA FILTER Register Name: IFR Access Type: Read-write Offset: 0x4C Reset Value: 0x00000000 31 30 29 28 27 26 25 24 – – – – – – – – 23 22 21 20 19 18 17 16 – – – – – – – – 15 14 13 12 11 10 9 8 – – – – – – – – 7 6 5 4 3 2 1 0 IRDA_FILTER (cid:129) IRDA_FILTER: IrDA Filter Sets the filter of the IrDA demodulator. 362 32058K AVR32-01/12
AT32UC3A 26.8.16 USART Manchester Configuration Register Name: MAN Access Type: Read-write Offset: 0x50 Reset Value: 0x30011004 31 30 29 28 27 26 25 24 – DRIFT 1 RX_MPOL – – RX_PP 23 22 21 20 19 18 17 16 – – – – RX_PL 15 14 13 12 11 10 9 8 – – – TX_MPOL – – TX_PP 7 6 5 4 3 2 1 0 – – – – TX_PL (cid:129) DRIFT: Drift compensation 0:The USART can not recover from an important clock drift 1:The USART can recover from clock drift. The 16X clock mode must be enabled. (cid:129) RX_MPOL: Receiver Manchester Polarity 0:Logic Zero is coded as a zero-to-one transition, Logic One is coded as a one-to-zero transition. 1:Logic Zero is coded as a one-to-zero transition, Logic One is coded as a zero-to-one transition. (cid:129) RX_PP: Receiver Preamble Pattern detected RX_PP Preamble Pattern default polarity assumed (RX_MPOL field not set) 0 0 ALL_ONE 0 1 ALL_ZERO 1 0 ZERO_ONE 1 1 ONE_ZERO (cid:129) RX_PL: Receiver Preamble Length 0: The receiver preamble pattern detection is disabled 1 - 15: The detected preamble length is RX_PL x Bit Period (cid:129) TX_MPOL: Transmitter Manchester Polarity 0:Logic Zero is coded as a zero-to-one transition, Logic One is coded as a one-to-zero transition. 1:Logic Zero is coded as a one-to-zero transition, Logic One is coded as a zero-to-one transition. 363 32058K AVR32-01/12
AT32UC3A (cid:129) TX_PP: Transmitter Preamble Pattern TX_PP Preamble Pattern default polarity assumed (TX_MPOL field not set) 0 0 ALL_ONE 0 1 ALL_ZERO 1 0 ZERO_ONE 1 1 ONE_ZERO (cid:129) TX_PL: Transmitter Preamble Length 0: The Transmitter Preamble pattern generation is disabled 1 - 15: The Preamble Length is TX_PL x Bit Period 364 32058K AVR32-01/12
AT32UC3A 26.8.17 USART Version Register Name: VERSION Access Type: Read-only Offset: 0xFC Reset Value: 0x00000000 31 30 29 28 27 26 25 24 – – – – – – – – 23 22 21 20 19 18 17 16 – – – – – VARIANT 15 14 13 12 11 10 9 8 – – – – VERSION 7 6 5 4 3 2 1 0 VERSION (cid:129) VARIANT Reserved. No functionality associated. (cid:129) VERSION Version of the module. No functionality associated. 365 32058K AVR32-01/12
AT32UC3A 27. Static Memory Controller (SMC) Rev. 1.0.0.0 27.1 Features (cid:129) 4 Chip Selects Available (cid:129) 64-Mbyte Address Space per Chip Select (cid:129) 8-, 16- or 32-bit Data Bus (cid:129) Word, Halfword, Byte Transfers (cid:129) Byte Write or Byte Select Lines (cid:129) Programmable Setup, Pulse And Hold Time for Read Signals per Chip Select (cid:129) Programmable Setup, Pulse And Hold Time for Write Signals per Chip Select (cid:129) Programmable Data Float Time per Chip Select (cid:129) Compliant with LCD Module (cid:129) External Wait Request (cid:129) Automatic Switch to Slow Clock Mode (cid:129) Asynchronous Read in Page Mode Supported: Page Size Ranges from 4 to 32 Bytes 27.2 Overview The Static Memory Controller (SMC) generates the signals that control the access to the exter- nal memory devices or peripheral devices. It has 4 Chip Selects and a 26-bit address bus. The 32-bit data bus can be configured to interface with 8-, or16-, or 32-bit external devices. Separate read and write control signals allow for direct memory and peripheral interfacing. Read and write signal waveforms are fully parametrizable. The SMC can manage wait requests from external devices to extend the current access. The SMC is provided with an automatic slow clock mode. In slow clock mode, it switches from user- programmed waveforms to slow-rate specific waveforms on read and write signals. The SMC supports asynchronous burst read in page mode access for page size up to 32 bytes. 366 32058K AVR32-01/12
AT32UC3A 27.3 Block Diagram Figure 27-1. Block Diagram GPIO Controller NCS[5:0] NCS[5:0] SMC NRD Bus Matrix Chip Select NWR0/NWE NRD NWR0/NWE A0/NBS0 A0/NBS0 SMC NWR1/NBS1 NWR1/NBS1 A1/NWR2/NBS2 A1/NWR2/NBS2 PM CLK_SMC NWR3/NBS3 NWR3/NBS3 A[25:2] A[25:2] D[31:0] D[31:0] NWAIT NWAIT User Interface Peripheral Bus 27.4 I/O Lines Description Table 27-1. I/O Line Description Name Description Type Active Level NCS[3:0] Static Memory Controller Chip Select Lines Output Low NRD Read Signal Output Low NWR0/NWE Write 0/Write Enable Signal Output Low A0/NBS0 Address Bit 0/Byte 0 Select Signal Output Low NWR1/NBS1 Write 1/Byte 1 Select Signal Output Low A1/NWR2/NBS2 Address Bit 1/Write 2/Byte 2 Select Signal Output Low NWR3/NBS3 Write 3/Byte 3 Select Signal Output Low A[25:2] Address Bus Output D[31:0] Data Bus I/O NWAIT External Wait Signal Input Low 367 32058K AVR32-01/12
AT32UC3A 27.5 Product Dependencies 27.5.1 EBI I/O Lines The Static Memory Controller signals pass througth the EBI module where they are multiplexed. The programmer must first configure the GPIO controller to assign the EBI pins corresponding to SMC signals to their peripheral function. If I/O lines of the EBI corresponding to SMC signals are not used by the application, they can be used for other purposes by the GPIO Controller. 27.6 Functionnal Description 27.6.1 Application Example 27.6.1.1 Hardware Interface Figure 27-2. SMC Connections to Static Memory Devices D0-D31 A0/NBS0 128K x 8 128K x 8 NWR0/NWE SRAM SRAM NWR1/NBS1 D0-D7 D8-D15 A1/NWR2/NBS2 D0-D7 D0-D7 NWR3/NBS3 CS CS A0-A16 A2-A18 A0-A16 A2-A18 NRD NRD NCS0 OE OE NNCCSS12 NWR0/NWE WE NWR1/NBS1 WE NCS3 NCS4 NCS5 128K x 8 128K x 8 SRAM SRAM D16-D23 D24-D31 A2-A25 D0-D7 D0-D7 CS CS A2-A18 A0-A16 A2-A18 A0-A16 NRD NRD OE OE A1/NWR2/NBS2 WE NWR3/NBS3 WE Static Memory Controller 27.6.2 External Memory Mapping The SMC provides up to 26 address lines, A[25:0]. This allows each chip select line to address up to 64 Mbytes of memory. 368 32058K AVR32-01/12
AT32UC3A If the physical memory device connected on one chip select is smaller than 64 Mbytes, it wraps around and appears to be repeated within this space. The SMC correctly handles any valid access to the memory device within the page (see Figure 27-3). A[25:0] is only significant for 8-bit memory, A[25:1] is used for 16-bit memory, A[25:2] is used for 32-bit memory. Figure 27-3. Memory Connections for 6 External Devices NCS[0] - NCS[5] NRD SMC NWE NCS5 Memory Enable A[25:0] NCS4 Memory Enable D[31:0] NCS3 Memory Enable NCS2 Memory Enable NCS1 Memory Enable NCS0 Memory Enable Output Enable Write Enable A[25:0] 8 or 16 or 32 D[31:0] or D[15:0] or D[7:0] 27.6.3 Connection to External Devices 27.6.3.1 Data Bus Width A data bus width of 8, 16 or 32 bits can be selected for each chip select. This option is controlled by the field DBW in MODE (Mode Register) for the corresponding chip select. Figure 27-4 shows how to connect a 512K x 8-bit memory on NCS2. Figure 27-5 shows how to connect a 512K x 16-bit memory on NCS2. Figure 27-6 shows two 16-bit memories connected as a single 32-bit memory. 27.6.3.2 Byte Write or Byte Select Access Each chip select with a 16-bit or 32-bit data bus can operate with one of two different types of write access: byte write or byte select access. This is controlled by the BAT field of the MODE register for the corresponding chip select. 369 32058K AVR32-01/12
AT32UC3A Figure 27-4. Memory Connection for an 8-bit Data Bus D[7:0] D[7:0] A[18:2] A[18:2] A0 A0 SMC A1 A1 NWE Write Enable NRD Output Enable NCS[2] Memory Enable Figure 27-5. Memory Connection for a 16-bit Data Bus D[15:0] D[15:0] A[19:2] A[18:1] A1 A[0] NBS0 Low Byte Enable SMC NBS1 High Byte Enable NWE Write Enable NRD Output Enable NCS[2] Memory Enable Figure 27-6. Memory Connection for a 32-bit Data Bus D[31:16] D[31:16] D[15:0] D[15:0] A[20:2] A[18:0] NBS0 Byte 0 Enable SMC NBS1 Byte 1 Enable NBS2 Byte 2 Enable NBS3 Byte 3 Enable NWE Write Enable NRD Output Enable NCS[2] Memory Enable 370 32058K AVR32-01/12
AT32UC3A – Byte Write Access Byte write access supports one byte write signal per byte of the data bus and a single read signal. Note that the SMC does not allow boot in Byte Write Access mode. (cid:129) For 16-bit devices: the SMC provides NWR0 and NWR1 write signals for respectively byte0 (lower byte) and byte1 (upper byte) of a 16-bit bus. One single read signal (NRD) is provided. Byte Write Access is used to connect 2 x 8-bit devices as a 16-bit memory. (cid:129) For 32-bit devices: NWR0, NWR1, NWR2 and NWR3, are the write signals of byte0 (lower byte), byte1, byte2 and byte 3 (upper byte) respectively. One single read signal (NRD) is provided. Byte Write Access is used to connect 4 x 8-bit devices as a 32-bit memory. Byte Write option is illustrated on Figure 27-7. – Byte Select Access In this mode, read/write operations can be enabled/disabled at a byte level. One byte-select line per byte of the data bus is provided. One NRD and one NWE signal control read and write. (cid:129) For 16-bit devices: the SMC provides NBS0 and NBS1 selection signals for respectively byte0 (lower byte) and byte1 (upper byte) of a 16-bit bus. Byte Select Access is used to connect one 16-bit device. (cid:129) For 32-bit devices: NBS0, NBS1, NBS2 and NBS3, are the selection signals of byte0 (lower byte), byte1, byte2 and byte 3 (upper byte) respectively. Byte Select Access is used to connect two 16-bit devices. Figure 27-8 shows how to connect two 16-bit devices on a 32-bit data bus in Byte Select Access mode, on NCS3 (BAT = Byte Select Access). 371 32058K AVR32-01/12
AT32UC3A Figure 27-7. Connection of 2 x 8-bit Devices on a 16-bit Bus: Byte Write Option D[7:0] D[7:0] D[15:8] A[24:2] A[23:1] SMC A1 A[0] NWR0 Write Enable NWR1 NRD Read Enable NCS[3] Memory Enable D[15:8] A[23:1] A[0] Write Enable Read Enable Memory Enable – Signal Multiplexing Depending on the BAT, only the write signals or the byte select signals are used. To save IOs at the external bus interface, control signals at the SMC interface are multiplexed. For 32-bit devices, bits A0 and A1 are unused. For 16-bit devices, bit A0 of address is unused. When Byte Select Option is selected, NWR1 to NWR3 are unused. When Byte Write option is selected, NBS0 to NBS3 are unused. 372 32058K AVR32-01/12
AT32UC3A Figure 27-8. Connection of 2x16-bit Data Bus on a 32-bit Data Bus (Byte Select Option) D[15:0] D[15:0] D[31:16] A[25:2] A[23:0] NWE Write Enable NBS0 Low Byte Enable NBS1 High Byte Enable SMC NBS2 NBS3 NRD Read Enable NCS[3] Memory Enable D[31:16] A[23:0] Write Enable Low Byte Enable High Byte Enable Read Enable Memory Enable Table 27-2. SMC Multiplexed Signal Translation Signal Name 32-bit Bus 16-bit Bus 8-bit Bus Device Type 1x32-bit 2x16-bit 4 x 8-bit 1x16-bit 2 x 8-bit 1 x 8-bit Byte Access Type (BAT) Byte Select Byte Select Byte Write Byte Select Byte Write NBS0_A0 NBS0 NBS0 NBS0 A0 NWE_NWR0 NWE NWE NWR0 NWE NWR0 NWE NBS1_NWR1 NBS1 NBS1 NWR1 NBS1 NWR1 NBS2_NWR2_A1 NBS2 NBS2 NWR2 A1 A1 A1 NBS3_NWR3 NBS3 NBS3 NWR3 27.6.4 Standard Read and Write Protocols In the following sections, the byte access type is not considered. Byte select lines (NBS0 to NBS3) always have the same timing as the A address bus. NWE represents either the NWE sig- nal in byte select access type or one of the byte write lines (NWR0 to NWR3) in byte write access type. NWR0 to NWR3 have the same timings and protocol as NWE. In the same way, NCS represents one of the NCS[0..3] chip select lines. 373 32058K AVR32-01/12
AT32UC3A 27.6.4.1 Read Waveforms The read cycle is shown on Figure 27-9. The read cycle starts with the address setting on the memory address bus, i.e.: {A[25:2], A1, A0} for 8-bit devices {A[25:2], A1} for 16-bit devices A[25:2] for 32-bit devices. Figure 27-9. Standard Read Cycle CLK_SMC A[25:2] NBS0, NBS1, A0, A1 NRD NCS D[15:0] NRD_SETUP NRD_PULSE NRD_HOLD NCS_RD_SETUP NCS_RD_PULSE NCS_RD_HOLD NRD_CYCLE – NRD Waveform The NRD signal is characterized by a setup timing, a pulse width and a hold timing. 1. NRD_SETUP: the NRD setup time is defined as the setup of address before the NRD falling edge; 2. NRD_PULSE: the NRD pulse length is the time between NRD falling edge and NRD ris- ing edge; 3. NRD_HOLD: the NRD hold time is defined as the hold time of address after the NRD ris- ing edge. 374 32058K AVR32-01/12
AT32UC3A – NCS Waveform Similarly, the NCS signal can be divided into a setup time, pulse length and hold time: 1. NCS_RD_SETUP: the NCS setup time is defined as the setup time of address before the NCS falling edge. 2. NCS_RD_PULSE: the NCS pulse length is the time between NCS falling edge and NCS rising edge; 3. NCS_RD_HOLD: the NCS hold time is defined as the hold time of address after the NCS rising edge. –Read Cycle The NRD_CYCLE time is defined as the total duration of the read cycle, i.e., from the time where address is set on the address bus to the point where address may change. The total read cycle time is equal to: NRD_CYCLE = NRD_SETUP + NRD_PULSE + NRD_HOLD = NCS_RD_SETUP + NCS_RD_PULSE + NCS_RD_HOLD All NRD and NCS timings are defined separately for each chip select as an integer number of Master Clock cycles. To ensure that the NRD and NCS timings are coherent, user must define the total read cycle instead of the hold timing. NRD_CYCLE implicitly defines the NRD hold time and NCS hold time as: NRD_HOLD = NRD_CYCLE - NRD SETUP - NRD PULSE NCS_RD_HOLD = NRD_CYCLE - NCS_RD_SETUP - NCS_RD_PULSE – Null Delay Setup and Hold If null setup and hold parameters are programmed for NRD and/or NCS, NRD and NCS remain active continuously in case of consecutive read cycles in the same memory (see Figure 27-10). 375 32058K AVR32-01/12
AT32UC3A Figure 27-10. No Setup, No Hold On NRD and NCS Read Signals CLK_SMC A[25:2] NBS0, NBS1, A0, A1 NRD NCS D[15:0] NRD_SETUP NRD_PULSE NRD_PULSE NCS_RD_PULSE NCS_RD_PULSE NCS_RD_PULSE NRD_CYCLE NRD_CYCLE NRD_CYCLE – Null Pulse Programming null pulse is not permitted. Pulse must be at least set to 1. A null value leads to unpredictable behavior. 27.6.4.2 Read Mode As NCS and NRD waveforms are defined independently of one other, the SMC needs to know when the read data is available on the data bus. The SMC does not compare NCS and NRD tim- ings to know which signal rises first. The READ_MODE parameter in the MODE register of the corresponding chip select indicates which signal of NRD and NCS controls the read operation. – Read is Controlled by NRD (READ_MODE = 1): Figure 27-11 shows the waveforms of a read operation of a typical asynchronous RAM. The read data is available t after the falling edge of NRD, and turns to ‘Z’ after the rising edge of PACC NRD. In this case, the READ_MODE must be set to 1 (read is controlled by NRD), to indicate that data is available with the rising edge of NRD. The SMC samples the read data internally on the rising edge of Master Clock that generates the rising edge of NRD, whatever the pro- grammed waveform of NCS may be. 376 32058K AVR32-01/12
AT32UC3A Figure 27-11. READ_MODE = 1: Data is sampled by SMC before the rising edge of NRD CLK_SMC A[25:2] NBS0, NBS1, A0, A1 NRD NCS t PACC D[15:0] Data Sampling – Read is Controlled by NCS (READ_MODE = 0) Figure 27-12 shows the typical read cycle of an LCD module. The read data is valid t after PACC the falling edge of the NCS signal and remains valid until the rising edge of NCS. Data must be sampled when NCS is raised. In that case, the READ_MODE must be set to 0 (read is controlled by NCS): the SMC internally samples the data on the rising edge of Master Clock that generates the rising edge of NCS, whatever the programmed waveform of NRD may be. 377 32058K AVR32-01/12
AT32UC3A Figure 27-12. READ_MODE = 0: Data is sampled by SMC before the rising edge of NCS CLK_SMC A[25:2] NBS0, NBS1, A0, A1 NRD NCS t PACC D[15:0] Data Sampling 27.6.4.3 Write Waveforms The write protocol is similar to the read protocol. It is depicted in Figure 27-13. The write cycle starts with the address setting on the memory address bus. –NWE Waveforms The NWE signal is characterized by a setup timing, a pulse width and a hold timing. 1. NWE_SETUP: the NWE setup time is defined as the setup of address and data before the NWE falling edge; 2. NWE_PULSE: The NWE pulse length is the time between NWE falling edge and NWE rising edge; 3. NWE_HOLD: The NWE hold time is defined as the hold time of address and data after the NWE rising edge. The NWE waveforms apply to all byte-write lines in Byte Write access mode: NWR0 to NWR3. 27.6.4.4 NCS Waveforms The NCS signal waveforms in write operation are not the same that those applied in read opera- tions, but are separately defined: 1. NCS_WR_SETUP: the NCS setup time is defined as the setup time of address before the NCS falling edge. 2. NCS_WR_PULSE: the NCS pulse length is the time between NCS falling edge and NCS rising edge; 3. NCS_WR_HOLD: the NCS hold time is defined as the hold time of address after the NCS rising edge. 378 32058K AVR32-01/12
AT32UC3A Figure 27-13. Write Cycle CLK_SMC A[25:2] NBS0, NBS1, A0, A1 NWE NCS NWE_SETUP NWE_PULSE NWE_HOLD NCS_WR_SETUP NCS_WR_PULSE NCS_WR_HOLD NWE_CYCLE –Write Cycle The write_cycle time is defined as the total duration of the write cycle, that is, from the time where address is set on the address bus to the point where address may change. The total write cycle time is equal to: NWE_CYCLE = NWE_SETUP + NWE_PULSE + NWE_HOLD = NCS_WR_SETUP + NCS_WR_PULSE + NCS_WR_HOLD All NWE and NCS (write) timings are defined separately for each chip select as an integer num- ber of Master Clock cycles. To ensure that the NWE and NCS timings are coherent, the user must define the total write cycle instead of the hold timing. This implicitly defines the NWE hold time and NCS (write) hold times as: NWE_HOLD = NWE_CYCLE - NWE_SETUP - NWE_PULSE NCS_WR_HOLD = NWE_CYCLE - NCS_WR_SETUP - NCS_WR_PULSE – Null Delay Setup and Hold If null setup parameters are programmed for NWE and/or NCS, NWE and/or NCS remain active continuously in case of consecutive write cycles in the same memory (see Figure 27-14). How- ever, for devices that perform write operations on the rising edge of NWE or NCS, such as SRAM, either a setup or a hold must be programmed. 379 32058K AVR32-01/12
AT32UC3A Figure 27-14. Null Setup and Hold Values of NCS and NWE in Write Cycle CLK_SMC A[25:2] NBS0, NBS1, A0, A1 NWE, NWE0, NWE1 NCS D[15:0] NWE_SETUP NWE_PULSE NWE_PULSE NCS_WR_SETUP NCS_WR_PULSE NCS_WR_PULSE NWE_CYCLE NWE_CYCLE NWE_CYCLE – Null Pulse Programming null pulse is not permitted. Pulse must be at least set to 1. A null value leads to unpredictable behavior. 27.6.4.5 Write Mode The WRITE_MODE parameter in the MODE register of the corresponding chip select indicates which signal controls the write operation. – Write is Controlled by NWE (WRITE_MODE = 1): Figure 27-15 shows the waveforms of a write operation with WRITE_MODE set to 1. The data is put on the bus during the pulse and hold steps of the NWE signal. The internal data buffers are turned out after the NWE_SETUP time, and until the end of the write cycle, regardless of the programmed waveform on NCS. 380 32058K AVR32-01/12
AT32UC3A Figure 27-15. WRITE_MODE = 1. The write operation is controlled by NWE CLK_SMC A[25:2] NBS0, NBS1, A0, A1 NWE, NWR0, NWR1 NCS D[15:0] – Write is Controlled by NCS (WRITE_MODE = 0) Figure 27-16 shows the waveforms of a write operation with WRITE_MODE set to 0. The data is put on the bus during the pulse and hold steps of the NCS signal. The internal data buffers are turned out after the NCS_WR_SETUP time, and until the end of the write cycle, regardless of the programmed waveform on NWE. Figure 27-16. WRITE_MODE = 0. The write operation is controlled by NCS CLK_SMC A[25:2] NBS0, NBS1, A0, A1 NWE, NWR0, NWR1 NCS D[15:0] 27.6.4.6 Coding Timing Parameters All timing parameters are defined for one chip select and are grouped together in one REGIS- TER according to their type. 381 32058K AVR32-01/12
AT32UC3A The SETUP register groups the definition of all setup parameters: (cid:129) NRD_SETUP, NCS_RD_SETUP, NWE_SETUP, NCS_WR_SETUP The PULSE register groups the definition of all pulse parameters: (cid:129) NRD_PULSE, ncs_rd_pULSE, nwe_pULSE, ncs_wr_pULSE The CYCLE register groups the definition of all cycle parameters: (cid:129) NRD_CYCLE, NWE_CYCLEe Table 27-3 shows how the timing parameters are coded and their permitted range. Table 27-3. Coding and Range of Timing Parameters Permitted Range Coded Value Number of Bits Effective Value Coded Value Effective Value setup [5:0] 6 128 x setup[5] + setup[4:0] 0 ≤ ≤ 31 128 ≤ ≤ 128+31 pulse [6:0] 7 256 x pulse[6] + pulse[5:0] 0 ≤ ≤ 63 256 ≤ ≤ 256+63 256 ≤ ≤ 256+127 cycle [8:0] 9 256 x cycle[8:7] + cycle[6:0] 0 ≤ ≤ 127 512 ≤ ≤ 512+127 768 ≤ ≤ 768+127 27.6.4.7 Usage Restriction The SMC does not check the validity of the user-programmed parameters. If the sum of SETUP and PULSE parameters is larger than the corresponding CYCLE parameter, this leads to unpredictable behavior of the SMC. For read operations: Null but positive setup and hold of address and NRD and/or NCS can not be guaranteed at the memory interface because of the propagation delay of theses signals through external logic and pads. If positive setup and hold values must be verified, then it is strictly recommended to pro- gram non-null values so as to cover possible skews between address, NCS and NRD signals. For write operations: If a null hold value is programmed on NWE, the SMC can guarantee a positive hold of address, byte select lines, and NCS signal after the rising edge of NWE. This is true for WRITE_MODE = 1 only. See ”Early Read Wait State” on page 385. For read and write operations: a null value for pulse parameters is forbidden and may lead to unpredictable behavior. In read and write cycles, the setup and hold time parameters are defined in reference to the address bus. For external devices that require setup and hold time between NCS and NRD sig- nals (read), or between NCS and NWE signals (write), these setup and hold times must be converted into setup and hold times in reference to the address bus. 27.6.5 Automatic Wait States Under certain circumstances, the SMC automatically inserts idle cycles between accesses to avoid bus contention or operation conflict. 382 32058K AVR32-01/12
AT32UC3A 27.6.5.1 Chip Select Wait States The SMC always inserts an idle cycle between 2 transfers on separate chip selects. This idle cycle ensures that there is no bus contention between the de-activation of one device and the activation of the next one. During chip select wait state, all control lines are turned inactive: NBS0 to NBS3, NWR0 to NWR3, NCS[0..5], NRD lines are all set to 1. Figure 27-17 illustrates a chip select wait state between access on Chip Select 0 and Chip Select 2. 383 32058K AVR32-01/12
AT32UC3A Figure 27-17. Chip Select Wait State between a Read Access on NCS0 and a Write Access on NCS2 CLK_SMC A[25:2] S0, NBS1, A0, A1 NRD NWE NCS0 NCS2 NRD_CYCLE NWE_CYCLE D[15:0] Read to Write Chip Select Wait State Wait State 384 32058K AVR32-01/12
AT32UC3A 27.6.5.2 Early Read Wait State In some cases, the SMC inserts a wait state cycle between a write access and a read access to allow time for the write cycle to end before the subsequent read cycle begins. This wait state is not generated in addition to a chip select wait state. The early read cycle thus only occurs between a write and read access to the same memory device (same chip select). (cid:129) An early read wait state is automatically inserted if at least one of the following conditions is valid: (cid:129) if the write controlling signal has no hold time and the read controlling signal has no setup time (Figure 27-18). (cid:129) in NCS write controlled mode (WRITE_MODE = 0), if there is no hold timing on the NCS signal and the NCS_RD_SETUP parameter is set to 0, regardless of the read mode (Figure 27-19). The write operation must end with a NCS rising edge. Without an Early Read Wait State, the write operation could not complete properly. (cid:129) in NWE controlled mode (WRITE_MODE = 1) and if there is no hold timing (NWE_HOLD = 0), the feedback of the write control signal is used to control address, data, chip select and byte select lines. If the external write control signal is not inactivated as expected due to load capacitances, an Early Read Wait State is inserted and address, data and control signals are maintained one more cycle. See Figure 27-20. Figure 27-18. Early Read Wait State: Write with No Hold Followed by Read with No Setup. CLK_SMC A[25:2] NBS0, NBS1, A0, A1 NWE NRD No hold No setup D[15:0] Write cycle Early Read Read cycle Wait state 385 32058K AVR32-01/12
AT32UC3A Figure 27-19. Early Read Wait State: NCS Controlled Write with No Hold Followed by a Read with No Setup. CLK_SMC A[25:2] NBS0, NBS1, A0, A1 NWE NRD No hold No setup D[15:0] Write cycle Early Read Read cycle (WRITE_MODE=0) Wait state (READ_MODE=0 or READ_MODE=1) 386 32058K AVR32-01/12
AT32UC3A Figure 27-20. Early Read Wait State: NWE-controlled Write with No Hold Followed by a Read with one Set-up Cycle. CLK_SMC A[25:2] NBS0, NBS1, A0, A1 Internal write controlling signal external write controlling signal(NWE) No hold Read setup=1 NRD D[15:0] Read cycle Write cycle Early Read (READ_MODE=0 or READ_MODE=1) (WRITE_MODE = 1) Wait state 27.6.5.3 Reload User Configuration Wait State The user may change any of the configuration parameters by writing the SMC user interface. When detecting that a new user configuration has been written in the user interface, the SMC inserts a wait state before starting the next access. The so called “Reload User Configuration Wait State” is used by the SMC to load the new set of parameters to apply to next accesses. The Reload Configuration Wait State is not applied in addition to the Chip Select Wait State. If accesses before and after re-programming the user interface are made to different devices (Chip Selects), then one single Chip Select Wait State is applied. On the other hand, if accesses before and after writing the user interface are made to the same device, a Reload Configuration Wait State is inserted, even if the change does not concern the current Chip Select. – User Procedure To insert a Reload Configuration Wait State, the SMC detects a write access to any MODE reg- ister of the user interface. If the user only modifies timing registers (SETUP, PULSE, CYCLE registers) in the user interface, he must validate the modification by writing the MODE, even if no change was made on the mode parameters. – Slow Clock Mode Transition A Reload Configuration Wait State is also inserted when the Slow Clock Mode is entered or exited, after the end of the current transfer (see ”Slow Clock Mode” on page 398). 387 32058K AVR32-01/12
AT32UC3A 27.6.5.4 Read to Write Wait State Due to an internal mechanism, a wait cycle is always inserted between consecutive read and write SMC accesses. This wait cycle is referred to as a read to write wait state in this document. This wait cycle is applied in addition to chip select and reload user configuration wait states when they are to be inserted. See Figure 27-17 on page 384. 27.6.6 Data Float Wait States Some memory devices are slow to release the external bus. For such devices, it is necessary to add wait states (data float wait states) after a read access: (cid:129) before starting a read access to a different external memory (cid:129) before starting a write access to the same device or to a different external one. The Data Float Output Time (t ) for each external memory device is programmed in the DF TDF_CYCLES field of the MODE register for the corresponding chip select. The value of TDF_CYCLES indicates the number of data float wait cycles (between 0 and 15) before the external device releases the bus, and represents the time allowed for the data output to go to high impedance after the memory is disabled. Data float wait states do not delay internal memory accesses. Hence, a single access to an external memory with long t will not slow down the execution of a program from internal DF memory. The data float wait states management depends on the READ_MODE and the TDF_MODE fields of the MODE register for the corresponding chip select. 27.6.6.1 READ_MODE Setting the READ_MODE to 1 indicates to the SMC that the NRD signal is responsible for turn- ing off the tri-state buffers of the external memory device. The Data Float Period then begins after the rising edge of the NRD signal and lasts TDF_CYCLES MCK cycles. When the read operation is controlled by the NCS signal (READ_MODE = 0), the TDF field gives the number of MCK cycles during which the data bus remains busy after the rising edge of NCS. Figure 27-21 illustrates the Data Float Period in NRD-controlled mode (READ_MODE =1), assuming a data float period of 2 cycles (TDF_CYCLES = 2). Figure 27-22 shows the read oper- ation when controlled by NCS (READ_MODE = 0) and the TDF_CYCLES parameter equals 3. 388 32058K AVR32-01/12
AT32UC3A Figure 27-21. TDF Period in NRD Controlled Read Access (TDF = 2) CLK_SMC A[25:2] NBS0, NBS1, A0, A1 NRD NCS t PACC D[15:0] TDF = 2 clock cycles NRD controlled read operation Figure 27-22. TDF Period in NCS Controlled Read Operation (TDF = 3) CLK_SMC A[25:2] NBS0, NBS1, A0, A1 NRD NCS t PACC D[15:0] TDF = 3 clock cycles NCS controlled read operation 389 32058K AVR32-01/12
AT32UC3A 27.6.6.2 TDF Optimization Enabled (TDF_MODE = 1) When the TDF_MODE of the MODE register is set to 1 (TDF optimization is enabled), the SMC takes advantage of the setup period of the next access to optimize the number of wait states cycle to insert. Figure 27-23 shows a read access controlled by NRD, followed by a write access controlled by NWE, on Chip Select 0. Chip Select 0 has been programmed with: NRD_HOLD = 4; READ_MODE = 1 (NRD controlled) NWE_SETUP = 3; WRITE_MODE = 1 (NWE controlled) TDF_CYCLES = 6; TDF_MODE = 1 (optimization enabled). Figure 27-23. TDF Optimization: No TDF wait states are inserted if the TDF period is over when the next access begins CLK_SMC A[25:2] NRD NRD_HOLD = 4 NWE NWE_SETUP = 3 NCS0 TDF_CYCLES = 6 D[15:0] Read access on NCS0 (NRD controlled) Read to Write write access on NCS0 (NWE controlled) Wait State 27.6.6.3 TDF Optimization Disabled (TDF_MODE = 0) When optimization is disabled, tdf wait states are inserted at the end of the read transfer, so that the data float period is ended when the second access begins. If the hold period of the read1 controlling signal overlaps the data float period, no additional tdf wait states will be inserted. Figure 27-24, Figure 27-25 and Figure 27-26 illustrate the cases: (cid:129) read access followed by a read access on another chip select, (cid:129) read access followed by a write access on another chip select, 390 32058K AVR32-01/12
AT32UC3A (cid:129) read access followed by a write access on the same chip select, with no TDF optimization. Figure 27-24. TDF Optimization Disabled (TDF Mode = 0). TDF wait states between 2 read accesses on different chip selects. CLK_SMC A[25:2] NBS0, NBS1, A0, A1 Read1 controlling signal(NRD) Read1 hold = 1 Read2 setup = 1 Read2 controlling signal(NRD) TDF_CYCLES = 6 D[15:0] 5 TDF WAIT STATES Read1 cycle Read 2 cycle TDF_CYCLES = 6 TDF_MODE=0 (optimization disabled) Chip Select Wait State Figure 27-25. TDF Mode = 0: TDF wait states between a read and a write access on different chip selects. CLK_SMC A[25:2] NBS0, NBS1, A0, A1 Read1 controlling signal(NRD) Read1 hold = 1 Write2 setup = 1 Write2 controlling signal(NWE) TDF_CYCLES = 4 D[15:0] Read1 cycle 2 TDF WAIT STATES Write 2 cycle TDF_CYCLES = 4 TDF_MODE=0 Read to Write Chip Select (optimization disabled) Wait State Wait State 391 32058K AVR32-01/12
AT32UC3A Figure 27-26. TDF Mode = 0: TDF wait states between read and write accesses on the same chip select. CLK_SMC A[25:2] NBS0, NBS1, A0, A1 Read1 controlling signal(NRD) Read1 hold = 1 Write2 setup = 1 Write2 controlling signal(NWE) TDF_CYCLES = 5 D[15:0] 4 TDF WAIT STATES Read1 cycle TDF_CYCLES = 5 Write 2 cycle Read to Write TDF_MODE=0 Wait State (optimization disabled) 27.6.7 External Wait Any access can be extended by an external device using the NWAIT input signal of the SMC. The EXNW_MODE field of the MODE register on the corresponding chip select must be set to either to “10” (frozen mode) or “11” (ready mode). When the EXNW_MODE is set to “00” (dis- abled), the NWAIT signal is simply ignored on the corresponding chip select. The NWAIT signal delays the read or write operation in regards to the read or write controlling signal, depending on the read and write modes of the corresponding chip select. 27.6.7.1 Restriction When one of the EXNW_MODE is enabled, it is mandatory to program at least one hold cycle for the read/write controlling signal. For that reason, the NWAIT signal cannot be used in Page Mode (”Asynchronous Page Mode” on page 400), or in Slow Clock Mode (”Slow Clock Mode” on page 398). The NWAIT signal is assumed to be a response of the external device to the read/write request of the SMC. Then NWAIT is examined by the SMC only in the pulse state of the read or write controlling signal. The assertion of the NWAIT signal outside the expected period has no impact on SMC behavior. 392 32058K AVR32-01/12
AT32UC3A 27.6.7.2 Frozen Mode When the external device asserts the NWAIT signal (active low), and after internal synchroniza- tion of this signal, the SMC state is frozen, i.e., SMC internal counters are frozen, and all control signals remain unchanged. When the resynchronized NWAIT signal is deasserted, the SMC completes the access, resuming the access from the point where it was stopped. See Figure 27- 27. This mode must be selected when the external device uses the NWAIT signal to delay the access and to freeze the SMC. The assertion of the NWAIT signal outside the expected period is ignored as illustrated in Figure 27-28. Figure 27-27. Write Access with NWAIT Assertion in Frozen Mode (EXNW_MODE = 10). CLK_SMC A[25:2] NBS0, NBS1, A0, A1 FROZEN STATE 4 3 2 1 1 1 1 0 NWE 6 5 4 3 2 2 2 2 0 NCS D[15:0] NWAIT Internally synchronized NWAIT signal Write cycle EXNW_MODE = 10 (Frozen) WRITE_MODE = 1 (NWE_controlled) NWE_PULSE = 5 NCS_WR_PULSE = 7 393 32058K AVR32-01/12
AT32UC3A Figure 27-28. Read Access with NWAIT Assertion in Frozen Mode (EXNW_MODE = 10). CLK_SMC A[25:2] NBS0, NBS1, A0, A1 FROZEN STATE 4 3 2 2 2 1 0 NCS 2 1 0 1 0 NRD 5 5 5 4 3 2 1 0 NWAIT Internally synchronized NWAIT signal Read cycle EXNW_MODE = 10 (Frozen) READ_MODE = 0 (NCS_controlled) Assertion is ignored NRD_PULSE = 2, NRD_HOLD = 6 NCS_RD_PULSE = 5, NCS_RD_HOLD = 3 394 32058K AVR32-01/12
AT32UC3A 27.6.7.3 Ready Mode In Ready mode (EXNW_MODE = 11), the SMC behaves differently. Normally, the SMC begins the access by down counting the setup and pulse counters of the read/write controlling signal. In the last cycle of the pulse phase, the resynchronized NWAIT signal is examined. If asserted, the SMC suspends the access as shown in Figure 27-29 and Figure 27-30. After deassertion, the access is completed: the hold step of the access is performed. This mode must be selected when the external device uses deassertion of the NWAIT signal to indicate its ability to complete the read or write operation. If the NWAIT signal is deasserted before the end of the pulse, or asserted after the end of the pulse of the controlling read/write signal, it has no impact on the access length as shown in Fig- ure 27-30. Figure 27-29. NWAIT Assertion in Write Access: Ready Mode (EXNW_MODE = 11). CLK_SMC A[25:2] NBS0, NBS1, A0, A1 FROZE N STATE 4 3 2 1 0 0 0 NWE 6 5 4 3 2 1 1 1 0 NCS D[15:0] NWAIT Internally synchronized NWAIT signal Write cycle EXNW_MODE = 11 (Ready mode) WRITE_MOD E = 1 (NWE_controlled) NWE_PULSE = 5 NCS_W R_PULSE = 7 395 32058K AVR32-01/12
AT32UC3A Figure 27-30. NWAIT Assertion in Read Access: Ready Mode (EXNW_MODE = 11). CLK_SMC A[25:2] NBS0, NBS1, A0, A1 Wait STATE 6 5 4 3 2 1 0 0 NCS 6 5 4 3 2 1 1 0 NRD NWAIT Internally synchronized NWAIT signal Read cycle EXNW_MODE = 11 (Ready mode) READ_MODE = 0 (NCS_controlled) Assertion is ignored Assertion is ignored NRD_PULSE = 7 NCS_RD_PULSE = 7 396 32058K AVR32-01/12
AT32UC3A 27.6.7.4 NWAIT Latency and Read/write Timings There may be a latency between the assertion of the read/write controlling signal and the asser- tion of the NWAIT signal by the device. The programmed pulse length of the read/write controlling signal must be at least equal to this latency plus the 2 cycles of resynchronization + 1 cycle. Otherwise, the SMC may enter the hold state of the access without detecting the NWAIT signal assertion. This is true in frozen mode as well as in ready mode. This is illustrated on Fig- ure 27-31. When EXNW_MODE is enabled (ready or frozen), the user must program a pulse length of the read and write controlling signal of at least: minimal pulse length = NWAIT latency + 2 resynchronization cycles + 1 cycle Figure 27-31. NWAIT Latency CLK_SMC A[25:2] NBS0, NBS1, A0, A1 Wait STATE 4 3 2 1 0 0 0 NRD Minimal pulse length NWAIT nternally synchronized NWAIT latency 2 cycle resynchronization NWAIT signal Read cycle EXNW_MODE = 10 or 11 READ_MODE = 1 (NRD_controlled) NRD_PULSE = 5 397 32058K AVR32-01/12
AT32UC3A 27.6.8 Slow Clock Mode The SMC is able to automatically apply a set of “slow clock mode” read/write waveforms when an internal signal driven by the Power Management Controller is asserted because CLK_SMC has been turned to a very slow clock rate (typically 32kHz clock rate). In this mode, the user-pro- grammed waveforms are ignored and the slow clock mode waveforms are applied. This mode is provided so as to avoid reprogramming the User Interface with appropriate waveforms at very slow clock rate. When activated, the slow mode is active on all chip selects. 27.6.8.1 Slow Clock Mode Waveforms Figure 27-32 illustrates the read and write operations in slow clock mode. They are valid on all chip selects. indicates the value of read and write parameters in slow clock mode. Figure 27-32. Read/write Cycles in Slow Clock Mode CLK_SMC CLK_SMC A[25:2] A[25:2] NBS0, NBS1, NBS0, NBS1, A0, A1 A0, A1 NRD NWE 1 1 1 1 1 NCS NCS NRD_CYCLES = 2 NWE_CYCLES = 3 SLOW CLOCK MODE WRITE SLOW CLOCK MODE READ Table 27-4. Read and Write Timing Parameters in Slow Clock Mode Read Parameters Duration (cycles) Write Parameters Duration (cycles) NRD_SETUP 1 NWE_SETUP 1 NRD_PULSE 1 NWE_PULSE 1 NCS_RD_SETUP 0 NCS_WR_SETUP 0 NCS_RD_PULSE 2 NCS_WR_PULSE 3 NRD_CYCLE 2 NWE_CYCLE 3 398 32058K AVR32-01/12
AT32UC3A 27.6.8.2 Switching from (to) Slow Clock Mode to (from) Normal Mode When switching from slow clock mode to the normal mode, the current slow clock mode transfer is completed at high clock rate, with the set of slow clock mode parameters.See Figure 27-33 on page 399. The external device may not be fast enough to support such timings. Figure 27-34 illustrates the recommended procedure to properly switch from one mode to the other. Figure 27-33. Clock Rate Transition Occurs while the SMC is Performing a Write Operation Slow Clock Mode Internal signal from PM CLK_SMC A[25:2] NBS0, NBS1, A0, A1 NWE 1 1 1 1 1 1 2 3 2 NCS NWE_CYCLE = 3 NWE_CYCLE = 7 SLOW CLOCK MODE WRITE SLOW CLOCK MODE WRITE NORMAL MODE WRITE This write cycle finishes with the slow clock mode set Slow clock mode transition is detected: Of parameters after the clock rate transition Reload Configuration Wait State 399 32058K AVR32-01/12
AT32UC3A Figure 27-34. Recommended Procedure to Switch from Slow Clock Mode to Normal Mode or from Normal Mode to Slow Clock Mode Slow Clock Mode Internal signal from PM CLK_SMC A[25:2] NBS0, NBS1, A0, A1 NWE 1 1 1 2 3 2 NCS SLOW CLOCK MODE WRITE IDLE STATE NORMAL MODE WRITE Reload Configuration Wait State 27.6.9 Asynchronous Page Mode The SMC supports asynchronous burst reads in page mode, providing that the page mode is enabled in the MODE register (PMEN field). The page size must be configured in the MODE register (PS field) to 4, 8, 16 or 32 bytes. The page defines a set of consecutive bytes into memory. A 4-byte page (resp. 8-, 16-, 32-byte page) is always aligned to 4-byte boundaries (resp. 8-, 16-, 32-byte boundaries) of memory. The MSB of data address defines the address of the page in memory, the LSB of address define the address of the data in the page as detailed in Table 27-5. With page mode memory devices, the first access to one page (t ) takes longer than the subse- pa quent accesses to the page (t ) as shown in Figure 27-35. When in page mode, the SMC sa enables the user to define different read timings for the first access within one page, and next accesses within the page. Table 27-5. Page Address and Data Address within a Page Page Size Page Address(1) Data Address in the Page(2) 4 bytes A[25:2] A[1:0] 8 bytes A[25:3] A[2:0] 16 bytes A[25:4] A[3:0] 32 bytes A[25:5] A[4:0] Notes: 1. A denotes the address bus of the memory device 2. For 16-bit devices, the bit 0 of address is ignored. For 32-bit devices, bits [1:0] are ignored. 27.6.9.1 Protocol and Timings in Page Mode Figure 27-35 shows the NRD and NCS timings in page mode access. 400 32058K AVR32-01/12
AT32UC3A Figure 27-35. Page Mode Read Protocol (Address MSB and LSB are defined in Table 27-5) CLK_SMC A[MSB] A[LSB] NRD t pa tsa tsa NCS D[15:0] NCS_RD_PULSE NRD_PULSE NRD_PULSE The NRD and NCS signals are held low during all read transfers, whatever the programmed val- ues of the setup and hold timings in the User Interface may be. Moreover, the NRD and NCS timings are identical. The pulse length of the first access to the page is defined with the NCS_RD_PULSE field of the PULSE register. The pulse length of subsequent accesses within the page are defined using the NRD_PULSE parameter. In page mode, the programming of the read timings is described in Table 27-6: Table 27-6. Programming of Read Timings in Page Mode Parameter Value Definition READ_MODE ‘x’ No impact NCS_RD_SETUP ‘x’ No impact NCS_RD_PULSE t Access time of first access to the page pa NRD_SETUP ‘x’ No impact NRD_PULSE t Access time of subsequent accesses in the page sa NRD_CYCLE ‘x’ No impact The SMC does not check the coherency of timings. It will always apply the NCS_RD_PULSE timings as page access timing (t ) and the NRD_PULSE for accesses to the page (t ), even if pa sa the programmed value for t is shorter than the programmed value for t . pa sa 27.6.9.2 Byte Access Type in Page Mode The Byte Access Type configuration remains active in page mode. For 16-bit or 32-bit page mode devices that require byte selection signals, configure the BAT field of the REGISTER to 0 (byte select access type). 401 32058K AVR32-01/12
AT32UC3A 27.6.9.3 Page Mode Restriction The page mode is not compatible with the use of the NWAIT signal. Using the page mode and the NWAIT signal may lead to unpredictable behavior. 27.6.9.4 Sequential and Non-sequential Accesses If the chip select and the MSB of addresses as defined in Table 27-5 are identical, then the cur- rent access lies in the same page as the previous one, and no page break occurs. Using this information, all data within the same page, sequential or not sequential, are accessed with a minimum access time (t ). Figure 27-36 illustrates access to an 8-bit memory device in sa page mode, with 8-byte pages. Access to D1 causes a page access with a long access time (t ). Accesses to D3 and D7, though they are not sequential accesses, only require a short pa access time (t ). sa If the MSB of addresses are different, the SMC performs the access of a new page. In the same way, if the chip select is different from the previous access, a page break occurs. If two sequen- tial accesses are made to the page mode memory, but separated by an other internal or external peripheral access, a page break occurs on the second access because the chip select of the device was deasserted between both accesses. Figure 27-36. Access to Non-sequential Data within the Same Page CLK_SMC A[25:3] Page address A[2], A1, A0 A1 A3 A7 NRD NCS D[7:0] D1 D3 D7 NCS_RD_PULSE NRD_PULSE NRD_PULSE 402 32058K AVR32-01/12
AT32UC3A 27.7 User Interface The SMC is programmed using the registers listed in Table 27-7. For each chip select, a set of 4 registers is used to pro- gram the parameters of the external device connected on it. In Table 27-7, “CS_number” denotes the chip select number. 16 bytes (0x10) are required per chip select. The user must complete writing the configuration by writing any one of the MODE registers. Table 27-7. SMC Register Mapping Offset Register Name Access Reset State 0x10 x CS_number + 0x00 SMC Setup Register SETUP Read/Write – 0x10 x CS_number + 0x04 SMC Pulse Register PULSE Read/Write – 0x10 x CS_number + 0x08 SMC Cycle Register CYCLE Read/Write – 0x10 x CS_number + 0x0C SMC Mode Register MODE Read/Write – 403 32058K AVR32-01/12
AT32UC3A 27.7.1 Setup Register Register Name: SETUP[0 ..3] Access Type: Read/Write Offset: 0x10 x CS_number + 0x00 Reset Value: – 31 30 29 28 27 26 25 24 – – NCS_RD_SETUP 23 22 21 20 19 18 17 16 – – NRD_SETUP 15 14 13 12 11 10 9 8 – – NCS_WR_SETUP 7 6 5 4 3 2 1 0 – – NWE_SETUP (cid:129) NCS_RD_SETUP: NCS Setup Length in READ Access In read access, the NCS signal setup length is defined as: NCS setup length = (128* NCS_RD_SETUP[5] + NCS_RD_SETUP[4:0]) clock cycles (cid:129) NRD_SETUP: NRD Setup Length The NRD signal setup length is defined in clock cycles as: NRD setup length = (128* NRD_SETUP[5] + NRD_SETUP[4:0]) clock cycles (cid:129) NCS_WR_SETUP: NCS Setup Length in WRITE Access In write access, the NCS signal setup length is defined as: NCS setup length = (128* NCS_WR_SETUP[5] + NCS_WR_SETUP[4:0]) clock cycles (cid:129) NWE_SETUP: NWE Setup Length The NWE signal setup length is defined as: NWE setup length = (128* NWE_SETUP[5] + NWE_SETUP[4:0]) clock cycles 404 32058K AVR32-01/12
AT32UC3A 27.7.2 Pulse Register Register Name: PULSE[0..3] Access Type: Read/Write Offset: 0x10 x CS_number + 0x04 Reset Value: – 31 30 29 28 27 26 25 24 – NCS_RD_PULSE 23 22 21 20 19 18 17 16 – NRD_PULSE 15 14 13 12 11 10 9 8 – NCS_WR_PULSE 7 6 5 4 3 2 1 0 – NWE_PULSE (cid:129) NCS_RD_PULSE: NCS Pulse Length in READ Access In standard read access, the NCS signal pulse length is defined as: NCS pulse length = (256* NCS_RD_PULSE[6] + NCS_RD_PULSE[5:0]) clock cycles The NCS pulse length must be at least 1 clock cycle. In page mode read access, the NCS_RD_PULSE parameter defines the duration of the first access to one page. (cid:129) NRD_PULSE: NRD Pulse Length In standard read access, the NRD signal pulse length is defined in clock cycles as: NRD pulse length = (256* NRD_PULSE[6] + NRD_PULSE[5:0]) clock cycles The NRD pulse length must be at least 1 clock cycle. In page mode read access, the NRD_PULSE parameter defines the duration of the subsequent accesses in the page. (cid:129) NCS_WR_PULSE: NCS Pulse Length in WRITE Access In write access, the NCS signal pulse length is defined as: NCS pulse length = (256* NCS_WR_PULSE[6] + NCS_WR_PULSE[5:0]) clock cycles The NCS pulse length must be at least 1 clock cycle. (cid:129) NWE _PULSE: NWE Pulse Length The NWE signal pulse length is defined as: NWE pulse length = (256* NWE_PULSE[6] + NWE_PULSE[5:0]) clock cycles The NWE pulse length must be at least 1 clock cycle. 405 32058K AVR32-01/12
AT32UC3A 27.7.3 Cycle Register Register Name: CYCLE[0..3] Access Type: Read/Write Offset: 0x10 x CS_number + 0x08 Reset Value: – 31 30 29 28 27 26 25 24 – – – – – – – NRD_CYCLE 23 22 21 20 19 18 17 16 NRD_CYCLE 15 14 13 12 11 10 9 8 – – – – – – – NWE_CYCLE 7 6 5 4 3 2 1 0 NWE_CYCLE (cid:129) NRD_CYCLE: Total Read Cycle Length The total read cycle length is the total duration in clock cycles of the read cycle. It is equal to the sum of the setup, pulse and hold steps of the NRD and NCS signals. It is defined as: Read cycle length = (NRD_CYCLE[8:7]*256 + NRD_CYCLE[6:0]) clock cycles (cid:129) NWE_CYCLE: Total Write Cycle Length The total write cycle length is the total duration in clock cycles of the write cycle. It is equal to the sum of the setup, pulse and hold steps of the NWE and NCS signals. It is defined as: Write cycle length = (NWE_CYCLE[8:7]*256 + NWE_CYCLE[6:0]) clock cycles 406 32058K AVR32-01/12
AT32UC3A 27.7.4 MODE Register Register Name: MODE[0..3] Access Type: Read/Write Offset: 0x10 x CS_number + 0x0C Reset Value: – 31 30 29 28 27 26 25 24 – – PS – – – PMEN 23 22 21 20 19 18 17 16 – – – TDF_MODE TDF_CYCLES 15 14 13 12 11 10 9 8 – – DBW – – – BAT 7 6 5 4 3 2 1 0 WRITE_MOD – – EXNW_MODE – – READ_MODE E (cid:129) PS: Page Size If page mode is enabled, this field indicates the size of the page in bytes. Table 27-8. Page size settings. PS Page Size 0 0 4-byte page 0 1 8-byte page 1 0 16-byte page 1 1 32-byte page (cid:129) PMEN: Page Mode Enabled 1:Asynchronous burst read in page mode is applied on the corresponding chip select. 0:Standard read is applied. (cid:129) TDF_MODE: TDF Optimization 1:TDF optimization is enabled. – The number of TDF wait states is optimized using the setup period of the next read/write access. 0: TDF optimization is disabled. – The number of TDF wait states is inserted before the next access begins. (cid:129) TDF_CYCLES: Data Float Time This field gives the integer number of clock cycles required by the external device to release the data after the rising edge of the read controlling signal. The SMC always provide one full cycle of bus turnaround after the TDF_CYCLES period. The 407 32058K AVR32-01/12
AT32UC3A external bus cannot be used by another chip select during TDF_CYCLES + 1 cycles. From 0 up to 15 TDF_CYCLES can be set. (cid:129) Data Bus Width (DBW) DBW Data Bus Width 0 0 8-bit bus 0 1 16-bit bus 1 0 32-bit bus 1 1 Reserved (cid:129) BAT: Byte Access Type This field is used only if DBW defines a 16- or 32-bit data bus. 1: Byte write access type: – Write operation is controlled using NCS, NWR0, NWR1, NWR2, NWR3. – Read operation is controlled using NCS and NRD. 0: Byte select access type: – Write operation is controlled using NCS, NWE, NBS0, NBS1, NBS2 and NBS3 – Read operation is controlled using NCS, NRD, NBS0, NBS1, NBS2 and NBS3 (cid:129) EXNW_MODE: NWAIT Mode The NWAIT signal is used to extend the current read or write signal. It is only taken into account during the pulse phase of the read and write controlling signal. When the use of NWAIT is enabled, at least one cycle hold duration must be pro- grammed for the read and write controlling signal. Table 27-9. EXNW_MODE EXNW_MODE NWAIT Mode 0 0 Disabled 0 1 Reserved 1 0 Frozen Mode 1 1 Ready Mode (cid:129) Disabled Mode: The NWAIT input signal is ignored on the corresponding Chip Select. (cid:129) Frozen Mode: If asserted, the NWAIT signal freezes the current read or write cycle. After deassertion, the read/write cycle is resumed from the point where it was stopped. (cid:129) Ready Mode: The NWAIT signal indicates the availability of the external device at the end of the pulse of the controlling read or write signal, to complete the access. If high, the access normally completes. If low, the access is extended until NWAIT returns high. (cid:129) WRITE_MODE 1: The write operation is controlled by the NWE signal. – If TDF optimization is enabled (TDF_MODE =1), TDF wait states will be inserted after the setup of NWE. 0: The write operation is controlled by the NCS signal. – If TDF optimization is enabled (TDF_MODE =1), TDF wait states will be inserted after the setup of NCS. (cid:129) READ_MODE: 1: The read operation is controlled by the NRD signal. 408 32058K AVR32-01/12
AT32UC3A – If TDF cycles are programmed, the external bus is marked busy after the rising edge of NRD. – If TDF optimization is enabled (TDF_MODE =1), TDF wait states are inserted after the setup of NRD. 0: The read operation is controlled by the NCS signal. – If TDF cycles are programmed, the external bus is marked busy after the rising edge of NCS. – If TDF optimization is enabled (TDF_MODE =1), TDF wait states are inserted after the setup of NCS. 409 32058K AVR32-01/12
AT32UC3A 28. SDRAM Controller (SDRAMC) Rev: 2.0.1.1 28.1 Features (cid:129) Numerous Configurations Supported – 2K, 4K, 8K Row Address Memory Parts – SDRAM with Two or Four Internal Banks – SDRAM with 16- or 32-bit Data Path (cid:129) Programming Facilities – Word, Half-word, Byte Access – Automatic Page Break When Memory Boundary Has Been Reached – Multibank Ping-pong Access – Timing Parameters Specified by Software – Automatic Refresh Operation, Refresh Rate is Programmable – Automatic Update of DS, TCR and PASR Parameters (Mobile SDRAM Devices) (cid:129) Energy-saving Capabilities – Self-refresh, Power-down and Deep Power Modes Supported – Supports Mobile SDRAM Devices (cid:129) Error Detection – Refresh Error Interrupt (cid:129) SDRAM Power-up Initialization by Software (cid:129) CAS Latency of 1, 2, 3 Supported (cid:129) Auto Precharge Command Not Used 28.2 Description The SDRAM Controller (SDRAMC) extends the memory capabilities of a chip by providing the interface to an external 16-bit or 32-bit SDRAM device. The page size supports ranges from 2048 to 8192 and the number of columns from 256 to 2048. It supports byte (8-bit), half-word (16-bit) and word (32-bit) accesses. The SDRAM Controller supports a read or write burst length of one location. It keeps track of the active row in each bank, thus maximizing SDRAM performance, e.g., the application may be placed in one bank and data in the other banks. So as to optimize performance, it is advisable to avoid accessing different rows in the same bank. The SDRAM controller supports a CAS latency of 1, 2 or 3 and optimizes the read access depending on the frequency. The different modes available - self-refresh, power-down and deep power-down modes - mini- mize power consumption on the SDRAM device. 410 32058K AVR32-01/12
AT32UC3A 28.3 Block Diagram Figure 28-1. SDRAM Controller Block Diagram PIO Controller SDRAMC Chip Select SDCK Memory SDCKE Controller SDRAMC SDCS Interrupt BA[1:0] RAS MCK SDRAMC CAS PMC SDWE NBS[3:0] SDRAMC_A[12:0] D[31:0] User Interface Peripheral Bus 28.4 I/O Lines Description Table 28-1. I/O Line Description Name Description Type Active Level SDCK SDRAM Clock Output SDCKE SDRAM Clock Enable Output High SDCS SDRAM Controller Chip Select Output Low BA[1:0] Bank Select Signals Output RAS Row Signal Output Low CAS Column Signal Output Low SDWE SDRAM Write Enable Output Low NBS[3:0] Data Mask Enable Signals Output Low SDRAMC_A[12:0] Address Bus Output D[31:0] Data Bus I/O 411 32058K AVR32-01/12
AT32UC3A 28.5 Application Example 28.5.1 Hardware Interface Figure 28-2 shows an example of SDRAM device connection to the SDRAM Controller using a 32-bit data bus width. Figure 28-3 shows an example of SDRAM device connection using a 16- bit data bus width. It is important to note that these examples are given for a direct connection of the devices to the SDRAM Controller , without Externa l Bus Inter face or PIO Controller multiplexing. Figure 28-2. SDRAM Controller Connections to SDRAM Devices: 32-bit Data Bus Width D0-D31 RCAASS 2M x 8 2M x 8 SDCK SDRAM SDRAM SSDDCWKEE D0-D7 D0-D7 D8-D15 D0-D7 NBS0 CS CS NNNBBBSSS321 NSDBWS0E RCCCWDKAALQEKSESM A0-A9, BBAAAA111001 BBSSAADD10RRAAMMCC__AA1[00- 9], SDRAMC_A11 SNDBWSE1 RCCCWDKAALQEKSESM A0-A9, BBAAAA111001 BBSSAADD10RRAAMMCC__AA1[00- 9], SDRAMC_A11 SDRAMC_A[0-12] BA0 BA1 2M x 8 2M x 8 SDRAM SDRAM D16-D23 D0-D7 D24-D31 D0-D7 SDCS CS CS SDWERCCCWKAALEKSES A0-A9, BBAAAA110101 SSBBAADD10RRAAMMCC__AA1[00- 9], SDRAMC_ A11 SDWE RCCCWKAALEKSES A0-A9, BBAAAA111010 BBSSAADD10RRAAMMCC__AA1[00- 9], SDRAMC_A11 SDRAM NBS2DQM NBS3 DQM Controller Figure 28-3. SDRAM Controller Connections to SDRAM Devices: 16-bit Data Bus Width D0-D31 RAS 2M x 8 2M x 8 CAS SDCK SDRAM SDRAM SSDDCWKEE D0-D7 D0-D7 D8-D15 D0-D7 NBS0 CS CS NBS1 NSDBWS0E RCCCWDKAALQEKSESM A0-A9, BBAAAA111001 SSBBAADD10RRAAMMCC__AA1[00- 9], SDRAMC_A11 SNDBWSE1 RCCCWDKAALQEKSESM A0-A9, BBAAAA111001 BBSSAADD10RRAAMMCC__AA1[00- 9], SDRAMC_A11 SDRAMC_A[0-12] BA0 BA1 SDRAM SDCS Controller 412 32058K AVR32-01/12
AT32UC3A 28.5.2 Software Interface The SDRAM address space is organized into banks, rows, and columns. The SDRAM controller allows mapping different memory types according to the values set in the SDRAMC configura- tion register. The SDRAM Controller’s function is to make the SDRAM device access protocol transparent to the user. Table 28-2 to Table 28-7 illustrate the SDRAM device memory mapping seen by the user in correlation with the device structure. Various configurations are illustrated. 28.5.2.1 32-bit Memory Data Bus Width Table 28-2. SDRAM Configuration Mapping: 2K Rows, 256/512/1024/2048 Columns CPU Address Line 2 2 2 2 2 2 2 2 1 1 1 1 1 1 1 1 1 1 7 6 5 4 3 2 1 0 9 8 7 6 5 4 3 2 1 0 9 8 7 6 5 4 3 2 1 0 Bk[1:0] Row[10:0] Column[7:0] M[1:0] Bk[1:0] Row[10:0] Column[8:0] M[1:0] Bk[1:0] Row[10:0] Column[9:0] M[1:0] Bk[1:0] Row[10:0] Column[10:0] M[1:0] Table 28-3. SDRAM Configuration Mapping: 4K Rows, 256/512/1024/2048 Columns CPU Address Line 2 2 2 2 2 2 2 2 1 1 1 1 1 1 1 1 1 1 7 6 5 4 3 2 1 0 9 8 7 6 5 4 3 2 1 0 9 8 7 6 5 4 3 2 1 0 Bk[1:0] Row[11:0] Column[7:0] M[1:0] Bk[1:0] Row[11:0] Column[8:0] M[1:0] Bk[1:0] Row[11:0] Column[9:0] M[1:0] Bk[1:0] Row[11:0] Column[10:0] M[1:0] Table 28-4. SDRAM Configuration Mapping: 8K Rows, 256/512/1024/2048 Columns CPU Address Line 2 2 2 2 2 2 2 2 1 1 1 1 1 1 1 1 1 1 7 6 5 4 3 2 1 0 9 8 7 6 5 4 3 2 1 0 9 8 7 6 5 4 3 2 1 0 Bk[1:0] Row[12:0] Column[7:0] M[1:0] Bk[1:0] Row[12:0] Column[8:0] M[1:0] Bk[1:0] Row[12:0] Column[9:0] M[1:0] Bk[1:0] Row[12:0] Column[10:0] M[1:0] Notes: 1. M[1:0] is the byte address inside a 32-bit word. 2. Bk[1] = BA1, Bk[0] = BA0. 413 32058K AVR32-01/12
AT32UC3A 28.5.2.2 16-bit Memory Data Bus Width Table 28-5. SDRAM Configuration Mapping: 2K Rows, 256/512/1024/2048 Columns CPU Address Line 2 2 2 2 2 2 2 2 1 1 1 1 1 1 1 1 1 1 7 6 5 4 3 2 1 0 9 8 7 6 5 4 3 2 1 0 9 8 7 6 5 4 3 2 1 0 Bk[1:0] Row[10:0] Column[7:0] M 0 Bk[1:0] Row[10:0] Column[8:0] M 0 Bk[1:0] Row[10:0] Column[9:0] M 0 Bk[1:0] Row[10:0] Column[10:0] M 0 Table 28-6. SDRAM Configuration Mapping: 4K Rows, 256/512/1024/2048 Columns CPU Address Line 2 2 2 2 2 2 2 2 1 1 1 1 1 1 1 1 1 1 7 6 5 4 3 2 1 0 9 8 7 6 5 4 3 2 1 0 9 8 7 6 5 4 3 2 1 0 Bk[1:0] Row[11:0] Column[7:0] M 0 Bk[1:0] Row[11:0] Column[8:0] M 0 Bk[1:0] Row[11:0] Column[9:0] M 0 Bk[1:0] Row[11:0] Column[10:0] M 0 Table 28-7. SDRAM Configuration Mapping: 8K Rows, 256/512/1024/2048 Columns CPU Address Line 2 2 2 2 2 2 2 2 1 1 1 1 1 1 1 1 1 1 7 6 5 4 3 2 1 0 9 8 7 6 5 4 3 2 1 0 9 8 7 6 5 4 3 2 1 0 Bk[1:0] Row[12:0] Column[7:0] M 0 Bk[1:0] Row[12:0] Column[8:0] M 0 Bk[1:0] Row[12:0] Column[9:0] M 0 Bk[1:0] Row[12:0] Column[10:0] M 0 Notes: 1. M0 is the byte address inside a 16-bit half-word. 2. Bk[1] = BA1, Bk[0] = BA0. 414 32058K AVR32-01/12
AT32UC3A 28.6 Product Dependencies 28.6.1 SDRAM Device Initialization The initialization sequence is generated by software. The SDRAM devices are initialized by the following sequence: 1. SDRAM features must be set in the configuration register: asynchronous timings (TRC, TRAS, ...), number of column, rows, CAS latency, and the data bus width. 2. For mobile SDRAM, temperature-compensated self refresh (TCSR), drive strength (DS) and partial array self refresh (PASR) must be set in the Low Power Register. 3. The SDRAM memory type must be set in the Memory Device Register. 4. An No Operation (NOP)command must be issued to the SDRAM devices to start the SDRAM clock. The application must set Mode to 1 in the and perform a write access to any SDRAM address. 5. A minimum pause of 200 µs is provided to precede any signal toggle. 6. An All Banks Precharge command must be issued to the SDRAM devices. The applica- tion must set Mode to 2 in the Mode Register and perform a write access to any SDRAM address. 7. Eight auto-refresh (CBR) cycles are provided. The application must set the Mode to 4 in the Mode Register and performs a write access to any SDRAM location eight times. 8. A Mode Register set (MRS) cycle must be issued to program the parameters of the SDRAM devices, in particular CAS latency and burst length. The application must set Mode to 3 in the Mode Register and perform a write access to the SDRAM. The write address must be chosen so that BA[1:0] are set to 0. For example, with a 16-bit 128 MB SDRAM (12 rows, 9 columns, 4 banks) bank address, the SDRAM write access should be done at the address 0x20000000. 9. For mobile SDRAM initialization, an Extended Mode Register set (EMRS) cycle must be issued to program the SDRAM parameters (TCSR, PASR, DS). The application must set Mode to 5 in the Mode Register and perform a write access to the SDRAM. The write address must be chosen so that BA[1] or BA[0] are set to 1. For example, with a 16-bit 128 MB SDRAM, (12 rows, 9 columns, 4 banks) bank address the SDRAM write access should be done at the address 0x20800000 or 0x20400000. 10. The application must go into Normal Mode, setting Mode to 0 in the Mode Register and performing a write access at any location in the SDRAM. 11. Write the refresh rate into the count field in the SDRAMC Refresh Timer register. (Refresh rate = delay between refresh cycles). The SDRAM device requires a refresh every 15.625 us or 7.81 us. With a 100 MHz frequency, the Refresh Timer Counter Reg- ister must be set with the value 1562 (15.625 µs x 100 MHz) or 781 (7.81 µs x 100 MHz). After initialization, the SDRAM devices are fully functional. 415 32058K AVR32-01/12
AT32UC3A Figure 28-4. SDRAM Device Initialization Sequence SDCKE t t t RP RC MRD SDCK SDRAMC_A[9:0] A10 SDRAMC_A[12:11] SDCS RAS CAS SDWE NBS Inputs Stable for Precharge All Banks 1st Auto-refresh 8th Auto-refresh MRS Command Valid Command 200 μsec 28.6.2 I/O Lines The pins used for interfacing the SDRAM Controller may be multiplexed with the PIO lines. The programmer must first program the PIO controller to assign the SDRAM Controller pins to their peripheral function. If I/O lines of the SDRAM Controller are not used by the application, they can be used for other purposes by the PIO Controller. 28.6.3 Interrupt The SDRAM Controller has an interrupt line connected to the interrupt controller. In order to han- dle interrupts, the interrupt controller must be programmed before configuring the SDRAM Controller. Using the SDRAM Controller interrupt requires the IC to be programmed first.) 416 32058K AVR32-01/12
AT32UC3A 28.7 Functional Description 28.7.1 SDRAM Controller Write Cycle The SDRAM Controller allows burst access or single access. In both cases, the SDRAM control- ler keeps track of the active row in each bank, thus maximizing performance. To initiate a burst access, the SDRAM Controller uses the transfer type signal provided by the master requesting the access. If the next access is a sequential write access, writing to the SDRAM device is car- ried out. If the next access is a write-sequential access, but the current access is to a boundary page, or if the next access is in another row, then the SDRAM Controller generates a precharge command, activates the new row and initiates a write command. To comply with SDRAM timing parameters, additional clock cycles are inserted between precharge/active (t ) commands and RP active/write (t ) commands. For definition of these timing parameters, refer to the ”SDRAMC RCD Configuration Register” on page 427. This is described in Figure 28-5 below. Figure 28-5. Write Burst, 32-bit SDRAM Access t = 3 RCD SDCS SDCK SDRAMC_A[12:0] Row n col a col b col c col d col e col f col g col h col i col j col k col l RAS CAS SDWE D[31:0] Dna Dnb Dnc Dnd Dne Dnf Dng Dnh Dni Dnj Dnk Dnl 28.7.2 SDRAM Controller Read Cycle The SDRAM Controller allows burst access, incremental burst of unspecified length or single access. In all cases, the SDRAM Controller keeps track of the active row in each bank, thus maximizing performance of the SDRAM. If row and bank addresses do not match the previous row/bank address, then the SDRAM controller automatically generates a precharge command, activates the new row and starts the read command. To comply with the SDRAM timing param- eters, additional clock cycles on SDCK are inserted between precharge and active commands (t ) and between active and read command (t ). These two parameters are set in the config- RP RCD uration register of the SDRAM Controller. After a read command, additional wait states are generated to comply with the CAS latency (1, 2 or 3 clock delays specified in the configuration register). 417 32058K AVR32-01/12
AT32UC3A For a single access or an incremented burst of unspecified length, the SDRAM Controller antici- pates the next access. While the last value of the column is returned by the SDRAM Controller on the bus, the SDRAM Controller anticipates the read to the next column and thus anticipates the CAS latency. This reduces the effect of the CAS latency on the internal bus. For burst access of specified length (4, 8, 16 words), access is not anticipated. This case leads to the best performance. If the burst is broken (border, busy mode, etc.), the next access is han- dled as an incrementing burst of unspecified length. Figure 28-6. Read Burst, 32-bit SDRAM Access tRCD = 3 CAS = 2 SDCS SDCK SDRAMC_A[12:0] Row n col a col b col c col d col e col f RAS CAS SDWE D[31:0] Dna Dnb Dnc Dnd Dne Dnf (Input) 28.7.3 Border Management When the memory row boundary has been reached, an automatic page break is inserted. In this case, the SDRAM controller generates a precharge command, activates the new row and initi- ates a read or write command. To comply with SDRAM timing parameters, an additional clock cycle is inserted between the precharge/active (t ) command and the active/read (t ) com- RP RCD mand. This is described in Figure 28-7 below. 418 32058K AVR32-01/12
AT32UC3A Figure 28-7. Read Burst with Boundary Row Access T = 3 T = 3 CAS = 2 RP RCD SDCS SDCK Row n SDRAMC_A[12:0] col a col b col c col d Row m col a col b col c col d col e RAS CAS SDWE D[31:0] Dna Dnb Dnc Dnd Dma Dmb Dmc Dmd Dme 28.7.4 SDRAM Controller Refresh Cycles An auto-refresh command is used to refresh the SDRAM device. Refresh addresses are gener- ated internally by the SDRAM device and incremented after each auto-refresh automatically. The SDRAM Controller generates these auto-refresh commands periodically. An internal timer is loaded with the value in the register TR that indicates the number of clock cycles between refresh cycles. A refresh error interrupt is generated when the previous auto-refresh command did not perform. It is acknowledged by reading the Interrupt Status Register (ISR). When the SDRAM Controller initiates a refresh of the SDRAM device, internal memory accesses are not delayed. However, if the CPU tries to access the SDRAM, the slave indicates that the device is busy and the master is held by a wait signal. See Figure 28-8. 419 32058K AVR32-01/12
AT32UC3A Figure 28-8. Refresh Cycle Followed by a Read Access tRP = 3 tRC = 8 tRCD = 3 CAS = 2 SDCS SDCK Row n SDRAMC_A[12:0] col c col d Row m col a RAS CAS SDWE D[31:0] Dnb Dnc Dnd Dma (input) 28.7.5 Power Management Three low-power modes are available: (cid:129) Self-refresh Mode: The SDRAM executes its own Auto-refresh cycle without control of the SDRAM Controller. Current drained by the SDRAM is very low. (cid:129) Power-down Mode: Auto-refresh cycles are controlled by the SDRAM Controller. Between auto-refresh cycles, the SDRAM is in power-down. Current drained in Power-down mode is higher than in Self-refresh Mode. (cid:129) Deep Power-down Mode: (Only available with Mobile SDRAM) The SDRAM contents are lost, but the SDRAM does not drain any current. The SDRAM Controller activates one low-power mode as soon as the SDRAM device is not selected. It is possible to delay the entry in self-refresh and power-down mode after the last access by programming a timeout value in the Low Power Register. 28.7.5.1 Self-refresh Mode This mode is selected by programming the LPCB field to 1 in the SDRAMC Low Power Register. In self-refresh mode, the SDRAM device retains data without external clocking and provides its own internal clocking, thus performing its own auto-refresh cycles. All the inputs to the SDRAM device become “don’t care” except SDCKE, which remains low. As soon as the SDRAM device is selected, the SDRAM Controller provides a sequence of commands and exits self-refresh mode. Some low-power SDRAMs (e.g., mobile SDRAM) can refresh only one quarter or a half quarter or all banks of the SDRAM array. This feature reduces the self-refresh current. To configure this feature, Temperature Compensated Self Refresh (TCSR), Partial Array Self Refresh (PASR) and Drive Strength (DS) parameters must be set in the Low Power Register and transmitted to the low-power SDRAM during initialization. 420 32058K AVR32-01/12
AT32UC3A After initialization, as soon as PASR/DS/TCSR fields are modified and self-refresh mode is acti- vated, the Extended Mode Register is accessed automatically and PASR/DS/TCSR bits are updated before entry into self-refresh mode. The SDRAM device must remain in self-refresh mode for a minimum period of t and may RAS remain in self-refresh mode for an indefinite period. This is described in Figure 28-9. Figure 28-9. Self-refresh Mode Behavior Self Refresh Mode TXSR = 3 SRCB = 1 Write SDRAMC_SRR SDRAMC_A[12:0] Row SDCK SDCKE SDCS RAS CAS SDWE Access Request to the SDRAM Controller 28.7.5.2 Low-power Mode This mode is selected by programming the LPCB field to 2 in the SDRAMC Low Power Register. Power consumption is greater than in self-refresh mode. All the input and output buffers of the SDRAM device are deactivated except SDCKE, which remains low. In contrast to self-refresh mode, the SDRAM device cannot remain in low-power mode longer than the refresh period (64 ms for a whole device refresh operation). As no auto-refresh operations are performed by the SDRAM itself, the SDRAM Controller carries out the refresh operation. The exit procedure is faster than in self-refresh mode. This is described in Figure 28-10. 421 32058K AVR32-01/12
AT32UC3A Figure 28-10. Low-power Mode Behavior TRCD = 3 CAS = 2 Low Power Mode SDCS SDCK SDRAMC_A[12:0] Row n col a col b col c col d col e col f RAS CAS SDCKE D[31:0] Dna Dnb Dnc Dnd Dne Dnf (input) 28.7.5.3 Deep Power-down Mode This mode is selected by programming the LPCB field to 3 in the SDRAMC Low Power Register. When this mode is activated, all internal voltage generators inside the SDRAM are stopped and all data is lost. When this mode is enabled, the application must not access to the SDRAM until a new initializa- tion sequence is done (See ”SDRAM Device Initialization” on page 415). This is described in Figure 28-11. 422 32058K AVR32-01/12
AT32UC3A Figure 28-11. Deep Power-down Mode Behavior t = 3 RP SDCS SDCK Row n SDRAMC_A[12:0] col c col d RAS CAS SDWE CKE D[31:0] Dnb Dnc Dnd (input) 423 32058K AVR32-01/12
AT32UC3A 28.8 SDRAM Controller User Interface Table 28-8. SDRAM Controller Memory Map Offset Register Name Access Reset State 0x00 SDRAMC Mode Register MR Read/Write 0x00000000 0x04 SDRAMC Refresh Timer Register TR Read/Write 0x00000000 0x08 SDRAMC Configuration Register CR Read/Write 0x852372C0 0x0C SDRAMC High Speed Register HSR Read/Write 0x00 0x10 SDRAMC Low Power Register LPR Read/Write 0x0 0x14 SDRAMC Interrupt Enable Register IER Write-only – 0x18 SDRAMC Interrupt Disable Register IDR Write-only – 0x1C SDRAMC Interrupt Mask Register IMR Read-only 0x0 0x20 SDRAMC Interrupt Status Register ISR Read-only 0x0 0x24 SDRAMC Memory Device Register MDR Read/Write 0x0 0x28 - 0xFC Reserved – – – 424 32058K AVR32-01/12
AT32UC3A 28.8.1 SDRAMC Mode Register Register Name: MR Access Type: Read/Write Reset Value: 0x00000000 31 30 29 28 27 26 25 24 – – – – – – – – 23 22 21 20 19 18 17 16 – – – – – – – – 15 14 13 12 11 10 9 8 – – – – – – – – 7 6 5 4 3 2 1 0 – – – – – MODE (cid:129) MODE: SDRAMC Command Mode This field defines the command issued by the SDRAM Controller when the SDRAM device is accessed. Table 28-9. MODE Description 0 0 0 Normal mode. Any access to the SDRAM is decoded normally. 0 0 1 The SDRAM Controller issues a NOP command when the SDRAM device is accessed regardless of the cycle. The SDRAM Controller issues an “All Banks Precharge” command when the SDRAM device is accessed 0 1 0 regardless of the cycle. The SDRAM Controller issues a “Load Mode Register” command when the SDRAM device is accessed 0 1 1 regardless of the cycle. The command will load the CAS latency from the Configuration Register and every other value set to 0 into the Mode Register. The SDRAM Controller issues an “Auto-Refresh” Command when the SDRAM device is accessed regardless of 1 0 0 the cycle. Previously, an “All Banks Precharge” command must be issued. The SDRAM Controller issues an extended load mode register command when the SDRAM device is accessed 1 0 1 regardless of the cycle. The command will load the PASR, DS and TCR from the Low Power Register and every other value set to 0 into the Extended Mode Register. 1 1 0 Deep power-down mode. Enters deep power-down mode. 425 32058K AVR32-01/12
AT32UC3A 28.8.2 SDRAMC Refresh Timer Register Register Name: TR Access Type: Read/Write Reset Value: 0x00000000 31 30 29 28 27 26 25 24 – – – – – – – – 23 22 21 20 19 18 17 16 – – – – – – – – 15 14 13 12 11 10 9 8 – – – – COUNT 7 6 5 4 3 2 1 0 COUNT (cid:129) COUNT: SDRAMC Refresh Timer Count This 12-bit field is loaded into a timer that generates the refresh pulse. Each time the refresh pulse is generated, a refresh burst is initiated. The value to be loaded depends on the SDRAMC clock frequency (MCK: Master Clock), the refresh rate of the SDRAM device and the refresh burst length where 15.6 µs per row is a typical value for a burst of length one. To refresh the SDRAM device, this 12-bit field must be written. If this condition is not satisfied, no refresh command is issued and no refresh of the SDRAM device is carried out. 426 32058K AVR32-01/12
AT32UC3A 28.8.3 SDRAMC Configuration Register Register Name: CR Access Type: Read/Write Reset Value: 0x852372C0 31 30 29 28 27 26 25 24 TXSR TRAS 23 22 21 20 19 18 17 16 TRCD TRP 15 14 13 12 11 10 9 8 TRC TWR 7 6 5 4 3 2 1 0 DBW CAS NB NR NC (cid:129) NC: Number of Column Bits Reset value is 8 column bits. NC Column Bits 0 0 8 0 1 9 1 0 10 1 1 11 (cid:129) NR: Number of Row Bits Reset value is 11 row bits. NR Row Bits 0 0 11 0 1 12 1 0 13 1 1 Reserved (cid:129) NB: Number of Banks Reset value is two banks. NB Number of Banks 0 2 1 4 427 32058K AVR32-01/12
AT32UC3A (cid:129) CAS: CAS Latency Reset value is two cycles. In the SDRAMC, only a CAS latency of one, two and three cycles is managed. CAS CAS Latency (Cycles) 0 0 Reserved 0 1 1 1 0 2 1 1 3 (cid:129) DBW: Data Bus Width Reset value is 16 bits 0: Data bus width is 32 bits. 1: Data bus width is 16 bits. (cid:129) TWR: Write Recovery Delay Reset value is two cycles. This field defines the Write Recovery Time in number of cycles. Number of cycles is between 0 and 15. (cid:129) TRC: Row Cycle Delay Reset value is seven cycles. This field defines the delay between a Refresh and an Activate Command in number of cycles. Number of cycles is between 0 and 15. (cid:129) TRP: Row Precharge Delay Reset value is three cycles. This field defines the delay between a Precharge Command and another Command in number of cycles. Number of cycles is between 0 and 15. (cid:129) TRCD: Row to Column Delay Reset value is two cycles. This field defines the delay between an Activate Command and a Read/Write Command in number of cycles. Number of cycles is between 0 and 15. (cid:129) TRAS: Active to Precharge Delay Reset value is five cycles. This field defines the delay between an Activate Command and a Precharge Command in number of cycles. Number of cycles is between 0 and 15. (cid:129) TXSR: Exit Self Refresh to Active Delay Reset value is height cycles. This field defines the delay between SCKE set high and an Activate Command in number of cycles. Number of cycles is between 0 and 15. 428 32058K AVR32-01/12
AT32UC3A 28.8.4 SDRAMC High Speed Register Register Name: HSR Access Type: Read/Write 31 30 29 28 27 26 25 24 – – – – – – – – 23 22 21 20 19 18 17 16 – – – – – – – – 15 14 13 12 11 10 9 8 – – – – – – – – 7 6 5 4 3 2 1 0 – – – – – – – DA (cid:129) DA: Decode Cycle Enable A decode cycle can be added on the addresses as soon as a non-sequential access is performed on the HSB bus. The addition of the decode cycle allows the SDRAMC to gain time to access the SDRAM memory. 0: Decode cycle is disabled. 1: Decode cycle is enabled. 429 32058K AVR32-01/12
AT32UC3A 28.8.5 SDRAMC Low Power Register Register Name: LPR Access Type: Read/Write Reset Value: 0x0 31 30 29 28 27 26 25 24 – – – – – – – – 23 22 21 20 19 18 17 16 – – – – – – – – 15 14 13 12 11 10 9 8 – – TIMEOUT DS TCSR 7 6 5 4 3 2 1 0 – PASR – – LPCB (cid:129) LPCB: Low-power Configuration Bits Low Power Feature is inhibited: no Power-down, Self-refresh or Deep Power-down command is issued to 00 the SDRAM device. The SDRAM Controller issues a Self-refresh command to the SDRAM device, the SDCLK clock is 01 deactivated and the SDCKE signal is set low. The SDRAM device leaves the Self Refresh Mode when accessed and enters it after the access. The SDRAM Controller issues a Power-down Command to the SDRAM device after each access, the 10 SDCKE signal is set to low. The SDRAM device leaves the Power-down Mode when accessed and enters it after the access. The SDRAM Controller issues a Deep Power-down command to the SDRAM device. This mode is 11 unique to low-power SDRAM. (cid:129) PASR: Partial Array Self-refresh (only for low-power SDRAM) PASR parameter is transmitted to the SDRAM during initialization to specify whether only one quarter, one half or all banks of the SDRAM array are enabled. Disabled banks are not refreshed in self-refresh mode. This parameter must be set according to the SDRAM device specification. After initialization, as soon as PASR field is modified and self-refresh mode is activated, the Extended Mode Register is accessed automatically and PASR bits are updated before entry in self-refresh mode. (cid:129) TCSR: Temperature Compensated Self-Refresh (only for low-power SDRAM) TCSR parameter is transmitted to the SDRAM during initialization to set the refresh interval during self-refresh mode depending on the temperature of the low-power SDRAM. This parameter must be set according to the SDRAM device specification. After initialization, as soon as TCSR field is modified and self-refresh mode is activated, the Extended Mode Register is accessed automatically and TCSR bits are updated before entry in self-refresh mode. (cid:129) DS: Drive Strength (only for low-power SDRAM) DS parameter is transmitted to the SDRAM during initialization to select the SDRAM strength of data output. This parame- ter must be set according to the SDRAM device specification. 430 32058K AVR32-01/12
AT32UC3A After initialization, as soon as DS field is modified and self-refresh mode is activated, the Extended Mode Register is accessed automatically and DS bits are updated before entry in self-refresh mode. (cid:129) TIMEOUT: Time to define when low-power mode is enabled 00 The SDRAM controller activates the SDRAM low-power mode immediately after the end of the last transfer. The SDRAM controller activates the SDRAM low-power mode 64 clock cycles after the end of the last 01 transfer. The SDRAM controller activates the SDRAM low-power mode 128 clock cycles after the end of the last 10 transfer. 11 Reserved. 431 32058K AVR32-01/12
AT32UC3A 28.8.6 SDRAMC Interrupt Enable Register Register Name: IER Access Type: Write-only 31 30 29 28 27 26 25 24 – – – – – – – – 23 22 21 20 19 18 17 16 – – – – – – – – 15 14 13 12 11 10 9 8 – – – – – – – – 7 6 5 4 3 2 1 0 – – – – – – – RES (cid:129) RES: Refresh Error Status 0: No effect. 1: Enables the refresh error interrupt. 432 32058K AVR32-01/12
AT32UC3A 28.8.7 SDRAMC Interrupt Disable Register Register Name: IDR Access Type: Write-only 31 30 29 28 27 26 25 24 – – – – – – – – 23 22 21 20 19 18 17 16 – – – – – – – – 15 14 13 12 11 10 9 8 – – – – – – – – 7 6 5 4 3 2 1 0 – – – – – – – RES (cid:129) RES: Refresh Error Status 0: No effect. 1: Disables the refresh error interrupt. 433 32058K AVR32-01/12
AT32UC3A 28.8.8 SDRAMC Interrupt Mask Register Register Name: IMR Access Type: Read-only 31 30 29 28 27 26 25 24 – – – – – – – – 23 22 21 20 19 18 17 16 – – – – – – – – 15 14 13 12 11 10 9 8 – – – – – – – – 7 6 5 4 3 2 1 0 – – – – – – – RES (cid:129) RES: Refresh Error Status 0: The refresh error interrupt is disabled. 1: The refresh error interrupt is enabled. 434 32058K AVR32-01/12
AT32UC3A 28.8.9 SDRAMC Interrupt Status Register Register Name: ISR Access Type: Read-only 31 30 29 28 27 26 25 24 – – – – – – – – 23 22 21 20 19 18 17 16 – – – – – – – – 15 14 13 12 11 10 9 8 – – – – – – – – 7 6 5 4 3 2 1 0 – – – – – – – RES (cid:129) RES: Refresh Error Status 0: No refresh error has been detected since the register was last read. 1: A refresh error has been detected since the register was last read. 435 32058K AVR32-01/12
AT32UC3A 28.8.10 SDRAMC Memory Device Register Register Name: MDR Access Type: Read/Write 31 30 29 28 27 26 25 24 – – – – – – – – 23 22 21 20 19 18 17 16 – – – – – – – – 15 14 13 12 11 10 9 8 – – – – – – – – 7 6 5 4 3 2 1 0 – – – – – – MD (cid:129) MD: Memory Device Type 00 SDRAM 01 Low-power SDRAM 10 Reserved 11 Reserved. 436 32058K AVR32-01/12
AT32UC3A 29. Ethernet MAC (MACB) Rev: 1.1.2.5 29.1 Features (cid:129) Compatible with IEEE Standard 802.3 (cid:129) 10 and 100 Mbit/s Operation (cid:129) Full- and Half-duplex Operation (cid:129) Statistics Counter Registers (cid:129) MII/RMII Interface to the Physical Layer (cid:129) Interrupt Generation to Signal Receive and Transmit Completion (cid:129) DMA Master on Receive and Transmit Channels (cid:129) Transmit and Receive FIFOs (cid:129) Automatic Pad and CRC Generation on Transmitted Frames (cid:129) Automatic Discard of Frames Received with Errors (cid:129) Address Checking Logic Supports Up to Four Specific 48-bit Addresses (cid:129) Supports Promiscuous Mode Where All Valid Received Frames are Copied to Memory (cid:129) Hash Matching of Unicast and Multicast Destination Addresses (cid:129) External Address Matching of Received Frames (cid:129) Physical Layer Management through MDIO Interface (cid:129) Half-duplex Flow Control by Forcing Collisions on Incoming Frames (cid:129) Full-duplex Flow Control with Recognition of Incoming Pause Frames and Hardware Generation of Transmitted Pause Frames (cid:129) Support for 802.1Q VLAN Tagging with Recognition of Incoming VLAN and Priority Tagged Frames (cid:129) Multiple Buffers per Receive and Transmit Frame (cid:129) Wake-on-LAN Support (cid:129) Jumbo Frames Up to 10240 bytes Supported 29.2 Description The MACB module implements a 10/100 Ethernet MAC compatible with the IEEE 802.3 stan- dard using an address checker, statistics and control registers, receive and transmit blocks, and a DMA interface. The address checker recognizes four specific 48-bit addresses and contains a 64-bit hash regis- ter for matching multicast and unicast addresses. It can recognize the broadcast address of all ones, copy all frames, and act on an external address match signal. The statistics register block contains registers for counting various types of events associated with transmit and receive operations. These registers, along with the status words stored in the receive buffer list, enable software to generate network management statistics compatible with IEEE 802.3. 437 32058K AVR32-01/12
AT32UC3A 29.3 Block Diagram Figure 29-1. MACB Block Diagram Address Checker Peripheral Bus Slave Register Interface Statistics Registers MDIO Control Registers DMA Interface RX FIFO TX FIFO Ethernet Receive MII/RMII High Speed Bus Master Ethernet Transmit 29.4 Product Dependencies 29.4.1 I/O Lines The pins used for interfacing the compliant external devices may be multiplexed with PIO lines. The programmer must first program the PIO controllers to assign the MACB pins to their periph- eral functions. 29.4.2 Power Management The MACB clock is generated by the Power Manager. Before using the MACB, the programmer must ensure that the MACB clock is enabled in the Power Manager. In the MACB description, Master Clock (MCK) is the clock of the peripheral bus to which the MACB is connected. The synchronization module in the MACB requires that the bus clock (hclk) runs on at least the speed of the macb_tx/rx_clk, which is 25MHz in 100Mbps, and 2.5MHZ in 10Mbps in MII mode and 50MHz in 100Mbps, and 5MHZ in 10Mbps in RMII mode. To prevent bus errors the MACB operation must be terminated before entering sleep mode. 438 32058K AVR32-01/12
AT32UC3A 29.4.3 Interrupt The MACB interface has an interrupt line connected to the Interrupt Controller. Handling the MACB interrupt requires programming the interrupt controller before configuring the MACB. 29.5 Functional Description Figure 29-1 on page 438 illustrates the different blocks of the MACB module. The control registers drive the MDIO interface, setup DMA activity, start frame transmission and select modes of operation such as full- or half-duplex. The receive block checks for valid preamble, FCS, alignment and length, and presents received frames to the address checking block and DMA interface. The transmit block takes data from the DMA interface, adds preamble and, if necessary, pad and FCS, and transmits data according to the CSMA/CD (carrier sense multiple access with col- lision detect) protocol. The start of transmission is deferred if CRS (carrier sense) is active. If COL (collision) becomes active during transmission, a jam sequence is asserted and the transmission is retried after a random back off. CRS and COL have no effect in full duplex mode. The DMA block connects to external memory through its high speed bus (HSB) interface. It con- tains receive and transmit FIFOs for buffering frame data. It loads the transmit FIFO and empties the receive FIFO using HSB bus master operations. Receive data is not sent to memory until the address checking logic has determined that the frame should be copied. Receive or transmit frames are stored in one or more buffers. Receive buffers have a fixed length of 128 bytes. Transmit buffers range in length between 0 and 2047 bytes, and up to 128 buffers are permitted per frame. The DMA block manages the transmit and receive framebuffer queues. These queues can hold multiple frames. 29.5.1 Memory Interface Frame data is transferred to and from the MACB through the DMA interface. All transfers are 32- bit words and may be single accesses or bursts of 2, 3 or 4 words. Burst accesses do not cross sixteen-byte boundaries. Bursts of 4 words are the default data transfer; single accesses or bursts of less than four words may be used to transfer data at the beginning or the end of a buffer. The DMA controller performs six types of operation on the bus. In order of priority, these are: 1. Receive buffer manager write 2. Receive buffer manager read 3. Transmit data DMA read 4. Receive data DMA write 5. Transmit buffer manager read 6. Transmit buffer manager write 29.5.1.1 FIFO The FIFO depths are 124 bytes. Data is typically transferred into and out of the FIFOs in bursts of four words. For receive, a bus request is asserted when the FIFO contains four words and has space for three more. For trans- mit, a bus request is generated when there is space for four words, or when there is space for two words if the next transfer is to be only one or two words. 439 32058K AVR32-01/12
AT32UC3A Thus the bus latency must be less than the time it takes to load the FIFO and transmit or receive three words (12 bytes) of data. At 100 Mbit/s, it takes 960 ns to transmit or receive 12 bytes of data. In addition, six master clock cycles should be allowed for data to be loaded from the bus and to propagate through the FIFOs. For a 60 MHz master clock this takes 100 ns, making the bus latency requirement 860 ns. 29.5.1.2 Receive Buffers Received frames, optionally including CRC/FCS, are written to receive buffers stored in mem- ory. Each receive buffer is 128 bytes long. The start location for each receive buffer is stored in memory in a list of receive buffer descriptors at a location pointed to by the receive buffer queue pointer register. The receive buffer start location is a word address. For the first buffer of a frame, the start location can be offset by up to three bytes depending on the value written to bits 14 and 15 of the network configuration register. If the start location of the buffer is offset the available length of the first buffer of a frame is reduced by the corresponding number of bytes. Each list entry consists of two words, the first being the address of the receive buffer and the second being the receive status. If the length of a receive frame exceeds the buffer length, the status word for the used buffer is written with zeroes except for the “start of frame” bit and the offset bits, if appropriate. Bit zero of the address field is written to one to show the buffer has been used. The receive buffer manager then reads the location of the next receive buffer and fills that with receive frame data. The final buffer descriptor status word contains the complete frame status. Refer to Table 29-1 for details of the receive buffer descriptor list. Table 29-1. Receive Buffer Descriptor Entry Bit Function Word 0 31:2 Address of beginning of buffer 1 Wrap - marks last descriptor in receive buffer descriptor list. Ownership - needs to be zero for the MACB to write data to the receive buffer. The MACB sets this to one once it has 0 successfully written a frame to memory. Software has to clear this bit before the buffer can be used again. Word 1 31 Global all ones broadcast address detected 30 Multicast hash match 29 Unicast hash match 28 External address match 27 Reserved for future use 26 Specific address register 1 match 25 Specific address register 2 match 24 Specific address register 3 match 23 Specific address register 4 match 22 Type ID match 21 VLAN tag detected (i.e., type id of 0x8100) 440 32058K AVR32-01/12
AT32UC3A Table 29-1. Receive Buffer Descriptor Entry (Continued) Bit Function 20 Priority tag detected (i.e., type id of 0x8100 and null VLAN identifier) 19:17 VLAN priority (only valid if bit 21 is set) 16 Concatenation format indicator (CFI) bit (only valid if bit 21 is set) End of frame - when set the buffer contains the end of a frame. If end of frame is not set, then the only other valid status 15 are bits 12, 13 and 14. Start of frame - when set the buffer contains the start of a frame. If both bits 15 and 14 are set, then the buffer contains a 14 whole frame. Receive buffer offset - indicates the number of bytes by which the data in the first buffer is offset from the word address. Updated with the current values of the network configuration register. If jumbo frame mode is enabled through bit 3 of the 13:12 network configuration register, then bits 13:12 of the receive buffer descriptor entry are used to indicate bits 13:12 of the frame length. 11:0 Length of frame including FCS (if selected). Bits 13:12 are also used if jumbo frame mode is selected. To receive frames, the buffer descriptors must be initialized by writing an appropriate address to bits 31 to 2 in the first word of each list entry. Bit zero must be written with zero. Bit one is the wrap bit and indicates the last entry in the list. The start location of the receive buffer descriptor list must be written to the receive buffer queue pointer register before setting the receive enable bit in the network control register to enable receive. As soon as the receive block starts writing received frame data to the receive FIFO, the receive buffer manager reads the first receive buffer location pointed to by the receive buffer queue pointer register. If the filter block then indicates that the frame should be copied to memory, the receive data DMA operation starts writing data into the receive buffer. If an error occurs, the buffer is recov- ered. If the current buffer pointer has its wrap bit set or is the 1024th descriptor, the next receive buffer location is read from the beginning of the receive descriptor list. Otherwise, the next receive buffer location is read from the next word in memory. There is an 11-bit counter to count out the 2048 word locations of a maximum length, receive buffer descriptor list. This is added with the value originally written to the receive buffer queue pointer register to produce a pointer into the list. A read of the receive buffer queue pointer reg- ister returns the pointer value, which is the queue entry currently being accessed. The counter is reset after receive status is written to a descriptor that has its wrap bit set or rolls over to zero after 1024 descriptors have been accessed. The value written to the receive buffer pointer regis- ter may be any word-aligned address, provided that there are at least 2048 word locations available between the pointer and the top of the memory. The System Bus specification states that bursts should not cross 1K boundaries. As receive buf- fer manager writes are bursts of two words, to ensure that this does not occur, it is best to write the pointer register with the least three significant bits set to zero. As receive buffers are used, the receive buffer manager sets bit zero of the first word of the descriptor to indicate used. If a receive error is detected the receive buffer currently being written is recovered. Previous buffers are not recovered. Software should search through the used bits in the buffer descriptors to find out how many frames have been received. It should be checking the start-of-frame and end-of- frame bits, and not rely on the value returned by the receive buffer queue pointer register which changes continuously as more buffers are used. 441 32058K AVR32-01/12
AT32UC3A For CRC errored frames, excessive length frames or length field mismatched frames, all of which are counted in the statistics registers, it is possible that a frame fragment might be stored in a sequence of receive buffers. Software can detect this by looking for start of frame bit set in a buffer following a buffer with no end of frame bit set. For a properly working Ethernet system, there should be no excessively long frames or frames greater than 128 bytes with CRC/FCS errors. Collision fragments are less than 128 bytes long. Therefore, it is a rare occurrence to find a frame fragment in a receive buffer. If bit zero is set when the receive buffer manager reads the location of the receive buffer, then the buffer has already been used and cannot be used again until software has processed the frame and cleared bit zero. In this case, the DMA block sets the buffer not available bit in the receive status register and triggers an interrupt. If bit zero is set when the receive buffer manager reads the location of the receive buffer and a frame is being received, the frame is discarded and the receive resource error statistics register is incremented. A receive overrun condition occurs when bus was not granted in time or because HRESP was not OK (bus error). In a receive overrun condition, the receive overrun interrupt is asserted and the buffer currently being written is recovered. The next frame received with an address that is recognized reuses the buffer. If bit 17 of the network configuration register is set, the FCS of received frames shall not be cop- ied to memory. The frame length indicated in the receive status field shall be reduced by four bytes in this case. 29.5.1.3 Transmit Buffer Frames to be transmitted are stored in one or more transmit buffers. Transmit buffers can be between 0 and 2047 bytes long, so it is possible to transmit frames longer than the maximum length specified in IEEE Standard 802.3. Zero length buffers are allowed. The maximum number of buffers permitted for each transmit frame is 128. The start location for each transmit buffer is stored in memory in a list of transmit buffer descrip- tors at a location pointed to by the transmit buffer queue pointer register. Each list entry consists of two words, the first being the byte address of the transmit buffer and the second containing the transmit control and status. Frames can be transmitted with or without automatic CRC gen- eration. If CRC is automatically generated, padding is also automatically generated to take frames to a minimum length of 64 bytes. Table 29-2 on page 443 defines an entry in the transmit buffer descriptor list. To transmit frames, the buffer descriptors must be initialized by writing an appropriate byte address to bits 31 to 0 in the first word of each list entry. The second transmit buffer descriptor is initialized with control information that indicates the length of the buffer, whether or not it is to be transmitted with CRC and whether the buffer is the last buffer in the frame. After transmission, the control bits are written back to the second word of the first buffer along with the “used” bit and other status information. Before a transmission, bit 31 is the “used” bit which must be zero when the control word is read. It is written to one when a frame has been transmitted. Bits 27, 28 and 29 indicate various transmit error conditions. Bit 30 is the “wrap” bit which can be set for any buffer within a frame. If no wrap bit is encountered after 1024 descrip- tors, the queue pointer rolls over to the start. The transmit buffer queue pointer register must not be written while transmit is active. If a new value is written to the transmit buffer queue pointer register, the queue pointer resets itself to 442 32058K AVR32-01/12
AT32UC3A point to the beginning of the new queue. If transmit is disabled by writing to bit 3 of the network control, the transmit buffer queue pointer register resets to point to the beginning of the transmit queue. Note that disabling receive does not have the same effect on the receive queue pointer. Once the transmit queue is initialized, transmit is activated by writing to bit 9, the Transmit Start bit of the network control register. Transmit is halted when a buffer descriptor with its used bit set is read, or if a transmit error occurs, or by writing to the transmit halt bit of the network control register. (Transmission is suspended if a pause frame is received while the pause enable bit is set in the network configuration register.) Rewriting the start bit while transmission is active is allowed. Transmission control is implemented with a Tx_go variable which is readable in the transmit sta- tus register at bit location 3. The Tx_go variable is reset when: – transmit is disabled – a buffer descriptor with its ownership bit set is read – a new value is written to the transmit buffer queue pointer register – bit 10, tx_halt, of the network control register is written – there is a transmit error such as too many retries or a transmit underrun. To set tx_go, write to bit 9, tx_start, of the network control register. Transmit halt does not take effect until any ongoing transmit finishes. If a collision occurs during transmission of a multi-buf- fer frame, transmission automatically restarts from the first buffer of the frame. If a “used” bit is read midway through transmission of a multi-buffer frame, this is treated as a transmit error. Transmission stops, tx_er is asserted and the FCS is bad. If transmission stops due to a transmit error, the transmit queue pointer resets to point to the beginning of the transmit queue. Software needs to re-initialize the transmit queue after a trans- mit error. If transmission stops due to a “used” bit being read at the start of the frame, the transmission queue pointer is not reset and transmit starts from the same transmit buffer descriptor when the transmit start bit is written Table 29-2. Transmit Buffer Descriptor Entry Bit Function Word 0 31:0 Byte Address of buffer Word 1 Used. Needs to be zero for the MACB to read data from the transmit buffer. The MACB sets this to one for the first buffer of a frame once it has been successfully transmitted. 31 Software has to clear this bit before the buffer can be used again. Note: This bit is only set for the first buffer in a frame unlike receive where all buffers have the Used bit set once used. 30 Wrap. Marks last descriptor in transmit buffer descriptor list. 29 Retry limit exceeded, transmit error detected Transmit underrun, occurs either when hresp is not OK (bus error) or the transmit data could not be fetched in time or 28 when buffers are exhausted in mid frame. 27 Buffers exhausted in mid frame 26:17 Reserved 443 32058K AVR32-01/12
AT32UC3A Table 29-2. Transmit Buffer Descriptor Entry (Continued) Bit Function 16 No CRC. When set, no CRC is appended to the current frame. This bit only needs to be set for the last buffer of a frame. 15 Last buffer. When set, this bit indicates the last buffer in the current frame has been reached. 14:11 Reserved 10:0 Length of buffer 29.5.2 Transmit Block This block transmits frames in accordance with the Ethernet IEEE 802.3 CSMA/CD protocol. Frame assembly starts by adding preamble and the start frame delimiter. Data is taken from the transmit FIFO a word at a time. Data is transmitted least significant nibble first. If necessary, padding is added to increase the frame length to 60 bytes. CRC is calculated as a 32-bit polyno- mial. This is inverted and appended to the end of the frame, taking the frame length to a minimum of 64 bytes. If the No CRC bit is set in the second word of the last buffer descriptor of a transmit frame, neither pad nor CRC are appended. In full-duplex mode, frames are transmitted immediately. Back-to-back frames are transmitted at least 96 bit times apart to guarantee the interframe gap. In half-duplex mode, the transmitter checks carrier sense. If asserted, it waits for it to de-assert and then starts transmission after the interframe gap of 96 bit times. If the collision signal is asserted during transmission, the transmitter transmits a jam sequence of 32 bits taken from the data register and retries transmission after the back off time has elapsed. The back-off time is based on an XOR of the 10 least significant bits of the data coming from the transmit FIFO and a 10-bit pseudo random number. The number of bits used depends on the number of collisions seen. After the first collision, 1 bit is used, after the second 2, and so on up to 10. Above 10, all 10 bits are used. An error is indicated and no further attempts are made if 16 attempts cause collisions. If transmit DMA underruns, bad CRC is automatically appended using the same mechanism as jam insertion and the TX_ER signal is asserted. In a properly configured system, this should never happen. If the back pressure bit is set in the network control register in half duplex mode, the transmit block transmits 64 bits of data, which can consist of 16 nibbles of 1011 or in bit-rate mode 64 1s, whenever it sees an incoming frame to force a collision. This provides a way of implementing flow control in half-duplex mode. 29.5.3 Pause Frame Support The start of an 802.3 pause frame is as follows: Table 29-3. Start of an 802.3 Pause Frame Source Type Pause Destination Address Address (Mac Control Frame) Opcode Pause Time 0x0180C2000001 6 bytes 0x8808 0x0001 2 bytes The network configuration register contains a receive pause enable bit (13). If a valid pause frame is received, the pause time register is updated with the frame’s pause time, regardless of 444 32058K AVR32-01/12
AT32UC3A its current contents and regardless of the state of the configuration register bit 13. An interrupt (12) is triggered when a pause frame is received, assuming it is enabled in the interrupt mask register. If bit 13 is set in the network configuration register and the value of the pause time reg- ister is non-zero, no new frame is transmitted until the pause time register has decremented to zero. The loading of a new pause time, and hence the pausing of transmission, only occurs when the MACB is configured for full-duplex operation. If the MACB is configured for half-duplex, there is no transmission pause, but the pause frame received interrupt is still triggered. A valid pause frame is defined as having a destination address that matches either the address stored in specific address register 1 or matches 0x0180C2000001 and has the MAC control frame type ID of 0x8808 and the pause opcode of 0x0001. Pause frames that have FCS or other errors are treated as invalid and are discarded. Valid pause frames received increment the Pause Frame Received statistic register. The pause time register decrements every 512 bit times (i.e., 128 rx_clks in nibble mode) once transmission has stopped. For test purposes, the register decrements every rx_clk cycle once transmission has stopped if bit 12 (retry test) is set in the network configuration register. If the pause enable bit (13) is not set in the network configuration register, then the decrementing occurs regardless of whether transmission has stopped or not. An interrupt (13) is asserted whenever the pause time register decrements to zero (assuming it is enabled in the interrupt mask register). Automatic transmission of pause frames is supported through the transmit pause frame bits of the network control register and the tx_pause and tx_pause_zero inputs. If either bit 11 or bit 12 of the network control register is written to with a 1, or if the input signal tx_pause is toggled, a pause frame is transmitted only if full duplex is selected in the network configuration register and transmit is enabled in the network control register. Pause frame transmission occurs immediately if transmit is inactive or if transmit is active between the current frame and the next frame due to be transmitted. The transmitted pause frame is comprised of the items in the following list: (cid:129) a destination address of 01-80-C2-00-00-01 (cid:129) a source address taken from the specific address 1 register (cid:129) a type ID of 88-08 (MAC control frame) (cid:129) a pause opcode of 00-01 (cid:129) a pause quantum (cid:129) fill of 00 to take the frame to minimum frame length (cid:129) valid FCS The pause quantum used in the generated frame depends on the trigger source for the frame as follows: 1. If bit 11 is written with a one, the pause quantum comes from the transmit pause quan- tum register. The Transmit Pause Quantum register resets to a value of 0xFFFF giving a maximum pause quantum as a default. 2. If bit 12 is written with a one, the pause quantum is zero. 3. If the tx_pause input is toggled and the tx_pause_zero input is held low until the next toggle, the pause quantum comes from the transmit pause quantum register. 4. If the tx_pause input is toggled and the tx_pause_zero input is held high until the next toggle, the pause quantum is zero. 445 32058K AVR32-01/12
AT32UC3A After transmission, no interrupts are generated and the only statistics register that is incre- mented is the pause frames transmitted register. 29.5.4 Receive Block The receive block checks for valid preamble, FCS, alignment and length, presents received frames to the DMA block and stores the frames destination address for use by the address checking block. If, during frame reception, the frame is found to be too long or rx_er is asserted, a bad frame indication is sent to the DMA block. The DMA block then ceases sending data to memory. At the end of frame reception, the receive block indicates to the DMA block whether the frame is good or bad. The DMA block recovers the current receive buffer if the frame was bad. The receive block signals the register block to increment the alignment error, the CRC (FCS) error, the short frame, long frame, jabber error, the receive symbol error statistics and the length field mismatch statistics. The enable bit for jumbo frames in the network configuration register allows the MACB to receive jumbo frames of up to 10240 bytes in size. This operation does not form part of the IEEE802.3 specification and is disabled by default. When jumbo frames are enabled, frames received with a frame size greater than 10240 bytes are discarded. 29.5.5 Address Checking Block The address checking (or filter) block indicates to the DMA block which receive frames should be copied to memory. Whether a frame is copied depends on what is enabled in the network configuration register, the state of the external match pin, the contents of the specific address and hash registers and the frame’s destination address. In this implementation of the MACB, the frame’s source address is not checked. Provided that bit 18 of the Network Configuration regis- ter is not set, a frame is not copied to memory if the MACB is transmitting in half duplex mode at the time a destination address is received. If bit 18 of the Network Configuration register is set, frames can be received while transmitting in half-duplex mode. Ethernet frames are transmitted a byte at a time, least significant bit first. The first six bytes (48 bits) of an Ethernet frame make up the destination address. The first bit of the destination address, the LSB of the first byte of the frame, is the group/individual bit: this is One for multicast addresses and Zero for unicast. The All Ones address is the broadcast address, and a special case of multicast. The MACB supports recognition of four specific addresses. Each specific address requires two registers, specific address register bottom and specific address register top. Specific address register bottom stores the first four bytes of the destination address and specific address register top contains the last two bytes. The addresses stored can be specific, group, local or universal. The destination address of received frames is compared against the data stored in the specific address registers once they have been activated. The addresses are deactivated at reset or when their corresponding specific address register bottom is written. They are activated when specific address register top is written. If a receive frame address matches an active address, the frame is copied to memory. 446 32058K AVR32-01/12
AT32UC3A The following example illustrates the use of the address match registers for a MAC address of 21:43:65:87:A9:CB. Preamble 55 SFD D5 DA (Octet0 - LSB) 21 DA(Octet 1) 43 DA(Octet 2) 65 DA(Octet 3) 87 DA(Octet 4) A9 DA (Octet5 - MSB) CB SA (LSB) 00 SA 00 SA 00 SA 00 SA 00 SA (MSB) 43 SA (LSB) 21 The sequence above shows the beginning of an Ethernet frame. Byte order of transmission is from top to bottom as shown. For a successful match to specific address 1, the following address matching registers must be set up: (cid:129) Base address + 0x98 0x87654321 (Bottom) (cid:129) Base address + 0x9C 0x0000CBA9 (Top) And for a successful match to the Type ID register, the following should be set up: (cid:129) Base address + 0xB8 0x00004321 29.5.6 Broadcast Address The broadcast address of 0xFFFFFFFFFFFF is recognized unless the ‘no broadcast’ bit in the network configuration register is set. 29.5.7 Hash Addressing The hash address register is 64 bits long and takes up two locations in the memory map. The least significant bits are stored in hash register bottom and the most significant bits in hash reg- ister top. The unicast hash enable and the multicast hash enable bits in the network configuration register enable the reception of hash matched frames. The destination address is reduced to a 6-bit index into the 64-bit hash register using the following hash function. The hash function is an exclusive or of every sixth bit of the destination address. 447 32058K AVR32-01/12
AT32UC3A hash_index[5] = da[5] ^ da[11] ^ da[17] ^ da[23] ^ da[29] ^ da[35] ^ da[41] ^ da[47] hash_index[4] = da[4] ^ da[10] ^ da[16] ^ da[22] ^ da[28] ^ da[34] ^ da[40] ^ da[46] hash_index[3] = da[3] ^ da[09] ^ da[15] ^ da[21] ^ da[27] ^ da[33] ^ da[39] ^ da[45] hash_index[2] = da[2] ^ da[08] ^ da[14] ^ da[20] ^ da[26] ^ da[32] ^ da[38] ^ da[44] hash_index[1] = da[1] ^ da[07] ^ da[13] ^ da[19] ^ da[25] ^ da[31] ^ da[37] ^ da[43] hash_index[0] = da[0] ^ da[06] ^ da[12] ^ da[18] ^ da[24] ^ da[30] ^ da[36] ^ da[42] da[0] represents the least significant bit of the first byte received, that is, the multicast/unicast indicator, and da[47] represents the most significant bit of the last byte received. If the hash index points to a bit that is set in the hash register, then the frame is matched accord- ing to whether the frame is multicast or unicast. A multicast match is signalled if the multicast hash enable bit is set. da[0] is 1 and the hash index points to a bit set in the hash register. A unicast match is signalled if the unicast hash enable bit is set. da[0] is 0 and the hash index points to a bit set in the hash register. To receive all multicast frames, the hash register should be set with all ones and the multicast hash enable bit should be set in the network configuration register. 29.5.8 External Address Matching The external address signal (eam) is enabled by bit 9 in the network configuration register. When enabled, the filter block sends the store frame and the external address match status sig- nal to the DMA block if the external address match signal is asserted (from a source external to the MACB) and the destination address has been received and the frame has not completed. For the DMA block to be able to copy the frame to memory, the external address signal must be asserted before four words have been loaded into the receive FIFO. 29.5.9 Copy All Frames (or Promiscuous Mode) If the copy all frames bit is set in the network configuration register, then all non-errored frames are copied to memory. For example, frames that are too long, too short, or have FCS errors or rx_er asserted during reception are discarded and all others are received. Frames with FCS errors are copied to memory if bit 19 in the network configuration register is set. 29.5.10 Type ID Checking The contents of the type_id register are compared against the length/type ID of received frames (i.e., bytes 13 and 14). Bit 22 in the receive buffer descriptor status is set if there is a match. The reset state of this register is zero which is unlikely to match the length/type ID of any valid Ether- net frame. Note: A type ID match does not affect whether a frame is copied to memory. 448 32058K AVR32-01/12
AT32UC3A 29.5.11 VLAN Support An Ethernet encoded 802.1Q VLAN tag looks like this: Table 29-4. 802.1Q VLAN Tag TPID (Tag Protocol Identifier) 16 bits TCI (Tag Control Information) 16 bits 0x8100 First 3 bits priority, then CFI bit, last 12 bits VID The VLAN tag is inserted at the 13th byte of the frame, adding an extra four bytes to the frame. If the VID (VLAN identifier) is null (0x000), this indicates a priority-tagged frame. The MAC can support frame lengths up to 1536 bytes, 18 bytes more than the original Ethernet maximum frame length of 1518 bytes. This is achieved by setting bit 8 in the network configuration register. The following bits in the receive buffer descriptor status word give information about VLAN tagged frames: (cid:129) Bit 21 set if receive frame is VLAN tagged (i.e. type id of 0x8100) (cid:129) Bit 20 set if receive frame is priority tagged (i.e. type id of 0x8100 and null VID). (If bit 20 is set bit 21 is set also.) (cid:129) Bit 19, 18 and 17 set to priority if bit 21 is set (cid:129) Bit 16 set to CFI if bit 21 is set 29.5.12 PHY Maintenance The register MAN enables the MACB to communicate with a PHY by means of the MDIO inter- face. It is used during auto-negotiation to ensure that the MACB and the PHY are configured for the same speed and duplex configuration. The PHY maintenance register is implemented as a shift register. Writing to the register starts a shift operation which is signalled as complete when bit two is set in the network status register (about 2000 MCK cycles later when bit ten is set to zero, and bit eleven is set to one in the net- work configuration register). An interrupt is generated as this bit is set. During this time, the MSB of the register is output on the MDIO pin and the LSB updated from the MDIO pin with each MDC cycle. This causes transmission of a PHY management frame on MDIO. Reading during the shift operation returns the current contents of the shift register. At the end of management operation, the bits have shifted back to their original locations. For a read opera- tion, the data bits are updated with data read from the PHY. It is important to write the correct values to the register to ensure a valid PHY management frame is produced. The MDIO interface can read IEEE 802.3 clause 45 PHYs as well as clause 22 PHYs. To read clause 45 PHYs, bits[31:28] should be written as 0x0011. For a description of MDC generation, see the network configuration register in the ”Network Control Register” on page 456. 29.5.13 Media Independent Interface The Ethernet MAC is capable of interfacing to both RMII and MII Interfaces. The RMII bit in the USRIO register controls the interface that is selected. When this bit is set, the RMII interface is selected, else the MII interface is selected. 449 32058K AVR32-01/12
AT32UC3A The MII and RMII interface are capable of both 10Mb/s and 100Mb/s data rates as described in the IEEE 802.3u standard. The signals used by the MII and RMII interfaces are described in Table 29-5. Table 29-5. Pin Configuration Pin Name MII RMII ETXCK_EREFCK ETXCK: Transmit Clock EREFCK: Reference Clock ECRS ECRS: Carrier Sense ECOL ECOL: Collision Detect ERXDV ERXDV: Data Valid ECRSDV: Carrier Sense/Data Valid ERX0 - ERX3 ERX0 - ERX3: 4-bit Receive Data ERX0 - ERX1: 2-bit Receive Data ERXER ERXER: Receive Error ERXER: Receive Error ERXCK ERXCK: Receive Clock ETXEN ETXEN: Transmit Enable ETXEN: Transmit Enable ETX0-ETX3 ETX0 - ETX3: 4-bit Transmit Data ETX0 - ETX1: 2-bit Transmit Data ETXER ETXER: Transmit Error The intent of the RMII is to provide a reduced pin count alternative to the IEEE 802.3u MII. It uses 2 bits for transmit (ETX0 and ETX1) and two bits for receive (ERX0 and ERX1). There is a Transmit Enable (ETXEN), a Receive Error (ERXER), a Carrier Sense (ECRS_DV), and a 50 MHz Reference Clock (ETXCK_EREFCK) for 100Mb/s data rate. 29.5.13.1 RMII Transmit and Receive Operation The same signals are used internally for both the RMII and the MII operations. The RMII maps these signals in a more pin-efficient manner. The transmit and receive bits are converted from a 4-bit parallel format to a 2-bit parallel scheme that is clocked at twice the rate. The carrier sense and data valid signals are combined into the ECRSDV signal. This signal contains information on carrier sense, FIFO status, and validity of the data. Transmit error bit (ETXER) and collision detect (ECOL) are not used in RMII mode. 450 32058K AVR32-01/12
AT32UC3A 29.6 Programming Interface 29.6.1 Initialization 29.6.1.1 Configuration Initialization of the MACB configuration (e.g. frequency ratios) must be done while the transmit and receive circuits are disabled. See the description of the network control register and network configuration register later in this document. 29.6.1.2 Receive Buffer List Receive data is written to areas of data (i.e., buffers) in system memory. These buffers are listed in another data structure that also resides in main memory. This data structure (receive buffer queue) is a sequence of descriptor entries as defined in ”Receive Buffer Descriptor Entry” on page 440. It points to this data structure. Figure 29-2. Receive Buffer List Receive Buffer 0 Receive Buffer Queue Pointer (MAC Register) Receive Buffer 1 Receive Buffer N Receive Buffer Descriptor List (In memory) (In memory) To create the list of buffers: 1. Allocate a number (n) of buffers of 128 bytes in system memory. 2. Allocate an area 2n words for the receive buffer descriptor entry in system memory and create n entries in this list. Mark all entries in this list as owned by MACB, i.e., bit 0 of word 0 set to 0. 3. If less than 1024 buffers are defined, the last descriptor must be marked with the wrap bit (bit 1 in word 0 set to 1). 4. Write address of receive buffer descriptor entry to MACB register receive_buffer queue pointer. 5. The receive circuits can then be enabled by writing to the address recognition registers and then to the network control register. 451 32058K AVR32-01/12
AT32UC3A 29.6.1.3 Transmit Buffer List Transmit data is read from the system memory These buffers are listed in another data structure that also resides in main memory. This data structure (Transmit Buffer Queue) is a sequence of descriptor entries (as defined in Table 29-2 on page 443) that points to this data structure. To create this list of buffers: 1. Allocate a number (n) of buffers of between 1 and 2047 bytes of data to be transmitted in system memory. Up to 128 buffers per frame are allowed. 2. Allocate an area 2n words for the transmit buffer descriptor entry in system memory and create N entries in this list. Mark all entries in this list as owned by MACB, i.e. bit 31 of word 1 set to 0. 3. If fewer than 1024 buffers are defined, the last descriptor must be marked with the wrap bit — bit 30 in word 1 set to 1. 4. Write address of transmit buffer descriptor entry to MACB register transmit_buffer queue pointer. 5. The transmit circuits can then be enabled by writing to the network control register. 29.6.1.4 Address Matching The MACB register-pair hash address and the four specific address register-pairs must be writ- ten with the required values. Each register-pair comprises a bottom register and top register, with the bottom register being written first. The address matching is disabled for a particular reg- ister-pair after the bottom-register has been written and re-enabled when the top register is written. See Section “29.5.5” on page 446. for details of address matching. Each register-pair may be written at any time, regardless of whether the receive circuits are enabled or disabled. 29.6.1.5 Interrupts There are 14 interrupt conditions that are detected within the MACB. These are ORed to make a single interrupt. This interrupt is passed to the interrupt controller. On receipt of the interrupt sig- nal, the CPU enters the interrupt handler. To ascertain which interrupt has been generated, read the interrupt status register. Note that this register clears itself when read. At reset, all interrupts are disabled. To enable an interrupt, write to interrupt enable register with the pertinent interrupt bit set to 1. To disable an interrupt, write to interrupt disable register with the pertinent interrupt bit set to 1. To check whether an interrupt is enabled or disabled, read interrupt mask register: if the bit is set to 1, the interrupt is disabled. 29.6.1.6 Transmitting Frames To set up a frame for transmission: 1. Enable transmit in the network control register. 2. Allocate an area of system memory for transmit data. This does not have to be contigu- ous, varying byte lengths can be used as long as they conclude on byte borders. 3. Set-up the transmit buffer list. 4. Set the network control register to enable transmission and enable interrupts. 5. Write data for transmission into these buffers. 6. Write the address to transmit buffer descriptor queue pointer. 7. Write control and length to word one of the transmit buffer descriptor entry. 8. Write to the transmit start bit in the network control register. 452 32058K AVR32-01/12
AT32UC3A 29.6.1.7 Receiving Frames When a frame is received and the receive circuits are enabled, the MACB checks the address and, in the following cases, the frame is written to system memory: (cid:129) if it matches one of the four specific address registers. (cid:129) if it matches the hash address function. (cid:129) if it is a broadcast address (0xFFFFFFFFFFFF) and broadcasts are allowed. (cid:129) if the MACB is configured to copy all frames. (cid:129) if the EAM is asserted before four words have been loaded into the receive FIFO. The register receive buffer queue pointer points to the next entry (see Table 29-1 on page 440) and the MACB uses this as the address in system memory to write the frame to. Once the frame has been completely and successfully received and written to system memory, the MACB then updates the receive buffer descriptor entry with the reason for the address match and marks the area as being owned by software. Once this is complete an interrupt receive complete is set. Software is then responsible for handling the data in the buffer and then releasing the buffer by writing the ownership bit back to 0. If the MACB is unable to write the data at a rate to match the incoming frame, then an interrupt receive overrun is set. If there is no receive buffer available, i.e., the next buffer is still owned by software, the interrupt receive buffer not available is set. If the frame is not successfully received, a statistic register is incremented and the frame is discarded without informing software. 453 32058K AVR32-01/12
AT32UC3A 29.7 Ethernet MAC (MACB) User Interface Table 29-6. Ethernet MAC (MACB) Register Mapping Offset Register Name Access Reset Value 0x00 Network Control Register NCR Read/Write 0 0x04 Network Configuration Register NCFG Read/Write 0x800 0x08 Network Status Register NSR Read-only - 0x0C Reserved 0x10 Reserved 0x14 Transmit Status Register TSR Read/Write 0x0000_0000 0x18 Receive Buffer Queue Pointer Register RBQP Read/Write 0x0000_0000 0x1C Transmit Buffer Queue Pointer Register TBQP Read/Write 0x0000_0000 0x20 Receive Status Register RSR Read/Write 0x0000_0000 0x24 Interrupt Status Register ISR Read/Write 0x0000_0000 0x28 Interrupt Enable Register IER Write-only - 0x2C Interrupt Disable Register IDR Write-only - 0x30 Interrupt Mask Register IMR Read-only 0x0000_3FFF 0x34 Phy Maintenance Register MAN Read/Write 0x0000_0000 0x38 Pause Time Register PTR Read/Write 0x0000_0000 0x3C Pause Frames Received Register PFR Read/Write 0x0000_0000 0x40 Frames Transmitted Ok Register FTO Read/Write 0x0000_0000 0x44 Single Collision Frames Register SCF Read/Write 0x0000_0000 0x48 Multiple Collision Frames Register MCF Read/Write 0x0000_0000 0x4C Frames Received Ok Register FRO Read/Write 0x0000_0000 0x50 Frame Check Sequence Errors Register FCSE Read/Write 0x0000_0000 0x54 Alignment Errors Register ALE Read/Write 0x0000_0000 0x58 Deferred Transmission Frames Register DTF Read/Write 0x0000_0000 0x5C Late Collisions Register LCOL Read/Write 0x0000_0000 0x60 Excessive Collisions Register EXCOL Read/Write 0x0000_0000 0x64 Transmit Underrun Errors Register TUND Read/Write 0x0000_0000 0x68 Carrier Sense Errors Register CSE Read/Write 0x0000_0000 0x6C Receive Resource Errors Register RRE Read/Write 0x0000_0000 0x70 Receive Overrun Errors Register ROV Read/Write 0x0000_0000 0x74 Receive Symbol Errors Register RSE Read/Write 0x0000_0000 0x78 Excessive Length Errors Register ELE Read/Write 0x0000_0000 0x7C Receive Jabbers Register RJA Read/Write 0x0000_0000 0x80 Undersize Frames Register USF Read/Write 0x0000_0000 0x84 SQE Test Errors Register STE Read/Write 0x0000_0000 0x88 Received Length Field Mismatch Register RLE Read/Write 0x0000_0000 454 32058K AVR32-01/12
AT32UC3A Table 29-6. Ethernet MAC (MACB) Register Mapping (Continued) Offset Register Name Access Reset Value 0x8C Transmitted Pause Frames Register TPF Read/Write 0x0000_0000 0x90 Hash Register Bottom [31:0] Register HRB Read/Write 0x0000_0000 0x94 Hash Register Top [63:32] Register HRT Read/Write 0x0000_0000 0x98 Specific Address 1 Bottom Register SA1B Read/Write 0x0000_0000 0x9C Specific Address 1 Top Register SA1T Read/Write 0x0000_0000 0xA0 Specific Address 2 Bottom Register SA2B Read/Write 0x0000_0000 0xA4 Specific Address 2 Top Register SA2T Read/Write 0x0000_0000 0xA8 Specific Address 3 Bottom Register SA3B Read/Write 0x0000_0000 0xAC Specific Address 3 Top Register SA3T Read/Write 0x0000_0000 0xB0 Specific Address 4 Bottom Register SA4B Read/Write 0x0000_0000 0xB4 Specific Address 4 Top Register SA4T Read/Write 0x0000_0000 0xB8 Type ID Checking Register TID Read/Write 0x0000_0000 0xBC Transmit Pause Quantum Register TPQ Read/Write 0x0000_FFFF 0xC0 User Input/output Register USRIO Read/Write 0x0000_0000 0xC4 Wake on LAN Register WOL Read/Write 0x0000_0000 0xC8 - 0xFC Reserved – – – 455 32058K AVR32-01/12
AT32UC3A 29.7.1 Network Control Register Register Name: NCR Access Type: Read/Write 31 30 29 28 27 26 25 24 – – – – – – – – 23 22 21 20 19 18 17 16 – – – – – – – – 15 14 13 12 11 10 9 8 – – – TZQ TPF THALT TSTART BP 7 6 5 4 3 2 1 0 WESTAT INCSTAT CLRSTAT MPE TE RE LLB LB (cid:129) LB: LoopBack Asserts the loopback signal to the PHY. (cid:129) LLB: LoopBack Local connects txd to rxd, tx_en to rx_dv, forces full duplex and drives rx_clk and tx_clk with pclk divided by 4. rx_clk and tx_clk may glitch as the MACB is switched into and out of internal loop back. It is important that receive and transmit circuits have already been disabled when making the switch into and out of internal loop back. This function may not be supported by some instantiations of the MACB. (cid:129) RE: Receive enable When set, enables the MACB to receive data. When reset, frame reception stops immediately and the receive FIFO is cleared. The receive queue pointer register is unaffected. (cid:129) TE: Transmit enable When set, enables the Ethernet transmitter to send data. When reset, transmission stops immediately, the transmit FIFO and control registers are cleared and the transmit queue pointer register resets to point to the start of the transmit descrip- tor list. (cid:129) MPE: Management port enable Set to one to enable the management port. When zero, forces MDIO to high impedance state and MDC low. (cid:129) CLRSTAT: Clear statistics registers This bit is write only. Writing a one clears the statistics registers. (cid:129) INCSTAT: Increment statistics registers This bit is write only. Writing a one increments all the statistics registers by one for test purposes. (cid:129) WESTAT: Write enable for statistics registers Setting this bit to one makes the statistics registers writable for functional test purposes. (cid:129) BP: Back pressure If set in half duplex mode, forces collisions on all received frames. 456 32058K AVR32-01/12
AT32UC3A (cid:129) TSTART: Start transmission Writing one to this bit starts transmission. (cid:129) THALT: Transmit halt Writing one to this bit halts transmission as soon as any ongoing frame transmission ends. (cid:129) TPF: Transmit pause frame Writing one to this bit transmits a pause frame with the pause quantum from the transmit pause quantum register at the next available transmitter idle time. (cid:129) TZQ: Transmit zero quantum pause frame Writing a one to this bit transmits a pause frame with zero pause quantum at the next available transmitter idle time. 457 32058K AVR32-01/12
AT32UC3A 29.7.2 Network Configuration Register Register Name: NCFGR Access Type: Read/Write 31 30 29 28 27 26 25 24 – – – – – – – – 23 22 21 20 19 18 17 16 – – – – IRXFCS EFRHD DRFCS RLCE 15 14 13 12 11 10 9 8 RBOF PAE RTY CLK EAE BIG 7 6 5 4 3 2 1 0 UNI MTI NBC CAF JFRAME Bit rate FD SPD (cid:129) SPD: Speed Set to 1 to indicate 100 Mbit/s operation, 0 for 10 Mbit/s. The value of this pin is reflected on the speed pin. (cid:129) FD: Full Duplex If set to 1, the transmit block ignores the state of collision and carrier sense and allows receive while transmitting. Also con- trols the half_duplex pin. (cid:129) Bit rate: If set to 1 to configure the interface for serial operation. Must be set before receive and transmit enable in the network con- trol register. If set a serial interface is configured with transmit and receive data being driven out on txd[0] and received on rxd[0] serially. Also the crs and rx_dv are logically ORed together so either may be used as the data valid signal. (cid:129) CAF: Copy All Frames When set to 1, all valid frames are received. (cid:129) JFRAME: Jumbo Frames Set to one to enable jumbo frames of up to 10240 bytes to be accepted. (cid:129) NBC: No Broadcast When set to 1, frames addressed to the broadcast address of all ones are not received. (cid:129) MTI: Multicast Hash Enable When set, multicast frames are received when the 6-bit hash function of the destination address points to a bit that is set in the hash register. (cid:129) UNI: Unicast Hash Enable When set, unicast frames are received when the 6-bit hash function of the destination address points to a bit that is set in the hash register. (cid:129) BIG: Receive 1536 bytes frames Setting this bit means the MACB receives frames up to 1536 bytes in length. Normally, the MACB would reject any frame above 1518 bytes. (cid:129) EAE: External address match enable When set, the eam pin can be used to copy frames to memory. 458 32058K AVR32-01/12
AT32UC3A (cid:129) CLK: MDC clock divider Set according to system clock speed. This determines by what number system clock is divided to generate MDC. For conformance with 802.3, MDC must not exceed 2.5MHz (MDC is only active during MDIO read and write operations). CLK MDC 00 MCK divided by 8 (MCK up to 20 MHz) 01 MCK divided by 16 (MCK up to 40 MHz) 10 MCK divided by 32 (MCK up to 80 MHz) 11 MCK divided by 64 (MCK up to 160 MHz) (cid:129) RTY: Retry test Must be set to zero for normal operation. If set to one, the back off between collisions is always one slot time. Setting this bit to one helps testing the too many retries condition. Also used in the pause frame tests to reduce the pause counters decrement time from 512 bit times, to every rx_clk cycle. (cid:129) PAE: Pause Enable When set, transmission pauses when a valid pause frame is received. (cid:129) RBOF: Receive Buffer Offset Indicates the number of bytes by which the received data is offset from the start of the first receive buffer. RBOF Offset 00 No offset from start of receive buffer 01 One-byte offset from start of receive buffer 10 Two-byte offset from start of receive buffer 11 Three-byte offset from start of receive buffer (cid:129) RLCE: Receive Length field Checking Enable When set, frames with measured lengths shorter than their length fields are discarded. Frames containing a type ID in bytes 13 and 14 — length/type ID = 0600 — are not be counted as length errors. (cid:129) DRFCS: Discard Receive FCS When set, the FCS field of received frames will not be copied to memory. (cid:129) EFRHD: Enable Frames to be received in half-duplex mode while transmitting. (cid:129) IRXFCS: Ignore RX FCS When set, frames with FCS/CRC errors are not rejected and no FCS error statistics are counted. For normal operation, this bit must be set to 0. 459 32058K AVR32-01/12
AT32UC3A 29.7.3 Network Status Register Register Name: NSR Access Type: Read-only 31 30 29 28 27 26 25 24 – – – – – – – – 23 22 21 20 19 18 17 16 – – – – – – – – 15 14 13 12 11 10 9 8 – – – – – – – – 7 6 5 4 3 2 1 0 – – – – – IDLE MDIO - (cid:129) MDIO Returns status of the mdio_in pin. Use the PHY maintenance register for reading managed frames rather than this bit. (cid:129) IDLE 0 = The PHY logic is running. 1 = The PHY management logic is idle (i.e., has completed). 460 32058K AVR32-01/12
AT32UC3A 29.7.4 Transmit Status Register Register Name: TSR Access Type: Read/Write 31 30 29 28 27 26 25 24 – – – – – – – – 23 22 21 20 19 18 17 16 – – – – – – – – 15 14 13 12 11 10 9 8 – – – – – – – – 7 6 5 4 3 2 1 0 – UND COMP BEX TGO RLE COL UBR This register, when read, provides details of the status of a transmit. Once read, individual bits may be cleared by writing 1 to them. It is not possible to set a bit to 1 by writing to the register. (cid:129) UBR: Used Bit Read Set when a transmit buffer descriptor is read with its used bit set. Cleared by writing a one to this bit. (cid:129) COL: Collision Occurred Set by the assertion of collision. Cleared by writing a one to this bit. (cid:129) RLE: Retry Limit exceeded Cleared by writing a one to this bit. (cid:129) TGO: Transmit Go If high transmit is active. (cid:129) BEX: Buffers exhausted mid frame If the buffers run out during transmission of a frame, then transmission stops, FCS shall be bad and tx_er asserted. Cleared by writing a one to this bit. (cid:129) COMP: Transmit Complete Set when a frame has been transmitted. Cleared by writing a one to this bit. (cid:129) UND: Transmit Underrun Set when transmit DMA was not able to read data from memory, either because the bus was not granted in time, because a not OK hresp(bus error) was returned or because a used bit was read midway through frame transmission. If this occurs, the transmitter forces bad CRC. Cleared by writing a one to this bit. 461 32058K AVR32-01/12
AT32UC3A 29.7.5 Receive Buffer Queue Pointer Register Register Name: RBQP Access Type: Read/Write 31 30 29 28 27 26 25 24 ADDR 23 22 21 20 19 18 17 16 ADDR 15 14 13 12 11 10 9 8 ADDR 7 6 5 4 3 2 1 0 ADDR – – This register points to the entry in the receive buffer queue (descriptor list) currently being used. It is written with the start location of the receive buffer descriptor list. The lower order bits increment as buffers are used up and wrap to their original values after either 1024 buffers or when the wrap bit of the entry is set. Reading this register returns the location of the descriptor currently being accessed. This value increments as buffers are used. Software should not use this register for determining where to remove received frames from the queue as it con- stantly changes as new frames are received. Software should instead work its way through the buffer descriptor queue checking the used bits. Receive buffer writes also comprise bursts of two words and, as with transmit buffer reads, it is recommended that bit 2 is always written with zero to prevent a burst crossing a 1K boundary, in violation of the System Bus specification. (cid:129) ADDR: Receive buffer queue pointer address Written with the address of the start of the receive queue, reads as a pointer to the current buffer being used. 462 32058K AVR32-01/12
AT32UC3A 29.7.6 Transmit Buffer Queue Pointer Register Register Name: TBQP Access Type: Read/Write 31 30 29 28 27 26 25 24 ADDR 23 22 21 20 19 18 17 16 ADDR 15 14 13 12 11 10 9 8 ADDR 7 6 5 4 3 2 1 0 ADDR – – This register points to the entry in the transmit buffer queue (descriptor list) currently being used. It is written with the start location of the transmit buffer descriptor list. The lower order bits increment as buffers are used up and wrap to their original values after either 1024 buffers or when the wrap bit of the entry is set. This register can only be written when bit 3 in the transmit status register is low. As transmit buffer reads consist of bursts of two words, it is recommended that bit 2 is always written with zero to prevent a burst crossing a 1K boundary, in violation of the System Bus specification. (cid:129) ADDR: Transmit buffer queue pointer address Written with the address of the start of the transmit queue, reads as a pointer to the first buffer of the frame being transmit- ted or about to be transmitted. 463 32058K AVR32-01/12
AT32UC3A 29.7.7 Receive Status Register Register Name: RSR Access Type: Read/Write 31 30 29 28 27 26 25 24 – – – – – – – – 23 22 21 20 19 18 17 16 – – – – – – – – 15 14 13 12 11 10 9 8 – – – – – – – – 7 6 5 4 3 2 1 0 – – – – – OVR REC BNA This register, when read, provides details of the status of a receive. Once read, individual bits may be cleared by writing 1 to them. It is not possible to set a bit to 1 by writing to the register. (cid:129) BNA: Buffer Not Available An attempt was made to get a new buffer and the pointer indicated that it was owned by the processor. The DMA rereads the pointer each time a new frame starts until a valid pointer is found. This bit is set at each attempt that fails even if it has not had a successful pointer read since it has been cleared. Cleared by writing a one to this bit. (cid:129) REC: Frame Received One or more frames have been received and placed in memory. Cleared by writing a one to this bit. (cid:129) OVR: Receive Overrun The DMA block was unable to store the receive frame to memory, either because the bus was not granted in time or because a not OK hresp(bus error) was returned. The buffer is recovered if this happens. Cleared by writing a one to this bit. 464 32058K AVR32-01/12
AT32UC3A 29.7.8 Interrupt Status Register Register Name: ISR Access Type: Read/Write 31 30 29 28 27 26 25 24 – – – – – – – – 23 22 21 20 19 18 17 16 – – – – – – – – 15 14 13 12 11 10 9 8 – – PTZ PFR HRESP ROVR - – 7 6 5 4 3 2 1 0 TCOMP TXERR RLE TUND TXUBR RXUBR RCOMP MFD (cid:129) MFD: Management Frame Done The PHY maintenance register has completed its operation. Cleared on read. (cid:129) RCOMP: Receive Complete A frame has been stored in memory. Cleared on read. (cid:129) RXUBR: Receive Used Bit Read Set when a receive buffer descriptor is read with its used bit set. Cleared on read. (cid:129) TXUBR: Transmit Used Bit Read Set when a transmit buffer descriptor is read with its used bit set. Cleared on read. (cid:129) TUND: Ethernet Transmit Buffer Underrun The transmit DMA did not fetch frame data in time for it to be transmitted or hresp returned not OK. Also set if a used bit is read mid-frame or when a new transmit queue pointer is written. Cleared on read. (cid:129) RLE: Retry Limit Exceeded Cleared on read. (cid:129) TXERR: Transmit Error Transmit buffers exhausted in mid-frame - transmit error. Cleared on read. (cid:129) TCOMP: Transmit Complete Set when a frame has been transmitted. Cleared on read. (cid:129) ROVR: Receive Overrun Set when the receive overrun status bit gets set. Cleared on read. (cid:129) HRESP: Hresp not OK Set when the DMA block sees a bus error. Cleared on read. (cid:129) PFR: Pause Frame Received Indicates a valid pause has been received. Cleared on a read. (cid:129) PTZ: Pause Time Zero Set when the pause time register, 0x38 decrements to zero. Cleared on a read. 465 32058K AVR32-01/12
AT32UC3A 29.7.9 Interrupt Enable Register Register Name: IER 466 32058K AVR32-01/12
AT32UC3A Access Type: Write-only 31 30 29 28 27 26 25 24 – – – – – – – – 23 22 21 20 19 18 17 16 – – – – – – – – 15 14 13 12 11 10 9 8 – – PTZ PFR HRESP ROVR – 7 6 5 4 3 2 1 0 TCOMP TXERR RLE TUND TXUBR RXUBR RCOMP MFD (cid:129) MFD: Management Frame sent Enable management done interrupt. (cid:129) RCOMP: Receive Complete Enable receive complete interrupt. (cid:129) RXUBR: Receive Used Bit Read Enable receive used bit read interrupt. (cid:129) TXUBR: Transmit Used Bit Read Enable transmit used bit read interrupt. (cid:129) TUND: Ethernet Transmit Buffer Underrun Enable transmit underrun interrupt. (cid:129) RLE: Retry Limit Exceeded Enable retry limit exceeded interrupt. (cid:129) TXERR: Transmit Error Enable transmit buffers exhausted in mid-frame interrupt. (cid:129) TCOMP: Transmit Complete Enable transmit complete interrupt. (cid:129) ROVR: Receive Overrun Enable receive overrun interrupt. (cid:129) HRESP: Hresp not OK Enable Hresp not OK interrupt. (cid:129) PFR: Pause Frame Received Enable pause frame received interrupt. (cid:129) PTZ: Pause Time Zero Enable pause time zero interrupt. 467 32058K AVR32-01/12
AT32UC3A 29.7.10 Interrupt Disable Register Register Name: IDR Access Type: Write-only 31 30 29 28 27 26 25 24 – – – – – – – – 23 22 21 20 19 18 17 16 – – – – – – – – 15 14 13 12 11 10 9 8 – – PTZ PFR HRESP ROVR - – 7 6 5 4 3 2 1 0 TCOMP TXERR RLE TUND TXUBR RXUBR RCOMP MFD (cid:129) MFD: Management Frame sent Disable management done interrupt. (cid:129) RCOMP: Receive Complete Disable receive complete interrupt. (cid:129) RXUBR: Receive Used Bit Read Disable receive used bit read interrupt. (cid:129) TXUBR: Transmit Used Bit Read Disable transmit used bit read interrupt. (cid:129) TUND: Ethernet Transmit Buffer Underrun Disable transmit underrun interrupt. (cid:129) RLE: Retry Limit Exceeded Disable retry limit exceeded interrupt. (cid:129) TXERR: Transmit Error Disable transmit buffers exhausted in mid-frame interrupt. (cid:129) TCOMP: Transmit Complete Disable transmit complete interrupt. (cid:129) ROVR: Receive Overrun Disable receive overrun interrupt. (cid:129) HRESP: Hresp not OK Disable Hresp not OK interrupt. (cid:129) PFR: Pause Frame Received Disable pause frame received interrupt. (cid:129) PTZ: Pause Time Zero Disable pause time zero interrupt. 468 32058K AVR32-01/12
AT32UC3A 29.7.11 Interrupt Mask Register Register Name: IMR Access Type: Write-only 31 30 29 28 27 26 25 24 – – – – – – – – 23 22 21 20 19 18 17 16 – – – – – – – – 15 14 13 12 11 10 9 8 – – PTZ PFR HRESP ROVR - – 7 6 5 4 3 2 1 0 TCOMP TXERR RLE TUND TXUBR RXUBR RCOMP MFD (cid:129) MFD: Management Frame sent Management done interrupt masked. (cid:129) RCOMP: Receive Complete Receive complete interrupt masked. (cid:129) RXUBR: Receive Used Bit Read Receive used bit read interrupt masked. (cid:129) TXUBR: Transmit Used Bit Read Transmit used bit read interrupt masked. (cid:129) TUND: Ethernet Transmit Buffer Underrun Transmit underrun interrupt masked. (cid:129) RLE: Retry Limit Exceeded Retry limit exceeded interrupt masked. (cid:129) TXERR: Transmit Error Transmit buffers exhausted in mid-frame interrupt masked. (cid:129) TCOMP: Transmit Complete Transmit complete interrupt masked. (cid:129) ROVR: Receive Overrun Receive overrun interrupt masked. (cid:129) HRESP: Hresp not OK Hresp not OK interrupt masked. (cid:129) PFR: Pause Frame Received Pause frame received interrupt masked. (cid:129) PTZ: Pause Time Zero Pause time zero interrupt masked. 469 32058K AVR32-01/12
AT32UC3A 29.7.12 PHY Maintenance Register Register Name: MAN Access Type: Read/Write 31 30 29 28 27 26 25 24 SOF RW PHYA 23 22 21 20 19 18 17 16 PHYA REGA CODE 15 14 13 12 11 10 9 8 DATA 7 6 5 4 3 2 1 0 DATA (cid:129) DATA For a write operation this is written with the data to be written to the PHY. After a read operation this contains the data read from the PHY. (cid:129) CODE: Must be written to 10. Reads as written. (cid:129) REGA: Register Address Specifies the register in the PHY to access. (cid:129) PHYA: PHY Address (cid:129) RW: Read/Write 10 is read; 01 is write. Any other value is an invalid PHY management frame (cid:129) SOF: Start of frame Must be written 01 for a valid frame. 470 32058K AVR32-01/12
AT32UC3A 29.7.13 Pause Time Register Register Name: PTR Access Type: Read/Write 31 30 29 28 27 26 25 24 – – – – – – – – 23 22 21 20 19 18 17 16 – – – – – – – – 15 14 13 12 11 10 9 8 PTIME 7 6 5 4 3 2 1 0 PTIME (cid:129) PTIME: Pause Time Stores the current value of the pause time register which is decremented every 512 bit times. 471 32058K AVR32-01/12
AT32UC3A 29.7.14 Hash Register Bottom Register Name: HRB Access Type: Read/Write 31 30 29 28 27 26 25 24 ADDR 23 22 21 20 19 18 17 16 ADDR 15 14 13 12 11 10 9 8 ADDR 7 6 5 4 3 2 1 0 ADDR (cid:129) ADDR: Bits 31:0 of the hash address register. See ”Hash Addressing” on page 447. 472 32058K AVR32-01/12
AT32UC3A 29.7.15 Hash Register Top Register Name: HRT Access Type: Read/Write 31 30 29 28 27 26 25 24 ADDR 23 22 21 20 19 18 17 16 ADDR 15 14 13 12 11 10 9 8 ADDR 7 6 5 4 3 2 1 0 ADDR (cid:129) ADDR: Bits 63:32 of the hash address register. See ”Hash Addressing” on page 447. 473 32058K AVR32-01/12
AT32UC3A 29.7.16 Specific Address 1 Bottom Register Register Name: SA1B Access Type: Read/Write 31 30 29 28 27 26 25 24 ADDR 23 22 21 20 19 18 17 16 ADDR 15 14 13 12 11 10 9 8 ADDR 7 6 5 4 3 2 1 0 ADDR (cid:129) ADDR Least significant bits of the destination address. Bit zero indicates whether the address is multicast or unicast and corre- sponds to the least significant bit of the first byte received. 474 32058K AVR32-01/12
AT32UC3A 29.7.17 Specific Address 1 Top Register Register Name: SA1T Access Type: Read/Write 31 30 29 28 27 26 25 24 – – – – – – – – 23 22 21 20 19 18 17 16 – – – – – – – – 15 14 13 12 11 10 9 8 ADDR 7 6 5 4 3 2 1 0 ADDR (cid:129) ADDR The most significant bits of the destination address, that is bits 47 to 32. 475 32058K AVR32-01/12
AT32UC3A 29.7.18 Specific Address 2 Bottom Register Register Name: SA2B Access Type: Read/Write 31 30 29 28 27 26 25 24 ADDR 23 22 21 20 19 18 17 16 ADDR 15 14 13 12 11 10 9 8 ADDR 7 6 5 4 3 2 1 0 ADDR (cid:129) ADDR Least significant bits of the destination address. Bit zero indicates whether the address is multicast or unicast and corre- sponds to the least significant bit of the first byte received. 476 32058K AVR32-01/12
AT32UC3A 29.7.19 Specific Address 2 Top Register Register Name: SA2T Access Type: Read/Write 31 30 29 28 27 26 25 24 – – – – – – – – 23 22 21 20 19 18 17 16 – – – – – – – – 15 14 13 12 11 10 9 8 ADDR 7 6 5 4 3 2 1 0 ADDR (cid:129) ADDR The most significant bits of the destination address, that is bits 47 to 32. 477 32058K AVR32-01/12
AT32UC3A 29.7.20 Specific Address 3 Bottom Register Register Name: SA3B Access Type: Read/Write 31 30 29 28 27 26 25 24 ADDR 23 22 21 20 19 18 17 16 ADDR 15 14 13 12 11 10 9 8 ADDR 7 6 5 4 3 2 1 0 ADDR (cid:129) ADDR Least significant bits of the destination address. Bit zero indicates whether the address is multicast or unicast and corre- sponds to the least significant bit of the first byte received. 478 32058K AVR32-01/12
AT32UC3A 29.7.21 Specific Address 3 Top Register Register Name: SA3T Access Type: Read/Write 31 30 29 28 27 26 25 24 – – – – – – – – 23 22 21 20 19 18 17 16 – – – – – – – – 15 14 13 12 11 10 9 8 ADDR 7 6 5 4 3 2 1 0 ADDR (cid:129) ADDR The most significant bits of the destination address, that is bits 47 to 32. 479 32058K AVR32-01/12
AT32UC3A 29.7.22 Specific Address 4 Bottom Register Register Name: SA4B Access Type: Read/Write 31 30 29 28 27 26 25 24 ADDR 23 22 21 20 19 18 17 16 ADDR 15 14 13 12 11 10 9 8 ADDR 7 6 5 4 3 2 1 0 ADDR (cid:129) ADDR Least significant bits of the destination address. Bit zero indicates whether the address is multicast or unicast and corre- sponds to the least significant bit of the first byte received. 480 32058K AVR32-01/12
AT32UC3A 29.7.23 Specific Address 4 Top Register Register Name: SA4T Access Type: Read/Write 31 30 29 28 27 26 25 24 – – – – – – – – 23 22 21 20 19 18 17 16 – – – – – – – – 15 14 13 12 11 10 9 8 ADDR 7 6 5 4 3 2 1 0 ADDR (cid:129) ADDR The most significant bits of the destination address, that is bits 47 to 32. 481 32058K AVR32-01/12
AT32UC3A 29.7.24 Type ID Checking Register Register Name: TID Access Type: Read/Write 31 30 29 28 27 26 25 24 – – – – – – – – 23 22 21 20 19 18 17 16 – – – – – – – – 15 14 13 12 11 10 9 8 TID 7 6 5 4 3 2 1 0 TID (cid:129) TID: Type ID checking For use in comparisons with received frames TypeID/Length field. 482 32058K AVR32-01/12
AT32UC3A 29.7.25 Transmit Pause Quantum Register Register Name: TPQ Access Type: Read/Write 31 30 29 28 27 26 25 24 – – – – – – – – 23 22 21 20 19 18 17 16 – – – – – – – – 15 14 13 12 11 10 9 8 TPQ 7 6 5 4 3 2 1 0 TPQ (cid:129) TPQ: Transmit Pause Quantum Used in hardware generation of transmitted pause frames as value for pause quantum. 483 32058K AVR32-01/12
AT32UC3A 29.7.26 User Input/Output Register Register Name: USRIO Access Type: Read/Write 31 30 29 28 27 26 25 24 – – – – – – – – 23 22 21 20 19 18 17 16 – – – – – – – – 15 14 13 12 11 10 9 8 – – – – – – – – 7 6 5 4 3 2 1 0 TX_PAUSE_ – – – – TX_PAUSE EAM RMII ZERO (cid:129) RMII When set, this bit enables the MII operation mode. When reset, it selects the RMII mode. (cid:129) EAM When set, this bit causes a frame to be copied to memory, if this feature is enabled by the EAE bit in NCFGR. Otherwise, no frame is copied. (cid:129) TX_PAUSE Toggling this bit causes a PAUSE frame to be transmitted. (cid:129) TX_PAUSE_ZERO Selects either zero or the transmit quantum register as the transmitted pause frame quantum. 484 32058K AVR32-01/12
AT32UC3A 29.7.27 Wake-on-LAN Register Register Name: WOL Access Type: Read/Write 31 30 29 28 27 26 25 24 – – – – – – – – 23 22 21 20 19 18 17 16 – – – – MTI SA1 ARP MAG 15 14 13 12 11 10 9 8 IP 7 6 5 4 3 2 1 0 IP (cid:129) IP: ARP request IP address Written to define the least significant 16 bits of the target IP address that is matched to generate a Wake-on-LAN event. A value of zero does not generate an event, even if this is matched by the received frame. (cid:129) MAG: Magic packet event enable When set, magic packet events causes the wol output to be asserted. (cid:129) ARP: ARP request event enable When set, ARP request events causes the wol output to be asserted. (cid:129) SA1: Specific address register 1 event enable When set, specific address 1 events causes the wol output to be asserted. (cid:129) MTI: Multicast hash event enable When set, multicast hash events causes the wol output to be asserted. 485 32058K AVR32-01/12
AT32UC3A 29.7.28 MACB Statistic Registers These registers reset to zero on a read and stick at all ones when they count to their maximum value. They should be read frequently enough to prevent loss of data. The receive statistics registers are only incremented when the receive enable bit is set in the network control register. To write to these registers, bit 7, WESTAT, in the network control register, NCR, must be set. The statistics register block contains the following registers. 29.7.28.1 Pause Frames Received Register Register Name: PFR Access Type: Read/Write 31 30 29 28 27 26 25 24 – – – – – – – – 23 22 21 20 19 18 17 16 – – – – – – – – 15 14 13 12 11 10 9 8 FROK 7 6 5 4 3 2 1 0 FROK (cid:129) FROK: Pause Frames received OK A 16-bit register counting the number of good pause frames received. A good frame has a length of 64 to 1518 (1536 if bit 8, BIG, in network configuration register, NCFGR, is set, 10240 if bit 3, JFRAME in network configuration register, NCFGR, is set) and has no FCS, alignment or receive symbol errors. 29.7.28.2 Frames Transmitted OK Register Register Name: FTO Access Type: Read/Write 31 30 29 28 27 26 25 24 – – – – – – – – 23 22 21 20 19 18 17 16 FTOK 15 14 13 12 11 10 9 8 FTOK 7 6 5 4 3 2 1 0 FTOK (cid:129) FTOK: Frames Transmitted OK A 24-bit register counting the number of frames successfully transmitted, i.e., no underrun and not too many retries. 486 32058K AVR32-01/12
AT32UC3A 29.7.28.3 Single Collision Frames Register Register Name: SCF Access Type: Read/Write 31 30 29 28 27 26 25 24 – – – – – – – – 23 22 21 20 19 18 17 16 – – – – – – – – 15 14 13 12 11 10 9 8 SCF 7 6 5 4 3 2 1 0 SCF (cid:129) SCF: Single Collision Frames A 16-bit register counting the number of frames experiencing a single collision before being successfully transmitted, i.e., no underrun. 29.7.28.4 Multicollision Frames Register Register Name: MCF Access Type: Read/Write 31 30 29 28 27 26 25 24 – – – – – – – – 23 22 21 20 19 18 17 16 – – – – – – – – 15 14 13 12 11 10 9 8 MCF 7 6 5 4 3 2 1 0 MCF (cid:129) MCF: Multicollision Frames A 16-bit register counting the number of frames experiencing between two and fifteen collisions prior to being successfully transmitted, i.e., no underrun and not too many retries. 487 32058K AVR32-01/12
AT32UC3A 29.7.28.5 Frames Received OK Register Register Name: FRO Access Type: Read/Write 31 30 29 28 27 26 25 24 – – – – – – – – 23 22 21 20 19 18 17 16 FROK 15 14 13 12 11 10 9 8 FROK 7 6 5 4 3 2 1 0 FROK (cid:129) FROK: Frames Received OK A 24-bit register counting the number of good frames received, i.e., address recognized and successfully copied to mem- ory. A good frame is of length 64 to 1518 bytes (1536 if bit 8, BIG, in network configuration register, NCFGR, is set, 10240 if bit 3, JFRAME in network configuration register, NCFGR, is set) and has no FCS, alignment or receive symbol errors. 29.7.28.6 Frames Check Sequence Errors Register Register Name: FCSE Access Type: Read/Write 31 30 29 28 27 26 25 24 – – – – – – – – 23 22 21 20 19 18 17 16 – – – – – – – – 15 14 13 12 11 10 9 8 – – – – – – – – 7 6 5 4 3 2 1 0 FCSE (cid:129) FCSE: Frame Check Sequence Errors An 8-bit register counting frames that are an integral number of bytes, have bad CRC and are between 64 and 1518 bytes in length (1536 if bit 8, BIG, in network configuration register, NCFGR, is set, 10240 if bit 3, JFRAME in network configura- tion register, NCFGR, is set). This register is also incremented if a symbol error is detected and the frame is of valid length and has an integral number of bytes. 488 32058K AVR32-01/12
AT32UC3A 29.7.28.7 Alignment Errors Register Register Name: ALE Access Type: Read/Write 31 30 29 28 27 26 25 24 – – – – – – – – 23 22 21 20 19 18 17 16 – – – – – – – – 15 14 13 12 11 10 9 8 – – – – – – – – 7 6 5 4 3 2 1 0 ALE (cid:129) ALE: Alignment Errors An 8-bit register counting frames that are not an integral number of bytes long and have bad CRC when their length is trun- cated to an integral number of bytes and are between 64 and 1518 bytes in length (1536 if bit 8, BIG, in network configuration register, NCFGR, is set, 10240 if bit 3, JFRAME in network configuration register, NCFGR, is set). This regis- ter is also incremented if a symbol error is detected and the frame is of valid length and does not have an integral number of bytes. 29.7.28.8 Deferred Transmission Frames Register Register Name: DTF Access Type: Read/Write 31 30 29 28 27 26 25 24 – – – – – – – – 23 22 21 20 19 18 17 16 – – – – – – – – 15 14 13 12 11 10 9 8 DTF 7 6 5 4 3 2 1 0 DTF (cid:129) DTF: Deferred Transmission Frames A 16-bit register counting the number of frames experiencing deferral due to carrier sense being active on their first attempt at transmission. Frames involved in any collision are not counted nor are frames that experienced a transmit underrun. 489 32058K AVR32-01/12
AT32UC3A 29.7.28.9 Late Collisions Register Register Name: LCOL Access Type: Read/Write 31 30 29 28 27 26 25 24 – – – – – – – – 23 22 21 20 19 18 17 16 – – – – – – – – 15 14 13 12 11 10 9 8 – – – – – – – – 7 6 5 4 3 2 1 0 LCOL (cid:129) LCOL: Late Collisions An 8-bit register counting the number of frames that experience a collision after the slot time (512 bits) has expired. A late collision is counted twice; i.e., both as a collision and a late collision. 29.7.28.10 Excessive Collisions Register Register Name: EXCOL Access Type: Read/Write 31 30 29 28 27 26 25 24 – – – – – – – – 23 22 21 20 19 18 17 16 – – – – – – – – 15 14 13 12 11 10 9 8 – – – – – – – – 7 6 5 4 3 2 1 0 EXCOL (cid:129) EXCOL: Excessive Collisions An 8-bit register counting the number of frames that failed to be transmitted because they experienced 16 collisions. 490 32058K AVR32-01/12
AT32UC3A 29.7.28.11 Transmit Underrun Errors Register Register Name: TUND Access Type: Read/Write 31 30 29 28 27 26 25 24 – – – – – – – – 23 22 21 20 19 18 17 16 – – – – – – – – 15 14 13 12 11 10 9 8 – – – – – – – – 7 6 5 4 3 2 1 0 TUND (cid:129) TUND: Transmit Underruns An 8-bit register counting the number of frames not transmitted due to a transmit DMA underrun. If this register is incre- mented, then no other statistics register is incremented. 29.7.28.12 Carrier Sense Errors Register Register Name: CSE Access Type: Read/Write 31 30 29 28 27 26 25 24 – – – – – – – – 23 22 21 20 19 18 17 16 – – – – – – – – 15 14 13 12 11 10 9 8 – – – – – – – – 7 6 5 4 3 2 1 0 CSE (cid:129) CSE: Carrier Sense Errors An 8-bit register counting the number of frames transmitted where carrier sense was not seen during transmission or where carrier sense was deasserted after being asserted in a transmit frame without collision (no underrun). Only incremented in half-duplex mode. The only effect of a carrier sense error is to increment this register. The behavior of the other statistics registers is unaffected by the detection of a carrier sense error. 491 32058K AVR32-01/12
AT32UC3A 29.7.28.13 Receive Resource Errors Register Register Name: RRE Access Type: Read/Write 31 30 29 28 27 26 25 24 – – – – – – – – 23 22 21 20 19 18 17 16 – – – – – – – – 15 14 13 12 11 10 9 8 RRE 7 6 5 4 3 2 1 0 RRE (cid:129) RRE: Receive Resource Errors A 16-bit register counting the number of frames that were address matched but could not be copied to memory because no receive buffer was available. 29.7.28.14 Receive Overrun Errors Register Register Name: ROVR Access Type: Read/Write 31 30 29 28 27 26 25 24 – – – – – – – – 23 22 21 20 19 18 17 16 – – – – – – – – 15 14 13 12 11 10 9 8 – – – – – – – – 7 6 5 4 3 2 1 0 ROVR (cid:129) ROVR: Receive Overrun An 8-bit register counting the number of frames that are address recognized but were not copied to memory due to a receive DMA overrun. 492 32058K AVR32-01/12
AT32UC3A 29.7.28.15 Receive Symbol Errors Register Register Name: RSE Access Type: Read/Write 31 30 29 28 27 26 25 24 – – – – – – – – 23 22 21 20 19 18 17 16 – – – – – – – – 15 14 13 12 11 10 9 8 – – – – – – – – 7 6 5 4 3 2 1 0 RSE (cid:129) RSE: Receive Symbol Errors An 8-bit register counting the number of frames that had rx_er asserted during reception. Receive symbol errors are also counted as an FCS or alignment error if the frame is between 64 and 1518 bytes in length (1536 if bit 8, BIG, in network configuration register, NCFGR, is set, 10240 if bit 3, JFRAME in network configuration register, NCFGR, is set). If the frame is larger, it is recorded as a jabber error. 29.7.28.16 Excessive Length Errors Register Register Name: ELE Access Type: Read/Write 31 30 29 28 27 26 25 24 – – – – – – – – 23 22 21 20 19 18 17 16 – – – – – – – – 15 14 13 12 11 10 9 8 – – – – – – – – 7 6 5 4 3 2 1 0 EXL (cid:129) EXL: Excessive Length Errors An 8-bit register counting the number of frames received exceeding 1518 bytes (1536 if bit 8, BIG, in network configuration register, NCFGR, is set, 10240 if bit 3, JFRAME in network configuration register, NCFGR, is set) in length but do not have either a CRC error, an alignment error nor a receive symbol error. 493 32058K AVR32-01/12
AT32UC3A 29.7.28.17 Receive Jabbers Register Register Name: RJA Access Type: Read/Write 31 30 29 28 27 26 25 24 – – – – – – – – 23 22 21 20 19 18 17 16 – – – – – – – – 15 14 13 12 11 10 9 8 – – – – – – – – 7 6 5 4 3 2 1 0 RJB (cid:129) RJB: Rece ive Jabbers An 8-bit register counting the number of frames received exceeding 1518 bytes (1536 if bit 8, BIG, in network configuration register, NCFGR, is set, 10240 if bit 3, JFRAME in network configuration register, NCFGR, is set) in length and have either a CRC error, an alignment error or a receive symbol error. 29.7.28.18 Undersize Frames Register Register Name: USF Access Type: Read/Write 31 30 29 28 27 26 25 24 – – – – – – – – 23 22 21 20 19 18 17 16 – – – – – – – – 15 14 13 12 11 10 9 8 – – – – – – – – 7 6 5 4 3 2 1 0 USF (cid:129) USF: Und ersize frames An 8-bit register counting the number of frames received less than 64 bytes in length but do not have either a CRC error, an alignment error or a receive symbol error. 494 32058K AVR32-01/12
AT32UC3A 29.7.28.19 SQE Test Errors Register Register Name: STE Access Type: Read/Write 31 30 29 28 27 26 25 24 – – – – – – – – 23 22 21 20 19 18 17 16 – – – – – – – – 15 14 13 12 11 10 9 8 – – – – – – – – 7 6 5 4 3 2 1 0 SQER (cid:129) SQER: SQE test errors An 8-bit register counting the number of frames where col was not asserted within 96 bit times (an interframe gap) of tx_en being deasserted in half duplex mode. 29.7.28.20 Received Length Field Mismatch Register Register Name: RLE Access Type: Read/Write 31 30 29 28 27 26 25 24 – – – – – – – – 23 22 21 20 19 18 17 16 – – – – – – – – 15 14 13 12 11 10 9 8 – – – – – – – – 7 6 5 4 3 2 1 0 RLFM (cid:129) RLFM: Receive Length Field Mismatch An 8-bit register counting the number of frames received that have a measured length shorter than that extracted from its length field. Checking is enabled through bit 16 of the network configuration register. Frames containing a type ID in bytes 13 and 14 (i.e., length/type ID (cid:0) 0x0600) are not counted as length field errors, neither are excessive length frames. 495 32058K AVR32-01/12
AT32UC3A 29.7.28.21 Transmitted Pause Frames Register Register Name: TPF Access Type: Read/Write 31 30 29 28 27 26 25 24 – – – – – – – – 23 22 21 20 19 18 17 16 – – – – – – – – 15 14 13 12 11 10 9 8 TPF 7 6 5 4 3 2 1 0 TPF (cid:129) TPF: Transmitted Pause Frames A 16-bit register counting the number of pause frames transmitted. 496 32058K AVR32-01/12
AT32UC3A 30. USB On-The-Go Interface (USBB) Rev: 3.1.1.1 30.1 Features (cid:129) USB 2.0 Compliant, Full-/Low-Speed (FS/LS) and On-The-Go (OTG), 12 Mbit/s (cid:129) 7 Pipes/Endpoints (cid:129) 960 bytes of Embedded Dual-Port RAM (DPRAM) for Pipes/Endpoints (cid:129) Up to 2 Memory Banks per Pipe/Endpoint (Not for Control Pipe/Endpoint) (cid:129) Flexible Pipe/Endpoint Configuration and Management with Dedicated DMA Channels (cid:129) On-Chip Transceivers Including Pull-Ups/Pull-downs. (cid:129) On-Chip OTG pad including VBUS analog comparator 30.2 Description The Universal Serial Bus (USB) MCU device complies with the Universal Serial Bus (USB) 2.0 specification, but it does NOT feature high-speed USB (480 Mbit/s). Each pipe/endpoint can be configured in one of several transfer types. It can be associated with one or more banks of a dual-port RAM used to store the current data payload. If several banks are used (“ping-pong” mode), then one DPRAM bank is read or written by the CPU or the DMA while the other is read or written by the USB macro core. This feature is mandatory for isochro- nous pipes/endpoints. Table 30-1 describes the hardware configuration of the USB MCU device. Table 30-1. Description of USB Pipes/Endpoints Pipe/Endpoint Mnemonic Max. Size Max. Nb. Banks DMA Type 0 PEP0 64 bytes 1 N Control 1 PEP1 bytes Y Isochronous/Bulk/Interrupt 2 PEP2 bytes Y Isochronous/Bulk/Interrupt 3 PEP3 64 bytes Y Bulk/Interrupt 4 PEP4 64 bytes Y Bulk/Interrupt 5 PEP5 bytes Y Isochronous/Bulk/Interrupt 6 PEP6 bytes Y Isochronous/Bulk/Interrupt The theoretical maximal pipe/endpoint configuration (1600 bytes) exceeds the real DPRAM size (960 bytes). The user needs to be aware of this when configuring pipes/endpoints. To fully use the 960 bytes of DPRAM, the user could for example use the configuration described in Table 30-2. Table 30-2. Example of Configuration of Pipes/Endpoints Using the Whole DPRAM Pipe/Endpoint Mnemonic Size Nb. Banks 0 PEP0 64 bytes 1 1 PEP1 64 bytes 2 2 PEP2 64 bytes 2 3 PEP3 64 bytes 1 497 32058K AVR32-01/12
AT32UC3A Table 30-2. Example of Configuration of Pipes/Endpoints Using the Whole DPRAM Pipe/Endpoint Mnemonic Size Nb. Banks 4 PEP4 64 bytes 1 5 PEP5 256 bytes 1 6 PEP6 256 bytes 1 498 32058K AVR32-01/12
AT32UC3A 30.3 Block Diagram The USB controller provides a hardware device to interface a USB link to a data flow stored in a dual-port RAM (DPRAM). The USB controller requires a 48 MHz ± 0.25% reference clock, which is the USB generic clock generated from one of the power manager oscillators, optionally through one of the power man- ager PLLs. The 48 MHz clock is used to generate a 12 MHz full-speed (or 1.5 MHz low-speed) bit clock from the received USB differential data and to transmit data according to full- or low-speed USB device tolerance. Clock recovery is achieved by a digital phase-locked loop (a DPLL, not repre- sented), which complies with the USB jitter specifications. Figure 30-1. Block Diagram USB 32 bits DPRAM Local PEP HSB Allocation Slave Interface Slave HSB MUX Master HSB HSB0 DMA HSB1 VBUS PB User Interface D- USB 2.0 D+ Core Interrupt USB Interrupts USB_ID Controller GPIO Controller USB_VBOF Power USB GCLK @ 48 MHz Manager System Clock USB Clock Domain Domain 499 32058K AVR32-01/12
AT32UC3A 30.4 Application Block Diagram Depending on the USB operating mode (device-only, reduced-host or OTG mode) and the power source (bus-powered or self-powered), there are different typical hardware implementations. 30.4.1 Device Mode 30.4.1.1 Bus-Powered Device Figure 30-2. Bus-Powered Device Application Block Diagram VDD 3.3 V Regulator USB USB USB_VBOF Connector VBUS VBUS D- D- 39 Ω ± 1% D+ D+ 39 Ω ± 1% USB_ID ID GND 30.4.1.2 Self-Powered Device Figure 30-3. Self-Powered Device Application Block Diagram USB USB USB_VBOF Connector VBUS VBUS D- D- 39 Ω ± 1% D+ D+ 39 Ω ± 1% USB_ID ID GND 500 32058K AVR32-01/12
AT32UC3A 30.4.2 Host and OTG Modes Figure 30-4. Host and OTG Application Block Diagram VDD 5 V DC/DC Generator USB USB USB_VBOF Connector VBUS VBUS D- D- 39 Ω ± 1% D+ D+ 39 Ω ± 1% USB_ID ID GND 30.5 I/O Lines Description Table 30-3. I/O Lines Description Name Description Type Active Level USB_VBOF USB VBus On/Off: Bus Power Control Port Output VBUSPO VBUS VBus: Bus Power Measurement Port Input High D- Data -: Differential Data Line - Port Input/Output N/A D+ Data +: Differential Data Line + Port Input/Output N/A Low: Mini-A plug USB_ID USB Identification: Mini Connector Identification Port Input High Z: Mini-B plug 501 32058K AVR32-01/12
AT32UC3A 30.6 Product Dependencies 30.6.1 I/O Lines The USB_VBOF and USB_ID pins are multiplexed with GPIO lines and may also be multiplexed with lines of other peripherals. In order to use them with the USB, the programmer must first pro- gram the GPIO controller to assign them to their USB peripheral functions. Moreover, if USB_ID is used, the GPIO controller must be configured to enable the internal pull-up resistor of its pin. If USB_VBOF or USB_ID is not used by the application, the corresponding pin can be used for other purposes by the GPIO controller or by other peripherals. 30.6.2 Power Management The 48 MHz USB clock is generated by a dedicated generic clock from the power manager. Before using the USB, the programmer must ensure that the USB generic clock (USB GCLK) is enabled at 48 MHz in the power manager. 30.6.3 Interrupts The USB interface has an interrupt line connected to the interrupt controller. In order to handle USB interrupts, the interrupt controller must be programmed first. 502 32058K AVR32-01/12
AT32UC3A 30.7 Functional Description 30.7.1 USB General Operation 30.7.1.1 Introduction After a hardware reset, the USB controller is disabled. When enabled, the USB controller runs either in device mode or in host mode according to the ID detection. If the USB_ID pin is not connected to ground, the ID bit is set by hardware (the internal pull-up resistor of the USB_ID pin must be enabled by the GPIO controller) and device mode is engaged. The ID bit is cleared by hardware when a low level has been detected on the USB_ID pin. Host mode is then engaged. 30.7.1.2 Power-On and Reset Figure 30-5 describes the USB controller main states. Figure 30-5. General States Macro off: <any USBE = 0 USBE = 0 other Clock stopped: state> FRZCLK = 1 Reset HW RESET USBE = 1 ID = 1 USBE = 0 USBE = 1 ID = 0 Device USBE = 0 Host After a hardware reset, the USB controller is in the Reset state. In this state: (cid:129)the macro is disabled (USBE = 0); (cid:129)the macro clock is stopped in order to minimize power consumption (FRZCLK = 1); (cid:129)the pad is in suspend mode; (cid:129)the internal states and registers of the device and host modes are reset; (cid:129)the DPRAM is not cleared and is accessible; (cid:129)the ID and VBUS read-only bits reflect the states of the USB_ID and VBUS input pins; (cid:129)the OTGPADE, VBUSPO, FRZCLK, USBE, UIDE, UIMOD and LS bits can be written by software, so that the user can program pads and speed before enabling the macro, but their value is only taken into account once the macro is enabled and unfrozen. After setting USBE, the USB controller enters the Device or the Host mode (according to the ID detection) in idle state. The USB controller can be disabled at any time by clearing USBE. In fact, clearing USBE acts as a hardware reset, except that the OTGPADE, VBUSPO, FRZCLK, UIDE, UIMOD and LS bits are not reset. 503 32058K AVR32-01/12
AT32UC3A 30.7.1.3 Interrupts One interrupt vector is assigned to the USB interface. Figure 30-6 shows the structure of the USB interrupt system. Figure 30-6. Interrupt System USBSTA.IDTI USBCON.IDTE USBSTA.VBUSTI USBCON.VBUSTE USBSTA.SRPI USBCON.SRPE USBSTA.VBERRI USBCON.VBERRE USB General USBSTA.BCERRI Interrupt USBCON.BCERRE USBSTA.ROLEEXI USBCON.ROLEEXE USBSTA.HNPERRI USBCON.HNPERRE USBSTA.STOI USBCON.STOE UESTAX.TXINI UECONX.TXINE UESTAX.RXOUTI UECONX.RXOUTE UESTAX.RXSTPI UECONX.RXSTPE UESTAX.UNDERFI UECONX.UNDERFE UESTAX.NAKOUTI UECONX.NAKOUTE UESTAX.NAKINI UECONX.NAKINE UDINT.SUSP UESTAX.OVERFI UDINTE.SUSPE UECONX.OVERFE UDINT.SOF UESTAX.STALLEDI UDINTE.SOFE UECONX.STALLEDE UDINT.EORST UESTAX.CRCERRI UESnBdp Doeinvti cXe UDINTE.EORSTE UECONX.CRCERRE Interrupt UDINT.WAKEUP UESTAX.SHORTPACKET UDINTE.WAKEUPE USB Device USB UECONX.SHORTPACKETE UDINT.EORSM Interrupt Interrupt UESTAX.NBUSYBK UDINTE.EORSME UECONX.NBUSYBKE UDINT.UPRSM UDINTE.UPRSME UDDMAX_STATUS.EOT_STA UDINT.EPXINT UDDMAX_CONTROL.EOT_IRQ_EN UDINTE.EPXINTE UDDMAX_STATUS.EOCH_BUFF_STA UDINT.DMAXINT UDDMAX_STATUS.DESC_LD_STA UDDMAX_CONTROL.EOBUFF_IRQ_EN DMUAS BC hDaenvniceel X UDINTE.DMAXINTE Interrupt UDDMAX_CONTROL.DESC_LD_IRQ_EN UPSTAX.RXINI UPCONX.RXINE UPSTAX.TXOUTI UPCONX.TXOUTE UPSTAX.TXSTPI UPCONX.TXSTPE UPSTAX.UNDERFI UPCONX.UNDERFIE UPSTAX.PERRI UPCONX.PERRE UHINT.DCONNI UPSTAX.NAKEDI UHINTE.DCONNIE UPCONX.NAKEDE UHINT.DDISCI UPSTAX.OVERFI UHINTE.DDISCIE UPCONX.OVERFIE UHINT.RSTI UPSTAX.RXSTALLDI UHINTE.RSTIE UPCONX.RXSTALLDE UHINT.RSMEDI UPSTAUXP.SSHTOAXR.TCPRACCEKRERTII UPCONX.CRCERRE UInSPtBiepr erHu Xops tt UHINT.RXRSMI UUHHIINNTTEE..RRSXMRSEMDIIEE UInSteBrr Hupotst UPCONX.SHORTPACKETIE UHINT.HSOFI UPSTAX.NBUSYBK UHINTE.HSOFIE UPCONX.NBUSYBKE UHINT.HWUPI UHINTE.HWUPIE UHDMAX_STATUS.EOT_STA UHINT.PXINT UHDMAX_CONTROL.EOT_IRQ_EN UHINTE.PXINTE UHDMAX_STATUS.EOCH_BUFF_STA UHINT.DMAXINT UHDMAX_STATUS.DESC_LD_STA UHDMAX_CONTROL.EOBUFF_IRQ_EN DMUAS CBh Hanonsetl X UHINTE.DMAXINTE Interrupt UHDMAX_CONTROL.DESC_LD_IRQ_EN Asynchronous interrupt source 504 32058K AVR32-01/12
AT32UC3A See Section 30.7.2.17 on page 520 and Section 30.7.3.13 on page 528 for further details about device and host interrupts. There are two kinds of general interrupts: processing, i.e. their generation is part of the normal processing, and exception, i.e. errors (not related to CPU exceptions). The processing general interrupts are: (cid:129)the ID Transition interrupt (IDTI); (cid:129)the VBus Transition interrupt (VBUSTI); (cid:129)the SRP interrupt (SRPI); (cid:129)the Role Exchange interrupt (ROLEEXI). The exception general interrupts are: (cid:129)the VBus Error interrupt (VBERRI); (cid:129)the B-Connection Error interrupt (BCERRI); (cid:129)the HNP Error interrupt (HNPERRI); (cid:129)the Suspend Time-Out interrupt (STOI). 30.7.1.4 MCU Power Modes 30.7.1.4.1 Run Mode In this mode, all MCU clocks can run, including the USB clock. 30.7.1.4.2 Idle Mode In this mode, the CPU is halted, i.e. the CPU clock is stopped. The Idle mode is entered what- ever the state of the USB macro. The MCU wakes up on any USB interrupt. 30.7.1.4.3 Frozen Mode Same as the Idle mode, except that the HSB module is stopped, so the USB DMA, which is an HSB master, can not be used. Moreover, the USB DMA must be stopped before entering this sleep mode in order to avoid erratic behavior. The MCU wakes up on any USB interrupt. 30.7.1.4.4 Standby, Stop, DeepStop and Static Modes Same as the Frozen mode, except that the USB generic clock and other clocks are stopped, so the USB macro is frozen. 30.7.1.4.5 USB Clock Frozen In the Run, Idle and Frozen MCU modes, the USB macro can be frozen when the usb line is in the suspend mode, by setting the FRZCLK bit, what reduces power consumption. In this case, it is still possible to access the following elements, but only in Run mode: (cid:129)the OTGPADE, VBUSPO, FRZCLK, USBE, UIDE, UIMOD and LS bits; (cid:129)the DPRAM (through the USB_FIFOX_DATA registers, but not through USB bus transfers which are frozen). Moreover, when FRZCLK is set, only the asynchronous interrupt sources may trigger the USB interrupt: (cid:129)the ID Transition interrupt (IDTI); 505 32058K AVR32-01/12
AT32UC3A (cid:129)the VBus Transition interrupt (VBUSTI); (cid:129)the Wake-Up interrupt (WAKEUP); (cid:129)the Host Wake-Up interrupt (HWUPI). 30.7.1.4.6 USB Suspend mode : In peripheral mode, the UDINT.SUSP bit indicates that the usb line is in the suspend mode. In this case, the USB Data transceiver is automatically set in suspend mode to reduce the consumption. 30.7.1.5 Speed Control 30.7.1.5.1 Device Mode When the USB interface is in device mode, the speed selection (full-/low-speed) depends on which of D+ and D- is pulled up. The LS bit allows to connect an internal pull-up resistor either on D+ (full-speed mode) or on D- (low-speed mode). The LS bit should be configured before attaching the device, what can be done by clearing the DETACH bit. Figure 30-7. Speed Selection in Device Mode VBUS U P R UDCON.DETACH UDCON.LS D+ D- 30.7.1.5.2 Host Mode When the USB interface is in host mode, internal pull-down resistors are connected on both D+ and D- and the interface detects the speed of the connected device, which is reflected by the SPEED bit-field. 30.7.1.6 DPRAM Management Pipes and endpoints can only be allocated in ascending order (from the pipe/endpoint 0 to the last pipe/endpoint to be allocated). The firmware shall therefore configure them in the same order. The allocation of a pipe/endpoint k starts when its ALLOC bit is set. Then, the hardware allo- i cates a memory area in the DPRAM and inserts it between the k and k pipes/endpoints. The i-1 i+1 k pipe/endpoint memory window slides up and its data is lost. Note that the following pipe/end- i+1 point memory windows (from k ) do not slide. i+2 506 32058K AVR32-01/12
AT32UC3A Disabling a pipe (PENX = 0) or an endpoint (EPENX = 0) resets neither its ALLOC bit nor its configuration (PBK/EPBK, PSIZE/EPSIZE, PTOKEN/EPDIR, PTYPE/EPTYPE, PEPNUM, INT- FRQ). To free its memory, the firmware should clear its ALLOC bit. The k pipe/endpoint i+1 memory window then slides down and its data is lost. Note that the following pipe/endpoint memory windows (from k ) do not slide. i+2 Figure 30-8 illustrates the allocation and reorganization of the DPRAM in a typical example. Figure 30-8. Allocation and Reorganization of the DPRAM Free Memory Free Memory Free Memory Free Memory PEP5 PEP5 PEP5 PEP5 PEP4 Conflict PEP4 PEP4 PEP4 Lost Memory PEP3 PEP3 (larger size) PEP3 (ALLOC stays at 1) PEP4 PEP2 PEP2 PEP2 PEP2 PEP1 PEP1 PEP1 PEP1 PEP0 PEP0 PEP0 PEP0 U(P/E)RST.(E)PENX = 1 U(P/E)RST.(E)PEN3 = 0 U(P/E)CFG3.ALLOC = 0 U(P/E)RST.(E)PEN3 = 1 U(P/E)CFGX.ALLOC = 1 U(P/E)CFG3.ALLOC = 1 Pipes/Endpoints 0..5 Pipe/Endpoint 3 Pipe/Endpoint 3 Pipe/Endpoint 3 Activated Disabled Memory Freed Activated (cid:129) First, the pipes/endpoints 0 to 5 are enabled, configured and allocated in ascending order. Each pipe/endpoint then owns a memory area in the DPRAM. (cid:129) Then, the pipe/endpoint 3 is disabled, but its memory is kept allocated by the controller. (cid:129) In order to free its memory, its ALLOC bit is then cleared by the firmware. The pipe/endpoint 4 memory window slides down, but the pipe/endpoint 5 does not move. (cid:129) Finally, if the firmware chooses to reconfigure the pipe/endpoint 3 with a larger size, the controller allocates a memory area after the pipe/endpoint 2 memory area and automatically slides up the pipe/endpoint 4 memory window. The pipe/endpoint 5 does not move and a memory conflict appears as the memory windows of the pipes/endpoints 4 and 5 overlap. The data of these pipes/endpoints is potentially lost. Note that: (cid:129)there is no way the data of the pipe/endpoint 0 can be lost (except if it is de-allocated) as memory allocation and de-allocation may affect only higher pipes/endpoints; (cid:129)deactivating then reactivating a same pipe/endpoint with the same configuration only modifies temporarily the controller DPRAM pointer and size for this pipe/endpoint, but nothing changes in the DPRAM, so higher endpoints seem to not have been moved and their data is preserved as far as nothing has been written or received into them while changing the allocation state of the first pipe/endpoint; (cid:129)when the firmware sets the ALLOC bit, the CFGOK bit is set by hardware only if the configured size and number of banks are correct compared to their maximal allowed values for the endpoint and to the maximal FIFO size (i.e. the DPRAM size), so the value of CFGOK does not consider memory allocation conflicts. 507 32058K AVR32-01/12
AT32UC3A 30.7.1.7 Pad Suspend Figure 30-9 shows the pad behavior. Figure 30-9. Pad Behavior USBE = 1 & DETACH = 0 & Suspend Idle USBE = 0 Active | DETACH = 1 | Suspend (cid:129) In the Idle state, the pad is put in low power consumption mode. (cid:129) In the Active state, the pad is working. Figure 30-10 illustrates the pad events leading to a PAD state change. Figure 30-10. Pad Events SUSP Suspend detected Cleared by hardware on wake-up WAKEUP Wake-up detected Cleared by software to acknowledge the interrupt PAD State Active Idle Active The Suspend interrupt flag (SUSP) is set and the Wake-Up interrupt flag (WAKEUP) is cleared when a USB “Suspend” state has been detected on the USB bus. This event automatically puts the USB pad in the Idle state. The detection of a non-idle event sets WAKEUP, clears SUSP and wakes up the USB pad. Moreover, the pad goes to the Idle state if the macro is disabled or if the DETACH bit is set. It returns to the Active state when USBE = 1 and DETACH = 0. 508 32058K AVR32-01/12
AT32UC3A 30.7.1.8 Customizing of OTG Timers It is possible to refine some OTG timers thanks to the TIMPAGE and TIMVALUE bit-fields, as shown by Figure 30-4. Table 30-4. Customizing of OTG Timers TIMPAGE 00b: 01b: 10b: 11b: AWaitVrise Time-Out VbBusPulsing Time-Out PdTmOutCnt Time-Out SRPDetTmOut Time-Out ([OTG] Chapter 6.6.5.1) ([OTG] Chapter 5.3.4) ([OTG] Chapter 5.3.2) ([OTG] Chapter 5.3.3) 00b 20 ms 15 ms 93 ms 10 µs E U L 01b 50 ms 23 ms 105 ms 100 µs A V M 10b 70 ms 31 ms 118 ms 1 ms TI 11b 100 ms 40 ms 131 ms 11 ms TIMPAGE is used to select the OTG timer to access while TIMVALUE indicates the time-out value of the selected timer. TIMPAGE and TIMVALUE can be read or written. Before writing them, the firmware should unlock write accesses by setting the UNLOCK bit. This is not required for read accesses, except before accessing TIMPAGE if it has to be written in order to read the TIMVALUE bit-field of another OTG timer. 30.7.1.9 Plug-In Detection The USB connection is detected from the VBUS pad. Figure 30-11 shows the architecture of the plug-in detector. Figure 30-11. Plug-In Detection Input Block Diagram VDD VBus_pulsing U P Session_valid R VBUS Logic VBUS VBUSTI Va_Vbus_valid D USBSTA USBSTA P R VBus_discharge GND Pad Logic The control logic of the VBUS pad outputs two signals: (cid:129)the Session_valid signal is high when the voltage on the VBUS pad is higher than or equal to 1.4 V; (cid:129)the Va_Vbus_valid signal is high when the voltage on the VBUS pad is higher than or equal to 4.4 V. In device mode, the VBUS bit follows the Session_valid comparator output: (cid:129)it is set when the voltage on the VBUS pad is higher than or equal to 1.4 V; 509 32058K AVR32-01/12
AT32UC3A (cid:129)it is cleared when the voltage on the VBUS pad is lower than 1.4 V. In host mode, the VBUS bit follows an hysteresis based on Session_valid and Va_Vbus_valid: (cid:129)it is set when the voltage on the VBUS pad is higher than or equal to 4.4 V; (cid:129)it is cleared when the voltage on the VBUS pad is lower than 1.4 V. The VBus Transition interrupt (VBUSTI) is raised on each transition of the VBUS bit. The VBUS bit is effective whether the USB macro is enabled or not. 30.7.1.10 ID Detection Figure 30-12 shows how the ID transitions are detected. Figure 30-12. ID Detection Input Block Diagram VDD U P R 1 USB_ID 0 ID IDTI UIMOD USBSTA USBSTA USBCON UIDE USBCON GPIO Controller The USB mode (device or host) can be either detected from the USB_ID pin or software selected from the UIMOD bit, according to the UIDE bit. This allows the USB_ID pin to be used as a general purpose I/O pin even when the USB interface is enabled. By default, the USB_ID pin is selected (UIDE = 1) and the USB macro is in device mode (ID = 1), what corresponds to the case where no Mini-A plug is connected, i.e. no plug or a Mini-B plug is connected and the USB_ID pin is kept high by the internal pull-up resistor from the GPIO con- troller (which must be enabled if USB_ID is used). The ID Transition interrupt (IDTI) is raised on each transition of the ID bit, i.e. when a Mini-A plug (host mode) is connected or disconnected. This does not occur when a Mini-B plug (device mode) is connected or disconnected. The ID bit is effective whether the USB macro is enabled or not. 510 32058K AVR32-01/12
AT32UC3A 30.7.2 USB Device Operation 30.7.2.1 Introduction In device mode, the USB controller supports full- and low-speed data transfers. In addition to the default control endpoint, six endpoints are provided, which can be configured with the types isochronous, bulk or interrupt, as described in Table 30-1 on page 497. The device mode starts in the Idle state, so the pad consumption is reduced to the minimum. 30.7.2.2 Power-On and Reset Figure 30-13 describes the USB controller device mode main states. Figure 30-13. Device Mode States <any other USBE = 0 state> | ID = 0 USBE = 0 | ID = 0 Idle Reset USBE = 1 & ID = 1 HW RESET After a hardware reset, the USB controller device mode is in the Reset state. In this state: (cid:129)the macro clock is stopped in order to minimize power consumption (FRZCLK = 1); (cid:129)the internal registers of the device mode are reset; (cid:129)the endpoint banks are de-allocated; (cid:129)neither D+ nor D- is pulled up (DETACH = 1). D+ or D- will be pulled up according to the selected speed as soon as the DETACH bit is cleared and VBus is present. See Section 30.7.1.5.1 on page 506 for further details. When the USB macro is enabled (USBE = 1) in device mode (ID = 1), its device mode state goes to the Idle state with minimal power consumption. This does not require the USB clock to be activated. The USB controller device mode can be disabled and reset at any time by disabling the USB macro (USBE = 0) or when host mode is engaged (ID = 0). 30.7.2.3 USB Reset The USB bus reset is managed by hardware. It is initiated by a connected host. When a USB reset is detected on the USB line, the following operations are performed by the controller: (cid:129)all the endpoints are disabled, except the default control endpoint; (cid:129)the default control endpoint is reset (see Section 30.7.2.4 on page 512 for more details); (cid:129)the data toggle sequence of the default control endpoint is cleared; (cid:129)at the end of the reset process, the End of Reset interrupt (EORST) is raised. 511 32058K AVR32-01/12
AT32UC3A 30.7.2.4 Endpoint Reset An endpoint can be reset at any time by setting its EPRSTX bit in the UERST register. This is recommended before using an endpoint upon hardware reset or when a USB bus reset has been received. This resets: (cid:129)the internal state machine of this endpoint; (cid:129)the receive and transmit bank FIFO counters; (cid:129)all the registers of this endpoint (UECFGX, UESTAX, UECONX), except its configuration (ALLOC, EPBK, EPSIZE, EPDIR, EPTYPE) and its Data Toggle Sequence bit-field (DTSEQ). Note that the interrupt sources located in the UESTAX register are not cleared when a USB bus reset has been received. The endpoint configuration remains active and the endpoint is still enabled. The endpoint reset may be associated with a clear of the data toggle sequence as an answer to the CLEAR_FEATURE USB request. This can be achieved by setting the RSTDT bit (by setting the RSTDTS bit). In the end, the firmware has to clear the EPRSTX bit to complete the reset operation and to start using the FIFO. 30.7.2.5 Endpoint Activation The endpoint is maintained inactive and reset (see Section 30.7.2.4 on page 512 for more details) as long as it is disabled (EPENX = 0). The Data Toggle Sequence bit-field (DTSEQ) is also reset. The algorithm represented on Figure 30-14 must be followed in order to activate an endpoint. Figure 30-14. Endpoint Activation Algorithm Endpoint Activation EPENX = 1 Enable the endpoint. UECFGX Configure the endpoint: EPTYPE - type; EPDIR - direction; EPSIZE - size; EPBK - number of banks. ALLOC Allocate the configured DPRAM banks. CFGOK == Test if the endpoint configuration 1? No is correct. Yes Endpoint ERROR Activated As long as the endpoint is not correctly configured (CFGOK = 0), the controller does not acknowledge the packets sent by the host to this endpoint. The CFGOK bit is set by hardware only if the configured size and number of banks are correct compared to their maximal allowed values for the endpoint (see Table 30-1 on page 497) and to the maximal FIFO size (i.e. the DPRAM size). 512 32058K AVR32-01/12
AT32UC3A See Section 30.7.1.6 on page 506 for more details about DPRAM management. 30.7.2.6 Address Setup The USB device address is set up according to the USB protocol: (cid:129)after all kinds of resets, the USB device address is 0; (cid:129)the host starts a SETUP transaction with a SET_ADDRESS(addr) request; (cid:129)the firmware records this address into the UADD bit-field, leaving the ADDEN bit cleared, so the actual address is still 0; (cid:129)the firmware sends a zero-length IN packet from the control endpoint; (cid:129)the firmware enables the recorded USB device address by setting ADDEN. Once the USB device address is configured, the controller filters the packets to only accept those targeting the address stored in UADD. UADD and ADDEN shall not be written all at once. UADD and ADDEN are cleared by hardware: (cid:129)on a hardware reset; (cid:129)when the USB macro is disabled (USBE = 0); (cid:129)when a USB reset is detected. When UADD or ADDEN is cleared, the default device address 0 is used. 30.7.2.7 Suspend and Wake-Up When an idle USB bus state has been detected for 3 ms, the controller raises the Suspend inter- rupt (SUSP). The firmware may then set the FRZCLK bit to reduce power consumption. The MCU can also enter the Idle or Frozen sleep mode to lower again power consumption. To recover from the Suspend mode, the firmware should wait for the Wake-Up interrupt (WAKEUP), which is raised when a non-idle event is detected, then clear FRZCLK. As the WAKEUP interrupt is raised when a non-idle event is detected, it can occur whether the controller is in the Suspend mode or not. The SUSP and WAKEUP interrupts are thus indepen- dent of each other except that one’s flag is cleared by hardware when the other is raised. 30.7.2.8 Detach The reset value of the DETACH bit is 1. It is possible to initiate a device re-enumeration simply by setting then clearing DETACH. DETACH acts on the pull-up connections of the D+ and D- pads. See Section 30.7.1.5.1 on page 506 for further details. 30.7.2.9 Remote Wake-Up The Remote Wake-Up request (also known as Upstream Resume) is the only one the device may send on its own initiative, but the device should have beforehand been allowed to by a DEVICE_REMOTE_WAKEUP request from the host. (cid:129) First, the USB controller must have detected a “Suspend” state on the bus, i.e. the Remote Wake-Up request can only be sent after a SUSP interrupt has been raised. 513 32058K AVR32-01/12
AT32UC3A (cid:129) The firmware may then set the RMWKUP bit to send an upstream resume to the host for a remote wake-up. This will automatically be done by the controller after 5 ms of inactivity on the USB bus. (cid:129) When the controller sends the upstream resume, the Upstream Resume interrupt (UPRSM) is raised and SUSP is cleared by hardware. (cid:129) RMWKUP is cleared by hardware at the end of the upstream resume. (cid:129) If the controller detects a valid “End of Resume” signal from the host, the End of Resume interrupt (EORSM) is raised. 30.7.2.10 STALL Request For each endpoint, the STALL management is performed using: (cid:129)the STALL Request bit (STALLRQ) to initiate a STALL request; (cid:129)the STALLed interrupt (STALLEDI) raised when a STALL handshake has been sent. To answer the next request with a STALL handshake, STALLRQ has to be set by setting the STALLRQS bit. All following requests will be discarded (RXOUTI, etc. will not be set) and hand- shaked with a STALL until the STALLRQ bit is cleared, what is done by hardware when a new SETUP packet is received (for control endpoints) or when the STALLRQC bit is set. Each time a STALL handshake is sent, the STALLEDI flag is set by the USB controller and the EPXINT interrupt is raised. 30.7.2.10.1 Special Considerations for Control Endpoints If a SETUP packet is received into a control endpoint for which a STALL is requested, the Received SETUP interrupt (RXSTPI) is raised and STALLRQ and STALLEDI are cleared by hardware. The SETUP has to be ACKed. This management simplifies the enumeration process management. If a command is not sup- ported or contains an error, the firmware requests a STALL and can return to the main task, waiting for the next SETUP request. 30.7.2.10.2 STALL Handshake and Retry Mechanism The retry mechanism has priority over the STALL handshake. A STALL handshake is sent if the STALLRQ bit is set and if there is no retry required. 30.7.2.11 Management of Control Endpoints 30.7.2.11.1 Overview A SETUP request is always ACKed. When a new SETUP packet is received, the Received SETUP interrupt (RXSTPI) is raised, but not the Received OUT Data interrupt (RXOUTI). The FIFOCON and RWALL bits are irrelevant for control endpoints. The firmware shall therefore never use them on these endpoints. When read, their value is always 0. Control endpoints are managed using: (cid:129)the Received SETUP interrupt (RXSTPI) which is raised when a new SETUP packet is received and which shall be cleared by firmware to acknowledge the packet and to free the bank; 514 32058K AVR32-01/12
AT32UC3A (cid:129)the Received OUT Data interrupt (RXOUTI) which is raised when a new OUT packet is received and which shall be cleared by firmware to acknowledge the packet and to free the bank; (cid:129)the Transmitted IN Data interrupt (TXINI) which is raised when the current bank is ready to accept a new IN packet and which shall be cleared by firmware to send the packet. 30.7.2.11.2 Control Write Figure 30-15 shows a control write transaction. During the status stage, the controller will not necessarily send a NAK on the first IN token: (cid:129)if the firmware knows the exact number of descriptor bytes that must be read, it can then anticipate the status stage and send a zero-length packet after the next IN token; (cid:129)or it can read the bytes and wait for the NAKed IN interrupt (NAKINI) which tells that all the bytes have been sent by the host and that the transaction is now in the status stage. Figure 30-15. Control Write SETUP DATA STATUS USB Bus SETUP OUT OUT IN IN NAK RXSTPI HW SW RXOUTI HW SW HW SW TXINI SW 30.7.2.11.3 Control Read Figure 30-16 shows a control read transaction. The USB controller has to manage the simulta- neous write requests from the CPU and the USB host. Figure 30-16. Control Read SETUP DATA STATUS USB Bus SETUP IN IN OUT OUT NAK RXSTPI HW SW RXOUTI HW SW TXINI SW HW SW Wr Enable HOST Wr Enable CPU A NAK handshake is always generated on the first status stage command. When the controller detects the status stage, all the data written by the CPU is lost and clearing TXINI has no effect. The firmware checks if the transmission or the reception is complete. 515 32058K AVR32-01/12
AT32UC3A The OUT retry is always ACKed. This reception sets RXOUTI and TXINI. Handle this with the following software algorithm: set TXINI wait for RXOUTI OR TXINI if RXOUTI, then clear flag and return if TXINI, then continue Once the OUT status stage has been received, the USB controller waits for a SETUP request. The SETUP request has priority over any other request and has to be ACKed. This means that any other flag should be cleared and the FIFO reset when a SETUP is received. The firmware has to take care of the fact that the byte counter is reset when a zero-length OUT packet is received. 30.7.2.12 Management of IN Endpoints 30.7.2.12.1 Overview IN packets are sent by the USB device controller upon IN requests from the host. All the data can be written by the firmware which acknowledges or not the bank when it is full. The endpoint must be configured first. The TXINI bit is set by hardware at the same time as FIFOCON when the current bank is free. This triggers an EPXINT interrupt if TXINE = 1. TXINI shall be cleared by software (by setting the TXINIC bit) to acknowledge the interrupt, what has no effect on the endpoint FIFO. The firmware then writes into the FIFO and clears the FIFOCON bit to allow the USB controller to send the data. If the IN endpoint is composed of multiple banks, this also switches to the next bank. The TXINI and FIFOCON bits are updated by hardware in accordance with the status of the next bank. TXINI shall always be cleared before clearing FIFOCON. The RWALL bit is set by hardware when the current bank is not full, i.e. the software can write further data into the FIFO. Figure 30-17. Example of an IN Endpoint with 1 Data Bank NAK DATA IN ACK IN (bank 0) HW TXINI SW SW write data to CPU write data to CPU FIFOCON SW SW BANK 0 BANK 0 516 32058K AVR32-01/12
AT32UC3A Figure 30-18. Example of an IN Endpoint with 2 Data Banks DATA DATA IN ACK IN ACK (bank 0) (bank 1) HW TXINI SW SW SW FIFOCON write data to CPU SW write data to CPU SW write data to CPU BANK 0 BANK 1 BANK0 30.7.2.12.2 Detailed Description The data is written by the firmware, following the next flow: (cid:129)when the bank is empty, TXINI and FIFOCON are set, what triggers an EPXINT interrupt if TXINE = 1; (cid:129)the firmware acknowledges the interrupt by clearing TXINI; (cid:129)the firmware writes the data into the current bank by using the USB Pipe/Endpoint X FIFO Data register (USB_FIFOX_DATA), until all the data frame is written or the bank is full (in which case RWALL is cleared by hardware and BYCT reaches the endpoint size); (cid:129)the firmware allows the controller to send the bank and switches to the next bank (if any) by clearing FIFOCON. If the endpoint uses several banks, the current one can be written by the firmware while the pre- vious one is being read by the host. Then, when the firmware clears FIFOCON, the following bank may already be free and TXINI is set immediately. An “Abort” stage can be produced when a zero-length OUT packet is received during an IN stage of a control or isochronous IN transaction. The KILLBK bit is used to kill the last written bank. The best way to manage this abort is to apply the algorithm represented on Figure 30-19. 517 32058K AVR32-01/12
AT32UC3A Figure 30-19. Abort Algorithm Endpoint Abort Disable the TXINI interrupt. TXINEC = 1 NBUSYBK No Abort is based on the fact == 0? that no bank is busy, i.e. that Yes nothing has to be sent. EPRSTX = 1 KILLBKS = 1 Kill the last written bank. KILLBK Wait for the end of the Yes == 1? procedure. No Abort Done 30.7.2.13 Management of OUT Endpoints 30.7.2.13.1 Overview OUT packets are sent by the host. All the data can be read by the firmware which acknowledges or not the bank when it is empty. The endpoint must be configured first. The RXOUTI bit is set by hardware at the same time as FIFOCON when the current bank is full. This triggers an EPXINT interrupt if RXOUTE = 1. RXOUTI shall be cleared by software (by setting the RXOUTIC bit) to acknowledge the interrupt, what has no effect on the endpoint FIFO. The firmware then reads from the FIFO and clears the FIFOCON bit to free the bank. If the OUT endpoint is composed of multiple banks, this also switches to the next bank. The RXOUTI and FIFOCON bits are updated by hardware in accordance with the status of the next bank. RXOUTI shall always be cleared before clearing FIFOCON. The RWALL bit is set by hardware when the current bank is not empty, i.e. the software can read further data from the FIFO. 518 32058K AVR32-01/12
AT32UC3A Figure 30-20. Example of an OUT Endpoint with 1 Data Bank DATA NAK DATA OUT ACK OUT ACK (bank 0) (bank 0) HW HW RXOUTI SW SW FIFOCON read data from CPU SW read data from CPU BANK 0 BANK 0 Figure 30-21. Example of an OUT Endpoint with 2 Data Banks DATA DATA OUT ACK OUT ACK (bank 0) (bank 1) HW HW RXOUTI SW SW FIFOCON read data from CPU SW read data from CPU BANK 0 BANK 1 30.7.2.13.2 Detailed Description The data is read by the firmware, following the next flow: (cid:129)when the bank is full, RXOUTI and FIFOCON are set, what triggers an EPXINT interrupt if RXOUTE = 1; (cid:129)the firmware acknowledges the interrupt by clearing RXOUTI; (cid:129)the firmware can read the byte count of the current bank from BYCT to know how many bytes to read, rather than polling RWALL; (cid:129)the firmware reads the data from the current bank by using the USB Pipe/Endpoint X FIFO Data register (USB_FIFOX_DATA), until all the expected data frame is read or the bank is empty (in which case RWALL is cleared by hardware and BYCT reaches 0); (cid:129)the firmware frees the bank and switches to the next bank (if any) by clearing FIFOCON. If the endpoint uses several banks, the current one can be read by the firmware while the follow- ing one is being written by the host. Then, when the firmware clears FIFOCON, the following bank may already be ready and RXOUTI is set immediately. 30.7.2.14 Underflow This error exists only for isochronous IN/OUT endpoints. It raises the Underflow interrupt (UNDERFI), what triggers an EPXINT interrupt if UNDERFE = 1. An underflow can occur during IN stage if the host attempts to read from an empty bank. A zero- length packet is then automatically sent by the USB controller. 519 32058K AVR32-01/12
AT32UC3A An underflow can not occur during OUT stage on a CPU action, since the firmware may read only if the bank is not empty (RXOUTI = 1 or RWALL = 1). An underflow can also occur during OUT stage if the host sends a packet while the bank is already full. Typically, the CPU is not fast enough. The packet is lost. An underflow can not occur during IN stage on a CPU action, since the firmware may write only if the bank is not full (TXINI = 1 or RWALL = 1). 30.7.2.15 Overflow This error exists for all endpoint types. It raises the Overflow interrupt (OVERFI), what triggers an EPXINT interrupt if OVERFE = 1. An overflow can occur during OUT stage if the host attempts to write into a bank that is too small for the packet. The packet is acknowledged and the Received OUT Data interrupt (RXOUTI) is raised as if no overflow had occurred. The bank is filled with all the first bytes of the packet that fit in. An overflow can not occur during IN stage on a CPU action, since the firmware may write only if the bank is not full (TXINI = 1 or RWALL = 1). 30.7.2.16 CRC Error This error exists only for isochronous OUT endpoints. It raises the CRC Error interrupt (CRCERRI), what triggers an EPXINT interrupt if CRCERRE = 1. A CRC error can occur during OUT stage if the USB controller detects a corrupted received packet. The OUT packet is stored in the bank as if no CRC error had occurred (RXOUTI is raised). 30.7.2.17 Interrupts See the structure of the USB device interrupt system on Figure 30-6 on page 504. There are two kinds of device interrupts: processing, i.e. their generation is part of the normal processing, and exception, i.e. errors (not related to CPU exceptions). 30.7.2.17.1 Global Interrupts The processing device global interrupts are: (cid:129)the Suspend interrupt (SUSP); (cid:129)the Start of Frame interrupt (SOF) with no frame number CRC error (FNCERR = 0); (cid:129)the End of Reset interrupt (EORST); (cid:129)the Wake-Up interrupt (WAKEUP); (cid:129)the End of Resume interrupt (EORSM); (cid:129)the Upstream Resume interrupt (UPRSM); (cid:129)the Endpoint X interrupt (EPXINT); (cid:129)the DMA Channel X interrupt (DMAXINT). The exception device global interrupts are: (cid:129)the Start of Frame interrupt (SOF) with a frame number CRC error (FNCERR = 1). 520 32058K AVR32-01/12
AT32UC3A 30.7.2.17.2 Endpoint Interrupts The processing device endpoint interrupts are: (cid:129)the Transmitted IN Data interrupt (TXINI); (cid:129)the Received OUT Data interrupt (RXOUTI); (cid:129)the Received SETUP interrupt (RXSTPI); (cid:129)the Short Packet interrupt (SHORTPACKET); (cid:129)the Number of Busy Banks interrupt (NBUSYBK). The exception device endpoint interrupts are: (cid:129)the Underflow interrupt (UNDERFI); (cid:129)the NAKed OUT interrupt (NAKOUTI); (cid:129)the NAKed IN interrupt (NAKINI); (cid:129)the Overflow interrupt (OVERFI); (cid:129)the STALLed interrupt (STALLEDI); (cid:129)the CRC Error interrupt (CRCERRI); 30.7.2.17.3 DMA Interrupts The processing device DMA interrupts are: (cid:129)the End of USB Transfer Status interrupt (EOT_STA); (cid:129)the End of Channel Buffer Status interrupt (EOCH_BUFF_STA); (cid:129)the Descriptor Loaded Status interrupt (DESC_LD_STA). There is no exception device DMA interrupt. 521 32058K AVR32-01/12
AT32UC3A 30.7.3 USB Host Operation 30.7.3.1 Description of Pipes For the USB controller in host mode, the term “pipe” is used instead of “endpoint” (used in device mode). A host pipe corresponds to a device endpoint, as described by the Figure 30-22 from the USB specification. Figure 30-22. USB Communication Flow In host mode, the USB controller associates a pipe to a device endpoint, considering the device configuration descriptors. 30.7.3.2 Power-On and Reset Figure 30-23 describes the USB controller host mode main states. Figure 30-23. Host Mode States <any Macro off Device other Clocks topped Disconnection state> Idle Device Connection Device Disconnection Ready SOFE = 0 SOFE = 1 Suspend After a hardware reset, the USB controller host mode is in the Reset state. When the USB macro is enabled (USBE = 1) in host mode (ID = 0), its host mode state goes to the Idle state. In this state, the controller waits for device connection with minimal power con- sumption. The USB pad should be in the Idle state. Once a device is connected, the macro enters the Ready state, what does not require the USB clock to be activated. 522 32058K AVR32-01/12
AT32UC3A The controller enters the Suspend state when the USB bus is in a “Suspend” state, i.e. when the host mode does not generate the “Start of Frame”. In this state, the USB consumption is mini- mal. The host mode exits the Suspend state when starting to generate the SOF over the USB line. 30.7.3.3 Device Detection A device is detected by the USB controller host mode when D+ or D- is no longer tied low, i.e. when the device D+ or D- pull-up resistor is connected. To enable this detection, the host con- troller has to provide the VBus power supply to the device by setting the VBUSRQ bit (by setting the VBUSRQS bit). The device disconnection is detected by the host controller when both D+ and D- are pulled down. 30.7.3.4 USB Reset The USB controller sends a USB bus reset when the firmware sets the RESET bit. The USB Reset Sent interrupt (RSTI) is raised when the USB reset has been sent. In this case, all the pipes are disabled and de-allocated. If the bus was previously in a “Suspend” state (SOFE = 0), the USB controller automatically switches it to the “Resume” state, the Host Wake-Up interrupt (HWUPI) is raised and the SOFE bit is set by hardware in order to generate SOFs immediately after the USB reset. 30.7.3.5 Pipe Reset A pipe can be reset at any time by setting its PRSTX bit in the UPRST register. This is recom- mended before using a pipe upon hardware reset or when a USB bus reset has been sent. This resets: (cid:129)the internal state machine of this pipe; (cid:129)the receive and transmit bank FIFO counters; (cid:129)all the registers of this pipe (UPCFGX, UPSTAX, UPCONX), except its configuration (ALLOC, PBK, PSIZE, PTOKEN, PTYPE, PEPNUM, INTFRQ) and its Data Toggle Sequence bit-field (DTSEQ). The pipe configuration remains active and the pipe is still enabled. The pipe reset may be associated with a clear of the data toggle sequence. This can be achieved by setting the RSTDT bit (by setting the RSTDTS bit). In the end, the firmware has to clear the PRSTX bit to complete the reset operation and to start using the FIFO. 30.7.3.6 Pipe Activation The pipe is maintained inactive and reset (see Section 30.7.3.5 on page 523 for more details) as long as it is disabled (PENX = 0). The Data Toggle Sequence bit-field (DTSEQ) is also reset. The algorithm represented on Figure 30-24 must be followed in order to activate a pipe. 523 32058K AVR32-01/12
AT32UC3A Figure 30-24. Pipe Activation Algorithm Pipe Activation PENX = 1 Enable the pipe. UPCFGX Configure the pipe: INTFRQ - interrupt request frequency; PEPNUM - endpoint number; PTYPE - type; PTOKEN - token; PSIZE - size; PBK - number of banks. ALLOC Allocate the configured DPRAM banks. CFGOK == Test if the pipe configuration is 1? No correct. Yes Pipe Activated ERROR As long as the pipe is not correctly configured (CFGOK = 0), the controller can not send packets to the device through this pipe. The CFGOK bit is set by hardware only if the configured size and number of banks are correct compared to their maximal allowed values for the pipe (see Table 30-1 on page 497) and to the maximal FIFO size (i.e. the DPRAM size). See Section 30.7.1.6 on page 506 for more details about DPRAM management. Once the pipe is correctly configured (CFGOK = 1), only the PTOKEN and INTFRQ bit-fields can be modified by software. INTFRQ is meaningless for non-interrupt pipes. When starting an enumeration, the firmware gets the device descriptor by sending a GET_DESCRIPTOR USB request. This descriptor contains the maximal packet size of the device default control endpoint (bMaxPacketSize0) and the firmware re-configures the size of the default control pipe with this size parameter. 30.7.3.7 Address Setup Once the device has answered the first host requests with the default device address 0, the host assigns a new address to the device. The host controller has to send a USB reset to the device and to send a SET_ADDRESS(addr) SETUP request with the new address to be used by the device. Once this SETUP transaction is over, the firmware writes the new address into the HADDR bit-field. All following requests, on all pipes, will be performed using this new address. When the host controller sends a USB reset, the HADDR bit-field is reset by hardware and the following host requests will be performed using the default device address 0. 30.7.3.8 Remote Wake-Up The controller host mode enters the Suspend state when the SOFE bit is cleared. No more “Start of Frame” is sent on the USB bus and the USB device enters the Suspend state 3 ms later. The device awakes the host by sending an Upstream Resume (Remote Wake-Up feature). When the host controller detects a non-idle state on the USB bus, it raises the Host Wake-Up 524 32058K AVR32-01/12
AT32UC3A interrupt (HWUPI). If the non-idle bus state corresponds to an Upstream Resume (K state), the Upstream Resume Received interrupt (RXRSMI) is raised. The firmware has to generate a Downstream Resume within 1 ms and for at least 20 ms by setting the RESUME bit. It is manda- tory to set SOFE before setting RESUME to enter the Ready state, else RESUME will have no effect. 30.7.3.9 Management of Control Pipes A control transaction is composed of three stages: (cid:129)SETUP; (cid:129)Data (IN or OUT); (cid:129)Status (OUT or IN). The firmware has to change the pipe token according to each stage. For the control pipe, and only for it, each token is assigned a specific initial data toggle sequence: (cid:129)SETUP: Data0; (cid:129)IN: Data1; (cid:129)OUT: Data1. 30.7.3.10 Management of IN Pipes IN packets are sent by the USB device controller upon IN requests from the host. All the data can be read by the firmware which acknowledges or not the bank when it is empty. The pipe must be configured first. When the host requires data from the device, the firmware has to select beforehand the IN request mode with the INMODE bit: (cid:129)when INMODE is cleared, the USB controller will perform (INRQ + 1) IN requests before freezing the pipe; (cid:129)when INMODE is set, the USB controller will perform IN requests endlessly when the pipe is not frozen by the firmware. The generation of IN requests starts when the pipe is unfrozen (PFREEZE = 0). The RXINI bit is set by hardware at the same time as FIFOCON when the current bank is full. This triggers a PXINT interrupt if RXINE = 1. RXINI shall be cleared by software (by setting the RXINIC bit) to acknowledge the interrupt, what has no effect on the pipe FIFO. The firmware then reads from the FIFO and clears the FIFOCON bit to free the bank. If the IN pipe is composed of multiple banks, this also switches to the next bank. The RXINI and FIFO- CON bits are updated by hardware in accordance with the status of the next bank. RXINI shall always be cleared before clearing FIFOCON. The RWALL bit is set by hardware when the current bank is not empty, i.e. the software can read further data from the FIFO. 525 32058K AVR32-01/12
AT32UC3A Figure 30-25. Example of an IN Pipe with 1 Data Bank DATA DATA IN ACK IN ACK (bank 0) (bank 0) HW HW RXINI SW SW FIFOCON read data from CPU SW read data from CPU BANK 0 BANK 0 Figure 30-26. Example of an IN Pipe with 2 Data Banks DATA DATA IN ACK IN ACK (bank 0) (bank 1) HW HW RXINI SW SW FIFOCON read data from CPU SW read data from CPU BANK 0 BANK 1 30.7.3.11 Management of OUT Pipes OUT packets are sent by the host. All the data can be written by the firmware which acknowl- edges or not the bank when it is full. The pipe must be configured and unfrozen first. The TXOUTI bit is set by hardware at the same time as FIFOCON when the current bank is free. This triggers a PXINT interrupt if TXOUTE = 1. TXOUTI shall be cleared by software (by setting the TXOUTIC bit) to acknowledge the interrupt, what has no effect on the pipe FIFO. The firmware then writes into the FIFO and clears the FIFOCON bit to allow the USB controller to send the data. If the OUT pipe is composed of multiple banks, this also switches to the next bank. The TXOUTI and FIFOCON bits are updated by hardware in accordance with the status of the next bank. TXOUTI shall always be cleared before clearing FIFOCON. The RWALL bit is set by hardware when the current bank is not full, i.e. the software can write further data into the FIFO. Note that if the firmware decides to switch to the Suspend state (by clearing the SOFE bit) while a bank is ready to be sent, the USB controller automatically exits this state and the bank is sent. 526 32058K AVR32-01/12
AT32UC3A Figure 30-27. Example of an OUT Pipe with 1 Data Bank DATA OUT ACK OUT (bank 0) HW TXOUTI SW SW write data to CPU write data to CPU FIFOCON SW SW BANK 0 BANK 0 Figure 30-28. Example of an OUT Pipe with 2 Data Banks and no Bank Switching Delay DATA DATA OUT ACK OUT ACK (bank 0) (bank 1) HW TXOUTI SW SW SW FIFOCON write data to CPU SW write data to CPU write data to CPU BANK 0 BANK 1 SW BANK0 Figure 30-29. Example of an OUT Pipe with 2 Data Banks and a Bank Switching Delay DATA DATA OUT ACK OUT ACK (bank 0) (bank 1) HW TXOUTI SW SW SW write data to CPU write data to CPU write data to CPU FIFOCON SW SW BANK 0 BANK 1 BANK0 30.7.3.12 CRC Error This error exists only for isochronous IN pipes. It raises the CRC Error interrupt (CRCERRI), what triggers a PXINT interrupt if CRCERRE = 1. A CRC error can occur during IN stage if the USB controller detects a corrupted received packet. The IN packet is stored in the bank as if no CRC error had occurred (RXINI is raised). 527 32058K AVR32-01/12
AT32UC3A 30.7.3.13 Interrupts See the structure of the USB host interrupt system on Figure 30-6 on page 504. There are two kinds of host interrupts: processing, i.e. their generation is part of the normal pro- cessing, and exception, i.e. errors (not related to CPU exceptions). 30.7.3.13.1 Global Interrupts The processing host global interrupts are: (cid:129)the Device Connection interrupt (DCONNI); (cid:129)the Device Disconnection interrupt (DDISCI); (cid:129)the USB Reset Sent interrupt (RSTI); (cid:129)the Downstream Resume Sent interrupt (RSMEDI); (cid:129)the Upstream Resume Received interrupt (RXRSMI); (cid:129)the Host Start of Frame interrupt (HSOFI); (cid:129)the Host Wake-Up interrupt (HWUPI); (cid:129)the Pipe X interrupt (PXINT); (cid:129)the DMA Channel X interrupt (DMAXINT). There is no exception host global interrupt. 30.7.3.13.2 Pipe Interrupts The processing host pipe interrupts are: (cid:129)the Received IN Data interrupt (RXINI); (cid:129)the Transmitted OUT Data interrupt (TXOUTI); (cid:129)the Transmitted SETUP interrupt (TXSTPI); (cid:129)the Short Packet interrupt (SHORTPACKETI); (cid:129)the Number of Busy Banks interrupt (NBUSYBK). The exception host pipe interrupts are: (cid:129)the Underflow interrupt (UNDERFI); (cid:129)the Pipe Error interrupt (PERRI); (cid:129)the NAKed interrupt (NAKEDI); (cid:129)the Overflow interrupt (OVERFI); (cid:129)the Received STALLed interrupt (RXSTALLDI); (cid:129)the CRC Error interrupt (CRCERRI). 30.7.3.13.3 DMA Interrupts The processing host DMA interrupts are: (cid:129)the End of USB Transfer Status interrupt (EOT_STA); (cid:129)the End of Channel Buffer Status interrupt (EOCH_BUFF_STA); (cid:129)the Descriptor Loaded Status interrupt (DESC_LD_STA). There is no exception host DMA interrupt. 528 32058K AVR32-01/12
AT32UC3A 30.7.4 USB DMA Operation USB packets of any length may be transferred when required by the USB controller. These transfers always feature sequential addressing. These two characteristics mean that in case of high USB controller throughput, both HSB ports will benefit from “incrementing burst of unspeci- fied length” since the average access latency of HSB slaves can then be reduced. The DMA uses word “incrementing burst of unspecified length” of up to 256 beats for both data transfers and channel descriptor loading. A burst may last on the HSB busses for the duration of a whole USB packet transfer, unless otherwise broken by the HSB arbitration or the HSB 1 kbyte boundary crossing. Packet data HSB bursts may be locked on a DMA buffer basis for drastic overall HSB bus band- width performance boost with paged memories. This is because these memories row (or bank) changes, which are very clock-cycle consuming, will then likely not occur or occur once instead of dozens of times during a single big USB packet DMA transfer in case other HSB masters address the memory. This means up to 128 words single cycle unbroken HSB bursts for bulk pipes/endpoints and 256 words single cycle unbroken bursts for isochronous pipes/endpoints. This maximal burst length is then controlled by the lowest programmed USB pipe/endpoint size (PSIZE/EPSIZE) and DMA channel byte length (CH_BYTE_LENGTH). The USB controller average throughput may be up to nearly 1.5 Mbyte/s. Its average access latency decreases as burst length increases due to the 0 wait-state side effect of unchanged pipe/endpoint. Word access allows reducing the HSB bandwidth required for the USB by 4 com- pared to native byte access. If at least 0 wait-state word burst capability is also provided by the other DMA HSB bus slaves, each of both DMA HSB busses need less than 1.1% bandwidth allocation for full USB bandwidth usage at 33 MHz, and less than 0.6% at 66 MHz. Figure 30-30. Example of DMA Chained List Transfer Descriptor USB DMA Channel X Registers (Current Transfer Descriptor) Next Descriptor Address HSB Address Transfer Descriptor Next Descriptor Address Control Next Descriptor Address HSB Address HSB Address Transfer Descriptor Control Next Descriptor Address Control HSB Address Status Control NULL Memory Area Data Buffer 1 Data Buffer 2 Data Buffer 3 529 32058K AVR32-01/12
AT32UC3A 30.8 USB User Interface Table 30-5. USB PB Memory Map Offset Register Name Access Reset Value 0x0000 Device General Control Register UDCON Read/Write 0x00000100 0x0004 Device Global Interrupt Register UDINT Read-Only 0x00000000 0x0008 Device Global Interrupt Clear Register UDINTCLR Write-Only 0x00000000 0x000C Device Global Interrupt Set Register UDINTSET Write-Only 0x00000000 0x0010 Device Global Interrupt Enable Register UDINTE Read-Only 0x00000000 0x0014 Device Global Interrupt Enable Clear Register UDINTECLR Write-Only 0x00000000 0x0018 Device Global Interrupt Enable Set Register UDINTESET Write-Only 0x00000000 0x001C Endpoint Enable/Reset Register UERST Read/Write 0x00000000 0x0020 Device Frame Number Register UDFNUM Read-Only 0x00000000 0x0024 - 0x00FC Reserved – – – 0x0100 Endpoint 0 Configuration Register UECFG0 Read/Write 0x00000000 0x0104 Endpoint 1 Configuration Register UECFG1 Read/Write 0x00000000 0x0108 Endpoint 2 Configuration Register UECFG2 Read/Write 0x00000000 0x010C Endpoint 3 Configuration Register UECFG3 Read/Write 0x00000000 0x0110 Endpoint 4 Configuration Register UECFG4 Read/Write 0x00000000 0x0114 Endpoint 5 Configuration Register UECFG5 Read/Write 0x00000000 0x0118 Endpoint 6 Configuration Register UECFG6 Read/Write 0x00000000 +0x004 - 0x012C Reserved – – – 0x0130 Endpoint 0 Status Register UESTA0 Read-Only 0x00000100 0x0134 Endpoint 1 Status Register UESTA1 Read-Only 0x00000100 0x0138 Endpoint 2 Status Register UESTA2 Read-Only 0x00000100 0x013C Endpoint 3 Status Register UESTA3 Read-Only 0x00000100 0x0140 Endpoint 4 Status Register UESTA4 Read-Only 0x00000100 0x0144 Endpoint 5 Status Register UESTA5 Read-Only 0x00000100 0x0148 Endpoint 6 Status Register UESTA6 Read-Only 0x00000100 +0x004 - 0x015C Reserved – – – 0x0160 Endpoint 0 Status Clear Register UESTA0CLR Write-Only 0x00000000 0x0164 Endpoint 1 Status Clear Register UESTA1CLR Write-Only 0x00000000 0x0168 Endpoint 2 Status Clear Register UESTA2CLR Write-Only 0x00000000 0x016C Endpoint 3 Status Clear Register UESTA3CLR Write-Only 0x00000000 0x0170 Endpoint 4 Status Clear Register UESTA4CLR Write-Only 0x00000000 0x0174 Endpoint 5 Status Clear Register UESTA5CLR Write-Only 0x00000000 0x0178 Endpoint 6 Status Clear Register UESTA6CLR Write-Only 0x00000000 +0x04 - 0x018C Reserved – – – 0x0190 Endpoint 0 Status Set Register UESTA0SET Write-Only 0x00000000 530 32058K AVR32-01/12
AT32UC3A Table 30-5. USB PB Memory Map Offset Register Name Access Reset Value 0x0194 Endpoint 1 Status Set Register UESTA1SET Write-Only 0x00000000 0x0198 Endpoint 2 Status Set Register UESTA2SET Write-Only 0x00000000 0x019C Endpoint 3 Status Set Register UESTA3SET Write-Only 0x00000000 0x01A0 Endpoint 4 Status Set Register UESTA4SET Write-Only 0x00000000 0x01A4 Endpoint 5 Status Set Register UESTA5SET Write-Only 0x00000000 0x01A8 Endpoint 6 Status Set Register UESTA6SET Write-Only 0x00000000 +0x04 - 0x01BC Reserved – – – 0x01C0 Endpoint 0 Control Register UECON0 Read-Only 0x00000000 0x01C4 Endpoint 1 Control Register UECON1 Read-Only 0x00000000 0x01C8 Endpoint 2 Control Register UECON2 Read-Only 0x00000000 0x01CC Endpoint 3 Control Register UECON3 Read-Only 0x00000000 0x01D0 Endpoint 4 Control Register UECON4 Read-Only 0x00000000 0x01D4 Endpoint 5 Control Register UECON5 Read-Only 0x00000000 0x01D8 Endpoint 6 Control Register UECON6 Read-Only 0x00000000 +0x04 - 0x01EC Reserved – – – 0x01F0 Endpoint 0 Control Set Register UECON0SET Write-Only 0x00000000 0x01F4 Endpoint 1 Control Set Register UECON1SET Write-Only 0x00000000 0x01F8 Endpoint 2 Control Set Register UECON2SET Write-Only 0x00000000 0x01FC Endpoint 3 Control Set Register UECON3SET Write-Only 0x00000000 0x0200 Endpoint 4 Control Set Register UECON4SET Write-Only 0x00000000 0x0204 Endpoint 5 Control Set Register UECON5SET Write-Only 0x00000000 0x0208 Endpoint 6 Control Set Register UECON6SET Write-Only 0x00000000 +0x04 - 0x021C Reserved – – – 0x0220 Endpoint 0 Control Clear Register UECON0CLR Write-Only 0x00000000 0x0224 Endpoint 1 Control Clear Register UECON1CLR Write-Only 0x00000000 0x0228 Endpoint 2 Control Clear Register UECON2CLR Write-Only 0x00000000 0x022C Endpoint 3 Control Clear Register UECON3CLR Write-Only 0x00000000 0x0230 Endpoint 4 Control Clear Register UECON4CLR Write-Only 0x00000000 0x0234 Endpoint 5 Control Clear Register UECON5CLR Write-Only 0x00000000 0x0238 Endpoint 6 Control Clear Register UECON6CLR Write-Only 0x00000000 +0x04 - 0x030C Reserved – – – Device DMA Channel 1 Next Descriptor UDDMA1_ 0x0310 Read/Write 0x00000000 Address Register NEXTDESC UDDMA1_ 0x0314 Device DMA Channel 1 HSB Address Register Read/Write 0x00000000 ADDR UDDMA1_ 0x0318 Device DMA Channel 1 Control Register Read/Write 0x00000000 CONTROL 531 32058K AVR32-01/12
AT32UC3A Table 30-5. USB PB Memory Map Offset Register Name Access Reset Value UDDMA1_ 0x031C Device DMA Channel 1 Status Register Read/Write 0x00000000 STATUS Device DMA Channel 2 Next Descriptor UDDMA2_ 0x0320 Read/Write 0x00000000 Address Register NEXTDESC UDDMA2_ 0x0324 Device DMA Channel 2 HSB Address Register Read/Write 0x00000000 ADDR UDDMA2_ 0x0328 Device DMA Channel 2 Control Register Read/Write 0x00000000 CONTROL UDDMA2_ 0x032C Device DMA Channel 2 Status Register Read/Write 0x00000000 STATUS Device DMA Channel 3 Next Descriptor UDDMA3_ 0x0330 Read/Write 0x00000000 Address Register NEXTDESC UDDMA3_ 0x0334 Device DMA Channel 3 HSB Address Register Read/Write 0x00000000 ADDR UDDMA3_ 0x0338 Device DMA Channel 3 Control Register Read/Write 0x00000000 CONTROL UDDMA3_ 0x033C Device DMA Channel 3 Status Register Read/Write 0x00000000 STATUS Device DMA Channel 4 Next Descriptor UDDMA4_ 0x0340 Read/Write 0x00000000 Address Register NEXTDESC UDDMA4_ 0x0344 Device DMA Channel 4 HSB Address Register Read/Write 0x00000000 ADDR UDDMA4_ 0x0348 Device DMA Channel 4 Control Register Read/Write 0x00000000 CONTROL UDDMA4_ 0x034C Device DMA Channel 4 Status Register Read/Write 0x00000000 STATUS Device DMA Channel 5 Next Descriptor UDDMA5_ 0x0350 Read/Write 0x00000000 Address Register NEXTDESC UDDMA5_ 0x0354 Device DMA Channel 5 HSB Address Register Read/Write 0x00000000 ADDR UDDMA5_ 0x0358 Device DMA Channel 5 Control Register Read/Write 0x00000000 CONTROL UDDMA5_ 0x035C Device DMA Channel 5 Status Register Read/Write 0x00000000 STATUS Device DMA Channel 6 Next Descriptor UDDMA6_ 0x0360 Read/Write 0x00000000 Address Register NEXTDESC UDDMA6_ 0x0364 Device DMA Channel 6 HSB Address Register Read/Write 0x00000000 ADDR UDDMA6_ 0x0368 Device DMA Channel 6 Control Register Read/Write 0x00000000 CONTROL UDDMA6_ 0x036C Device DMA Channel 6 Status Register Read/Write 0x00000000 STATUS 0x0370 - 0x03FC Reserved – – – 532 32058K AVR32-01/12
AT32UC3A Table 30-5. USB PB Memory Map Offset Register Name Access Reset Value 0x0400 Host General Control Register UHCON Read/Write 0x00000000 0x0404 Host Global Interrupt Register UHINT Read-Only 0x00000000 0x0408 Host Global Interrupt Clear Register UHINTCLR Write-Only 0x00000000 0x040C Host Global Interrupt Set Register UHINTSET Write-Only 0x00000000 0x0410 Host Global Interrupt Enable Register UHINTE Read-Only 0x00000000 0x0414 Host Global Interrupt Enable Clear Register UHINTECLR Write-Only 0x00000000 0x0418 Host Global Interrupt Enable Set Register UHINTESET Write-Only 0x00000000 0x0041C Pipe Enable/Reset Register UPRST Read/Write 0x00000000 0x0420 Host Frame Number Register UHFNUM Read/Write 0x00000000 0x0424 Host Address 1 Register UHADDR1 Read/Write 0x00000000 0x0428 Host Address 2 Register UHADDR2 Read/Write 0x00000000 +0x04 - 0x04FC Reserved – – – 0x0500 Pipe 0 Configuration Register UPCFG0 Read/Write 0x00000000 0x0504 Pipe 1 Configuration Register UPCFG1 Read/Write 0x00000000 0x0508 Pipe 2 Configuration Register UPCFG2 Read/Write 0x00000000 0x050C Pipe 3 Configuration Register UPCFG3 Read/Write 0x00000000 0x0510 Pipe 4 Configuration Register UPCFG4 Read/Write 0x00000000 0x0514 Pipe 5 Configuration Register UPCFG5 Read/Write 0x00000000 0x0518 Pipe 6 Configuration Register UPCFG6 Read/Write 0x00000000 +0x04 - 0x052C Reserved – – – 0x0530 Pipe 0 Status Register UPSTA0 Read-Only 0x00000000 0x0534 Pipe 1 Status Register UPSTA1 Read-Only 0x00000000 0x0538 Pipe 2 Status Register UPSTA2 Read-Only 0x00000000 0x053C Pipe 3 Status Register UPSTA3 Read-Only 0x00000000 0x0540 Pipe 4 Status Register UPSTA4 Read-Only 0x00000000 0x0544 Pipe 5 Status Register UPSTA5 Read-Only 0x00000000 0x0548 Pipe 6 Status Register UPSTA6 Read-Only 0x00000000 +0x04 - 0x055C Reserved – – – 0x0560 Pipe 0 Status Clear Register UPSTA0CLR Write-Only 0x00000000 0x0564 Pipe 1 Status Clear Register UPSTA1CLR Write-Only 0x00000000 0x0568 Pipe 2 Status Clear Register UPSTA2CLR Write-Only 0x00000000 0x056C Pipe 3 Status Clear Register UPSTA3CLR Write-Only 0x00000000 0x0570 Pipe 4 Status Clear Register UPSTA4CLR Write-Only 0x00000000 0x0574 Pipe 5 Status Clear Register UPSTA5CLR Write-Only 0x00000000 0x0578 Pipe 6 Status Clear Register UPSTA6CLR Write-Only 0x00000000 +0x04 - 0x058C Reserved – – – 533 32058K AVR32-01/12
AT32UC3A Table 30-5. USB PB Memory Map Offset Register Name Access Reset Value 0x0590 Pipe 0 Status Set Register UPSTA0SET Write-Only 0x00000000 0x0594 Pipe 1 Status Set Register UPSTA1SET Write-Only 0x00000000 0x0598 Pipe 2 Status Set Register UPSTA2SET Write-Only 0x00000000 0x059C Pipe 3 Status Set Register UPSTA3SET Write-Only 0x00000000 0x05A0 Pipe 4 Status Set Register UPSTA4SET Write-Only 0x00000000 0x05A4 Pipe 5 Status Set Register UPSTA5SET Write-Only 0x00000000 0x05A8 Pipe 6 Status Set Register UPSTA6SET Write-Only 0x00000000 +0x04 - 0x05BC Reserved – – – 0x05C0 Pipe 0 Control Register UPCON0 Read-Only 0x00000000 0x05C4 Pipe 1 Control Register UPCON1 Read-Only 0x00000000 0x05C8 Pipe 2 Control Register UPCON2 Read-Only 0x00000000 0x05CC Pipe 3 Control Register UPCON3 Read-Only 0x00000000 0x05D0 Pipe 4 Control Register UPCON4 Read-Only 0x00000000 0x05D4 Pipe 5 Control Register UPCON5 Read-Only 0x00000000 0x05D8 Pipe 6 Control Register UPCON6 Read-Only 0x00000000 +0x04 - 0x05EC Reserved – – – 0x05F0 Pipe 0 Control Set Register UPCON0SET Write-Only 0x00000000 0x05F4 Pipe 1 Control Set Register UPCON1SET Write-Only 0x00000000 0x05F8 Pipe 2 Control Set Register UPCON2SET Write-Only 0x00000000 0x05FC Pipe 3 Control Set Register UPCON3SET Write-Only 0x00000000 0x0600 Pipe 4 Control Set Register UPCON4SET Write-Only 0x00000000 0x0604 Pipe 5 Control Set Register UPCON5SET Write-Only 0x00000000 0x0608 Pipe 6 Control Set Register UPCON6SET Write-Only 0x00000000 +0x04 - 0x061C Reserved – – – 0x0620 Pipe 0 Control Clear Register UPCON0CLR Write-Only 0x00000000 0x0624 Pipe 1 Control Clear Register UPCON1CLR Write-Only 0x00000000 0x0628 Pipe 2 Control Clear Register UPCON2CLR Write-Only 0x00000000 0x062C Pipe 3 Control Clear Register UPCON3CLR Write-Only 0x00000000 0x0630 Pipe 4 Control Clear Register UPCON4CLR Write-Only 0x00000000 0x0634 Pipe 5 Control Clear Register UPCON5CLR Write-Only 0x00000000 0x0638 Pipe 6 Control Clear Register UPCON6CLR Write-Only 0x00000000 +0x04 - 0x064C Reserved – – – 0x0650 Pipe 0 IN Request Register UPINRQ0 Read/Write 0x00000000 0x0654 Pipe 1 IN Request Register UPINRQ1 Read/Write 0x00000000 0x0658 Pipe 2 IN Request Register UPINRQ2 Read/Write 0x00000000 0x065C Pipe 3 IN Request Register UPINRQ3 Read/Write 0x00000000 534 32058K AVR32-01/12
AT32UC3A Table 30-5. USB PB Memory Map Offset Register Name Access Reset Value 0x0660 Pipe 4 IN Request Register UPINRQ4 Read/Write 0x00000000 0x0664 Pipe 5 IN Request Register UPINRQ5 Read/Write 0x00000000 0x0668 Pipe 6 IN Request Register UPINRQ6 Read/Write 0x00000000 0x066C - 0x067C Reserved – – – 0x0680 Pipe 0 Error Register UPERR0 Read/Write 0x00000000 0x0684 Pipe 1 Error Register UPERR1 Read/Write 0x00000000 0x0688 Pipe 2 Error Register UPERR2 Read/Write 0x00000000 0x068C Pipe 3 Error Register UPERR3 Read/Write 0x00000000 0x0690 Pipe 4 Error Register UPERR4 Read/Write 0x00000000 0x0694 Pipe 5 Error Register UPERR5 Read/Write 0x00000000 0x0698 Pipe 6 Error Register UPERR6 Read/Write 0x00000000 +0x04 - 0x070C Reserved – – – Host DMA Channel 1 Next Descriptor Address UHDMA1_ 0x0710 Read/Write 0x00000000 Register NEXTDESC UHDMA1_ 0x0714 Host DMA Channel 1 HSB Address Register Read/Write 0x00000000 ADDR UHDMA1_ 0x0718 Host DMA Channel 1 Control Register Read/Write 0x00000000 CONTROL UHDMA1_ 0x071C Host DMA Channel 1 Status Register Read/Write 0x00000000 STATUS Host DMA Channel 2 Next Descriptor Address UHDMA2_ 0x0720 Read/Write 0x00000000 Register NEXTDESC UHDMA2_ 0x0724 Host DMA Channel 2 HSB Address Register Read/Write 0x00000000 ADDR UHDMA2_ 0x0728 Host DMA Channel 2 Control Register Read/Write 0x00000000 CONTROL UHDMA2_ 0x072C Host DMA Channel 2 Status Register Read/Write 0x00000000 STATUS Host DMA Channel 3 Next Descriptor Address UHDMA3_ 0x0730 Read/Write 0x00000000 Register NEXTDESC UHDMA3_ 0x0734 Host DMA Channel 3 HSB Address Register Read/Write 0x00000000 ADDR UHDMA3_ 0x0738 Host DMA Channel 3 Control Register Read/Write 0x00000000 CONTROL UHDMA3_ 0x073C Host DMA Channel 3Status Register Read/Write 0x00000000 STATUS Host DMA Channel 4 Next Descriptor Address UHDMA4_ 0x0740 Read/Write 0x00000000 Register NEXTDESC UHDMA4_ 0x0744 Host DMA Channel 4 HSB Address Register Read/Write 0x00000000 ADDR 535 32058K AVR32-01/12
AT32UC3A Table 30-5. USB PB Memory Map Offset Register Name Access Reset Value UHDMA4_ 0x0748 Host DMA Channel 4 Control Register Read/Write 0x00000000 CONTROL UHDMA4_ 0x074C Host DMA Channel 4 Status Register Read/Write 0x00000000 STATUS Host DMA Channel 5 Next Descriptor Address UHDMA5_ 0x0750 Read/Write 0x00000000 Register NEXTDESC UHDMA5_ 0x0754 Host DMA Channel 5 HSB Address Register Read/Write 0x00000000 ADDR UHDMA5_ 0x0758 Host DMA Channel 5 Control Register Read/Write 0x00000000 CONTROL UHDMA5_ 0x075C Host DMA Channel 5 Status Register Read/Write 0x00000000 STATUS Host DMA Channel 6 Next Descriptor Address UHDMA6_ 0x0760 Read/Write 0x00000000 Register NEXTDESC UHDMA6_ 0x0764 Host DMA Channel 6 HSB Address Register Read/Write 0x00000000 ADDR UHDMA6_ 0x0768 Host DMA Channel 6 Control Register Read/Write 0x00000000 CONTROL UHDMA6_ 0x076C Host DMA Channel 6 Status Register Read/Write 0x00000000 STATUS 0x0770 - 0x07FC Reserved – – – 0x0800 General Control Register USBCON Read/Write 0x03004000 0x0804 General Status Register USBSTA Read-Only 0x00000400 0x0808 General Status Clear Register USBSTACLR Write-Only 0x00000000 0x080C General Status Set Register USBSTASET Write-Only 0x00000000 0x0810-0x0814 Reserved – – – 0x0818 IP Version Register UVERS Read-Only 0x00000311 0x081C IP Features Register UFEATURES Read-Only 0x00012467 0x0820 IP PB Address Size Register UADDRSIZE Read-Only 0x00001000 0x48555342 0x0824 IP Name Register 1 UNAME1 Read-Only (“HUSB”) 0x004F5447 0x0828 IP Name Register 2 UNAME2 Read-Only (“\0OTG“) 0x082C USB Finite State Machine Status Register USBFSM Read-Only 0x00000009 0x0830 - 0x0BFC Reserved – – – 536 32058K AVR32-01/12
AT32UC3A Table 30-6. USB HSB Memory Map Offset Register Name Access Reset Value 0x00000 - USB_ Pipe/Endpoint 0 FIFO Data Register Read/Write Undefined 0x0FFFC FIFO0_DATA 0x10000 - USB_ Pipe/Endpoint 1 FIFO Data Register Read/Write Undefined 0x1FFFC FIFO1_DATA 0x20000 - USB_ Pipe/Endpoint 2 FIFO Data Register Read/Write Undefined 0x2FFFC FIFO2_DATA 0x30000 - USB_ Pipe/Endpoint 3 FIFO Data Register Read/Write Undefined 0x3FFFC FIFO3_DATA 0x40000 - USB_ Pipe/Endpoint 4 FIFO Data Register Read/Write Undefined 0x4FFFC FIFO4_DATA 0x50000 - USB_ Pipe/Endpoint 5 FIFO Data Register Read/Write Undefined 0x5FFFC FIFO5_DATA 0x60000 - USB_ Pipe/Endpoint 6 FIFO Data Register Read/Write Undefined 0x6FFFC FIFO6_DATA +0x00004 - Reserved – – – 0xFFFFC In the following subsections, the bit and bit-field access types use the following flags: (cid:129)“r”: readable; (cid:129)“w”: writable; (cid:129)“u”: may be updated by hardware. 537 32058K AVR32-01/12
AT32UC3A 30.8.1 USB General Registers 30.8.1.1 USB General Control Register (USBCON) Offset: 0x0800 Register Name: USBCON Access Type: Read/Write Reset Value: 0x03004000 31 30 29 28 27 26 25 24 – – – – – – UIMOD UIDE rw rw 1 1 23 22 21 20 19 18 17 16 – UNLOCK TIMPAGE – – TIMVALUE rw rw rw 0 0 0 0 0 15 14 13 12 11 10 9 8 USBE FRZCLK VBUSPO OTGPADE HNPREQ SRPREQ SRPSEL VBUSHWC rw rw rw rw rwu rwu rw rw 0 1 0 0 0 0 0 0 7 6 5 4 3 2 1 0 STOE HNPERRE ROLEEXE BCERRE VBERRE SRPE VBUSTE IDTE rw rw rw rw rw rw rw rw 0 0 0 0 0 0 0 0 (cid:129) IDTE: ID Transition Interrupt Enable Set to enable the ID Transition interrupt (IDTI). Clear to disable the ID Transition interrupt (IDTI). (cid:129) VBUSTE: VBus Transition Interrupt Enable Set to enable the VBus Transition interrupt (VBUSTI). Clear to disable the VBus Transition interrupt (VBUSTI). (cid:129) SRPE: SRP Interrupt Enable Set to enable the SRP interrupt (SRPI). Clear to disable the SRP interrupt (SRPI). (cid:129) VBERRE: VBus Error Interrupt Enable Set to enable the VBus Error interrupt (VBERRI). Clear to disable the VBus Error interrupt (VBERRI). (cid:129) BCERRE: B-Connection Error Interrupt Enable Set to enable the B-Connection Error interrupt (BCERRI). Clear to disable the B-Connection Error interrupt (BCERRI). (cid:129) ROLEEXE: Role Exchange Interrupt Enable Set to enable the Role Exchange interrupt (ROLEEXI). 538 32058K AVR32-01/12
AT32UC3A Clear to disable the Role Exchange interrupt (ROLEEXI). (cid:129) HNPERRE: HNP Error Interrupt Enable Set to enable the HNP Error interrupt (HNPERRI). Clear to disable the HNP Error interrupt (HNPERRI). (cid:129) STOE: Suspend Time-Out Interrupt Enable Set to enable the Suspend Time-Out interrupt (STOI). Clear to disable the Suspend Time-Out interrupt (STOI). (cid:129) VBUSHWC: VBus Hardware Control Set to disable the hardware control over the USB_VBOF output pin. Clear to enable the hardware control over the USB_VBOF output pin. If cleared, then the USB macro considers VBus problems and resets the USB_VBOF output pin in that event. (cid:129) SRPSEL: SRP Selection Set to choose VBus pulsing as SRP method. Clear to choose data line pulsing as SRP method. (cid:129) SRPREQ: SRP Request Set to initiate an SRP when the controller is in device mode. Cleared by hardware when the controller is initiating an SRP. (cid:129) HNPREQ: HNP Request When the controller is in device mode: Set to initiate an HNP. Cleared by hardware when the controller is initiating an HNP. When the controller is in host mode: Set to accept an HNP. Clear otherwise. (cid:129) OTGPADE: OTG Pad Enable Set to enable the OTG pad. Clear to disable the OTG pad. Note that this bit can be set/cleared even if USBE = 0 or FRZCLK = 1. Disabling the USB controller (by clearing the USBE bit) does not reset this bit. (cid:129) VBUSPO: VBus Polarity When 0, the USB_VBOF output signal is in its default mode (active high). When 1, the USB_VBOF output signal is inverted (active low). To be generic. May be useful to control an external VBus power module. Note that this bit can be set/cleared even if USBE = 0 or FRZCLK = 1. Disabling the USB controller (by clearing the USBE bit) does not reset this bit. 539 32058K AVR32-01/12
AT32UC3A (cid:129) FRZCLK: Freeze USB Clock Set to disable the clock inputs (the resume detection is still active). This reduces power consumption. Unless explicitly stated, all registers then become read-only. Clear to enable the clock inputs. Note that this bit can be set/cleared even if USBE = 0 or FRZCLK = 1. Disabling the USB controller (by clearing the USBE bit) does not reset this bit, but this freezes the clock inputs whatever its value. (cid:129) USBE: USB Macro Enable Set to enable the USB controller. Clear to disable and reset the USB controller, to disable the USB transceiver and to disable the USB controller clock inputs. Unless explicitly stated, all registers then become read-only and are reset. Note that this bit can be set/cleared even if USBE = 0 or FRZCLK = 1. (cid:129) TIMVALUE: Timer Value Set to initialize the new value of the special timer register selected by TIMPAGE. (cid:129) TIMPAGE: Timer Page Write the page value to access a special timer register. (cid:129) UNLOCK: Timer Access Unlock Set to unlock the TIMPAGE and TIMVALUE fields before writing them. Reset to lock the TIMPAGE and TIMVALUE fields. Note that the TIMPAGE and TIMVALUE fields can always be read, whatever the value of UNLOCK. (cid:129) UIDE: USB_ID Pin Enable Set to select the USB mode (device/host) from the USB_ID input pin. Clear to select the USB mode (device/host) with the UIMOD bit. Note that this bit can be set/cleared even if USBE = 0 or FRZCLK = 1. Disabling the USB controller (by clearing the USBE bit) does not reset this bit. (cid:129) UIMOD: USB Macro Mode This bit has no effect when UIDE = 1 (USB_ID input pin activated). Set to select the USB device mode. Clear to select the USB host mode. Note that this bit can be set/cleared even if USBE = 0 or FRZCLK = 1. Disabling the USB controller (by clearing the USBE bit) does not reset this bit. 540 32058K AVR32-01/12
AT32UC3A 30.8.1.2 USB General Status Register (USBSTA) Offset: 0x0804 Register Name: USBSTA Access Type: Read-Only Reset Value: 0x00000400 31 30 29 28 27 26 25 24 – – – – – – – – 23 22 21 20 19 18 17 16 – – – – – – – – 15 14 13 12 11 10 9 8 – – SPEED VBUS ID VBUSRQ – ru ru ru ru 0 0 0 1 0 7 6 5 4 3 2 1 0 STOI HNPERRI ROLEEXI BCERRI VBERRI SRPI VBUSTI IDTI ru ru ru ru ru ru ru ru 0 0 0 0 0 0 0 0 (cid:129) IDTI: ID Transition Interrupt Flag Asynchronous interrupt. Set by hardware when a transition (high to low, low to high) has been detected on the USB_ID input pin. This triggers a USB interrupt if IDTE = 1. Shall be cleared by software (by setting the IDTIC bit) to acknowledge the interrupt (USB clock inputs must be enabled before). Note that this interrupt is generated even if the clock is frozen by the FRZCLK bit. (cid:129) VBUSTI: VBus Transition Interrupt Flag Asynchronous interrupt. Set by hardware when a transition (high to low, low to high) has been detected on the VBUS pad. This triggers a USB inter- rupt if VBUSTE = 1. Shall be cleared by software (by setting the VBUSTIC bit) to acknowledge the interrupt (USB clock inputs must be enabled before). Note that this interrupt is generated even if the clock is frozen by the FRZCLK bit. (cid:129) SRPI: SRP Interrupt Flag Shall only be used in host mode. Set by hardware when an SRP has been detected. This triggers a USB interrupt if SRPE = 1. Shall be cleared by software (by setting the SRPIC bit) to acknowledge the interrupt. 541 32058K AVR32-01/12
AT32UC3A (cid:129) VBERRI: VBus Error Interrupt Flag In host mode, set by hardware when a VBus drop has been detected. This triggers a USB interrupt if VBERRE = 1. Shall be cleared by software (by setting the VBERRIC bit) to acknowledge the interrupt. Note that if a VBus problem occurs, then the VBERRI interrupt is generated even if the USB macro does not go to an error state because of VBUSHWC = 1. (cid:129) BCERRI: B-Connection Error Interrupt Flag In host mode, set by hardware when an error occurs during the B-connection. This triggers a USB interrupt if BCERRE = 1. Shall be cleared by software (by setting the BCERRIC bit) to acknowledge the interrupt. (cid:129) ROLEEXI: Role Exchange Interrupt Flag Set by hardware when the USB controller has successfully switched its mode because of an HNP negotiation (host to device or device to host). This triggers a USB interrupt if ROLEEXE = 1. Shall be cleared by software (by setting the ROLEEXIC bit) to acknowledge the interrupt. (cid:129) HNPERRI: HNP Error Interrupt Flag In device mode, set by hardware when an error has been detected during an HNP negotiation. This triggers a USB interrupt if HNPERRE = 1. Shall be cleared by software (by setting the HNPERRIC bit) to acknowledge the interrupt. (cid:129) STOI: Suspend Time-Out Interrupt Flag In host mode, set by hardware when a time-out error (more than 200ms) has been detected after a suspend. This triggers a USB interrupt if STOE = 1. Shall be cleared by software (by setting the STOIC bit) to acknowledge the interrupt. (cid:129) VBUSRQ: VBus Request In host mode, set by software (by setting the VBUSRQS bit) to assert the USB_VBOF output pin in order to enable the VBus power supply generation. Cleared by software by setting the VBUSRQC bit. Cleared by hardware when a VBus error occurs when VBUSHWC = 0. (cid:129) ID: USB_ID Pin State Set/cleared by hardware and reflects the state of the USB_ID input pin, even if USBE = 0. (cid:129) VBUS: VBus Level Set/cleared by hardware and reflects the level of the VBus line, even if USBE = 0. This bit can be used in device mode to monitor the USB bus connection state of the application. (cid:129) SPEED: Speed Status Set by hardware according to the controller speed mode: SPEED Speed Status 0 0 FULL-SPEED mode 1 0 LOW-SPEED mode X 1 Reserved Shall only be used in host mode. 542 32058K AVR32-01/12
AT32UC3A 30.8.1.3 USB General Status Clear Register (USBSTACLR) Offset: 0x0808 Register Name: USBSTACLR Access Type: Write-Only Read Value: 0x00000000 31 30 29 28 27 26 25 24 – – – – – – – – 23 22 21 20 19 18 17 16 – – – – – – – – 15 14 13 12 11 10 9 8 – – – – – – VBUSRQC – w 0 7 6 5 4 3 2 1 0 STOIC HNPERRIC ROLEEXIC BCERRIC VBERRIC SRPIC VBUSTIC IDTIC w w w w w w w w 0 0 0 0 0 0 0 0 (cid:129) IDTIC: ID Transition Interrupt Flag Clear Set to clear IDTI. Clearing has no effect. Always read as 0. (cid:129) VBUSTIC: VBus Transition Interrupt Flag Clear Set to clear VBUSTI. Clearing has no effect. Always read as 0. (cid:129) SRPIC: SRP Interrupt Flag Clear Set to clear SRPI. Clearing has no effect. Always read as 0. (cid:129) VBERRIC: VBus Error Interrupt Flag Clear Set to clear VBERRI. Clearing has no effect. Always read as 0. (cid:129) BCERRIC: B-Connection Error Interrupt Flag Clear Set to clear BCERRI. 543 32058K AVR32-01/12
AT32UC3A Clearing has no effect. Always read as 0. (cid:129) ROLEEXIC: Role Exchange Interrupt Flag Clear Set to clear ROLEEXI. Clearing has no effect. Always read as 0. (cid:129) HNPERRIC: HNP Error Interrupt Flag Clear Set to clear HNPERRI. Clearing has no effect. Always read as 0. (cid:129) STOIC: Suspend Time-Out Interrupt Flag Clear Set to clear STOI. Clearing has no effect. Always read as 0. (cid:129) VBUSRQC: VBus Request Clear Set to clear VBUSRQ. Clearing has no effect. Always read as 0. 544 32058K AVR32-01/12
AT32UC3A 30.8.1.4 USB General Status Set Register (USBSTASET) Offset: 0x080C Register Name: USBSTASET Access Type: Write-Only Read Value: 0x00000000 31 30 29 28 27 26 25 24 – – – – – – – – 23 22 21 20 19 18 17 16 – – – – – – – – 15 14 13 12 11 10 9 8 – – – – – – VBUSRQS – w 0 7 6 5 4 3 2 1 0 STOIS HNPERRIS ROLEEXIS BCERRIS VBERRIS SRPIS VBUSTIS IDTIS w w w w w w w w 0 0 0 0 0 0 0 0 (cid:129) IDTIS: ID Transition Interrupt Flag Set Set to set IDTI, what may be useful for test or debug purposes. Clearing has no effect. Always read as 0. (cid:129) VBUSTIS: VBus Transition Interrupt Flag Set Set to set VBUSTI, what may be useful for test or debug purposes. Clearing has no effect. Always read as 0. (cid:129) SRPIS: SRP Interrupt Flag Set Set to set SRPI, what may be useful for test or debug purposes. Clearing has no effect. Always read as 0. (cid:129) VBERRIS: VBus Error Interrupt Flag Set Set to set VBERRI, what may be useful for test or debug purposes. Clearing has no effect. Always read as 0. (cid:129) BCERRIS: B-Connection Error Interrupt Flag Set Set to set BCERRI, what may be useful for test or debug purposes. 545 32058K AVR32-01/12
AT32UC3A Clearing has no effect. Always read as 0. (cid:129) ROLEEXIS: Role Exchange Interrupt Flag Set Set to set ROLEEXI, what may be useful for test or debug purposes. Clearing has no effect. Always read as 0. (cid:129) HNPERRIS: HNP Error Interrupt Flag Set Set to set HNPERRI, what may be useful for test or debug purposes. Clearing has no effect. Always read as 0. (cid:129) STOIS: Suspend Time-Out Interrupt Flag Set Set to set STOI, what may be useful for test or debug purposes. Clearing has no effect. Always read as 0. (cid:129) VBUSRQS: VBus Request Set Set to set VBUSRQ. Clearing has no effect. Always read as 0. 546 32058K AVR32-01/12
AT32UC3A 30.8.1.5 USB IP Version Register (UVERS) Offset: 0x0818 Register Name: UVERS Access Type: Read-Only Read Value: 0x00000260 31 30 29 28 27 26 25 24 – – – – – – – – 23 22 21 20 19 18 17 16 – – – – – METAL_FIX_NUM r 0 0 0 15 14 13 12 11 10 9 8 VERSION_NUM r 0 2 7 6 5 4 3 2 1 0 VERSION_NUM r 6 0 (cid:129) VERSION_NUM: IP Version Number This field indicates the version number of the USB macro IP, encoded with 1 version digit per nibble, e.g. 0x0260 for ver- sion 2.6.0. (cid:129) METAL_FIX_NUM: Number of Metal Fixes This field indicates the number of metal fixes of the USB macro IP. 547 32058K AVR32-01/12
AT32UC3A 30.8.1.6 USB IP Features Register (UFEATURES) Offset: 0x081C Register Name: UFEATURES Access Type: Read-Only Read Value: 0x00012467 31 30 29 28 27 26 25 24 – – – – – – – – 23 22 21 20 19 18 17 16 – – – – – – – – 15 14 13 12 11 10 9 8 BYTE_WRITE FIFO_MAX_SIZE DMA_FIFO_WORD_DEPTH _DPRAM r r r 0 0 1 0 0 1 0 0 7 6 5 4 3 2 1 0 DMA_BUFFER DMA_CHANNEL_NBR EPT_NBR_MAX _SIZE r r r 0 1 1 0 0 1 1 1 (cid:129) EPT_NBR_MAX: Maximal Number of Pipes/Endpoints This field indicates the number of hardware-implemented pipes/endpoints: EPT_NBR_MAX Maximal Number of Pipes/Endpoints 0 0 0 0 16 0 0 0 1 1 0 0 1 0 2 ... 1 1 1 1 15 (cid:129) DMA_CHANNEL_NBR: Number of DMA Channels This field indicates the number of hardware-implemented DMA channels: DMA_CHANNEL_NBR Number of DMA Channels 0 0 0 Reserved 0 0 1 1 0 1 0 2 ... 1 1 1 7 548 32058K AVR32-01/12
AT32UC3A (cid:129) DMA_BUFFER_SIZE: DMA Buffer Size This field indicates the size of the DMA buffer: DMA_BUFFER_SIZE DMA Buffer Size 0 16 bits 1 24 bits (cid:129) DMA_FIFO_WORD_DEPTH: DMA FIFO Depth in Words This field indicates the DMA FIFO depth controller in words: DMA_FIFO_WORD_DEPTH DMA FIFO Depth in Words 0 0 0 0 16 0 0 0 1 1 0 0 1 0 2 ... 1 1 1 1 15 (cid:129) FIFO_MAX_SIZE: Maximal FIFO Size This field indicates the maximal FIFO size, i.e. the DPRAM size: FIFO_MAX_SIZE Maximal FIFO Size 0 0 0 < 256 bytes 0 0 1 < 512 bytes 0 1 0 < 1024 bytes 0 1 1 < 2048 bytes 1 0 0 < 4096 bytes 1 0 1 < 8192 bytes 1 1 0 < 16384 bytes 1 1 1 >= 16384 bytes (cid:129) BYTE_WRITE_DPRAM: DPRAM Byte-Write Capability This field indicates whether the DPRAM is byte-write capable: BYTE_WRITE_DPRAM DPRAM Byte-Write Capability 0 DPRAM byte write lanes have shadow logic implemented in the USB macro IP interface. 1 DPRAM is natively byte-write capable. 549 32058K AVR32-01/12
AT32UC3A 30.8.1.7 USB IP PB Address Size Register (UADDRSIZE) Offset: 0x0820 Register Name: UADDRSIZE Access Type: Read-Only Read Value: 0x00001000 31 30 29 28 27 26 25 24 UADDRSIZE r 0 0 0 0 0 0 0 0 23 22 21 20 19 18 17 16 UADDRSIZE r 0 0 0 0 0 0 0 0 15 14 13 12 11 10 9 8 UADDRSIZE r 0 0 0 1 0 0 0 0 7 6 5 4 3 2 1 0 UADDRSIZE r 0 0 0 0 0 0 0 0 (cid:129) UADDRSIZE: IP PB Address Size This field indicates the size of the PB address space reserved for the USB macro IP interface (2 at the power of the number of bits reserved to encode the PB addresses of the USB macro IP interface relatively to its base address). 550 32058K AVR32-01/12
AT32UC3A 30.8.1.8 USB IP Name Register 1 (UNAME1) Offset: 0x0824 Register Name: UNAME1 Access Type: Read-Only Read Value: 0x48555342 (“HUSB”) 31 30 29 28 27 26 25 24 UNAME1 r “H” 23 22 21 20 19 18 17 16 UNAME1 r “U” 15 14 13 12 11 10 9 8 UNAME1 r “S” 7 6 5 4 3 2 1 0 UNAME1 r “B” (cid:129) UNAME1: IP Name Part 1 This field indicates the 1st part of the ASCII-encoded name of the USB macro IP. 551 32058K AVR32-01/12
AT32UC3A 30.8.1.9 USB IP Name Register 2 (UNAME2) Offset: 0x0828 Register Name: UNAME2 Access Type: Read-Only Read Value: 0x004F5447 (“\0OTG“) 31 30 29 28 27 26 25 24 UNAME2 r “\0“ 23 22 21 20 19 18 17 16 UNAME2 r “O“ 15 14 13 12 11 10 9 8 UNAME2 r “T“ 7 6 5 4 3 2 1 0 UNAME2 r “G“ (cid:129) UNAME2: IP Name Part 2 This field indicates the 2nd part of the ASCII-encoded name of the USB macro IP. 552 32058K AVR32-01/12
AT32UC3A 30.8.1.10 USB Finite State Machine Status Register (USBFSM) Offset: 0x082C Register Name: USBFSM Access Type: Read-Only Read Value: 0x00000009 31 30 29 28 27 26 25 24 - - - - - - - - 0 0 0 0 0 0 0 0 23 22 21 20 19 18 17 16 - - - - - - - - 0 0 0 0 0 0 0 0 15 14 13 12 11 10 9 8 - - - - - - - - 0 0 0 0 0 0 0 0 7 6 5 4 3 2 1 0 - - - - DRDSTATE r 0 0 0 0 1 0 0 1 (cid:129) DRDSTATE This field indicates the state of the USB controller. Refer to the OTG specification for more details. USBFSM Description 0 a_idle state : this is the start state for A-devices (when the ID pin is 0) a_wait_vrise : In this state, the A-device waits for the voltage on VBus to rise above the A- 1 device VBus Valid threshold (4.4 V). 2 a_wait_bcon : In this state, the A-device waits for the B-device to signal a connection. 3 a_host : In this state, the A-device that operates in Host mode is operational. 4 a_suspend : The A-device operating as a host is in the suspend mode. 5 a_peripheral : The A-device operates as a peripheral. a_wait_vfall : In this state, the A-device waits for the voltage on VBus to drop below the A- 6 device Session Valid threshold (1.4 V). a_vbus_err : In this state, the A-device waits for recovery of the overcurrent condition that 7 caused it to enter this state. a_wait_discharge : In this state, the A-device waits for the data usb line to discharge (100 8 us). 9 b_idle : this is the start state for B-device (when the ID pin is 1). 10 b_peripheral : In this state, the B-device acts as the peripheral. 553 32058K AVR32-01/12
AT32UC3A USBFSM Description b_wait_begin_hnp : In this state, the B-device is in suspend mode and waits until 3 ms 11 before initiating the HNP protocol if requested. b_wait_discharge : In this state, the B-device waits for the data usb line to discharge (100 12 us) before becoming Host. b_wait_acon : In this state, the B-device waits for the A-device to signal a connect before 13 becoming B-Host. 14 b_host : In this state, the B-device acts as the Host. 15 b_srp_init : In this state, the B-device attempts to start a session using the SRP protocol. 554 32058K AVR32-01/12
AT32UC3A 30.8.2 USB Device Registers 30.8.2.1 USB Device General Control Register (UDCON) Offset: 0x0000 Register Name: UDCON Access Type: Read/Write Reset Value: 0x00000100 31 30 29 28 27 26 25 24 – – – – – – – – 23 22 21 20 19 18 17 16 – – – – – – – – 15 14 13 12 11 10 9 8 – – – LS – – RMWKUP DETACH rw rwu rw 0 0 1 7 6 5 4 3 2 1 0 ADDEN UADD rwu rwu 0 0 0 0 0 0 0 0 (cid:129) UADD: USB Address Set to configure the device address. Cleared by hardware upon receiving a USB reset. (cid:129) ADDEN: Address Enable Set to activate the UADD field (USB address). Cleared by hardware upon receiving a USB reset. Clearing by software has no effect. (cid:129) DETACH: Detach Set to physically detach the device (disconnect internal pull-up resistor from D+ and D-). Clear to reconnect the device. (cid:129) RMWKUP: Remote Wake-Up Set to send an upstream resume to the host for a remote wake-up. Cleared by hardware upon receiving a USB reset or once the upstream resume has been sent. Clearing by software has no effect. (cid:129) LS: Low-Speed Mode Force Set to force the low-speed mode. 555 32058K AVR32-01/12
AT32UC3A Clear to unforce the low-speed mode. Then, the full-speed mode is active. Note that this bit can be set/cleared even if USBE = 0 or FRZCLK = 1. Disabling the USB controller (by clearing the USBE bit) does not reset this bit. 556 32058K AVR32-01/12
AT32UC3A 30.8.2.2 USB Device Global Interrupt Register (UDINT) Offset: 0x0004 Register Name: UDINT Access Type: Read-Only Reset Value: 0x00000000 31 30 29 28 27 26 25 24 DMA6INT DMA5INT DMA4INT DMA3INT DMA2INT DMA1INT – ru ru ru ru ru ru 0 0 0 0 0 0 23 22 21 20 19 18 17 16 – – – EP6INT EP5INT EP4INT ru ru ru 0 0 0 15 14 13 12 11 10 9 8 EP3INT EP2INT EP1INT EP0INT – – – – ru ru ru ru 0 0 0 0 7 6 5 4 3 2 1 0 – UPRSM EORSM WAKEUP EORST SOF – SUSP ru ru ru ru ru ru 0 0 0 0 0 0 (cid:129) SUSP: Suspend Interrupt Flag Set by hardware when a USB “Suspend” idle bus state has been detected for 3 frame periods (J state for 3 ms). This trig- gers a USB interrupt if SUSPE = 1. Shall be cleared by software (by setting the SUSPC bit) to acknowledge the interrupt. Cleared by hardware when a Wake-Up interrupt (WAKEUP) is raised. (cid:129) SOF: Start of Frame Interrupt Flag Set by hardware when a USB “Start of Frame” PID (SOF) has been detected (every 1 ms). This triggers a USB interrupt if SOFE = 1. The FNUM field is updated. Shall be cleared by software (by setting the SOFC bit) to acknowledge the interrupt. (cid:129) EORST: End of Reset Interrupt Flag Set by hardware when a USB “End of Reset” has been detected. This triggers a USB interrupt if EORSTE = 1. Shall be cleared by software (by setting the EORSTC bit) to acknowledge the interrupt. (cid:129) WAKEUP: Wake-Up Interrupt Flag Asynchronous interrupt. Set by hardware when the USB controller is reactivated by a filtered non-idle signal from the lines (not by an upstream resume). This triggers an interrupt if WAKEUPE = 1. Shall be cleared by software (by setting the WAKEUPC bit) to acknowledge the interrupt (USB clock inputs must be enabled before). Cleared by hardware when a Suspend interrupt (SUSP) is raised. 557 32058K AVR32-01/12
AT32UC3A Note that this interrupt is generated even if the clock is frozen by the FRZCLK bit. (cid:129) EORSM: End of Resume Interrupt Flag Set by hardware when the USB controller detects a valid “End of Resume” signal initiated by the host. This triggers a USB interrupt if EORSME = 1. Shall be cleared by software (by setting the EORSMC bit) to acknowledge the interrupt. (cid:129) UPRSM: Upstream Resume Interrupt Flag Set by hardware when the USB controller sends a resume signal called “Upstream Resume”. This triggers a USB interrupt if UPRSME = 1. Shall be cleared by software (by setting the UPRSMC bit) to acknowledge the interrupt (USB clock inputs must be enabled before). (cid:129) EPXINT, X in [0..6]: Endpoint X Interrupt Flag Set by hardware when an interrupt is triggered by the endpoint X (UESTAX, UECONX). This triggers a USB interrupt if EPXINTE = 1. Cleared by hardware when the interrupt source is serviced. (cid:129) DMAXINT, X in [1..6]: DMA Channel X Interrupt Flag Set by hardware when an interrupt is triggered by the DMA channel X. This triggers a USB interrupt if DMAXINTE = 1. Cleared by hardware when the UDDMAX_STATUS interrupt source is cleared. 558 32058K AVR32-01/12
AT32UC3A 30.8.2.3 USB Device Global Interrupt Clear Register (UDINTCLR) Offset: 0x0008 Register Name: UDINTCLR Access Type: Write-Only Read Value: 0x00000000 31 30 29 28 27 26 25 24 – – – – – – – – 23 22 21 20 19 18 17 16 – – – – – – – – 15 14 13 12 11 10 9 8 – – – – – – – – 7 6 5 4 3 2 1 0 – UPRSMC EORSMC WAKEUPC EORSTC SOFC – SUSPC w w w w w w 0 0 0 0 0 0 (cid:129) SUSPC: Suspend Interrupt Flag Clear Set to clear SUSP. Clearing has no effect. Always read as 0. (cid:129) SOFC: Start of Frame Interrupt Flag Clear Set to clear SOF. Clearing has no effect. Always read as 0. (cid:129) EORSTC: End of Reset Interrupt Flag Clear Set to clear EORST. Clearing has no effect. Always read as 0. (cid:129) WAKEUPC: Wake-Up Interrupt Flag Clear Set to clear WAKEUP. Clearing has no effect. Always read as 0. (cid:129) EORSMC: End of Resume Interrupt Flag Clear Set to clear EORSM. 559 32058K AVR32-01/12
AT32UC3A Clearing has no effect. Always read as 0. (cid:129) UPRSMC: Upstream Resume Interrupt Flag Clear Set to clear UPRSM. Clearing has no effect. Always read as 0. 560 32058K AVR32-01/12
AT32UC3A 30.8.2.4 USB Device Global Interrupt Set Register (UDINTSET) Offset: 0x000C Register Name: UDINTSET Access Type: Write-Only Read Value: 0x00000000 31 30 29 28 27 26 25 24 DMA7INTS DMA5INTS DMA4INTS DMA3INTS DMA2INTS DMA1INTS – w w w w w w 0 0 0 0 0 0 23 22 21 20 19 18 17 16 – – – – – – – – 15 14 13 12 11 10 9 8 – – – – – – – – 7 6 5 4 3 2 1 0 – UPRSMS EORSMS WAKEUPS EORSTS SOFS – SUSPS w w w w w w 0 0 0 0 0 0 (cid:129) SUSPS: Suspend Interrupt Flag Set Set to set SUSP, what may be useful for test or debug purposes. Clearing has no effect. Always read as 0. (cid:129) SOFS: Start of Frame Interrupt Flag Set Set to set SOF, what may be useful for test or debug purposes. Clearing has no effect. Always read as 0. (cid:129) EORSTS: End of Reset Interrupt Flag Set Set to set EORST, what may be useful for test or debug purposes. Clearing has no effect. Always read as 0. (cid:129) WAKEUPS: Wake-Up Interrupt Flag Set Set to set WAKEUP, what may be useful for test or debug purposes. Clearing has no effect. Always read as 0. (cid:129) EORSMS: End of Resume Interrupt Flag Set Set to set EORSM, what may be useful for test or debug purposes. 561 32058K AVR32-01/12
AT32UC3A Clearing has no effect. Always read as 0. (cid:129) UPRSMS: Upstream Resume Interrupt Flag Set Set to set UPRSM, what may be useful for test or debug purposes. Clearing has no effect. Always read as 0. (cid:129) DMAXINTS, X in [1..6]: DMA Channel X Interrupt Flag Set Set to set DMAXINT, what may be useful for test or debug purposes. Clearing has no effect. Always read as 0. 562 32058K AVR32-01/12
AT32UC3A 30.8.2.5 USB Device Global Interrupt Enable Register (UDINTE) Offset: 0x0010 Register Name: UDINTE Access Type: Read-Only Reset Value: 0x00000000 31 30 29 28 27 26 25 24 DMA6INTE DMA5INTE DMA4INTE DMA3INTE DMA2INTE DMA1INTE – r r r r r r 0 0 0 0 0 0 23 22 21 20 19 18 17 16 – – – EP6INTE EP5INTE EP4INTE r r r 0 0 0 15 14 13 12 11 10 9 8 EP3INTE EP2INTE EP1INTE EP0INTE – – – – r r r r 0 0 0 0 7 6 5 4 3 2 1 0 – UPRSME EORSME WAKEUPE EORSTE SOFE – SUSPE r r r r r r 0 0 0 0 0 0 (cid:129) SUSPE: Suspend Interrupt Enable Set by software (by setting the SUSPES bit) to enable the Suspend interrupt (SUSP). Clear by software (by setting the SUSPEC bit) to disable the Suspend interrupt (SUSP). (cid:129) SOFE: Start of Frame Interrupt Enable Set by software (by setting the SOFES bit) to enable the Start of Frame interrupt (SOF). Clear by software (by setting the SOFEC bit) to disable the Start of Frame interrupt (SOF). (cid:129) EORSTE: End of Reset Interrupt Enable Set by software (by setting the EORSTES bit) to enable the End of Reset interrupt (EORST). Clear by software (by setting the EORSTEC bit) to disable the End of Reset interrupt (EORST). (cid:129) WAKEUPE: Wake-Up Interrupt Enable Set by software (by setting the WAKEUPES bit) to enable the Wake-Up interrupt (WAKEUP). Clear by software (by setting the WAKEUPEC bit) to disable the Wake-Up interrupt (WAKEUP). (cid:129) EORSME: End of Resume Interrupt Enable Set by software (by setting the EORSMES bit) to enable the End of Resume interrupt (EORSM). Clear by software (by setting the EORSMEC bit) to disable the End of Resume interrupt (EORSM). (cid:129) UPRSME: Upstream Resume Interrupt Enable Set by software (by setting the UPRSMES bit) to enable the Upstream Resume interrupt (UPRSM). Clear by software (by setting the UPRSMEC bit) to disable the Upstream Resume interrupt (UPRSM). 563 32058K AVR32-01/12
AT32UC3A (cid:129) EPXINTE, X in [0..6]: Endpoint X Interrupt Enable Set by software (by setting the EPXINTES bit) to enable the Endpoint X interrupt (EPXINT). Clear by software (by setting the EPXINTEC bit) to disable the Endpoint X interrupt (EPXINT). (cid:129) DMAXINTE, X in [1..6]: DMA Channel X Interrupt Enable Set by software (by setting the DMAXINTES bit) to enable the DMA Channel X interrupt (DMAXINT). Clear by software (by setting the DMAXINTEC bit) to disable the DMA Channel X interrupt (DMAXINT). 564 32058K AVR32-01/12
AT32UC3A 30.8.2.6 USB Device Global Interrupt Enable Clear Register (UDINTECLR) Offset: 0x0014 Register Name: UDINTECLR Access Type: Write-Only Read Value: 0x00000000 31 30 29 28 27 26 25 24 – DMA6INTEC DMA5INTEC DMA4INTEC DMA3INTEC DMA2INTEC DMA1INTEC – w w w w w w 0 0 0 0 0 0 23 22 21 20 19 18 17 16 – – – – – EP6INTEC EP5INTEC EP4INTEC w w w 0 0 0 15 14 13 12 11 10 9 8 EP3INTEC EP2INTEC EP1INTEC EP0INTEC – – – – w w w w 0 0 0 0 7 6 5 4 3 2 1 0 – UPRSMEC EORSMEC WAKEUPEC EORSTEC SOFEC – SUSPEC w w w w w w 0 0 0 0 0 0 (cid:129) SUSPEC: Suspend Interrupt Enable Clear Set to clear SUSPE. Clearing has no effect. Always read as 0. (cid:129) SOFEC: Start of Frame Interrupt Enable Clear Set to clear SOFE. Clearing has no effect. Always read as 0. (cid:129) EORSTEC: End of Reset Interrupt Enable Clear Set to clear EORSTE. Clearing has no effect. Always read as 0. (cid:129) WAKEUPEC: Wake-Up Interrupt Enable Clear Set to clear WAKEUPE. Clearing has no effect. Always read as 0. (cid:129) EORSMEC: End of Resume Interrupt Enable Clear Set to clear EORSME. 565 32058K AVR32-01/12
AT32UC3A Clearing has no effect. Always read as 0. (cid:129) UPRSMEC: Upstream Resume Interrupt Enable Clear Set to clear UPRSME. Clearing has no effect. Always read as 0. (cid:129) EPXINTEC, X in [0..6]: Endpoint X Interrupt Enable Clear Set to clear EPXINTE. Clearing has no effect. Always read as 0. (cid:129) DMAXINTEC, X in [1..6]: DMA Channel X Interrupt Enable Clear Set to clear DMAXINTE. Clearing has no effect. Always read as 0. 566 32058K AVR32-01/12
AT32UC3A 30.8.2.7 USB Device Global Interrupt Enable Set Register (UDINTESET) Offset: 0x0018 Register Name: UDINTESET Access Type: Write-Only Read Value: 0x00000000 31 30 29 28 27 26 25 24 – DMA6INTES DMA5INTES DMA4INTES DMA3INTES DMA2INTES DMA1INTES – w w w w w w 0 0 0 0 0 0 23 22 21 20 19 18 17 16 – – – – – EP6INTES EP5INTES EP4INTES w w w 0 0 0 15 14 13 12 11 10 9 8 EP3INTES EP2INTES EP1INTES EP0INTES – – – – w w w w 0 0 0 0 7 6 5 4 3 2 1 0 – UPRSMES EORSMES WAKEUPES EORSTES SOFES – SUSPES w w w w w w 0 0 0 0 0 0 (cid:129) SUSPES: Suspend Interrupt Enable Set Set to set SUSPE. Clearing has no effect. Always read as 0. (cid:129) SOFES: Start of Frame Interrupt Enable Set Set to set SOFE. Clearing has no effect. Always read as 0. (cid:129) EORSTES: End of Reset Interrupt Enable Set Set to set EORSTE. Clearing has no effect. Always read as 0. (cid:129) WAKEUPES: Wake-Up Interrupt Enable Set Set to set WAKEUPE. Clearing has no effect. Always read as 0. (cid:129) EORSMES: End of Resume Interrupt Enable Set Set to set EORSME. 567 32058K AVR32-01/12
AT32UC3A Clearing has no effect. Always read as 0. (cid:129) UPRSMES: Upstream Resume Interrupt Enable Set Set to set UPRSME. Clearing has no effect. Always read as 0. (cid:129) EPXINTES, X in [0..6]: Endpoint X Interrupt Enable Set Set to set EPXINTE. Clearing has no effect. Always read as 0. (cid:129) DMAXINTES, X in [1..6]: DMA Channel X Interrupt Enable Set Set to set DMAXINTE. Clearing has no effect. Always read as 0. 568 32058K AVR32-01/12
AT32UC3A 30.8.2.8 USB Device Frame Number Register (UDFNUM) Offset: 0x0020 Register Name: UDFNUM Access Type: Read-Only Reset Value: 0x00000000 31 30 29 28 27 26 25 24 – – – – – – – – 23 22 21 20 19 18 17 16 – – – – – – – – 15 14 13 12 11 10 9 8 FNCERR – FNUM ru ru 0 0 0 0 0 0 0 7 6 5 4 3 2 1 0 FNUM – – – ru 0 0 0 0 0 (cid:129) FNUM: Frame Number Set by hardware. These bits are the 11-bit frame number information. They are provided in the last received SOF packet. Cleared by hardware upon receiving a USB reset. Note that FNUM is updated even if a corrupted SOF is received. (cid:129) FNCERR: Frame Number CRC Error Set by hardware when a corrupted frame number is received. This bit and the SOF interrupt flag are updated at the same time. Cleared by hardware upon receiving a USB reset. 569 32058K AVR32-01/12
AT32UC3A 30.8.2.9 USB Endpoint Enable/Reset Register (UERST) Offset: 0x001C Register Name: UERST Access Type: Read/Write Reset Value: 0x00000000 31 30 29 28 27 26 25 24 – – – – – – – – 23 22 21 20 19 18 17 16 – EPRST6 EPRST5 EPRST4 EPRST3 EPRST2 EPRST1 EPRST0 rwu rwu rwu rwu rwu rwu rwu 0 0 0 0 0 0 0 15 14 13 12 11 10 9 8 – – – – – – – – 7 6 5 4 3 2 1 0 – EPEN6 EPEN5 EPEN4 EPEN3 EPEN2 EPEN1 EPEN0 rw rw rw rw rw rw rw 0 0 0 0 0 0 0 (cid:129) EPENX, X in [0..6]: Endpoint X Enable Set to enable the endpoint X. Clear to disable the endpoint X, what forces the endpoint X state to inactive (no answer to USB requests) and resets the endpoint X registers (UECFGX, UESTAX, UECONX) but not the endpoint configuration (ALLOC, EPBK, EPSIZE, EPDIR, EPTYPE). (cid:129) EPRSTX, X in [0..6]: Endpoint X Reset Set by software to reset the endpoint X FIFO prior to any other operation, upon hardware reset or when a USB bus reset has been received. This resets the endpoint X registers (UECFGX, UESTAX, UECONX) but not the endpoint configuration (ALLOC, EPBK, EPSIZE, EPDIR, EPTYPE). All the endpoint mechanism (FIFO counter, reception, transmission, etc.) is reset apart from the Data Toggle Sequence field (DTSEQ) which can be cleared by setting the RSTDT bit (by setting the RSTDTS bit). The endpoint configuration remains active and the endpoint is still enabled. Then, clear by software to complete the reset operation and to start using the FIFO. Cleared by hardware upon receiving a USB reset. 570 32058K AVR32-01/12
AT32UC3A 30.8.2.10 USB Endpoint X Configuration Register (UECFGX) Offset: 0x0100 + X . 0x04 Register Name: UECFGX, X in [0..6] Access Type: Read/Write Reset Value: 0x00000000 31 30 29 28 27 26 25 24 – – – – – – – – 23 22 21 20 19 18 17 16 – – – – – – – – 15 14 13 12 11 10 9 8 – – – EPTYPE – AUTOSW EPDIR rwu rwu rwu 0 0 0 0 7 6 5 4 3 2 1 0 – EPSIZE EPBK ALLOC – rwu rwu rwu 0 0 0 0 0 0 (cid:129) ALLOC: Endpoint Memory Allocate Set to allocate the endpoint memory. Clear to free the endpoint memory. Cleared by hardware upon receiving a USB reset (except for the endpoint 0). Note that after setting this bit, the user should check the CFGOK bit to know whether the allocation of this endpoint is correct. (cid:129) EPBK: Endpoint Banks Set to select the number of banks for the endpoint: EPBK Endpoint Banks 0 0 1 (single-bank endpoint) 0 1 2 (double-bank endpoint) 1 0 3 (triple-bank endpoint) 1 1 Reserved For control endpoints, a single-bank endpoint (00b) should be selected. Cleared by hardware upon receiving a USB reset (except for the endpoint 0). 571 32058K AVR32-01/12
AT32UC3A (cid:129) EPSIZE: Endpoint Size Set to select the size of each endpoint bank: EPSIZE Endpoint Size 0 0 0 8 bytes 0 0 1 16 bytes 0 1 0 32 bytes 0 1 1 64 bytes 1 0 0 128 bytes 1 0 1 256 bytes 1 1 0 512 bytes 1 1 1 1024 bytes Cleared by hardware upon receiving a USB reset (except for the endpoint 0). (cid:129) EPDIR: Endpoint Direction Set to select the endpoint direction: EPDIR Endpoint Direction 0 OUT 1 IN (not for control endpoints) Cleared by hardware upon receiving a USB reset. (cid:129) AUTOSW: Automatic Switch Set to automatically switch bank when it is ready. Clear to disable the automatic bank switching. Cleared by hardware upon receiving a USB reset. (cid:129) EPTYPE: Endpoint Type Set to select the endpoint type: EPTYPE Endpoint Type 0 0 Control 0 1 Isochronous 1 0 Bulk 1 1 Interrupt Cleared by hardware upon receiving a USB reset. 572 32058K AVR32-01/12
AT32UC3A 30.8.2.11 USB Endpoint X Status Register (UESTAX) Offset: 0x0130 + X . 0x04 Register Name: UESTAX, X in [0..6] Access Type: Read-Only Reset Value: 0x00000100 31 30 29 28 27 26 25 24 – BYCT ru 0 0 0 0 0 0 0 23 22 21 20 19 18 17 16 BYCT – CFGOK CTRLDIR RWALL ru ru ru ru 0 0 0 0 0 0 0 15 14 13 12 11 10 9 8 CURRBK NBUSYBK – – DTSEQ ru ru ru 0 0 0 0 0 1 7 6 5 4 3 2 1 0 SHORT STALLEDI/ RXSTPI/ OVERFI NAKINI NAKOUTI RXOUTI TXINI PACKET CRCERRI UNDERFI ru ru ru ru ru ru ru ru 0 0 0 0 0 0 0 0 (cid:129) TXINI: Transmitted IN Data Interrupt Flag For control endpoints: Set by hardware when the current bank is ready to accept a new IN packet. This triggers an EPXINT interrupt if TXINE = 1. Shall be cleared by software (by setting the TXINIC bit) to acknowledge the interrupt and to send the packet. For isochronous, bulk and interrupt IN endpoints: Set by hardware at the same time as FIFOCON when the current bank is free. This triggers an EPXINT interrupt if TXINE = 1. Shall be cleared by software (by setting the TXINIC bit) to acknowledge the interrupt, what has no effect on the end- point FIFO. The software then writes into the FIFO and clears the FIFOCON bit to allow the USB controller to send the data. If the IN endpoint is composed of multiple banks, this also switches to the next bank. The TXINI and FIFOCON bits are updated by hardware in accordance with the status of the next bank. TXINI shall always be cleared before clearing FIFOCON. This bit is inactive (cleared) for isochronous, bulk and interrupt OUT endpoints. (cid:129) RXOUTI: Received OUT Data Interrupt Flag For control endpoints: Set by hardware when the current bank contains a bulk OUT packet (data or status stage). This triggers an EPXINT interrupt if RXOUTE = 1. 573 32058K AVR32-01/12
AT32UC3A Shall be cleared by software (by setting the RXOUTIC bit) to acknowledge the interrupt and to free the bank. For isochronous, bulk and interrupt OUT endpoints: Set by hardware at the same time as FIFOCON when the current bank is full. This triggers an EPXINT interrupt if RXOUTE = 1. Shall be cleared by software (by setting the RXOUTIC bit) to acknowledge the interrupt, what has no effect on the endpoint FIFO. The software then reads from the FIFO and clears the FIFOCON bit to free the bank. If the OUT endpoint is com- posed of multiple banks, this also switches to the next bank. The RXOUTI and FIFOCON bits are updated by hardware in accordance with the status of the next bank. RXOUTI shall always be cleared before clearing FIFOCON. This bit is inactive (cleared) for isochronous, bulk and interrupt IN endpoints. (cid:129) RXSTPI: Received SETUP Interrupt Flag For control endpoints, set by hardware to signal that the current bank contains a new valid SETUP packet. This triggers an EPXINT interrupt if RXSTPE = 1. Shall be cleared by software (by setting the RXSTPIC bit) to acknowledge the interrupt and to free the bank. This bit is inactive (cleared) for bulk and interrupt IN/OUT endpoints and it means UNDERFI for isochronous IN/OUT endpoints. (cid:129) UNDERFI: Underflow Interrupt Flag For isochronous IN/OUT endpoints, set by hardware when an underflow error occurs. This triggers an EPXINT interrupt if UNDERFE = 1. An underflow can occur during IN stage if the host attempts to read from an empty bank. A zero-length packet is then auto- matically sent by the USB controller. An underflow can also occur during OUT stage if the host sends a packet while the bank is already full. Typically, the CPU is not fast enough. The packet is lost. Shall be cleared by software (by setting the UNDERFIC bit) to acknowledge the interrupt. This bit is inactive (cleared) for bulk and interrupt IN/OUT endpoints and it means RXSTPI for control endpoints. (cid:129) NAKOUTI: NAKed OUT Interrupt Flag Set by hardware when a NAK handshake has been sent in response to an OUT request from the host. This triggers an EPXINT interrupt if NAKOUTE = 1. Shall be cleared by software (by setting the NAKOUTIC bit) to acknowledge the interrupt. (cid:129) NAKINI: NAKed IN Interrupt Flag Set by hardware when a NAK handshake has been sent in response to an IN request from the host. This triggers an EPX- INT interrupt if NAKINE = 1. Shall be cleared by software (by setting the NAKINIC bit) to acknowledge the interrupt. (cid:129) OVERFI: Overflow Interrupt Flag Set by hardware when an overflow error occurs. This triggers an EPXINT interrupt if OVERFE = 1. For all endpoint types, an overflow can occur during OUT stage if the host attempts to write into a bank that is too small for the packet. The packet is acknowledged and the Received OUT Data interrupt (RXOUTI) is raised as if no overflow had occurred. The bank is filled with all the first bytes of the packet that fit in. 574 32058K AVR32-01/12
AT32UC3A Shall be cleared by software (by setting the OVERFIC bit) to acknowledge the interrupt. (cid:129) STALLEDI: STALLed Interrupt Flag Set by hardware to signal that a STALL handshake has been sent. To do that, the software has to set the STALLRQ bit (by setting the STALLRQS bit). This triggers an EPXINT interrupt if STALLEDE = 1. Shall be cleared by software (by setting the STALLEDIC bit) to acknowledge the interrupt. (cid:129) CRCERRI: CRC Error Interrupt Flag Set by hardware to signal that a CRC error has been detected in an isochronous OUT endpoint. The OUT packet is stored in the bank as if no CRC error had occurred. This triggers an EPXINT interrupt if CRCERRE = 1. Shall be cleared by software (by setting the CRCERRIC bit) to acknowledge the interrupt. (cid:129) SHORTPACKET: Short Packet Interrupt Flag For non-control OUT endpoints, set by hardware when a short packet has been received. For non-control IN endpoints, set by hardware when a short packet is transmitted upon ending a DMA transfer, thus signal- ing an end of isochronous frame or a bulk or interrupt end of transfer, this only if the End of DMA Buffer Output Enable bit (DMAEND_EN) and the Automatic Switch bit (AUTOSW) are set. This triggers an EPXINT interrupt if SHORTPACKETE = 1. Shall be cleared by software (by setting the SHORTPACKETC bit) to acknowledge the interrupt. (cid:129) DTSEQ: Data Toggle Sequence Set by hardware to indicate the PID of the current bank: DTSEQ Data Toggle Sequence 0 0 Data0 0 1 Data1 1 X Reserved For IN transfers, it indicates the data toggle sequence that will be used for the next packet to be sent. This is not relative to the current bank. For OUT transfers, this value indicates the last data toggle sequence received on the current bank. Note that by default DTSEQ = 01b, as if the last data toggle sequence was Data1, so the next sent or expected data toggle sequence should be Data0. (cid:129) NBUSYBK: Number of Busy Banks Set by hardware to indicate the number of busy banks: NBUSYBK Number of Busy Banks 0 0 0 (all banks free) 0 1 1 1 0 2 1 1 3 For IN endpoints, it indicates the number of banks filled by the user and ready for IN transfer. When all banks are free, this triggers an EPXINT interrupt if NBUSYBKE = 1. 575 32058K AVR32-01/12
AT32UC3A For OUT endpoints, it indicates the number of banks filled by OUT transactions from the host. When all banks are busy, this triggers an EPXINT interrupt if NBUSYBKE = 1. Note that when the FIFOCON bit is cleared (by setting the FIFOCONC bit) to validate a new bank, this field is updated 2 or 3 clock cycles later to calculate the address of the next bank. An EPXINT interrupt is triggered if : - for IN endpoint, NBUSYBKE=1 and all the banks are free. - for OUT endpoint, NBUSYBKE=1 and all the banks are busy. (cid:129) CURRBK: Current Bank For non-control endpoints, set by hardware to indicate the current bank: CURRBK Current Bank 0 0 Bank0 0 1 Bank1 1 0 Bank2 1 1 Reserved Note that this field may be updated 1 clock cycle after the RWALL bit changes, so the user should not poll this field as an interrupt flag. (cid:129) RWALL: Read/Write Allowed For IN endpoints, set by hardware when the current bank is not full, i.e. the software can write further data into the FIFO. For OUT endpoints, set by hardware when the current bank is not empty, i.e. the software can read further data from the FIFO. Never set if STALLRQ = 1 or in case of error. Cleared by hardware otherwise. This bit shall not be used for control endpoints. (cid:129) CTRLDIR: Control Direction Set by hardware after a SETUP packet to indicate the direction of the following packet: CTRLDIR Control Direction 0 OUT 1 IN Can not be set or cleared by software. (cid:129) CFGOK: Configuration OK Status This bit is updated when the ALLOC bit is set. Set by hardware if the endpoint X number of banks (EPBK) and size (EPSIZE) are correct compared to the maximal allowed number of banks and size for this endpoint and to the maximal FIFO size (i.e. the DPRAM size). If this bit is cleared by hardware, the user should reprogram the UECFGX register with correct EPBK and EPSIZE values. (cid:129) BYCT: Byte Count Set by the hardware to indicate the byte count of the FIFO. 576 32058K AVR32-01/12
AT32UC3A For IN endpoints, incremented after each byte written by the software into the endpoint and decremented after each byte sent to the host. For OUT endpoints, incremented after each byte received from the host and decremented after each byte read by the soft- ware from the endpoint. Note that this field may be updated 1 clock cycle after the RWALL bit changes, so the user should not poll this field as an interrupt flag. 577 32058K AVR32-01/12
AT32UC3A 30.8.2.12 USB Endpoint X Status Clear Register (UESTAXCLR) Offset: 0x0160 + X . 0x04 Register Name: UESTAXCLR, X in [0..6] Access Type: Write-Only Read Value: 0x00000000 31 30 29 28 27 26 25 24 – – – – – – – – 23 22 21 20 19 18 17 16 – – – – – – – – 15 14 13 12 11 10 9 8 – – – – – – – – 7 6 5 4 3 2 1 0 SHORT STALLEDIC/ RXSTPIC/ OVERFIC NAKINIC NAKOUTIC RXOUTIC TXINIC PACKETC CRCERRIC UNDERFIC w w w w w w w w 0 0 0 0 0 0 0 0 (cid:129) TXINIC: Transmitted IN Data Interrupt Flag Clear Set to clear TXINI. Clearing has no effect. Always read as 0. (cid:129) RXOUTIC: Received OUT Data Interrupt Flag Clear Set to clear RXOUTI. Clearing has no effect. Always read as 0. (cid:129) RXSTPIC: Received SETUP Interrupt Flag Clear Set to clear RXSTPI. Clearing has no effect. Always read as 0. (cid:129) UNDERFIC: Underflow Interrupt Flag Clear Set to clear UNDERFI. Clearing has no effect. Always read as 0. (cid:129) NAKOUTIC: NAKed OUT Interrupt Flag Clear Set to clear NAKOUTI. 578 32058K AVR32-01/12
AT32UC3A Clearing has no effect. Always read as 0. (cid:129) NAKINIC: NAKed IN Interrupt Flag Clear Set to clear NAKINI. Clearing has no effect. Always read as 0. (cid:129) OVERFIC: Overflow Interrupt Flag Clear Set to clear OVERFI. Clearing has no effect. Always read as 0. (cid:129) STALLEDIC: STALLed Interrupt Flag Clear Set to clear STALLEDI. Clearing has no effect. Always read as 0. (cid:129) CRCERRIC: CRC Error Interrupt Flag Clear Set to clear CRCERRI. Clearing has no effect. Always read as 0. (cid:129) SHORTPACKETC: Short Packet Interrupt Flag Clear Set to clear SHORTPACKET. Clearing has no effect. Always read as 0. 579 32058K AVR32-01/12
AT32UC3A 30.8.2.13 USB Endpoint X Status Set Register (UESTAXSET) Offset: 0x0190 + X . 0x04 Register Name: UESTAXSET, X in [0..6] Access Type: Write-Only Read Value: 0x00000000 31 30 29 28 27 26 25 24 – – – – – – – – 23 22 21 20 19 18 17 16 – – – – – – – – 15 14 13 12 11 10 9 8 – – – NBUSYBKS – – – w 0 7 6 5 4 3 2 1 0 SHORT STALLEDIS/ RXSTPIS/ OVERFIS NAKINIS NAKOUTIS RXOUTIS TXINIS PACKETS CRCERRIS UNDERFIS w w w w w w w w 0 0 0 0 0 0 0 0 (cid:129) TXINIS: Transmitted IN Data Interrupt Flag Set Set to set TXINI, what may be useful for test or debug purposes. Clearing has no effect. Always read as 0. (cid:129) RXOUTIS: Received OUT Data Interrupt Flag Set Set to set RXOUTI, what may be useful for test or debug purposes. Clearing has no effect. Always read as 0. (cid:129) RXSTPIS: Received SETUP Interrupt Flag Set Set to set RXSTPI, what may be useful for test or debug purposes. Clearing has no effect. Always read as 0. (cid:129) UNDERFIS: Underflow Interrupt Flag Set Set to set UNDERFI, what may be useful for test or debug purposes. Clearing has no effect. Always read as 0. (cid:129) NAKOUTIS: NAKed OUT Interrupt Flag Set Set to set NAKOUTI, what may be useful for test or debug purposes. 580 32058K AVR32-01/12
AT32UC3A Clearing has no effect. Always read as 0. (cid:129) NAKINIS: NAKed IN Interrupt Flag Set Set to set NAKINI, what may be useful for test or debug purposes. Clearing has no effect. Always read as 0. (cid:129) OVERFIS: Overflow Interrupt Flag Set Set to set OVERFI, what may be useful for test or debug purposes. Clearing has no effect. Always read as 0. (cid:129) STALLEDIS: STALLed Interrupt Flag Set Set to set STALLEDI, what may be useful for test or debug purposes. Clearing has no effect. Always read as 0. (cid:129) CRCERRIS: CRC Error Interrupt Flag Set Set to set CRCERRI, what may be useful for test or debug purposes. Clearing has no effect. Always read as 0. (cid:129) SHORTPACKETS: Short Packet Interrupt Flag Set Set to set SHORTPACKET, what may be useful for test or debug purposes. Clearing has no effect. Always read as 0. (cid:129) NBUSYBKS: Number of Busy Banks Interrupt Flag Set Set to force the Number of Busy Banks interrupt flag (NBUSYBK), what may be useful for test or debug purposes. Set again to unforce the Number of Busy Banks interrupt flag (NBUSYBK). Clearing has no effect. Always read as 0. 581 32058K AVR32-01/12
AT32UC3A 30.8.2.14 USB Endpoint X Control Register (UECONX) Offset: 0x01C0 + X . 0x04 Register Name: UECONX, X in [0..6] Access Type: Read-Only Reset Value: 0x00000000 31 30 29 28 27 26 25 24 – – – – – – – – 23 22 21 20 19 18 17 16 – – – – STALLRQ RSTDT – EPDISHDMA ru ru r 0 0 0 15 14 13 12 11 10 9 8 – FIFOCON KILLBK NBUSYBKE – – – – ru ru r 0 0 0 7 6 5 4 3 2 1 0 SHORT STALLEDE/ RXSTPE/ OVERFE NAKINE NAKOUTE RXOUTE TXINE PACKETE CRCERRE UNDERFE r r r r r r r r 0 0 0 0 0 0 0 0 (cid:129) TXINE: Transmitted IN Data Interrupt Enable Set by software (by setting the TXINES bit) to enable the Transmitted IN Data interrupt (TXINI). Clear by software (by setting the TXINEC bit) to disable the Transmitted IN Data interrupt (TXINI). (cid:129) RXOUTE: Received OUT Data Interrupt Enable Set by software (by setting the RXOUTES bit) to enable the Received OUT Data interrupt (RXOUT). Clear by software (by setting the RXOUTEC bit) to disable the Received OUT Data interrupt (RXOUT). (cid:129) RXSTPE: Received SETUP Interrupt Enable Set by software (by setting the RXSTPES bit) to enable the Received SETUP interrupt (RXSTPI). Clear by software (by setting the RXSTPEC bit) to disable the Received SETUP interrupt (RXSTPI). (cid:129) UNDERFE: Underflow Interrupt Enable Set by software (by setting the UNDERFES bit) to enable the Underflow interrupt (UNDERFI). Clear by software (by setting the UNDERFEC bit) to disable the Underflow interrupt (UNDERFI). (cid:129) NAKOUTE: NAKed OUT Interrupt Enable Set by software (by setting the NAKOUTES bit) to enable the NAKed OUT interrupt (NAKOUTI). Clear by software (by setting the NAKOUTEC bit) to disable the NAKed OUT interrupt (NAKOUTI). (cid:129) NAKINE: NAKed IN Interrupt Enable Set by software (by setting the NAKINES bit) to enable the NAKed IN interrupt (NAKINI). Clear by software (by setting the NAKINEC bit) to disable the NAKed IN interrupt (NAKINI). 582 32058K AVR32-01/12
AT32UC3A (cid:129) OVERFE: Overflow Interrupt Enable Set by software (by setting the OVERFES bit) to enable the Overflow interrupt (OVERFI). Clear by software (by setting the OVERFEC bit) to disable the Overflow interrupt (OVERFI). (cid:129) STALLEDE: STALLed Interrupt Enable Set by software (by setting the STALLEDES bit) to enable the STALLed interrupt (STALLEDI). Clear by software (by setting the STALLEDEC bit) to disable the STALLed interrupt (STALLEDI). (cid:129) CRCERRE: CRC Error Interrupt Enable Set by software (by setting the CRCERRES bit) to enable the CRC Error interrupt (CRCERRI). Clear by software (by setting the CRCERREC bit) to disable the CRC Error interrupt (CRCERRI). (cid:129) SHORTPACKETE: Short Packet Interrupt Enable Set by software (by setting the SHORTPACKETES bit) to enable the Short Packet interrupt (SHORTPACKET). Clear by software (by setting the SHORTPACKETEC bit) to disable the Short Packet interrupt (SHORTPACKET). (cid:129) NBUSYBKE: Number of Busy Banks Interrupt Enable Set by software (by setting the NBUSYBKES bit) to enable the Number of Busy Banks interrupt (NBUSYBK). Clear by software (by setting the NBUSYBKEC bit) to disable the Number of Busy Banks interrupt (NBUSYBK). (cid:129) KILLBK: Kill IN Bank Set by software (by setting the KILLBKS bit) to kill the last written bank. Cleared by hardware when the bank is killed. Caution: The bank is really cleared when the “kill packet” procedure is accepted by the USB macro core. This bit is auto- matically cleared after the end of the procedure: – The bank is really cleared or the bank is sent (IN transfer): NBUSYBK is decremented. – The bank is not cleared but sent (IN transfer): NBUSYBK is decremented. – The bank is not cleared because it was empty. The software shall wait for this bit to be cleared before trying to kill another packet. Note that this kill request is refused if at the same time an IN token is coming and the last bank is the current one being sent on the USB line. If at least 2 banks are ready to be sent, there is no problem to kill a packet even if an IN token is coming. Indeed, in this case, the current bank is sent (IN transfer) while the last bank is killed. (cid:129) FIFOCON: FIFO Control For control endpoints: The FIFOCON and RWALL bits are irrelevant. The software shall therefore never use them on these endpoints. When read, their value is always 0. For IN endpoints: Set by hardware when the current bank is free, at the same time as TXINI. Clear by software (by setting the FIFOCONC bit) to send the FIFO data and to switch to the next bank. For OUT endpoints: Set by hardware when the current bank is full, at the same time as RXOUTI. 583 32058K AVR32-01/12
AT32UC3A Clear by software (by setting the FIFOCONC bit) to free the current bank and to switch to the next bank. (cid:129) EPDISHDMA: Endpoint Interrupts Disable HDMA Request Enable Set by software (by setting the EPDISHDMAS bit) to pause the on-going DMA channel X transfer on any Endpoint X inter- rupt (EPXINT), whatever the state of the Endpoint X Interrupt Enable bit (EPXINTE). The software then has to acknowledge or to disable the interrupt source (e.g. RXOUTI) or to clear the EPDISHDMA bit (by setting the EPDISHDMAC bit) in order to complete the DMA transfer. In ping-pong mode, if the interrupt is associated to a new system-bank packet (e.g. Bank1) and the current DMA transfer is running on the previous packet (Bank0), then the previous-packet DMA transfer completes normally, but the new-packet DMA transfer will not start (not requested). If the interrupt is not associated to a new system-bank packet (NAKINI, NAKOUTI, etc.), then the request cancellation may occur at any time and may immediately pause the current DMA transfer. This may be used for example to identify erroneous packets, to prevent them from being transferred into a buffer, to com- plete a DMA transfer by software after reception of a short packet, etc. (cid:129) RSTDT: Reset Data Toggle Set by software (by setting the RSTDTS bit) to clear the data toggle sequence, i.e. to set to Data0 the data toggle sequence of the next sent (IN endpoints) or received (OUT endpoints) packet. Cleared by hardware instantaneously. The software does not have to wait for this bit to be cleared. (cid:129) STALLRQ: STALL Request Set by software (by setting the STALLRQS bit) to request to send a STALL handshake to the host. Cleared by hardware when a new SETUP packet is received. Can also be cleared by software by setting the STALLRQC bit. 584 32058K AVR32-01/12
AT32UC3A 30.8.2.15 USB Endpoint X Control Clear Register (UECONXCLR) Offset: 0x0220 + X . 0x04 Register Name: UECONXCLR, X in [0..6] Access Type: Write-Only Read Value: 0x00000000 31 30 29 28 27 26 25 24 – – – – – – – – 23 22 21 20 19 18 17 16 – – – – STALLRQC – – EPDISHDMAC w w 0 0 15 14 13 12 11 10 9 8 – FIFOCONC – NBUSYBKEC – – – – w w 0 0 7 6 5 4 3 2 1 0 SHORT STALLEDEC/ RXSTPEC/ OVERFEC NAKINEC NAKOUTEC RXOUTEC TXINEC PACKETEC CRCERREC UNDERFEC w w w w w w w w 0 0 0 0 0 0 0 0 (cid:129) TXINEC: Transmitted IN Data Interrupt Enable Clear Set to clear TXINE. Clearing has no effect. Always read as 0. (cid:129) RXOUTEC: Received OUT Data Interrupt Enable Clear Set to clear RXOUTE. Clearing has no effect. Always read as 0. (cid:129) RXSTPEC: Received SETUP Interrupt Enable Clear Set to clear RXSTPE. Clearing has no effect. Always read as 0. (cid:129) UNDERFEC: Underflow Interrupt Enable Clear Set to clear UNDERFE. Clearing has no effect. Always read as 0. (cid:129) NAKOUTEC: NAKed OUT Interrupt Enable Clear Set to clear NAKOUTE. 585 32058K AVR32-01/12
AT32UC3A Clearing has no effect. Always read as 0. (cid:129) NAKINEC: NAKed IN Interrupt Enable Clear Set to clear NAKINE. Clearing has no effect. Always read as 0. (cid:129) OVERFEC: Overflow Interrupt Enable Clear Set to clear OVERFE. Clearing has no effect. Always read as 0. (cid:129) STALLEDEC: STALLed Interrupt Enable Clear Set to clear STALLEDE. Clearing has no effect. Always read as 0. (cid:129) CRCERREC: CRC Error Interrupt Enable Clear Set to clear CRCERRE. Clearing has no effect. Always read as 0. (cid:129) SHORTPACKETEC: Short Packet Interrupt Enable Clear Set to clear SHORTPACKETE. Clearing has no effect. Always read as 0. (cid:129) NBUSYBKEC: Number of Busy Banks Interrupt Enable Clear Set to clear NBUSYBKE. Clearing has no effect. Always read as 0. (cid:129) FIFOCONC: FIFO Control Clear Set to clear FIFOCON. Clearing has no effect. Always read as 0. (cid:129) EPDISHDMAC: Endpoint Interrupts Disable HDMA Request Enable Clear Set to clear EPDISHDMA. Clearing has no effect. Always read as 0. 586 32058K AVR32-01/12
AT32UC3A (cid:129) STALLRQC: STALL Request Clear Set to clear STALLRQ. Clearing has no effect. Always read as 0. 587 32058K AVR32-01/12
AT32UC3A 30.8.2.16 USB Endpoint X Control Set Register (UECONXSET) Offset: 0x01F0 + X . 0x04 Register Name: UECONXSET, X in [0..6] Access Type: Write-Only Read Value: 0x00000000 31 30 29 28 27 26 25 24 – – – – – – – – 23 22 21 20 19 18 17 16 – – – – STALLRQS RSTDTS – EPDISHDMAS w w 0 0 15 14 13 12 11 10 9 8 – – KILLBKS NBUSYBKES – – – – w w 0 0 7 6 5 4 3 2 1 0 SHORT STALLEDES/ RXSTPES/ OVERFES NAKINES NAKOUTES RXOUTES TXINES PACKETES CRCERRES UNDERFES w w w w w w w w 0 0 0 0 0 0 0 0 (cid:129) TXINES: Transmitted IN Data Interrupt Enable Set Set to set TXINE. Clearing has no effect. Always read as 0. (cid:129) RXOUTES: Received OUT Data Interrupt Enable Set Set to set RXOUTE. Clearing has no effect. Always read as 0. (cid:129) RXSTPES: Received SETUP Interrupt Enable Set Set to set RXSTPE. Clearing has no effect. Always read as 0. (cid:129) UNDERFES: Underflow Interrupt Enable Set Set to set UNDERFE. Clearing has no effect. Always read as 0. (cid:129) NAKOUTES: NAKed OUT Interrupt Enable Set Set to set NAKOUTE. 588 32058K AVR32-01/12
AT32UC3A Clearing has no effect. Always read as 0. (cid:129) NAKINES: NAKed IN Interrupt Enable Set Set to set NAKINE. Clearing has no effect. Always read as 0. (cid:129) OVERFES: Overflow Interrupt Enable Set Set to set OVERFE. Clearing has no effect. Always read as 0. (cid:129) STALLEDES: STALLed Interrupt Enable Set Set to set STALLEDE. Clearing has no effect. Always read as 0. (cid:129) CRCERRES: CRC Error Interrupt Enable Set Set to set CRCERRE. Clearing has no effect. Always read as 0. (cid:129) SHORTPACKETES: Short Packet Interrupt Enable Set Set to set SHORTPACKETE. Clearing has no effect. Always read as 0. (cid:129) NBUSYBKES: Number of Busy Banks Interrupt Enable Set Set to set NBUSYBKE. Clearing has no effect. Always read as 0. (cid:129) KILLBKS: Kill IN Bank Set Set to set KILLBK. Clearing has no effect. Always read as 0. (cid:129) EPDISHDMAS: Endpoint Interrupts Disable HDMA Request Enable Set Set to set EPDISHDMA. Clearing has no effect. 589 32058K AVR32-01/12
AT32UC3A Always read as 0. (cid:129) RSTDTS: Reset Data Toggle Set Set to set RSTDT. Clearing has no effect. Always read as 0. (cid:129) STALLRQS: STALL Request Set Set to set STALLRQ. Clearing has no effect. Always read as 0. 590 32058K AVR32-01/12
AT32UC3A 30.8.2.17 USB Device DMA Channel X Next Descriptor Address Register (UDDMAX_NEXTDESC) Offset: 0x0310 + (X - 1) . 0x10 Register Name: UDDMAX_NEXTDESC, X in [1..6] Access Type: Read/Write Reset Value: 0x00000000 31 30 29 28 27 26 25 24 NXT_DESC_ADDR rwu 0 0 0 0 0 0 0 0 23 22 21 20 19 18 17 16 NXT_DESC_ADDR rwu 0 0 0 0 0 0 0 0 15 14 13 12 11 10 9 8 NXT_DESC_ADDR rwu 0 0 0 0 0 0 0 0 7 6 5 4 3 2 1 0 NXT_DESC_ADDR – – – – rwu 0 0 0 0 (cid:129) NXT_DESC_ADDR: Next Descriptor Address This field contains the bits 31:4 of the 16-byte aligned address of the next channel descriptor to be processed. Note that this field is written either by software or by descriptor loading. 591 32058K AVR32-01/12
AT32UC3A 30.8.2.18 USB Device DMA Channel X HSB Address Register (UDDMAX_ADDR) Offset: 0x0314 + (X - 1) . 0x10 Register Name: UDDMAX_ADDR, X in [1..6] Access Type: Read/Write Reset Value: 0x00000000 31 30 29 28 27 26 25 24 HSB_ADDR rwu 0 0 0 0 0 0 0 0 23 22 21 20 19 18 17 16 HSB_ADDR rwu 0 0 0 0 0 0 0 0 15 14 13 12 11 10 9 8 HSB_ADDR rwu 0 0 0 0 0 0 0 0 7 6 5 4 3 2 1 0 HSB_ADDR rwu 0 0 0 0 0 0 0 0 (cid:129) HSB_ADDR: HSB Address This field determines the HSB bus current address of a channel transfer. The address set on the HSB address bus is HSB_ADDR rounded down to the nearest word-aligned address, i.e. HSB_ADDR[1:0] is considered as 00b since only word accesses are performed. Channel HSB start and end addresses may be aligned on any byte boundary. The software may write this field only when the Channel Enabled bit (CH_EN) of the UDDMAX_STATUS register is clear. This field is updated at the end of the address phase of the current access to the HSB bus. It is incremented of the HSB access byte-width. The HSB access width is 4 bytes, or less at packet start or end if the start or end address is not aligned on a word boundary. The packet start address is either the channel start address or the next channel address to be accessed in the channel buffer. The packet end address is either the channel end address or the latest channel address accessed in the channel buffer. The channel start address is written by software or loaded from the descriptor, whereas the channel end address is either determined by the end of buffer or the end of USB transfer if the Buffer Close Input Enable bit (BUFF_CLOSE_IN_EN) is set. 592 32058K AVR32-01/12
AT32UC3A 30.8.2.19 USB Device DMA Channel X Control Register (UDDMAX_CONTROL) Offset: 0x0318 + (X - 1) . 0x10 Register Name: UDDMAX_CONTROL, X in [1..6] Access Type: Read/Write Reset Value: 0x00000000 31 30 29 28 27 26 25 24 CH_BYTE_LENGTH rwu 0 0 0 0 0 0 0 0 23 22 21 20 19 18 17 16 CH_BYTE_LENGTH rwu 0 0 0 0 0 0 0 0 15 14 13 12 11 10 9 8 – – – – – – – – 7 6 5 4 3 2 1 0 BURST_LOCK DESC_LD_ EOBUFF_ BUFF_CLOSE LD_NXT_CH_ EOT_IRQ_EN DMAEND_EN CH_EN _EN IRQ_EN IRQ_EN _IN_EN DESC_EN rwu rwu rwu rwu rwu rwu rwu rwu 0 0 0 0 0 0 0 0 (cid:129) CH_EN: Channel Enable Set this bit to enable this channel data transfer. Clear this bit to disable the channel data transfer. This may be used to start or resume any requested transfer. This bit is cleared by hardware when the HSB source channel is disabled at end of dma buffer. (cid:129) LD_NXT_CH_DESC_EN: Load Next Channel Descriptor Enable Set this bit to allow automatic next descriptor loading at the end of the channel transfer. Clear this bit to disable this feature. If set, the dma channel controller loads the next descriptor when the UDDMAX_STATUS.CH_EN bit is reset due to soft- ware of hardware event (for example at the end of the current transfer). (cid:129) BUFF_CLOSE_IN_EN: Buffer Close Input Enable Set this bit to automatically closed the current dma transfer at the end of the usb OUT data transfer (received short packet). Clear this bit to disable this feature. (cid:129) DMAEND_EN: End of DMA Buffer Output Enable Set this bit to properly complete the usb transfer at the end of the dma transfer. For IN endpoint, it means that a short packet (or a Zero Length Packet) will be sent to the usb line to properly closed the usb transfer at the end of the dma transfer. For OUT endpoint, it means that all the banks will be properly released. (NBUSYBK=0) at the end of the dma transfer. 593 32058K AVR32-01/12
AT32UC3A (cid:129) EOT_IRQ_EN: End of USB Transfer Interrupt Enable Set this bit to enable the end of usb OUT data transfer interrupt. This interrupt is generated only if the BUFF_CLOSE_IN_EN bit is set. Clear this bit to disable this interrupt. (cid:129) EOBUFF_IRQ_EN: End of Buffer Interrupt Enable Set this bit to enable the end of buffer interrupt. This interrupt is generated when the channel byte count reaches zero. Clear this bit to disable this interrupt. (cid:129) DESC_LD_IRQ_EN: Descriptor Loaded Interrupt Enable Set this bit to enable the Descripor Loaded interrupt. This interrupt is generated when a Descriptor has been loaded from the system bus. Clear this bit to disable this interrupt. (cid:129) BURST_LOCK_EN: Burst Lock Enable Set this bit to lock the HSB data burst for maximum optimization of HSB busses bandwidth usage and maximization of fly- by duration. If clear, the DMA never locks HSB access. (cid:129) CH_BYTE_LENGTH: Channel Byte Length This field determines the total number of bytes to be transferred for this buffer. The maximum channel transfer size 64 kB is reached when this field is 0 (default value). If the transfer size is unknown, the transfer end is controlled by the peripheral and this field should be set to 0. This field can be written by software or descriptor loading only after the UDDMAX_STATUS.CH_EN bit has been cleared, otherwise this field is ignored. 594 32058K AVR32-01/12
AT32UC3A 30.8.2.20 USB Device DMA Channel X Status Register (UDDMAX_STATUS) Offset: 0x031C + (X - 1) . 0x10 Register Name: UDDMAX_STATUS, X in [1..6] Access Type: Read/Write Reset Value: 0x00000000 31 30 29 28 27 26 25 24 CH_BYTE_CNT ru 0 0 0 0 0 0 0 0 23 22 21 20 19 18 17 16 CH_BYTE_CNT ru 0 0 0 0 0 0 0 0 15 14 13 12 11 10 9 8 – – – – – – – – 7 6 5 4 3 2 1 0 DESC_LD_ EOCH_BUFF_ – EOT_STA – – CH_ACTIVE CH_EN STA STA ru ru ru rwu rwu 0 0 0 0 0 (cid:129) CH_EN: Channel Enabled If set, the DMA channel is currently enabled. If cleared, the DMA channel does no longer transfer data. (cid:129) CH_ACTIVE: Channel Active If set, the DMA channel is currently trying to source USB data. If cleared, the DMA channel is no longer trying to source USB data. When a USB data transfer is completed, this bit is automatically reset. (cid:129) EOT_STA: End of USB Transfer Status Set by hardware when the completion of the usb data transfer has closed the dma transfer. It is valid only if BUFF_CLOSE_EN=1. This bit is automatically cleared when read by software. (cid:129) EOCH_BUFF_STA: End of Channel Buffer Status Set by hardware when the Channel Byte Count downcounts to zero. This bit is automatically cleared when read by software. (cid:129) DESC_LD_STA: Descriptor Loaded Status Set by hardware when a Descriptor has been loaded from the HSB bus. This bit is automatically cleared when read by software. 595 32058K AVR32-01/12
AT32UC3A (cid:129) CH_BYTE_CNT: Channel Byte Count This field gives the current number of bytes still to be transferred for this buffer. This field is decremented at each dma access. This field is reliable (stable) only if the CH_EN flag is 0. 596 32058K AVR32-01/12
AT32UC3A 30.8.3 USB Host Registers 30.8.3.1 USB Host General Control Register (UHCON) Offset: 0x0400 Register Name: UHCON Access Type: Read/Write Reset Value: 0x00000000 31 30 29 28 27 26 25 24 – – – – – – – – 23 22 21 20 19 18 17 16 – – – – – – – – 15 14 13 12 11 10 9 8 – – – – – RESUME RESET SOFE rwu rwu rwu 0 0 0 7 6 5 4 3 2 1 0 – – – – – – – – (cid:129) SOFE: Start of Frame Generation Enable Set this bit to generate SOF on the USB bus in full speed mode and keep alive in low speed mode. Clear this bit to disable the SOF generation and to leave the USB bus in idle state. This bit is set by hardware when a USB reset is requested or an upstream resume interrupt is detected (UHINT.TXRSMI). (cid:129) RESET: Send USB Reset Set this bit to generate a USB Reset on the USB bus. Cleared by hardware when the USB Reset has been sent. It may be useful to clear this bit by software when a device disconnection is detected (UHINT.DDISCI is set) whereas a USB Reset is being sent. (cid:129) RESUME: Send USB Resume Set this bit to generate a USB Resume on the USB bus. Cleared by hardware when the USB Resume has been sent or when a USB reset is requested. Clearing by software has no effect. This bit should be set only when the start of frame generation is enable. (SOFE bit set). 597 32058K AVR32-01/12
AT32UC3A 30.8.3.2 USB Host Global Interrupt Register (UHINT) Offset: 0x0404 Register Name: UHINT Access Type: Read-Only Reset Value: 0x00000000 31 30 29 28 27 26 25 24 – DMA6INT DMA5INT DMA4INT DMA3INT DMA2INT DMA1INT – r r r r r r 0 0 0 0 0 0 23 22 21 20 19 18 17 16 – – – – – – – – 15 14 13 12 11 10 9 8 – P6INT P5INT P4INT P3INT P2INT P1INT P0INT r r r r r r r 0 0 0 0 0 0 0 7 6 5 4 3 2 1 0 – HWUPI HSOFI RXRSMI RSMEDI RSTI DDISCI DCONNI r r r r r r r 0 0 0 0 0 0 0 (cid:129) DCONNI: Device Connection Interrupt Flag Set by hardware when a new device has been connected to the USB bus. Shall be cleared by software (by setting the DCONNIC bit). (cid:129) DDISCI: Device Disconnection Interrupt Flag Set by hardware when the device has been removed from the USB bus. Shall be cleared by software (by setting the DDISCIC bit). (cid:129) RSTI: USB Reset Sent Interrupt Flag Set by hardware when a USB Reset has been sent to the device. Shall be cleared by software (by setting the RSTIC bit). (cid:129) RSMEDI: Downstream Resume Sent Interrupt Flag Set by hardware when a Downstream Resume has been sent to the Device. Shall be cleared by software (by setting the RSMEDIC bit). (cid:129) RXRSMI: Upstream Resume Received Interrupt Flag Set by hardware when an Upstream Resume has been received from the Device. Shall be cleared by software (by setting the RXRSMIC bit). (cid:129) HSOFI: Host Start of Frame Interrupt Flag Set by hardware when a SOF is issued by the Host controller. This triggers a USB interrupt when HSOFE is set. When using the host controller in low speed mode, this bit is also set when a keep-alive is sent. Shall be cleared by software (by setting the HSOFIC bit). 598 32058K AVR32-01/12
AT32UC3A (cid:129) HWUPI: Host Wake-Up Interrupt Flag Asynchronous interrupt. Set by hardware in the following cases : – The Host controller is in the suspend mode (SOFE=0) and an upstream resume from the Peripheral is detected. – The Host controller is in the suspend mode (SOFE=0) and a Peripheral disconnection is detected. – The Host controller is in the Idle state (VBUSRQ=0, no VBus is generated), and an OTG SRP event initiated by the Peripheral is detected. Note that this interrupt is generated even if the clock is frozen by the FRZCLK bit. (cid:129) PXINT, X in [0..6]: Pipe X Interrupt Flag Set by hardware when an interrupt is triggered by the endpoint X (UPSTAX). This triggers a USB interrupt if the corre- sponding pipe interrupt enable bit is set (UHINTE register). Cleared by hardware when the interrupt source is served. (cid:129) DMAXINT, X in [1..6]: DMA Channel X Interrupt Flag Set by hardware when an interrupt is triggered by the DMA channel X. This triggers a USB interrupt if the corresponding DMAXINTE is set (UHINTE register). Cleared by hardware when the UHDMAX_STATUS interrupt source is cleared. 599 32058K AVR32-01/12
AT32UC3A 30.8.3.3 USB Host Global Interrupt Clear Register (UHINTCLR) Offset: 0x0408 Register Name: UHINTCLR Access Type: Write-Only Read Value: 0x00000000 31 30 29 28 27 26 25 24 – – – – – – – – 23 22 21 20 19 18 17 16 – – – – – – – – 15 14 13 12 11 10 9 8 – – – – – – – – 7 6 5 4 3 2 1 0 – HWUPIC HSOFIC RXRSMIC RSMEDIC RSTIC DDISCIC DCONNIC w w w w w w w 0 0 0 0 0 0 0 (cid:129) DCONNIC: Device Connection Interrupt Flag Clear Set to clear DCONNI. Clearing has no effect. Always read as 0. (cid:129) DDISCIC: Device Disconnection Interrupt Flag Clear Set to clear DDISCI. Clearing has no effect. Always read as 0. (cid:129) RSTIC: USB Reset Sent Interrupt Flag Clear Set to clear RSTI. Clearing has no effect. Always read as 0. (cid:129) RSMEDIC: Downstream Resume Sent Interrupt Flag Clear Set to clear RSMEDI. Clearing has no effect. Always read as 0. (cid:129) RXRSMIC: Upstream Resume Received Interrupt Flag Clear Set to clear RXRSMI. 600 32058K AVR32-01/12
AT32UC3A Clearing has no effect. Always read as 0. (cid:129) HSOFIC: Host Start of Frame Interrupt Flag Clear Set to clear HSOFI. Clearing has no effect. Always read as 0. (cid:129) HWUPIC: Host Wake-Up Interrupt Flag Clear Set to clear HWUPI. Clearing has no effect. Always read as 0. 601 32058K AVR32-01/12
AT32UC3A 30.8.3.4 USB Host Global Interrupt Set Register (UHINTSET) Offset: 0x040C Register Name: UHINTSET Access Type: Write-Only Read Value: 0x00000000 31 30 29 28 27 26 25 24 – DMA6INTS DMA5INTS DMA4INTS DMA3INTS DMA2INTS DMA1INTS – w w w w w w 0 0 0 0 0 0 23 22 21 20 19 18 17 16 – – – – – – – – 15 14 13 12 11 10 9 8 – – – – – – – – 7 6 5 4 3 2 1 0 – HWUPIS HSOFIS RXRSMIS RSMEDIS RSTIS DDISCIS DCONNIS w w w w w w w 0 0 0 0 0 0 0 (cid:129) DCONNIS: Device Connection Interrupt Flag Set Set to set DCONNI, what may be useful for test or debug purposes. Clearing has no effect. Always read as 0. (cid:129) DDISCIS: Device Disconnection Interrupt Flag Set Set to set DDISCI, what may be useful for test or debug purposes. Clearing has no effect. Always read as 0. (cid:129) RSTIS: USB Reset Sent Interrupt Flag Set Set to set RSTI, what may be useful for test or debug purposes. Clearing has no effect. Always read as 0. (cid:129) RSMEDIS: Downstream Resume Sent Interrupt Flag Set Set to set RSMEDI, what may be useful for test or debug purposes. Clearing has no effect. Always read as 0. (cid:129) RXRSMIS: Upstream Resume Received Interrupt Flag Set Set to set RXRSMI, what may be useful for test or debug purposes. 602 32058K AVR32-01/12
AT32UC3A Clearing has no effect. Always read as 0. (cid:129) HSOFIS: Host Start of Frame Interrupt Flag Set Set to set HSOFI, what may be useful for test or debug purposes. Clearing has no effect. Always read as 0. (cid:129) HWUPIS: Host Wake-Up Interrupt Flag Set Set to set HWUPI, what may be useful for test or debug purposes. Clearing has no effect. Always read as 0. (cid:129) DMAXINTS, X in [1..6]: DMA Channel X Interrupt Flag Set Set to set DMAXINT, what may be useful for test or debug purposes. Clearing has no effect. Always read as 0. 603 32058K AVR32-01/12
AT32UC3A 30.8.3.5 USB Host Global Interrupt Enable Register (UHINTE) Offset: 0x0410 Register Name: UHINTE Access Type: Read-Only Reset Value: 0x00000000 31 30 29 28 27 26 25 24 – DMA6INTE DMA5INTE DMA4INTE DMA3INTE DMA2INTE DMA1INTE – r r r r r r 0 0 0 0 0 0 23 22 21 20 19 18 17 16 – – – – – – – – 15 14 13 12 11 10 9 8 – P6INTE P5INTE P4INTE P3INTE P2INTE P1INTE P0INTE r r r r r r r 0 0 0 0 0 0 0 7 6 5 4 3 2 1 0 – HWUPIE HSOFIE RXRSMIE RSMEDIE RSTIE DDISCIE DCONNIE r r r r r r r 0 0 0 0 0 0 0 (cid:129) DCONNIE: Device Connection Interrupt Enable Set by software (by setting the DCONNIES bit) to enable the Device Connection interrupt (DCONNI). Clear by software (by setting the DCONNIEC bit) to disable the Device Connection interrupt (DCONNI). (cid:129) DDISCIE: Device Disconnection Interrupt Enable Set by software (by setting the DDISCIES bit) to enable the Device Disconnection interrupt (DDISCI). Clear by software (by setting the DDISCIEC bit) to disable the Device Disconnection interrupt (DDISCI). (cid:129) RSTIE: USB Reset Sent Interrupt Enable Set by software (by setting the RSTIES bit) to enable the USB Reset Sent interrupt (RSTI). Clear by software (by setting the RSTIEC bit) to disable the USB Reset Sent interrupt (RSTI). (cid:129) RSMEDIE: Downstream Resume Sent Interrupt Enable Set by software (by setting the RSMEDIES bit) to enable the Downstream Resume interrupt (RSMEDI). Clear by software (by setting the RSMEDIEC bit) to disable the Downstream Resume interrupt (RSMEDI). (cid:129) RXRSMIE: Upstream Resume Received Interrupt Enable Set by software (by setting the RXRSMIES bit) to enable the Upstream Resume Received interrupt (RXRSMI). Clear by software (by setting the RXRSMIEC bit) to disable the Downstream Resume interrupt (RXRSMI). (cid:129) HSOFIE: Host Start of Frame Interrupt Enable Set by software (by setting the HSOFIES bit) to enable the Host Start of Frame interrupt (HSOFI). Clear by software (by setting the HSOFIEC bit) to disable the Host Start of Frame interrupt (HSOFI). 604 32058K AVR32-01/12
AT32UC3A (cid:129) HWUPIE: Host Wake-Up Interrupt Enable Set by software (by setting the HWUPIES bit) to enable the Host Wake-up Interrupt (HWUPI). Clear by software (by setting the HWUPIEC bit) to disable the Host Wake-up Interrupt (HWUPI). (cid:129) PXINTE, X in [0..6]: Pipe X Interrupt Enable Set by software (by setting the PXINTES bit) to enable the Pipe X Interrupt (PXINT). Clear by software (by setting the PXINTEC bit) to disable the Pipe X Interrupt (PXINT). (cid:129) DMAXINTE, X in [1..6]: DMA Channel X Interrupt Enable Set by software (by setting the DMAXINTES bit) to enable the DMA Channel X Interrupt (DMAXINT). Clear by software (by setting the DMAXINTEC bit) to disable the DMA Channel X Interrupt (DMAXINT). 605 32058K AVR32-01/12
AT32UC3A 30.8.3.6 USB Host Global Interrupt Enable Clear Register (UHINTECLR) Offset: 0x0414 Register Name: UHINTECLR Access Type: Write-Only Read Value: 0x00000000 31 30 29 28 27 26 25 24 – DMA6INTEC DMA5INTEC DMA4INTEC DMA3INTEC DMA2INTEC DMA1INTEC – w w w w w w 0 0 0 0 0 0 23 22 21 20 19 18 17 16 – – – – – – – – 15 14 13 12 11 10 9 8 – P6INTEC P5INTEC P4INTEC P3INTEC P2INTEC P1INTEC P0INTEC w w w w w w w 0 0 0 0 0 0 0 7 6 5 4 3 2 1 0 – HWUPIEC HSOFIEC RXRSMIEC RSMEDIEC RSTIEC DDISCIEC DCONNIEC w w w w w w w 0 0 0 0 0 0 0 (cid:129) DCONNIEC: Device Connection Interrupt Enable Clear Set to clear DCONNIE. Clearing has no effect. Always read as 0. (cid:129) DDISCIEC: Device Disconnection Interrupt Enable Clear Set to clear DDISCIEC. Clearing has no effect. Always read as 0. (cid:129) RSTIEC: USB Reset Sent Interrupt Enable Clear Set to clear RSTIEC. Clearing has no effect. Always read as 0. (cid:129) RSMEDIEC: Downstream Resume Sent Interrupt Enable Clear Set to clear RSMEDIEC. Clearing has no effect. Always read as 0. (cid:129) RXRSMIEC: Upstream Resume Received Interrupt Enable Clear Set to clear RSTIEC. 606 32058K AVR32-01/12
AT32UC3A Clearing has no effect. Always read as 0. (cid:129) HSOFIEC: Host Start of Frame Interrupt Enable Clear Set to clear HSOFIEC. Clearing has no effect. Always read as 0. (cid:129) HWUPIEC: Host Wake-Up Interrupt Enable Clear Set to clear HWUPIEC. Clearing has no effect. Always read as 0. (cid:129) PXINTEC, X in [0..6]: Pipe X Interrupt Enable Clear Set to clear PXINTEC. Clearing has no effect. Always read as 0. (cid:129) DMAXINTEC, X in [1..6]: DMA Channel X Interrupt Enable Clear Set to clear DMAXINTEC. Clearing has no effect. Always read as 0. 607 32058K AVR32-01/12
AT32UC3A 30.8.3.7 USB Host Global Interrupt Enable Set Register (UHINTESET) Offset: 0x0418 Register Name: UHINTESET Access Type: Write-Only Read Value: 0x00000000 31 30 29 28 27 26 25 24 – DMA6INTES DMA5INTES DMA4INTES DMA3INTES DMA2INTES DMA1INTES – w w w w w w 0 0 0 0 0 0 23 22 21 20 19 18 17 16 – – – – – – – – 15 14 13 12 11 10 9 8 – P6INTES P5INTES P4INTES P3INTES P2INTES P1INTES P0INTES w w w w w w w 0 0 0 0 0 0 0 7 6 5 4 3 2 1 0 – HWUPIES HSOFIES RXRSMIES RSMEDIES RSTIES DDISCIES DCONNIES w w w w w w w 0 0 0 0 0 0 0 (cid:129) DCONNIES: Device Connection Interrupt Enable Set Set to set DCONNIE. Clearing has no effect. Always read as 0. (cid:129) DDISCIES: Device Disconnection Interrupt Enable Set Set to set DDISCIE. Clearing has no effect. Always read as 0. (cid:129) RSTIES: USB Reset Sent Interrupt Enable Set Set to set RSTIE. Clearing has no effect. Always read as 0. (cid:129) RSMEDIES: Downstream Resume Sent Interrupt Enable Set Set to set RSMEDIE. Clearing has no effect. Always read as 0. (cid:129) RXRSMIES: Upstream Resume Received Interrupt Enable Set Set to set RXRSMIE. 608 32058K AVR32-01/12
AT32UC3A Clearing has no effect. Always read as 0. (cid:129) HSOFIES: Host Start of Frame Interrupt Enable Set Set to set HSOFIE. Clearing has no effect. Always read as 0. (cid:129) HWUPIES: Host Wake-Up Interrupt Enable Set Set to set HWUPIE. Clearing has no effect. Always read as 0. (cid:129) PXINTES, X in [0..6]: Pipe X Interrupt Enable Set Set to set PXINTE. Clearing has no effect. Always read as 0. (cid:129) DMAXINTES, X in [1..6]: DMA Channel X Interrupt Enable Set Set to set DMAXINTE. Clearing has no effect. Always read as 0. 609 32058K AVR32-01/12
AT32UC3A 30.8.3.8 USB Host Frame Number Register (UHFNUM) Offset: 0x0420 Register Name: UHFNUM Access Type: Read/Write Reset Value: 0x00000000 31 30 29 28 27 26 25 24 – – – – – – – – 23 22 21 20 19 18 17 16 FLENHIGH ru 0 0 0 0 0 0 0 0 15 14 13 12 11 10 9 8 – – FNUM rwu 0 0 0 0 0 0 7 6 5 4 3 2 1 0 FNUM – – – rwu 0 0 0 0 0 (cid:129) FNUM: Frame Number The value contained in this register is the current SOF number. This value can be modified by software. (cid:129) FLENHIGH: Frame Length This register gives the 8 high-order bits of the 14-bits internal frame counter (frame counter at 12 Mhz, counter length is 12000 to ensure a SOF generation every 1 ms). 610 32058K AVR32-01/12
AT32UC3A 30.8.3.9 USB Host Frame Number Register (UHADDR1) Offset: 0x0424 Register Name: UHADDR1 Access Type: Read/Write Reset Value: 0x00000000 31 30 29 28 27 26 25 24 – UHADDR_P3 rwu – 0 0 0 0 0 0 0 23 22 21 20 19 18 17 16 – UHADDR_P2 rwu – 0 0 0 0 0 0 0 15 14 13 12 11 10 9 8 – UHADDR_P1 rwu – 0 0 0 0 0 0 0 7 6 5 4 3 2 1 0 – UHADDR_P0 rwu – 0 0 0 0 (cid:129) UHADDR_P0 : USB Host Address These bits should contain the address of the Pipe0 of the USB Device. Cleared by hardware when a USB reset is requested. (cid:129) UHADDR_P1 : USB Host Address These bits should contain the address of the Pipe1 of the USB Device. Cleared by hardware when a USB reset is requested. (cid:129) UHADDR_P2 : USB Host Address These bits should contain the address of the Pipe2 of the USB Device. Cleared by hardware when a USB reset is requested. (cid:129) UHADDR_P3 : USB Host Address These bits should contain the address of the Pipe3 of the USB Device. Cleared by hardware when a USB reset is requested. 611 32058K AVR32-01/12
AT32UC3A 30.8.3.10 USB Host Frame Number Register (UHADDR2) Offset: 0x0428 Register Name: UHADDR2 Access Type: Read/Write Reset Value: 0x00000000 31 30 29 28 27 26 25 24 – – – – – – – – rwu – 0 0 0 0 0 0 0 23 22 21 20 19 18 17 16 – UHADDR_P6 rwu – 0 0 0 0 0 0 0 15 14 13 12 11 10 9 8 – UHADDR_P5 rwu – 0 0 0 0 0 0 0 7 6 5 4 3 2 1 0 – UHADDR_P4 rwu – 0 0 0 0 (cid:129) UHADDR_P4 : USB Host Address These bits should contain the address of the Pipe4 of the USB Device. Cleared by hardware when a USB reset is requested. (cid:129) UHADDR_P5 : USB Host Address These bits should contain the address of the Pipe5 of the USB Device. Cleared by hardware when a USB reset is requested. (cid:129) UHADDR_P6 : USB Host Address These bits should contain the address of the Pipe6 of the USB Device. Cleared by hardware when a USB reset is requested. (cid:129) UHADDR_P7 : USB Host Address These bits should contain the address of the Pipe7 of the USB Device. Cleared by hardware when a USB reset is requested. 612 32058K AVR32-01/12
AT32UC3A 30.8.3.11 USB Pipe Enable/Reset Register (UPRST) Offset: 0x0041C Register Name: UPRST Access Type: Read/Write Reset Value: 0x00000000 31 30 29 28 27 26 25 24 – – – – – – – – 23 22 21 20 19 18 17 16 – PRST6 PRST5 PRST4 PRST3 PRST2 PRST1 PRST0 rwu rwu rwu rwu rwu rwu rwu 0 0 0 0 0 0 0 15 14 13 12 11 10 9 8 – – – – – – – – 7 6 5 4 3 2 1 0 – PEN6 PEN5 PEN4 PEN3 PEN2 PEN1 PEN0 rw rw rw rw rw rw rw 0 0 0 0 0 0 0 (cid:129) PENX, X in [0..6]: Pipe X Enable Set to enable the Pipe X. Clear to disable the Pipe X, what forces the Pipe X state to inactive and resets the pipe X registers (UPCFGX, UPSTAX, UPCONX) but not the pipe configuration (ALLOC, PBK, PSIZE). (cid:129) PRSTX, X in [0..6]: Pipe X Reset Set by software to reset the Pipe X FIFO. This resets the endpoint X registers (UPCFGX, UPSTAX, UPCONX) but not the endpoint configuration (ALLOC, PBK, PSIZE, PTOKEN, PTYPE, PEPNUM, INTFRQ). All the endpoint mechanism (FIFO counter, reception, transmission, etc.) is reset apart from the Data Toggle management . The endpoint configuration remains active and the endpoint is still enabled. Then, clear by software to complete the reset operation and to start using the FIFO. 613 32058K AVR32-01/12
AT32UC3A 30.8.3.12 USB Pipe X Configuration Register (UPCFGX) Offset: 0x0500 + X . 0x04 Register Name: UPCFGX, X in [0..6] Access Type: Read/Write Reset Value: 0x00000000 31 30 29 28 27 26 25 24 INTFRQ rwu 0 0 0 0 0 0 0 0 23 22 21 20 19 18 17 16 – – – – PEPNUM rwu 0 0 0 0 15 14 13 12 11 10 9 8 – – PTYPE – AUTOSW PTOKEN rwu rwu rwu 0 0 0 0 0 7 6 5 4 3 2 1 0 – PSIZE PBK ALLOC – rwu rwu rwu 0 0 0 0 0 0 (cid:129) ALLOC: Pipe Memory Allocate Set to configure the pipe memory with the characteristics. Clear to update the memory allocation. This bit is cleared by hardware when a USB Reset is requested. Refer to the DPRAM Management chapter for more details. (cid:129) PBK: Pipe Banks Set to select the number of banks for the pipe: PBK Endpoint Banks 0 0 1 (single-bank pipe) 0 1 2 (double-bank pipe) 1 0 3 (triple-bank pipe) 1 1 Reserved For control endpoints, a single-bank pipe (00b) should be selected. Cleared by hardware upon sending a USB reset. 614 32058K AVR32-01/12
AT32UC3A (cid:129) PSIZE: Pipe Size Set to select the size of each pipe bank: PSIZE Endpoint Size 0 0 0 8 bytes 0 0 1 16 bytes 0 1 0 32 bytes 0 1 1 64 bytes 1 0 0 128 bytes 1 0 1 256 bytes 1 1 0 512 bytes 1 1 1 1024 bytes Cleared by hardware upon sending a USB reset. (cid:129) PTOKEN: Pipe Token Set to select the endpoint token: PTOKEN Endpoint Direction 00 SETUP 01 IN 10 OUT 11 reserved (cid:129) AUTOSW: Automatic Switch Set to automatically switch bank when it is ready. Clear to disable the automatic bank switching. Cleared by hardware upon sending a USB reset. (cid:129) PTYPE: Pipe Type Set to select the pipe type: PTYPE Pipe Type 0 0 Control 0 1 Isochronous 1 0 Bulk 1 1 Interrupt Cleared by hardware upon sending a USB reset. (cid:129) PEPNUM: Pipe Endpoint Number Set this field according to the Pipe configuration. Set the number of the endpoint targeted by the pipe. This value is from 0 to 15. Cleared by hardware upon sending a USB reset. 615 32058K AVR32-01/12
AT32UC3A (cid:129) INTFRQ: Pipe Interrupt Request Frequency These bits are the maximum value in millisecond of the polling period for an Interrupt Pipe. This value has no effect for a non-Interrupt Pipe. Cleared by hardware upon sending a USB reset. 616 32058K AVR32-01/12
AT32UC3A 30.8.3.13 USB Pipe X Status Register (UPSTAX) Offset: 0x0530 + X . 0x04 Register Name: UPSTAX, X in [0..6] Access Type: Read-Only Reset Value: 0x00000000 31 30 29 28 27 26 25 24 – PBYCT r 0 0 0 0 0 0 0 23 22 21 20 19 18 17 16 PBYCT – CFGOK – RWALL r r r 0 0 0 0 0 0 15 14 13 12 11 10 9 8 CURRBK NBUSYBK – – DTSEQ r r r 0 0 0 0 0 0 7 6 5 4 3 2 1 0 SHORT RXSTALLDI/ TXSTPI/ OVERFI NAKEDI PERRI TXOUTI RXINI PACKETI CRCERRI UNDERFI r r r r r r r r 0 0 0 0 0 0 0 0 (cid:129) RXINI: Received IN Data Interrupt Flag Set by hardware when a new USB message is stored in the current bank of the Pipe. This triggers an interrupt if the RXINE bit is set. Shall be cleared by software (by setting the RXINIC bit). (cid:129) TXOUTI: Transmitted OUT Data Interrupt Flag Set by hardware when the current OUT bank is free and can be filled. This triggers an interrupt if the TXOUTE bit is set. Shall be cleared by software (by setting the TXOUTIC bit). (cid:129) TXSTPI: Transmitted SETUP Interrupt Flag For Control endpoints. Set by hardware when the current SETUP bank is free and can be filled. This triggers an interrupt if the TXSTPE bit is set. Shall be cleared by software (by setting the TXSTPIC bit). (cid:129) UNDERFI: Underflow Interrupt Flag Set by hardware when a transaction underflow occurs in the current isochronous or interrupt pipe. (the pipe can’t send the OUT data packet in time because the current bank is not ready). A zero-length-packet (ZLP) will be send instead of. This triggers an interrupt if the UNDERFLE bit is set. Shall be cleared by software (by setting the UNDERFIC bit). (cid:129) PERRI: Pipe Error Interrupt Flag Set by hardware when an error occurs on the current bank of the Pipe. This triggers an interrupt if the PERRE bit is set. Refers to the UPERRX register to determine the source of the error. Automatically cleared by hardware when the error source bit is cleared. (cid:129) NAKEDI: NAKed Interrupt Flag Set by hardware when a NAK has been received on the current bank of the Pipe. This triggers an interrupt if the NAKEDE bit is set. Shall be cleared by software (by setting the NAKEDIC bit). 617 32058K AVR32-01/12
AT32UC3A (cid:129) OVERFI: Overflow Interrupt Flag Set by hardware when the current Pipe has received more data than the maximum length of the current Pipe. An interrupt is triggered if the OVERFIE bit is set. Shall be cleared by software (by setting the OVERFIC bit). (cid:129) RXSTALLDI: Received STALLed Interrupt Flag For all endpoints but isochronous. Set by hardware when a STALL handshake has been received on the current bank of the Pipe. The Pipe is automatically frozen. This triggers an interrupt if the RXSTALLE bit is set. Shall be cleared to hand- shake the interrupt (by setting the RXSTALLDIC bit). (cid:129) CRCERRI: CRC Error Interrupt Flag For isochronous endpoint, set by hardware when a CRC error occurs on the current bank of the Pipe. This triggers an inter- rupt if the TXSTPE bit is set. Shall be cleared to handshake the interrupt (by setting the CRCERRIC bit). (cid:129) SHORTPACKETI: Short Packet Interrupt Flag Set by hardware when a short packet is received by the host controller (packet length inferior to the PSIZE programmed field). Shall be cleared to handshake the interrupt (by setting the SHORTPACKETIC bit). (cid:129) DTSEQ: Data Toggle Sequence Set by hardware to indicate the data PID of the current bank. DTSEQ Data toggle sequence 0 0 Data0 0 1 Data1 1 0 reserved 1 1 reserved For OUT pipe, this field indicates the data toggle of the next packet that will be sent. For IN pipe, this field indicates the data toggle of the received packet stored in the current bank. (cid:129) NBUSYBK: Number of Busy Banks Set by hardware to indicate the number of busy bank. For OUT Pipe, it indicates the number of busy bank(s), filled by the user, ready for OUT transfer. When all banks are busy, this triggers an PXINT interrupt if UPCONX.NBUSYBKE = 1. For IN Pipe, it indicates the number of busy bank(s) filled by IN transaction from the Device. When all banks are free, this triggers an PXINT interrupt if UPCONX.NBUSYBKE = 1.. NBUSYBK Number of busy bank 0 0 All banks are free. 0 1 1 busy bank 1 0 2 busy banks 1 1 reserved 618 32058K AVR32-01/12
AT32UC3A (cid:129) CURRBK: Current Bank For non-control pipe, set by hardware to indicate the number of the current bank. CURRBK Current Bank 0 0 Bank0 0 1 Bank1 1 0 Bank2 1 1 Reserved Note that this field may be updated 1 clock cycle after the RWALL bit changes, so the user should not poll this field as an interrupt flag. (cid:129) RWALL: Read/Write Allowed For OUT pipe, set by hardware when the current bank is not full, i.e. the software can write further data into the FIFO. For IN pipe, set by hardware when the current bank is not empty, i.e. the software can read further data from the FIFO. Cleared by hardware otherwise. This bit is also cleared by hardware when the RXSTALL or the PERR bit is set. (cid:129) CFGOK: Configuration OK Status This bit is updated when the ALLOC bit is set. Set by hardware if the pipe X number of banks (PBK) and size (PSIZE) are correct compared to the maximal allowed num- ber of banks and size for this pipe and to the maximal FIFO size (i.e. the DPRAM size). If this bit is cleared by hardware, the user should reprogram the UPCFGX register with correct PBK and PSIZE values. (cid:129) PBYCT: Pipe Byte Count Set by the hardware to indicate the byte count of the FIFO. For OUT pipe, incremented after each byte written by the software into the pipe and decremented after each byte sent to the peripheral. For In pipe, incremented after each byte received from the peripheral and decremented after each byte read by the soft- ware from the pipe. Note that this field may be updated 1 clock cycle after the RWALL bit changes, so the user should not poll this field as an interrupt flag. 619 32058K AVR32-01/12
AT32UC3A 30.8.3.14 USB Pipe X Status Clear Register (UPSTAXCLR) Offset: 0x0560 + X . 0x04 Register Name: UPSTAXCLR, X in [0..6] Access Type: Write-Only Read Value: 0x00000000 31 30 29 28 27 26 25 24 – – – – – – – – 23 22 21 20 19 18 17 16 – – – – – – – – 15 14 13 12 11 10 9 8 – – – – – – – – 7 6 5 4 3 2 1 0 SHORT RXSTALLDIC/ TXSTPIC/ OVERFIC NAKEDIC – TXOUTIC RXINIC PACKETIC CRCERRIC UNDERFIC w w w w w w w 0 0 0 0 0 0 0 (cid:129) RXINIC: Received IN Data Interrupt Flag Clear Set to clear RXINI. Clearing has no effect. Always read as 0. (cid:129) TXOUTIC: Transmitted OUT Data Interrupt Flag Clear Set to clear TXOUTI. Clearing has no effect. Always read as 0. (cid:129) TXSTPIC: Transmitted SETUP Interrupt Flag Clear Set to clear TXSTPI. Clearing has no effect. Always read as 0. (cid:129) UNDERFIC: Underflow Interrupt Flag Clear Set to clear UNDERFI. Clearing has no effect. Always read as 0. (cid:129) NAKEDIC: NAKed Interrupt Flag Clear Set to clear NAKEDI. 620 32058K AVR32-01/12
AT32UC3A Clearing has no effect. Always read as 0. (cid:129) OVERFIC: Overflow Interrupt Flag Clear Set to clear OVERFI. Clearing has no effect. Always read as 0. (cid:129) RXSTALLDIC: Received STALLed Interrupt Flag Clear Set to clear RXSTALLDI. Clearing has no effect. Always read as 0. (cid:129) CRCERRIC: CRC Error Interrupt Flag Clear Set to clear CRCERRI. Clearing has no effect. Always read as 0. (cid:129) SHORTPACKETIC: Short Packet Interrupt Flag Clear Set to clear SHORTPACKETI. Clearing has no effect. Always read as 0. 621 32058K AVR32-01/12
AT32UC3A 30.8.3.15 USB Pipe X Status Set Register (UPSTAXSET) Offset: 0x0590 + X . 0x04 Register Name: UPSTAXSET, X in [0..6] Access Type: Write-Only Read Value: 0x00000000 31 30 29 28 27 26 25 24 – – – – – – – – 23 22 21 20 19 18 17 16 – – – – – – – – 15 14 13 12 11 10 9 8 – – – NBUSYBKS – – – – w 0 7 6 5 4 3 2 1 0 SHORT RXSTALLDIS/ TXSTPIS/ OVERFIS NAKEDIS PERRIS TXOUTIS RXINIS PACKETIS CRCERRIS UNDERFIS w w w w w w w w 0 0 0 0 0 0 0 0 (cid:129) RXINIS: Received IN Data Interrupt Flag Set Set to set RXINI, what may be useful for test or debug purposes. Clearing has no effect. Always read as 0. (cid:129) TXOUTIS: Transmitted OUT Data Interrupt Flag Set Set to set TXOUTI, what may be useful for test or debug purposes. Clearing has no effect. Always read as 0. (cid:129) TXSTPIS: Transmitted SETUP Interrupt Flag Set Set to set TXSTPI, what may be useful for test or debug purposes. Clearing has no effect. Always read as 0. (cid:129) UNDERFIS: Underflow Interrupt Flag Set Set to set UNDERFI, what may be useful for test or debug purposes. Clearing has no effect. Always read as 0. (cid:129) PERRIS: Pipe Error Interrupt Flag Set Set to set PERRI, what may be useful for test or debug purposes. 622 32058K AVR32-01/12
AT32UC3A Clearing has no effect. Always read as 0. (cid:129) NAKEDIS: NAKed Interrupt Flag Set Set to set NAKEDI, what may be useful for test or debug purposes. Clearing has no effect. Always read as 0. (cid:129) OVERFIS: Overflow Interrupt Flag Set Set to set OVERFI, what may be useful for test or debug purposes. Clearing has no effect. Always read as 0. (cid:129) RXSTALLDIS: Received STALLed Interrupt Flag Set Set to set RXSTALLDI, what may be useful for test or debug purposes. Clearing has no effect. Always read as 0. (cid:129) CRCERRIS: CRC Error Interrupt Flag Set Set to set CRCERRI, what may be useful for test or debug purposes. Clearing has no effect. Always read as 0. (cid:129) SHORTPACKETIS: Short Packet Interrupt Flag Set Set to set SHORTPACKETI, what may be useful for test or debug purposes. Clearing has no effect. Always read as 0. (cid:129) NBUSYBKS: Number of Busy Banks Interrupt Flag Set Set to set NBUSYBKI, what may be useful for test or debug purposes. Clearing has no effect. Always read as 0. 623 32058K AVR32-01/12
AT32UC3A 30.8.3.16 USB Pipe X Control Register (UPCONX) Offset: 0x05C0 + X . 0x04 Register Name: UPCONX, X in [0..6] Access Type: Read-Only Reset Value: 0x00000000 31 30 29 28 27 26 25 24 – – – – – – – – 23 22 21 20 19 18 17 16 – – – – – RSTDT PFREEZE PDISHDMA ru ru ru 0 0 0 15 14 13 12 11 10 9 8 – FIFOCON – NBUSYBKE – – – – ru ru 0 0 7 6 5 4 3 2 1 0 SHORT RXSTALLDE/ TXSTPE/ OVERFIE NAKEDE PERRE TXOUTE RXINE PACKETIE CRCERRE UNDERFIE ru ru ru ru ru ru ru ru 0 0 0 0 0 0 0 0 (cid:129) RXINE: Received IN Data Interrupt Enable Set by software (by setting the RXINES bit) to enable the Received IN Data interrupt (RXINE). Clear by software (by setting the RXINEC bit) to disable the Received IN Data interrupt (RXINE). (cid:129) TXOUTE: Transmitted OUT Data Interrupt Enable Set by software (by setting the TXOUTES bit) to enable the Transmitted OUT Data interrupt (TXOUTE). Clear by software (by setting the TXOUTECbit) to disable the Transmitted OUT Data interrupt (TXOUTE). (cid:129) TXSTPE: Transmitted SETUP Interrupt Enable Set by software (by setting the TXSTPES bit) to enable the Transmitted SETUP interrupt (TXSTPE). Clear by software (by setting the TXSTPEC bit) to disable the Transmitted SETUP interrupt (TXSTPE). (cid:129) UNDERFIE: Underflow Interrupt Enable Set by software (by setting the UNDERFIES bit) to enable the Underflow interrupt (UNDERFIE). Clear by software (by setting the UNDERFIEC bit) to disable the Underflow interrupt (UNDERFIE). (cid:129) PERRE: Pipe Error Interrupt Enable Set by software (by setting the PERRES bit) to enable the Pipe Error interrupt (PERRE). Clear by software (by setting the PERREC bit) to disable the Pipe Error interrupt (PERRE). (cid:129) NAKEDE: NAKed Interrupt Enable Set by software (by setting the NAKEDES bit) to enable the NAKed interrupt (NAKEDE). Clear by software (by setting the NAKEDEC bit) to disable the NAKed interrupt (NAKEDE). 624 32058K AVR32-01/12
AT32UC3A (cid:129) OVERFIE: Overflow Interrupt Enable Set by software (by setting the OVERFIES bit) to enable the Overflow interrupt (OVERFIE). Clear by software (by setting the OVERFIEC bit) to disable the Overflow interrupt (OVERFIE). (cid:129) RXSTALLDE: Received STALLed Interrupt Enable Set by software (by setting the RXSTALLDES bit) to enable the Received STALLed interrupt (RXSTALLDE). Clear by software (by setting the RXSTALLDEC bit) to disable the Received STALLed interrupt (RXSTALLDE). (cid:129) CRCERRE: CRC Error Interrupt Enable Set by software (by setting the CRCERRES bit) to enable the CRC Error interrupt (CRCERRE). Clear by software (by setting the CRCERREC bit) to disable the CRC Error interrupt (CRCERRE). (cid:129) SHORTPACKETIE: Short Packet Interrupt Enable Set by software (by setting the SHORTPACKETES bit) to enable the Short Packet interrupt (SHORTPACKETIE). Clear by software (by setting the SHORTPACKETEC bit) to disable the Short Packet interrupt (SHORTPACKETE). (cid:129) NBUSYBKE: Number of Busy Banks Interrupt Enable Set by software (by setting the NBUSYBKES bit) to enable the Number of Busy Banks interrupt (NBUSYBKE). Clear by software (by setting the NBUSYBKEC bit) to disable the Number of Busy Banks interrupt (NBUSYBKE). (cid:129) FIFOCON: FIFO Control For OUT and SETUP Pipe : Set by hardware when the current bank is free, at the same time than TXOUTI or TXSTPI. Clear by software (by setting the FIFOCONC bit) to send the FIFO data and to switch the bank. For IN Pipe: Set by hardware when a new IN message is stored in the current bank, at the same time than RXINI. Clear by software (by setting the FIFOCONC bit) to free the current bank and to switch to the next bank. (cid:129) PDISHDMA: Pipe Interrupts Disable HDMA Request Enable See EPDISHDMA (UECONX register). (cid:129) PFREEZE: Pipe Freeze Set by software (by setting the PFREEZES bit) to Freeze the Pipe requests generation. Clear by software (by setting the PFREEZEC bit) to enable the Pipe request generation. This bit is set by hardware when: - the pipe is not configured - a STALL handshake has been received on this Pipe - An error occurs on the Pipe (PERR = 1) - (INRQ+1) In requests have been processed This bit is set at 1 by hardware after a Pipe reset or a Pipe enable. (cid:129) RSTDT: Reset Data Toggle Set by software (by setting the RSTDTS bit) to reset the Data Toggle to its initial value for the current Pipe. Cleared by hardware when proceed. 625 32058K AVR32-01/12
AT32UC3A 30.8.3.17 USB Pipe X Control Clear Register (UPCONXCLR) Offset: 0x0620 + X . 0x04 Register Name: UPCONXCLR, X in [0..6] Access Type: Write-Only Read Value: 0x00000000 31 30 29 28 27 26 25 24 – – – – – – – – 23 22 21 20 19 18 17 16 – – – – – – PFREEZEC PDISHDMAC w w 0 0 15 14 13 12 11 10 9 8 – FIFOCONC – NBUSYBKEC – – – – w w 0 0 7 6 5 4 3 2 1 0 SHORT RXSTALLDEC/ TXSTPEC/ OVERFIEC NAKEDEC PERREC TXOUTEC RXINEC PACKETIEC CRCERREC UNDERFIEC w w w w w w w w 0 0 0 0 0 0 0 0 (cid:129) RXINEC: Received IN Data Interrupt Enable Clear Set to clear RXINE. Clearing has no effect. Always read as 0. (cid:129) TXOUTEC: Transmitted OUT Data Interrupt Enable Clear Set to clear TXOUTE. Clearing has no effect. Always read as 0. (cid:129) TXSTPEC: Transmitted SETUP Interrupt Enable Clear Set to clear TXSTPE. Clearing has no effect. Always read as 0. (cid:129) UNDERFIEC: Underflow Interrupt Enable Clear Set to clear UNDERFIE. Clearing has no effect. Always read as 0. (cid:129) PERREC: Pipe Error Interrupt Enable Clear Set to clear PERRE. 626 32058K AVR32-01/12
AT32UC3A Clearing has no effect. Always read as 0. (cid:129) NAKEDEC: NAKed Interrupt Enable Clear Set to clear NAKEDE. Clearing has no effect. Always read as 0. (cid:129) OVERFIEC: Overflow Interrupt Enable Clear Set to clear OVERFIE. Clearing has no effect. Always read as 0. (cid:129) RXSTALLDEC: Received STALLed Interrupt Enable Clear Set to clear RXSTALLDE. Clearing has no effect. Always read as 0. (cid:129) CRCERREC: CRC Error Interrupt Enable Clear Set to clear CRCERRE. Clearing has no effect. Always read as 0. (cid:129) SHORTPACKETIEC: Short Packet Interrupt Enable Clear Set to clear SHORTPACKETIE. Clearing has no effect. Always read as 0. (cid:129) NBUSYBKEC: Number of Busy Banks Interrupt Enable Clear Set to clear NBUSYBKE. Clearing has no effect. Always read as 0. (cid:129) FIFOCONC: FIFO Control Clear Set to clear FIFOCON. Clearing has no effect. Always read as 0. (cid:129) PDISHDMAC: Pipe Interrupts Disable HDMA Request Enable Clear Set to clear PDISHDMA. Clearing has no effect. Always read as 0. (cid:129) PFREEZEC: Pipe Freeze Clear Set to clear PFREEZE. 627 32058K AVR32-01/12
AT32UC3A Clearing has no effect. Always read as 0. 628 32058K AVR32-01/12
AT32UC3A 30.8.3.18 USB Pipe X Control Set Register (UPCONXSET) Offset: 0x05F0 + X . 0x04 Register Name: UPCONXSET, X in [0..6] Access Type: Write-Only Read Value: 0x00000000 31 30 29 28 27 26 25 24 – – – – – – – – 23 22 21 20 19 18 17 16 – – – – – RSTDTS PFREEZES PDISHDMAS w w w 0 0 0 15 14 13 12 11 10 9 8 – – – NBUSYBKES – – – – w 0 7 6 5 4 3 2 1 0 SHORT RXSTALLDES/ TXSTPES/ OVERFIES NAKEDES PERRES TXOUTES RXINES PACKETIES CRCERRES UNDERFIES w w w w w w w w 0 0 0 0 0 0 0 0 (cid:129) RXINES: Received IN Data Interrupt Enable Set Set to set RXINE. Clearing has no effect. Always read as 0. (cid:129) TXOUTE: Transmitted OUT Data Interrupt Enable Set Set to set RXINE. Clearing has no effect. Always read as 0. (cid:129) TXSTPES: Transmitted SETUP Interrupt Enable Set Set to set TXSTPE. Clearing has no effect. Always read as 0. (cid:129) UNDERFIES: Underflow Interrupt Enable Set Set to set UNDERFIE. Clearing has no effect. Always read as 0. (cid:129) PERRES: Pipe Error Interrupt Enable Set Set to set PERRE. 629 32058K AVR32-01/12
AT32UC3A Clearing has no effect. Always read as 0. (cid:129) NAKEDES: NAKed Interrupt Enable Set Set to set NAKEDE. Clearing has no effect. Always read as 0. (cid:129) OVERFIES: Overflow Interrupt Enable Set Set to set OVERFIE. Clearing has no effect. Always read as 0. (cid:129) RXSTALLDES: Received STALLed Interrupt Enable Set Set to set RXSTALLDE. Clearing has no effect. Always read as 0. (cid:129) CRCERRES: CRC Error Interrupt Enable Set Set to set CRCERRE. Clearing has no effect. Always read as 0. (cid:129) SHORTPACKETIES: Short Packet Interrupt Enable Set Set to set SHORTPACKETIE. Clearing has no effect. Always read as 0. (cid:129) NBUSYBKES: Number of Busy Banks Interrupt Enable Set Set to set NBUSYBKE. Clearing has no effect. Always read as 0. (cid:129) PDISHDMAS: Pipe Interrupts Disable HDMA Request Enable Set Set to set PDISHDMA. Clearing has no effect. Always read as 0. (cid:129) PFREEZES: Pipe Freeze Set Set to set PFREEZE. Clearing has no effect. Always read as 0. (cid:129) RSTDTS: Reset Data Toggle Set Set to set RSTDT. 630 32058K AVR32-01/12
AT32UC3A Clearing has no effect. Always read as 0. 631 32058K AVR32-01/12
AT32UC3A 30.8.3.19 USB Pipe X IN Request Register (UPINRQX) Offset: 0x0650 + X . 0x04 Register Name: UPINRQX, X in [0..6] Access Type: Read/Write Reset Value: 0x00000000 31 30 29 28 27 26 25 24 – – – – – – – – 23 22 21 20 19 18 17 16 – – – – – – – – 15 14 13 12 11 10 9 8 – – – – – – – INMODE rw 0 7 6 5 4 3 2 1 0 INRQ rwu 0 0 0 0 0 0 0 0 (cid:129) INRQ: IN Request Number before Freeze Enter the number of IN transactions before the USB controller freezes the pipe. The USB controller will perform (INRQ+1) IN requests before to freeze the Pipe. This counter is automatically decreased by 1 each time a IN request has been suc- cessfully performed. This register has no effect when the INMODE bit is set (infinite IN requests generation till the pipe is not frozen). (cid:129) INMODE: IN Request Mode Set this bit to allow the USB controller to perform infinite IN requests when the Pipe is not frozen. Clear this bit to perform a pre-defined number of IN requests. This number is the INRQ field. 632 32058K AVR32-01/12
AT32UC3A 30.8.3.20 USB Pipe X Error Register (UPERRX) Offset: 0x0680 + X . 0x04 Register Name: UPERRX, X in [0..6] Access Type: Read/Write Reset Value: 0x00000000 31 30 29 28 27 26 25 24 – – – – – – – – 23 22 21 20 19 18 17 16 – – – – – – – – 15 14 13 12 11 10 9 8 – – – – – – – – 7 6 5 4 3 2 1 0 – COUNTER CRC16 TIMEOUT PID DATAPID DATATGL rwu rwu rwu rwu rwu rwu 0 0 0 0 0 0 0 (cid:129) DATATGL: Data Toggle Error Set by hardware when a data toggle error has been detected. Shall be cleared by software. Setting by software has no effect. (cid:129) DATAPID: Data PID Error Set by hardware when a data PID error has been detected. Shall be cleared by software. Setting by software has no effect. (cid:129) PID: PID Error Set by hardware when a PID error has been detected. Shall be cleared by software. Setting by software has no effect. (cid:129) TIMEOUT: Time-Out Error Set by hardware when a Timeout error has been detected. Shall be cleared by software. Setting by software has no effect. (cid:129) CRC16: CRC16 Error Set by hardware when a CRC16 error has been detected. Shall be cleared by software. Setting by software has no effect. (cid:129) COUNTER: Error Counter Set by hardware when a CRC16 error has been detected. Shall be cleared by software. Setting by software has no effect. 633 32058K AVR32-01/12
AT32UC3A 30.8.3.21 USB Host DMA Channel X Next Descriptor Address Register (UHDMAX_NEXTDESC) Offset: 0x0710 + (X - 1) . 0x10 Register Name: UHDMAX_NEXTDESC, X in [1..6] Access Type: Read/Write Reset Value: 0x00000000 31 30 29 28 27 26 25 24 NXT_DESC_ADDR rwu 0 0 0 0 0 0 0 0 23 22 21 20 19 18 17 16 NXT_DESC_ADDR rwu 0 0 0 0 0 0 0 0 15 14 13 12 11 10 9 8 NXT_DESC_ADDR rwu 0 0 0 0 0 0 0 0 7 6 5 4 3 2 1 0 NXT_DESC_ADDR – – – – rwu 0 0 0 0 Same as ”USB Device DMA Channel X Next Descriptor Address Register (UDDMAX_NEXTDESC)” on page 591. 634 32058K AVR32-01/12
AT32UC3A 30.8.3.22 USB Host DMA Channel X HSB Address Register (UHDMAX_ADDR) Offset: 0x0714 + (X - 1) . 0x10 Register Name: UHDMAX_ADDR, X in [1..6] Access Type: Read/Write Reset Value: 0x00000000 31 30 29 28 27 26 25 24 HSB_ADDR rwu 0 0 0 0 0 0 0 0 23 22 21 20 19 18 17 16 HSB_ADDR rwu 0 0 0 0 0 0 0 0 15 14 13 12 11 10 9 8 HSB_ADDR rwu 0 0 0 0 0 0 0 0 7 6 5 4 3 2 1 0 HSB_ADDR rwu 0 0 0 0 0 0 0 0 Same as ”USB Device DMA Channel X HSB Address Register (UDDMAX_ADDR)” on page 592. 635 32058K AVR32-01/12
AT32UC3A 30.8.3.23 USB Host DMA Channel X Control Register (UHDMAX_CONTROL) Offset: 0x0718 + (X - 1) . 0x10 Register Name: UHDMAX_CONTROL, X in [1..6] Access Type: Read/Write Reset Value: 0x00000000 31 30 29 28 27 26 25 24 CH_BYTE_LENGTH rwu 0 0 0 0 0 0 0 0 23 22 21 20 19 18 17 16 CH_BYTE_LENGTH rwu 0 0 0 0 0 0 0 0 15 14 13 12 11 10 9 8 – – – – – – – – 7 6 5 4 3 2 1 0 BURST_LOCK DESC_LD_ EOBUFF_ BUFF_CLOSE LD_NXT_CH_ EOT_IRQ_EN DMAEND_EN CH_EN _EN IRQ_EN IRQ_EN _IN_EN DESC_EN rwu rwu rwu rwu rwu rwu rwu rwu 0 0 0 0 0 0 0 0 Same as ”USB Device DMA Channel X Control Register (UDDMAX_CONTROL)” on page 593. (just replace the IN endpoint term by OUT endpoint, and vice-versa) 636 32058K AVR32-01/12
AT32UC3A 30.8.3.24 USB Host DMA Channel X Status Register (UHDMAX_STATUS) Offset: 0x071C + (X - 1) . 0x10 Register Name: UHDMAX_STATUS, X in [1..6] Access Type: Read/Write Reset Value: 0x00000000 31 30 29 28 27 26 25 24 CH_BYTE_CNT ru 0 0 0 0 0 0 0 0 23 22 21 20 19 18 17 16 CH_BYTE_CNT ru 0 0 0 0 0 0 0 0 15 14 13 12 11 10 9 8 – – – – – – – – 7 6 5 4 3 2 1 0 DESC_LD_ EOCH_BUFF_ – EOT_STA – – CH_ACTIVE CH_EN STA STA ru ru ru rwu rwu 0 0 0 0 0 Same as ”USB Device DMA Channel X Status Register (UDDMAX_STATUS)” on page 595. 637 32058K AVR32-01/12
AT32UC3A 30.8.4 USB Pipe/Endpoint X FIFO Data Register (USB_FIFOX_DATA) Note that this register can be accessed even if USBE = 0 or FRZCLK = 1. Disabling the USB controller (by clearing the USBE bit) does not reset the DPRAM. 638 32058K AVR32-01/12
AT32UC3A 31. Timer/Counter (TC) Rev: 2.2.2.1 31.1 Features (cid:129) Three 16-bit Timer Counter Channels (cid:129) A Wide Range of Functions Including: – Frequency Measurement – Event Counting – Interval Measurement – Pulse Generation – Delay Timing – Pulse Width Modulation – Up/down Capabilities (cid:129) Each Channel is User-configurable and Contains: – Three External Clock Inputs – Five Internal Clock Inputs – Two Multi-purpose Input/Output Signals (cid:129) Internal Interrupt Signal (cid:129) Two Global Registers that Act on All Three TC Channels 31.2 Description The Timer Counter (TC) includes three identical 16-bit Timer Counter channels. Each channel can be independently programmed to perform a wide range of functions including frequency measurement, event counting, interval measurement, pulse generation, delay timing and pulse width modulation. Each channel has three external clock inputs, five internal clock inputs and two multi-purpose input/output signals which can be configured by the user. Each channel drives an internal inter- rupt signal which can be programmed to generate processor interrupts. The Timer Counter block has two global registers which act upon all three TC channels. The Block Control Register allows the three channels to be started simultaneously with the same instruction. The Block Mode Register defines the external clock inputs for each channel, allowing them to be chained. 639 32058K AVR32-01/12
AT32UC3A 31.3 Block Diagram Figure 31-1. Timer Counter Block Diagram Parallel I/O TIMER_CLOCK1 Controller TCLK0 TCLK0 TIMER_CLOCK2 TCLK1 TIOA1 TCLK2 TIMER_CLOCK3 TIOA2 XC0 Timer/Counter TCLK1 XC1 Channel 0 TIOA TIOA0 TIOA0 TIMER_CLOCK4 TIOB TIOB0 TCLK2 XC2 TIOB0 TIMER_CLOCK5 TC0XC0S SYNC INT0 TCLK0 TCLK1 XC0 Timer/Counter TIOA0 XC1 Channel 1 TIOA TIOA1 TIOA1 TIOB TIOB1 TIOA2 XC2 TIOB1 TCLK2 TC1XC1S SYNC INT1 TCLK0 XC0 Timer/Counter TCLK1 XC1 Channel 2 TIOA TIOA2 TIOA2 TIOB TIOB2 TCLK2 XC2 TIOB2 TIOA0 TC2XC2S SYNC INT2 TIOA1 Timer Counter Interrupt Controller Table 31-1. Signal Name Description Block/Channel Sign al Name Description XC0, XC1, XC2 External Clock Inputs Capture Mode: Timer Counter Input TIOA Waveform Mode: Timer Counter Output Channel Signal Capture Mode: Timer Counter Input TIOB Waveform Mode: Timer Counter Input/Output INT Interrupt Signal Output SYNC Synchronization Input Signal 640 32058K AVR32-01/12
AT32UC3A 31.4 Pin Name List Table 31-2. TC pin list Pin Name Description Type TCLK0-TCLK2 External Clock Input Input TIOA0-TIOA2 I/O Line A I/O TIOB0-TIOB2 I/O Line B I/O 31.5 Product Dependencies 31.5.1 I/O Lines The pins used for interfacing the compliant external devices may be multiplexed with PIO lines. The programmer must first program the PIO controllers to assign the TC pins to their peripheral functions. 31.5.2 Debug operation The Timer Counter clocks are frozen during debug operation, unless the OCD system keeps peripherals running in debug operation. 31.5.3 Power Management The Timer Counter clock is generated by the power manager. Before using the TC, the program- mer must ensure that the TC clock is enabled in the power manager. 31.5.4 Interrupt The TC has an interrupt line connected to the interrupt controller. Handling the TC interrupt requires programming the interrupt controller before configuring the TC. 31.6 Functional Description 31.6.1 TC Description The three channels of the Timer Counter are independent and identical in operation. The regis- ters for channel programming are listed in Table 31-4 on page 654. 31.6.1.1 16-bit Counter Each channel is organized around a 16-bit counter. The value of the counter is incremented at each positive edge of the selected clock. When the counter has reached the value 0xFFFF and passes to 0x0000, an overflow occurs and the COVFS bit in SR (Status Register) is set. The current value of the counter is accessible in real time by reading the Counter Value Regis- ter, CV. The counter can be reset by a trigger. In this case, the counter value passes to 0x0000 on the next valid edge of the selected clock. 31.6.1.2 Clock Selection At block level, input clock signals of each channel can either be connected to the external inputs TCLK0, TCLK1 or TCLK2, or be connected to the configurable I/O signals TIOA0, TIOA1 or TIOA2 for chaining by programming the BMR (Block Mode). See Figure 31-2. 641 32058K AVR32-01/12
AT32UC3A Each channel can independently select an internal or external clock source for its counter: (cid:129) Internal clock signals: TIMER_CLOCK1, TIMER_CLOCK2, TIMER_CLOCK3, TIMER_CLOCK4, TIMER_CLOCK5. The Peripherals Chapter details the connection of these clock sources. (cid:129) External clock signals: XC0, XC1 or XC2. The Peripherals Chapter details the connection of these clock sources. This selection is made by the TCCLKS bits in the TC Channel Mode Register . The selected clock can be inverted with the CLKI bit in CMR. This allows counting on the oppo- site edges of the clock. The burst function allows the clock to be validated when an external signal is high. The BURST parameter in the Mode Register defines this signal (none, XC0, XC1, XC2). Note: In all cases, if an external clock is used, the duration of each of its levels must be longer than the master clock period. The external clock frequency must be at least 2.5 times lower than the mas- ter clock Figure 31-2. Clock Selection TCCLKS TIMER_CLOCK1 TIMER_CLOCK2 CLKI TIMER_CLOCK3 TIMER_CLOCK4 TIMER_CLOCK5 Selected XC0 Clock XC1 XC2 BURST 1 31.6.1.3 Clock Control The clock of each counter can be controlled in two different ways: it can be enabled/disabled and started/stopped. See Figure 31-3. (cid:129) The clock can be enabled or disabled by the user with the CLKEN and the CLKDIS commands in the Control Register. In Capture Mode it can be disabled by an RB load event if LDBDIS is set to 1 in CMR. In Waveform Mode, it can be disabled by an RC Compare event if CPCDIS is set to 1 in CMR. When disabled, the start or the stop actions have no effect: only a CLKEN command in the Control Register can re-enable the clock. When the clock is enabled, the CLKSTA bit is set in the Status Register. (cid:129) The clock can also be started or stopped: a trigger (software, synchro, external or compare) always starts the clock. The clock can be stopped by an RB load event in Capture Mode 642 32058K AVR32-01/12
AT32UC3A (LDBSTOP = 1 in CMR) or a RC compare event in Waveform Mode (CPCSTOP = 1 in CMR). The start and the stop commands have effect only if the clock is enabled. Figure 31-3. Clock Control Selected Clock Trigger CLKSTA CLKEN CLKDIS Q S R Q S R Stop Disable Event Event Counter Clock 31.6.1.4 TC Operating Modes Each channel can independently operate in two different modes: (cid:129) Capture Mode provides measurement on signals. (cid:129) Waveform Mode provides wave generation. The TC Operating Mode is programmed with the WAVE bit in the TC Channel Mode Register. In Capture Mode, TIOA and TIOB are configured as inputs. In Waveform Mode, TIOA is always configured to be an output and TIOB is an output if it is not selected to be the external trigger. 31.6.1.5 Trigger A trigger resets the counter and starts the counter clock. Three types of triggers are common to both modes, and a fourth external trigger is available to each mode. The following triggers are common to both modes: (cid:129) Software Trigger: Each channel has a software trigger, available by setting SWTRG in CCR. (cid:129) SYNC: Each channel has a synchronization signal SYNC. When asserted, this signal has the same effect as a software trigger. The SYNC signals of all channels are asserted simultaneously by writing BCR (Block Control) with SYNC set. (cid:129) Compare RC Trigger: RC is implemented in each channel and can provide a trigger when the counter value matches the RC value if CPCTRG is set in CMR. The channel can also be configured to have an external trigger. In Capture Mode, the external trigger signal can be selected between TIOA and TIOB. In Waveform Mode, an external event can be programmed on one of the following signals: TIOB, XC0, XC1 or XC2. This external event can then be programmed to perform a trigger by setting ENETRG in CMR. 643 32058K AVR32-01/12
AT32UC3A If an external trigger is used, the duration of the pulses must be longer than the master clock period in order to be detected. Regardless of the trigger used, it will be taken into account at the following active edge of the selected clock. This means that the counter value can be read differently from zero just after a trigger, especially when a low frequency signal is selected as the clock. 31.6.2 Capture Operating Mode This mode is entered by clearing the WAVE parameter in CMR (Channel Mode Register). Capture Mode allows the TC channel to perform measurements such as pulse timing, fre- quency, period, duty cycle and phase on TIOA and TIOB signals which are considered as inputs. Figure 31-4 shows the configuration of the TC channel when programmed in Capture Mode. 31.6.2.1 Capture Registers A and B Registers A and B (RA and RB) are used as capture registers. This means that they can be loaded with the counter value when a programmable event occurs on the signal TIOA. The LDRA parameter in CMR defines the TIOA edge for the loading of register A, and the LDRB parameter defines the TIOA edge for the loading of Register B. RA is loaded only if it has not been loaded since the last trigger or if RB has been loaded since the last loading of RA. RB is loaded only if RA has been loaded since the last trigger or the last loading of RB. Loading RA or RB before the read of the last value loaded sets the Overrun Error Flag (LOVRS) in SR (Status Register). In this case, the old value is overwritten. 31.6.2.2 Trigger Conditions In addition to the SYNC signal, the software trigger and the RC compare trigger, an external trig- ger can be defined. The ABETRG bit in CMR selects TIOA or TIOB input signal as an external trigger. The ETRGEDG parameter defines the edge (rising, falling or both) detected to generate an external trigger. If ETRGEDG = 0 (none), the external trigger is disabled. 644 32058K AVR32-01/12
AT32UC3A Figure 31-4. Capture Mode = Register C mpare RC LCOPVCRSS Co COVFS NT LDRBS I S DI LDRAS B LD Capture Register B TECT1R_GSSR TC1_IMR S DI P K O TACLKENCL SQ R LDBST Capture Register A LDRB Edge Detector S K L C d e d VF Loa O s A i R er RG If nt T u C S R o P C C 6-bit SET Q 1 E R g CLK Tri LDRA Edge Detector KI L G C R T d SW G ETRGEDG EdgeDetector If RA is not loadeor RB is Loaded unter Channel R o T C KS RST ABE mer/ CCL BU Ti T 1 1 2 3 4 5 K K K K K B A C C C C C O O CLO CLO CLO CLO CLO MTI MTI _ _ _ _ _ R R R R R E E E E E M M M M M C0 C1 C2 TI TI TI TI TI X X X C B A N O O SY TI TI 645 32058K AVR32-01/12
AT32UC3A 31.6.3 Waveform Operating Mode Waveform operating mode is entered by setting the WAVE parameter in CMR (Channel Mode Register). In Waveform Operating Mode the TC channel generates 1 or 2 PWM signals with the same fre- quency and independently programmable duty cycles, or generates different types of one-shot or repetitive pulses. In this mode, TIOA is configured as an output and TIOB is defined as an output if it is not used as an external event (EEVT parameter in CMR). Figure 31-5 shows the configuration of the TC channel when programmed in Waveform Operat- ing Mode. 31.6.3.1 Waveform Selection Depending on the WAVSEL parameter in CMR (Channel Mode Register), the behavior of CV varies. With any selection, RA, RB and RC can all be used as compare registers. RA Compare is used to control the TIOA output, RB Compare is used to control the TIOB output (if correctly configured) and RC Compare is used to control TIOA and/or TIOB outputs. 646 32058K AVR32-01/12
AT32UC3A Figure 31-5. Waveform Mode OA TIOA OB TIOB TI TI M M rellortnoC tuptuO rellortnoC tuptuO G G ACPC ACPA AEEVT SWTR BCPC BCPB BEEVT SWTR A B CPCDIS CPCSTOP are RC = p m o C ENCLKDIS S R gister C mpare RB = CCPPCBSS CLK BRe Co CPAS NT CLKSTA Q ARegister A = CETORVGFSS I Register mpare R TC1_SR TC1_IMR o C OVF L S R VSEL Counter RESET WAVSE Q WA 6-bit 1 CLK Trig G R T E N E CLKI nnel a h C SWTRG EEVTEDG EdgeDetector mer/Counter Ti CCLKS BURST EEVT T 1 12 3 45 KK K KK CC C CC OO O OO LL L LL CC C CC __ _ __ RR R RR TIMETIME TIME TIMETIME XC0 XC1 XC2 C N B Y O S TI 647 32058K AVR32-01/12
AT32UC3A 31.6.3.2 WAVSEL = 00 When WAVSEL = 00, the value of CV is incremented from 0 to 0xFFFF. Once 0xFFFF has been reached, the value of CV is reset. Incrementation of CV starts again and the cycle continues. See Figure 31-6. An external event trigger or a software trigger can reset the value of CV. It is important to note that the trigger may occur at any time. See Figure 31-7. RC Compare cannot be programmed to generate a trigger in this configuration. At the same time, RC Compare can stop the counter clock (CPCSTOP = 1 in CMR) and/or disable the coun- ter clock (CPCDIS = 1 in CMR). Figure 31-6. WAVSEL= 00 without trigger Counter Value Counter cleared by compare match with 0xFFFF 0xFFFF R C R B R A Time Waveform Examples TIOB TIOA 648 32058K AVR32-01/12
AT32UC3A Figure 31-7. WAVSEL= 00 with trigger Counter Value Counter cleared by compare match with 0xFFFF 0xFFFF Counter cleared by trigger R C R B R A Time Waveform Examples TIOB TIOA 31.6.3.3 WAVSEL = 10 When WAVSEL = 10, the value of CV is incremented from 0 to the value of RC, then automati- cally reset on a RC Compare. Once the value of CV has been reset, it is then incremented and so on. See Figure 31-8. It is important to note that CV can be reset at any time by an external event or a software trigger if both are programmed correctly. See Figure 31-9. In addition, RC Compare can stop the counter clock (CPCSTOP = 1 in CMR) and/or disable the counter clock (CPCDIS = 1 in CMR). Figure 31-8. WAVSEL = 10 Without Trigger Counter Value 0xFFFF Counter cleared by compare match with RC R C R B R A Time Waveform Examples TIOB TIOA 649 32058K AVR32-01/12
AT32UC3A Figure 31-9. WAVSEL = 10 With Trigger Counter Value 0xFFFF Counter cleared by compare match with RC Counter cleared by trigger R C R B R A Time Waveform Examples TIOB TIOA 31.6.3.4 WAVSEL = 01 When WAVSEL = 01, the value of CV is incremented from 0 to 0xFFFF. Once 0xFFFF is reached, the value of CV is decremented to 0, then re-incremented to 0xFFFF and so on. See Figure 31-10. A trigger such as an external event or a software trigger can modify CV at any time. If a trigger occurs while CV is incrementing, CV then decrements. If a trigger is received while CV is decre- menting, CV then increments. See Figure 31-11. RC Compare cannot be programmed to generate a trigger in this configuration. At the same time, RC Compare can stop the counter clock (CPCSTOP = 1) and/or disable the counter clock (CPCDIS = 1). 650 32058K AVR32-01/12
AT32UC3A Figure 31-10. WAVSEL = 01 Without Trigger Counter Value Counter decremented by compare match with 0xFFFF 0xFFFF R C R B R A Time Waveform Examples TIOB TIOA Figure 31-11. WAVSEL = 01 With Trigger Counter Value Counter decremented by compare match with 0xFFFF 0xFFFF Counter decremented by trigger R C R B Counter incremented by trigger R A Time Waveform Examples TIOB TIOA 31.6.3.5 WAVSEL = 11 When WAVSEL = 11, the value of CV is incremented from 0 to RC. Once RC is reached, the value of CV is decremented to 0, then re-incremented to RC and so on. See Figure 31-12. A trigger such as an external event or a software trigger can modify CV at any time. If a trigger occurs while CV is incrementing, CV then decrements. If a trigger is received while CV is decre- menting, CV then increments. See Figure 31-13. RC Compare can stop the counter clock (CPCSTOP = 1) and/or disable the counter clock (CPCDIS = 1). 651 32058K AVR32-01/12
AT32UC3A Figure 31-12. WAVSEL = 11 Without Trigger Counter Value 0xFFFF Counter decremented by compare match with RC R C R B R A Time Waveform Examples TIOB TIOA Figure 31-13. WAVSEL = 11 With Trigger Counter Value 0xFFFF Counter decremented by compare match with RC R C Counter decremented by trigger R B Counter incremented by trigger R A Time Waveform Examples TIOB TIOA 31.6.3.6 External Event/Trigger Conditions An external event can be programmed to be detected on one of the clock sources (XC0, XC1, XC2) or TIOB. The external event selected can then be used as a trigger. The EEVT parameter in CMR selects the external trigger. The EEVTEDG parameter defines the trigger edge for each of the possible external triggers (rising, falling or both). If EEVTEDG is cleared (none), no external event is defined. 652 32058K AVR32-01/12
AT32UC3A If TIOB is defined as an external event signal (EEVT = 0), TIOB is no longer used as an output and the compare register B is not used to generate waveforms and subsequently no IRQs. In this case the TC channel can only generate a waveform on TIOA. When an external event is defined, it can be used as a trigger by setting bit ENETRG in CMR. As in Capture Mode, the SYNC signal and the software trigger are also available as triggers. RC Compare can also be used as a trigger depending on the parameter WAVSEL. 31.6.3.7 Output Controller The output controller defines the output level changes on TIOA and TIOB following an event. TIOB control is used only if TIOB is defined as output (not as an external event). The following events control TIOA and TIOB: software trigger, external event and RC compare. RA compare controls TIOA and RB compare controls TIOB. Each of these events can be pro- grammed to set, clear or toggle the output as defined in the corresponding parameter in CMR. 653 32058K AVR32-01/12
AT32UC3A 31.7 Timer Counter (TC) User Interface Table 31-3. TC Global Memory Map Offset Channel/Register Name Access Reset Value 0x00 TC Channel 0 See Table 31-4 0x40 TC Channel 1 See Table 31-4 0x80 TC Channel 2 See Table 31-4 0xC0 TC Block Control Register BCR Write-only – 0xC4 TC Block Mode Register BMR Read/Write 0 BCR (Block Control Register) and BMR (Block Mode Register) control the whole TC block. TC channels are controlled by the registers listed in Table 31-4. The offset of each of the channel registers in Table 31-4 is in relation to the offset of the corresponding channel as mentioned in Table 31-4. Table 31-4. TC Channel Memory Map Offset Register Name Access Reset Value 0x00 Channel Control Register CCR Write-only – 0x04 Channel Mode Register CMR Read/Write 0 0x08 Reserved – 0x0C Reserved – 0x10 Counter Value CV Read-only 0 0x14 Register A RA Read/Write(1) 0 0x18 Register B RB Read/Write(1) 0 0x1C Register C RC Read/Write 0 0x20 Status Register SR Read-only 0 0x24 Interrupt Enable Register IER Write-only – 0x28 Interrupt Disable Register IDR Write-only – 0x2C Interrupt Mask Register IMR Read-only 0 Notes: 1. Read-only if WAVE = 0 654 32058K AVR32-01/12
AT32UC3A 31.7.1 TC Block Control Register Register Name: BCR Access Type: Write-only 31 30 29 28 27 26 25 24 – – – – – – – – 23 22 21 20 19 18 17 16 – – – – – – – – 15 14 13 12 11 10 9 8 – – – – – – – – 7 6 5 4 3 2 1 0 – – – – – – – SYNC (cid:129) SYNC: Synchro Command 0 = No effect. 1 = Asserts the SYNC signal which generates a software trigger simultaneously for each of the channels. 655 32058K AVR32-01/12
AT32UC3A 31.7.2 TC Block Mode Register Register Name: BMR Access Type: Read/Write 31 30 29 28 27 26 25 24 – – – – – – – – 23 22 21 20 19 18 17 16 – – – – – – – – 15 14 13 12 11 10 9 8 – – – – – – – – 7 6 5 4 3 2 1 0 – – TC2XC2S TC1XC1S TC0XC0S (cid:129) TC0XC0S: External Clock Signal 0 Selection TC0XC0S Signal Connected to XC0 0 0 TCLK0 0 1 none 1 0 TIOA1 1 1 TIOA2 (cid:129) TC1XC1S: External Clock Signal 1 Selection TC1XC1S Signal Connected to XC1 0 0 TCLK1 0 1 none 1 0 TIOA0 1 1 TIOA2 (cid:129) TC2XC2S: External Clock Signal 2 Selection TC2XC2S Signal Connected to XC2 0 0 TCLK2 0 1 none 1 0 TIOA0 1 1 TIOA1 656 32058K AVR32-01/12
AT32UC3A 31.7.3 TC Channel Control Register Register Name: CCR Access Type: Write-only 31 30 29 28 27 26 25 24 – – – – – – – – 23 22 21 20 19 18 17 16 – – – – – – – – 15 14 13 12 11 10 9 8 – – – – – – – – 7 6 5 4 3 2 1 0 – – – – – SWTRG CLKDIS CLKEN (cid:129) CLKEN: Counter Clock Enable Command 0 = No effect. 1 = Enables the clock if CLKDIS is not 1. (cid:129) CLKDIS: Counter Clock Disable Command 0 = No effect. 1 = Disables the clock. (cid:129) SWTRG: Software Trigger Command 0 = No effect. 1 = A software trigger is performed: the counter is reset and the clock is started. 657 32058K AVR32-01/12
AT32UC3A 31.7.4 TC Channel Mode Register: Capture Mode Register Name: CMR Access Type: Read/Write 31 30 29 28 27 26 25 24 – – – – – – – – 23 22 21 20 19 18 17 16 – – – – LDRB LDRA 15 14 13 12 11 10 9 8 WAVE = 0 CPCTRG – – – ABETRG ETRGEDG 7 6 5 4 3 2 1 0 LDBDIS LDBSTOP BURST CLKI TCCLKS (cid:129) TCCLKS: Clock Selection TCCLKS Clock Selected 0 0 0 TIMER_CLOCK1 0 0 1 TIMER_CLOCK2 0 1 0 TIMER_CLOCK3 0 1 1 TIMER_CLOCK4 1 0 0 TIMER_CLOCK5 1 0 1 XC0 1 1 0 XC1 1 1 1 XC2 (cid:129) CLKI: Clock Invert 0 = Counter is incremented on rising edge of the clock. 1 = Counter is incremented on falling edge of the clock. (cid:129) BURST: Burst Signal Selection BURST 0 0 The clock is not gated by an external signal. 0 1 XC0 is ANDed with the selected clock. 1 0 XC1 is ANDed with the selected clock. 1 1 XC2 is ANDed with the selected clock. (cid:129) LDBSTOP: Counter Clock Stopped with RB Loading 0 = Counter clock is not stopped when RB loading occurs. 1 = Counter clock is stopped when RB loading occurs. (cid:129) LDBDIS: Counter Clock Disable with RB Loading 658 32058K AVR32-01/12
AT32UC3A 0 = Counter clock is not disabled when RB loading occurs. 1 = Counter clock is disabled when RB loading occurs. (cid:129) ETRGEDG: External Trigger Edge Selection ETRGEDG Edge 0 0 none 0 1 rising edge 1 0 falling edge 1 1 each edge (cid:129) ABETRG: TIOA or TIOB External Trigger Selection 0 = TIOB is used as an external trigger. 1 = TIOA is used as an external trigger. (cid:129) CPCTRG: RC Compare Trigger Enable 0 = RC Compare has no effect on the counter and its clock. 1 = RC Compare resets the counter and starts the counter clock. (cid:129) WAVE 0 = Capture Mode is enabled. 1 = Capture Mode is disabled (Waveform Mode is enabled). (cid:129) LDRA: RA Loading Selection LDRA Edge 0 0 none 0 1 rising edge of TIOA 1 0 falling edge of TIOA 1 1 each edge of TIOA (cid:129) LDRB: RB Loading Selection LDRB Edge 0 0 none 0 1 rising edge of TIOA 1 0 falling edge of TIOA 1 1 each edge of TIOA 659 32058K AVR32-01/12
AT32UC3A 31.7.5 TC Channel Mode Register: Waveform Mode Register Name: CMR Access Type: Read/Write 31 30 29 28 27 26 25 24 BSWTRG BEEVT BCPC BCPB 23 22 21 20 19 18 17 16 ASWTRG AEEVT ACPC ACPA 15 14 13 12 11 10 9 8 WAVE = 1 WAVSEL ENETRG EEVT EEVTEDG 7 6 5 4 3 2 1 0 CPCDIS CPCSTOP BURST CLKI TCCLKS (cid:129) TCCLKS: Clock Selection TCCLKS Clock Selected 0 0 0 TIMER_CLOCK1 0 0 1 TIMER_CLOCK2 0 1 0 TIMER_CLOCK3 0 1 1 TIMER_CLOCK4 1 0 0 TIMER_CLOCK5 1 0 1 XC0 1 1 0 XC1 1 1 1 XC2 (cid:129) CLKI: Clock Invert 0 = Counter is incremented on rising edge of the clock. 1 = Counter is incremented on falling edge of the clock. (cid:129) BURST: Burst Signal Selection BURST 0 0 The clock is not gated by an external signal. 0 1 XC0 is ANDed with the selected clock. 1 0 XC1 is ANDed with the selected clock. 1 1 XC2 is ANDed with the selected clock. (cid:129) CPCSTOP: Counter Clock Stopped with RC Compare 0 = Counter clock is not stopped when counter reaches RC. 1 = Counter clock is stopped when counter reaches RC. (cid:129) CPCDIS: Counter Clock Disable with RC Compare 660 32058K AVR32-01/12
AT32UC3A 0 = Counter clock is not disabled when counter reaches RC. 1 = Counter clock is disabled when counter reaches RC. (cid:129) EEVTEDG: External Event Edge Selection EEVTEDG Edge 0 0 none 0 1 rising edge 1 0 falling edge 1 1 each edge (cid:129) EEVT: External Event Selection EEVT Signal selected as external event TIOB Direction 0 0 TIOB input(1) 0 1 XC0 output 1 0 XC1 output 1 1 XC2 output Note: 1. If TIOB is chosen as the external event signal, it is configured as an input and no longer generates waveforms and subse- quently no IRQs. (cid:129) ENETRG: External Event Trigger Enable 0 = The external event has no effect on the counter and its clock. In this case, the selected external event only controls the TIOA output. 1 = The external event resets the counter and starts the counter clock. (cid:129) WAVSEL: Waveform Selection WAVSEL Effect 0 0 UP mode without automatic trigger on RC Compare 1 0 UP mode with automatic trigger on RC Compare 0 1 UPDOWN mode without automatic trigger on RC Compare 1 1 UPDOWN mode with automatic trigger on RC Compare (cid:129) WAVE = 1 0 = Waveform Mode is disabled (Capture Mode is enabled). 1 = Waveform Mode is enabled. 661 32058K AVR32-01/12
AT32UC3A (cid:129) ACPA: RA Compare Effect on TIOA ACPA Effect 0 0 none 0 1 set 1 0 clear 1 1 toggle (cid:129) ACPC: RC Compare Effect on TIOA ACPC Effect 0 0 none 0 1 set 1 0 clear 1 1 toggle (cid:129) AEEVT: External Event Effect on TIOA AEEVT Effect 0 0 none 0 1 set 1 0 clear 1 1 toggle (cid:129) ASWTRG: Software Trigger Effect on TIOA ASWTRG Effect 0 0 none 0 1 set 1 0 clear 1 1 toggle (cid:129) BCPB: RB Compare Effect on TIOB BCPB Effect 0 0 none 662 32058K AVR32-01/12
AT32UC3A BCPB Effect 0 1 set 1 0 clear 1 1 toggle (cid:129) BCPC: RC Compare Effect on TIOB BCPC Effect 0 0 none 0 1 set 1 0 clear 1 1 toggle (cid:129) BEEVT: External Event Effect on TIOB BEEVT Effect 0 0 none 0 1 set 1 0 clear 1 1 toggle (cid:129) BSWTRG: Software Trigger Effect on TIOB BSWTRG Effect 0 0 none 0 1 set 1 0 clear 1 1 toggle 663 32058K AVR32-01/12
AT32UC3A 31.7.6 TC Counter Value Register Register Name: CV Access Type: Read-only 31 30 29 28 27 26 25 24 – – – – – – – – 23 22 21 20 19 18 17 16 – – – – – – – – 15 14 13 12 11 10 9 8 CV 7 6 5 4 3 2 1 0 CV (cid:129) CV: Counter Value CV contains the counter value in real time. 664 32058K AVR32-01/12
AT32UC3A 31.7.7 TC Register A Register Name: RA Access Type: Read-only if WAVE = 0, Read/Write if WAVE = 1 31 30 29 28 27 26 25 24 – – – – – – – – 23 22 21 20 19 18 17 16 – – – – – – – – 15 14 13 12 11 10 9 8 RA 7 6 5 4 3 2 1 0 RA (cid:129) RA: Register A RA contains the Register A value in real time. 665 32058K AVR32-01/12
AT32UC3A 31.7.8 TC Register B Register Name: RB Access Type: Read-only if WAVE = 0, Read/Write if WAVE = 1 31 30 29 28 27 26 25 24 – – – – – – – – 23 22 21 20 19 18 17 16 – – – – – – – – 15 14 13 12 11 10 9 8 RB 7 6 5 4 3 2 1 0 RB (cid:129) RB: Register B RB contains the Register B value in real time. 666 32058K AVR32-01/12
AT32UC3A 31.7.9 TC Register C Register Name: RC Access Type: Read/Write 31 30 29 28 27 26 25 24 – – – – – – – – 23 22 21 20 19 18 17 16 – – – – – – – – 15 14 13 12 11 10 9 8 RC 7 6 5 4 3 2 1 0 RC (cid:129) RC: Register C RC contains the Register C value in real time. 667 32058K AVR32-01/12
AT32UC3A 31.7.10 TC Status Register Register Name: SR Access Type: Read-only 31 30 29 28 27 26 25 24 – – – – – – – – 23 22 21 20 19 18 17 16 – – – – – MTIOB MTIOA CLKSTA 15 14 13 12 11 10 9 8 – – – – – – – – 7 6 5 4 3 2 1 0 ETRGS LDRBS LDRAS CPCS CPBS CPAS LOVRS COVFS Note: Reading the Status Register will also clear the interrupt flag for the corresponding interrupts. (cid:129) COVFS: Counter Overflow Status 0 = No counter overflow has occurred since the last read of the Status Register. 1 = A counter overflow has occurred since the last read of the Status Register. (cid:129) LOVRS: Load Overrun Status 0 = Load overrun has not occurred since the last read of the Status Register or WAVE = 1. 1 = RA or RB have been loaded at least twice without any read of the corresponding register since the last read of the Sta- tus Register, if WAVE = 0. (cid:129) CPAS: RA Compare Status 0 = RA Compare has not occurred since the last read of the Status Register or WAVE = 0. 1 = RA Compare has occurred since the last read of the Status Register, if WAVE = 1. (cid:129) CPBS: RB Compare Status 0 = RB Compare has not occurred since the last read of the Status Register or WAVE = 0. 1 = RB Compare has occurred since the last read of the Status Register, if WAVE = 1. (cid:129) CPCS: RC Compare Status 0 = RC Compare has not occurred since the last read of the Status Register. 1 = RC Compare has occurred since the last read of the Status Register. (cid:129) LDRAS: RA Loading Status 0 = RA Load has not occurred since the last read of the Status Register or WAVE = 1. 1 = RA Load has occurred since the last read of the Status Register, if WAVE = 0. (cid:129) LDRBS: RB Loading Status 0 = RB Load has not occurred since the last read of the Status Register or WAVE = 1. 1 = RB Load has occurred since the last read of the Status Register, if WAVE = 0. (cid:129) ETRGS: External Trigger Status 0 = External trigger has not occurred since the last read of the Status Register. 1 = External trigger has occurred since the last read of the Status Register. 668 32058K AVR32-01/12
AT32UC3A (cid:129) CLKSTA: Clock Enabling Status 0 = Clock is disabled. 1 = Clock is enabled. (cid:129) MTIOA: TIOA Mirror 0 = TIOA is low. If WAVE = 0, this means that TIOA pin is low. If WAVE = 1, this means that TIOA is driven low. 1 = TIOA is high. If WAVE = 0, this means that TIOA pin is high. If WAVE = 1, this means that TIOA is driven high. (cid:129) MTIOB: TIOB Mirror 0 = TIOB is low. If WAVE = 0, this means that TIOB pin is low. If WAVE = 1, this means that TIOB is driven low. 1 = TIOB is high. If WAVE = 0, this means that TIOB pin is high. If WAVE = 1, this means that TIOB is driven high. 669 32058K AVR32-01/12
AT32UC3A 31.7.11 TC Interrupt Enable Register Register Name: IER Access Type: Write-only 31 30 29 28 27 26 25 24 – – – – – – – – 23 22 21 20 19 18 17 16 – – – – – – – – 15 14 13 12 11 10 9 8 – – – – – – – – 7 6 5 4 3 2 1 0 ETRGS LDRBS LDRAS CPCS CPBS CPAS LOVRS COVFS Note: Reading the Status Register will also clear the interrupt flag for the corresponding interrupts. (cid:129) COVFS: Counter Overflow 0 = No effect. 1 = Enables the Counter Overflow Interrupt. (cid:129) LOVRS: Load Overrun 0 = No effect. 1 = Enables the Load Overrun Interrupt. (cid:129) CPAS: RA Compare 0 = No effect. 1 = Enables the RA Compare Interrupt. (cid:129) CPBS: RB Compare 0 = No effect. 1 = Enables the RB Compare Interrupt. (cid:129) CPCS: RC Compare 0 = No effect. 1 = Enables the RC Compare Interrupt. (cid:129) LDRAS: RA Loading 0 = No effect. 1 = Enables the RA Load Interrupt. (cid:129) LDRBS: RB Loading 0 = No effect. 1 = Enables the RB Load Interrupt. (cid:129) ETRGS: External Trigger 0 = No effect. 1 = Enables the External Trigger Interrupt. 670 32058K AVR32-01/12
AT32UC3A 31.7.12 TC Interrupt Disable Register Register Name: IDR Access Type: Write-only 31 30 29 28 27 26 25 24 – – – – – – – – 23 22 21 20 19 18 17 16 – – – – – – – – 15 14 13 12 11 10 9 8 – – – – – – – – 7 6 5 4 3 2 1 0 ETRGS LDRBS LDRAS CPCS CPBS CPAS LOVRS COVFS Note: Reading the Status Register will also clear the interrupt flag for the corresponding interrupts. (cid:129) COVFS: Counter Overflow 0 = No effect. 1 = Disables the Counter Overflow Interrupt. (cid:129) LOVRS: Load Overrun 0 = No effect. 1 = Disables the Load Overrun Interrupt (if WAVE = 0). (cid:129) CPAS: RA Compare 0 = No effect. 1 = Disables the RA Compare Interrupt (if WAVE = 1). (cid:129) CPBS: RB Compare 0 = No effect. 1 = Disables the RB Compare Interrupt (if WAVE = 1). (cid:129) CPCS: RC Compare 0 = No effect. 1 = Disables the RC Compare Interrupt. (cid:129) LDRAS: RA Loading 0 = No effect. 1 = Disables the RA Load Interrupt (if WAVE = 0). (cid:129) LDRBS: RB Loading 0 = No effect. 1 = Disables the RB Load Interrupt (if WAVE = 0). (cid:129) ETRGS: External Trigger 0 = No effect. 1 = Disables the External Trigger Interrupt. 671 32058K AVR32-01/12
AT32UC3A 31.7.13 TC Interrupt Mask Register Register Name: IMR Access Type: Read-only 31 30 29 28 27 26 25 24 – – – – – – – – 23 22 21 20 19 18 17 16 – – – – – – – – 15 14 13 12 11 10 9 8 – – – – – – – – 7 6 5 4 3 2 1 0 ETRGS LDRBS LDRAS CPCS CPBS CPAS LOVRS COVFS Note: Reading the Status Register will also clear the interrupt flag for the corresponding interrupts. (cid:129) COVFS: Counter Overflow 0 = The Counter Overflow Interrupt is disabled. 1 = The Counter Overflow Interrupt is enabled. (cid:129) LOVRS: Load Overrun 0 = The Load Overrun Interrupt is disabled. 1 = The Load Overrun Interrupt is enabled. (cid:129) CPAS: RA Compare 0 = The RA Compare Interrupt is disabled. 1 = The RA Compare Interrupt is enabled. (cid:129) CPBS: RB Compare 0 = The RB Compare Interrupt is disabled. 1 = The RB Compare Interrupt is enabled. (cid:129) CPCS: RC Compare 0 = The RC Compare Interrupt is disabled. 1 = The RC Compare Interrupt is enabled. (cid:129) LDRAS: RA Loading 0 = The Load RA Interrupt is disabled. 1 = The Load RA Interrupt is enabled. (cid:129) LDRBS: RB Loading 0 = The Load RB Interrupt is disabled. 1 = The Load RB Interrupt is enabled. (cid:129) ETRGS: External Trigger 0 = The External Trigger Interrupt is disabled. 1 = The External Trigger Interrupt is enabled. 672 32058K AVR32-01/12
AT32UC3A 32. Pulse Width Modulation Controller (PWM) Rev: 1.3.0.1 32.1 Features (cid:129) 7 Channels (cid:129) One 20-bit Counter Per Channel (cid:129) Common Clock Generator Providing Thirteen Different Clocks – A Modulo n Counter Providing Eleven Clocks – Two Independent Linear Dividers Working on Modulo n Counter Outputs (cid:129) Independent Channels – Independent Enable Disable Command for Each Channel – Independent Clock Selection for Each Channel – Independent Period and Duty Cycle for Each Channel – Double Buffering of Period or Duty Cycle for Each Channel – Programmable Selection of The Output Waveform Polarity for Each Channel – Programmable Center or Left Aligned Output Waveform for Each Channel 32.2 Description The PWM macrocell controls several channels independently. Each channel controls one square output waveform. Characteristics of the output waveform such as period, duty-cycle and polarity are configurable through the user interface. Each channel selects and uses one of the clocks provided by the clock generator. The clock generator provides several clocks resulting from the division of the PWM macrocell master clock. All PWM macrocell accesses are made through registers mapped on the peripheral bus. Channels can be synchronized, to generate non overlapped waveforms. All channels integrate a double buffering system in order to prevent an unexpected output waveform while modifying the period or the duty-cycle. 673 32058K AVR32-01/12
AT32UC3A 32.3 Block Diagram Figure 32-1. Pulse Width Modulation Controller Block Diagram PWM Controller PWMx Channel Period Update PWMx Comparator Duty Cycle PWMx Clock Selector Counter PIO PWM0 Period Channel Update PWM0 Comparator Duty Cycle PWM0 Clock Selector Counter Power MCK Interrupt Clock Generator PB Interface Interrupt Generator Manager Controller Peripheral Bus 32.4 I/O Lines Description Each channel outputs one waveform on one external I/O line. Table 32-1. I/O Line Description Name Description Type PWMx PWM Waveform Output for channel x Output 674 32058K AVR32-01/12
AT32UC3A 32.5 Product Dependencies 32.5.1 I/O Lines The pins used for interfacing the PWM may be multiplexed with PIO lines. The programmer must first program the PIO controller to assign the desired PWM pins to their peripheral function. If I/O lines of the PWM are not used by the application, they can be used for other purposes by the PIO controller. Not all PWM outputs may be enabled. If an application requires only four channels, then only four PIO lines will be assigned to PWM outputs. 32.5.2 Debug operation The PWM clock is running during debug operation. 32.5.3 Power Management The PWM clock is generated by the Power Manager. Before using the PWM, the programmer must ensure that the PWM clock is enabled in the Power Manager. However, if the application does not require PWM operations, the PWM clock can be stopped when not needed and be restarted later. In this case, the PWM will resume its operations where it left off. In the PWM description, Master Clock (MCK) is the clock of the peripheral bus to which the PWM is connected. 32.5.4 Interrupt Sources The PWM interrupt line is connected to the interrupt controller. Using the PWM interrupt requires the interrupt controller to be programmed first. 675 32058K AVR32-01/12
AT32UC3A 32.6 Functional Description The PWM macrocell is primarily composed of a clock generator module and 7 channels. – Clocked by the system clock, MCK, the clock generator module provides 13 clocks. – Each channel can independently choose one of the clock generator outputs. – Each channel generates an output waveform with attributes that can be defined independently for each channel through the user interface registers. 32.6.1 PWM Clock Generator Figure 32-2. Functional View of the Clock Generator Block Diagram modulo n counter MCK MCK MCK/2 MCK/4 MCK/8 MCK/16 MCK/32 MCK/64 MCK/128 MCK/256 MCK/512 MCK/1024 Divider A clkA PREA DIVA PWM_MR Divider B clkB PREB DIVB PWM_MR Caution: Before using the PWM macrocell, the programmer must ensure that the PWM clock in the Power Manager is enabled. The PWM macrocell master clock, MCK, is divided in the clock generator module to provide dif- ferent clocks available for all channels. Each channel can independently select one of the divided clocks. 676 32058K AVR32-01/12
AT32UC3A The clock generator is divided in three blocks: – a modulo n counter which provides 11 clocks: F , F /2, F /4, F /8, F /16, MCK MCK MCK MCK MCK F /32, F /64, F /128, F /256, F /512, F /1024 MCK MCK MCK MCK MCK MCK – two linear dividers (1, 1/2, 1/3, ... 1/255) that provide two separate clocks: clkA and clkB Each linear divider can independently divide one of the clocks of the modulo n counter. The selection of the clock to be divided is made according to the PREA (PREB) field of the PWM Mode register (MR). The resulting clock clkA (clkB) is the clock selected divided by DIVA (DIVB) field value in the PWM Mode register (MR). After a reset of the PWM controller, DIVA (DIVB) and PREA (PREB) in the PWM Mode register are set to 0. This implies that after reset clkA (clkB) are turned off. At reset, all clocks provided by the modulo n counter are turned off except clock “clk”. This situa- tion is also true when the PWM master clock is turned off through the Power Management Controller. 32.6.2 PWM Channel 32.6.2.1 Block Diagram Figure 32-3. Functional View of the Channel Block Diagram inputs from clock Channel generator Clock Internal Comparator PWMx output waveform Selector Counter inputs from Peripheral Bus Each of the 7 channels is composed of three blocks: (cid:129) A clock selector which selects one of the clocks provided by the clock generator described in Section 32.6.1 ”PWM Clock Generator” on page 676. (cid:129) An internal counter clocked by the output of the clock selector. This internal counter is incremented or decremented according to the channel configuration and comparators events. The size of the internal counter is 20 bits. (cid:129) A comparator used to generate events according to the internal counter value. It also computes the PWMx output waveform according to the configuration. 32.6.2.2 Waveform Properties The different properties of output waveforms are: (cid:129) the internal clock selection. The internal channel counter is clocked by one of the clocks provided by the clock generator described in the previous section. This channel parameter is defined in the CPRE field of the CMRx register. This field is reset at 0. (cid:129) the waveform period. This channel parameter is defined in the CPRD field of the CPRDx register. 677 32058K AVR32-01/12
AT32UC3A - If the waveform is left aligned, then the output waveform period depends on the counter source clock and can be calculated: By using the Master Clock (MCK) divided by an X given prescaler value (with X being 1, 2, 4, 8, 16, 32, 64, 128, 256, 512, or 1024), the resulting period formula willbe: (X×CPRD) ------------------------------- MCK By using a Master Clock divided by one of both DIVA or DIVB divider, the formula becomes, respectively: (CRPD×DIVA) (CRPD×DIVAB) ---------------------------------------- -o-r ---------------------------------------------- MCK MCK If the waveform is center aligned then the output waveform period depends on the counter source clock and can be calculated: By using the Master Clock (MCK) divided by an X given prescaler value (with X being 1, 2, 4, 8, 16, 32, 64, 128, 256, 512, or 1024). The resulting period formula will be: (2×X×CPRD) ------------------------------------------ MCK By using a Master Clock divided by one of both DIVA or DIVB divider, the formula becomes, respectively: (2×CPRD×DIVA) (2×CPRD×DIVB) ------------------------------------------------- -o---r ----------------------------------------------------- MCK MCK (cid:129) the waveform duty cycle. This channel parameter is defined in the CDTY field of the CDTYx register. If the waveform is left aligned then: (period –1⁄fchannel_x_clock×CDTY) duty cycle = --------------------------------------------------------------------------------------------------------- period If the waveform is center aligned, then: ((period ⁄2)–1⁄fchannel_x_clock×CDTY)) duty cycle = ------------------------------------------------------------------------------------------------------------------------ (period ⁄2) (cid:129) the waveform polarity. At the beginning of the period, the signal can be at high or low level. This property is defined in the CPOL field of the CMRx register. By default the signal starts by a low level. (cid:129) the waveform alignment. The output waveform can be left or center aligned. Center aligned waveforms can be used to generate non overlapped waveforms. This property is defined in the CALG field of the CMRx register. The default mode is left aligned. 678 32058K AVR32-01/12
AT32UC3A Figure 32-4. Non Overlapped Center Aligned Waveforms No overlap PWM0 PWM1 Period Note: 1. See Figure 32-5 on page 680 for a detailed description of center aligned waveforms. When center aligned, the internal channel counter increases up to CPRD and.decreases down to 0. This ends the period. When left aligned, the internal channel counter increases up to CPRD and is reset. This ends the period. Thus, for the same CPRD value, the period for a center aligned channel is twice the period for a left aligned channel. Waveforms are fixed at 0 when: (cid:129) CDTY = CPRD and CPOL = 0 (cid:129) CDTY = 0 and CPOL = 1 Waveforms are fixed at 1 (once the channel is enabled) when: (cid:129) CDTY = 0 and CPOL = 0 (cid:129) CDTY = CPRD and CPOL = 1 The waveform polarity must be set before enabling the channel. This immediately affects the channel output level. Changes on channel polarity are not taken into account while the channel is enabled. 679 32058K AVR32-01/12
AT32UC3A Figure 32-5. Waveform Properties PWM_MCKx CHIDx(PWM_SR) CHIDx(PWM_ENA) CHIDx(PWM_DIS) Center Aligned CALG(PWM_CMRx) = 1 PWM_CCNTx CPRD(PWM_CPRDx) CDTY(PWM_CDTYx) Period Output Waveform PWMx CPOL(PWM_CMRx) = 0 Output Waveform PWMx CPOL(PWM_CMRx) = 1 CHIDx(PWM_ISR) Left Aligned CALG(PWM_CMRx) = 0 PWM_CCNTx CPRD(PWM_CPRDx) CDTY(PWM_CDTYx) Period Output Waveform PWMx CPOL(PWM_CMRx) = 0 Output Waveform PWMx CPOL(PWM_CMRx) = 1 CHIDx(PWM_ISR) 680 32058K AVR32-01/12
AT32UC3A 32.6.3 PWM Controller Operations 32.6.3.1 Initialization Before enabling the output channel, this channel must have been configured by the software application: (cid:129) Configuration of the clock generator if DIVA and DIVB are required (cid:129) Selection of the clock for each channel (CPRE field in the CMRx register) (cid:129) Configuration of the waveform alignment for each channel (CALG field in the CMRx register) (cid:129) Configuration of the period for each channel (CPRD in the CPRDx register). Writing in CPRDx Register is possible while the channel is disabled. After validation of the channel, the user must use CUPDx Register to update CPRDx as explained below. (cid:129) Configuration of the duty cycle for each channel (CDTY in the CDTYx register). Writing in CDTYx Register is possible while the channel is disabled. After validation of the channel, the user must use CUPDx Register to update CDTYx as explained below. (cid:129) Configuration of the output waveform polarity for each channel (CPOL in the CMRx register) (cid:129) Enable Interrupts (Writing CHIDx in the IER register) (cid:129) Enable the PWM channel (Writing CHIDx in the ENA register) It is possible to synchronize different channels by enabling them at the same time by means of writing simultaneously several CHIDx bits in the ENA register. In such a situation, all channels may have the same clock selector configuration and the same period specified. 32.6.3.2 Source Clock Selection Criteria The large number of source clocks can make selection difficult. The relationship between the value in the Period Register (CPRDx) and the Duty Cycle Register (CDTYx) can help the user in choosing. The event number written in the Period Register gives the PWM accuracy. The Duty Cycle quantum cannot be lower than 1/CPRDx value. The higher the value of CPRDx, the greater the PWM accuracy. For example, if the user sets 15 (in decimal) in CPRDx, the user is able to set a value between 1 up to 14 in CDTYx Register. The resulting duty cycle quantum cannot be lower than 1/15 of the PWM period. 32.6.3.3 Changing the Duty Cycle or the Period It is possible to modulate the output waveform duty cycle or period. To prevent unexpected output waveform, the user must use the update register (PWM_CUPDx) to change waveform parameters while the channel is still enabled. The user can write a new period value or duty cycle value in the update register (CUPDx). This register holds the new value until the end of the current cycle and updates the value for the next cycle. Depending on the CPD field in the CMRx register, CUPDx either updates CPRDx or CDTYx. Note that even if the update register is used, the period must not be smaller than the duty cycle. 681 32058K AVR32-01/12
AT32UC3A Figure 32-6. Synchronized Period or Duty Cycle Update User'sWriting PWM_CUPDx Value 1 0 PWM_CMRx. CPD PWM_CPRDx PWM_CDTYx End ofCycle To prevent overwriting the CUPDx by software, the user can use status events in order to syn- chronize his software. Two methods are possible. In both, the user must enable the dedicated interrupt in IER at PWM Controller level. The first method (polling method) consists of reading the relevant status bit in ISR Register according to the enabled channel(s). See Figure 32-7. The second method uses an Interrupt Service Routine associated with the PWM channel. Note: Reading the ISR register automatically clears CHIDx flags. Figure 32-7. Polling Method PWM_ISR Read Acknowledgement and clear previous register state Writing in CPD field Update of the Period or Duty Cycle CHIDx = 1 YES Writing in PWM_CUPDx The last write has been taken into account Note: Polarity and alignment can be modified only when the channel is disabled. 682 32058K AVR32-01/12
AT32UC3A 32.6.3.4 Interrupts Depending on the interrupt mask in the IMR register, an interrupt is generated at the end of the corresponding channel period. The interrupt remains active until a read operation in the ISR reg- ister occurs. A channel interrupt is enabled by setting the corresponding bit in the IER register. A channel interrupt is disabled by setting the corresponding bit in the IDR register. 683 32058K AVR32-01/12
AT32UC3A 32.7 Pulse Width Modulation (PWM) Controller User Interface 32.7.1 Register Mapping Table 32-2. PWM Controller Registers Peripheral Offset Register Name Access Reset Value 0x00 PWM Mode Register MR Read/Write 0 0x04 PWM Enable Register ENA Write-only - 0x08 PWM Disable Register DIS Write-only - 0x0C PWM Status Register SR Read-only 0 0x10 PWM Interrupt Enable Register IER Write-only - 0x14 PWM Interrupt Disable Register IDR Write-only - 0x18 PWM Interrupt Mask Register IMR Read-only 0 0x1C PWM Interrupt Status Register ISR Read-only 0 0x4C - 0xF8 Reserved – – – 0x4C - 0xFC Reserved – – – 0x100 - 0x1FC Reserved 0x200 Channel 0 Mode Register CMR0 Read/Write 0x0 0x204 Channel 0 Duty Cycle Register CDTY0 Read/Write 0x0 0x208 Channel 0 Period Register CPRD0 Read/Write 0x0 0x20C Channel 0 Counter Register CCNT0 Read-only 0x0 0x210 Channel 0 Update Register CUPD0 Write-only - ... Reserved 0x220 Channel 1 Mode Register CMR1 Read/Write 0x0 0x224 Channel 1 Duty Cycle Register CDTY1 Read/Write 0x0 0x228 Channel 1 Period Register CPRD1 Read/Write 0x0 0x22C Channel 1 Counter Register CCNT1 Read-only 0x0 0x230 Channel 1 Update Register CUPD1 Write-only - ... ... ... ... ... 684 32058K AVR32-01/12
AT32UC3A 32.7.2 PWM Mode Register Register Name: MR Access Type: Read/Write 31 30 29 28 27 26 25 24 – – – – PREB 23 22 21 20 19 18 17 16 DIVB 15 14 13 12 11 10 9 8 – – – – PREA 7 6 5 4 3 2 1 0 DIVA (cid:129) DIVA, DIVB: CLKA, CLKB Divide Factor DIVA, DIVB CLKA, CLKB 0 CLKA, CLKB clock is turned off 1 CLKA, CLKB clock is clock selected by PREA, PREB 2-255 CLKA, CLKB clock is clock selected by PREA, PREB divided by DIVA, DIVB factor. (cid:129) PREA, PREB PREA, PREB Divider Input Clock 0 0 0 0 MCK. 0 0 0 1 MCK/2 0 0 1 0 MCK/4 0 0 1 1 MCK/8 0 1 0 0 MCK/16 0 1 0 1 MCK/32 0 1 1 0 MCK/64 0 1 1 1 MCK/128 1 0 0 0 MCK/256 1 0 0 1 MCK/512 1 0 1 0 MCK/1024 Other Reserved 685 32058K AVR32-01/12
AT32UC3A 32.7.3 PWM Enable Register Register Name: ENA Access Type: Write-only 31 30 29 28 27 26 25 24 – – – – – – – – 23 22 21 20 19 18 17 16 – – – – – – – – 15 14 13 12 11 10 9 8 – – – – – – – – 7 6 5 4 3 2 1 0 – CHID6 CHID5 CHID4 CHID3 CHID2 CHID1 CHID0 (cid:129) CHIDx: Channel ID 0 = No effect. 1 = Enable PWM output for channel x. 686 32058K AVR32-01/12
AT32UC3A 32.7.4 PWM Disable Register Register Name: DIS Access Type: Write-only 31 30 29 28 27 26 25 24 – – – – – – – – 23 22 21 20 19 18 17 16 – – – – – – – – 15 14 13 12 11 10 9 8 – – – – – – – – 7 6 5 4 3 2 1 0 – CHID6 CHID5 CHID4 CHID3 CHID2 CHID1 CHID0 (cid:129) CHIDx: Channel ID 0 = No effect. 1 = Disable PWM output for channel x. 687 32058K AVR32-01/12
AT32UC3A 32.7.5 PWM Status Register Register Name: SR Access Type: Read-only 31 30 29 28 27 26 25 24 – – – – – – – – 23 22 21 20 19 18 17 16 – – – – – – – – 15 14 13 12 11 10 9 8 – – – – – – – – 7 6 5 4 3 2 1 0 – CHID6 CHID5 CHID4 CHID3 CHID2 CHID1 CHID0 (cid:129) CHIDx: Channel ID 0 = PWM output for channel x is disabled. 1 = PWM output for channel x is enabled. 688 32058K AVR32-01/12
AT32UC3A 32.7.6 PWM Interrupt Enable Register Register Name: IER Access Type: Write-only 31 30 29 28 27 26 25 24 – – – – – – – – 23 22 21 20 19 18 17 16 – – – – – – – – 15 14 13 12 11 10 9 8 – – – – – – – – 7 6 5 4 3 2 1 0 – CHID6 CHID5 CHID4 CHID3 CHID2 CHID1 CHID0 (cid:129) CHIDx: Channel ID. 0 = No effect. 1 = Enable interrupt for PWM channel x. 689 32058K AVR32-01/12
AT32UC3A 32.7.7 PWM Interrupt Disable Register Register Name: IDR Access Type: Write-only 31 30 29 28 27 26 25 24 – – – – – – – – 23 22 21 20 19 18 17 16 – – – – – – – – 15 14 13 12 11 10 9 8 – – – – – – – – 7 6 5 4 3 2 1 0 – CHID6 CHID5 CHID4 CHID3 CHID2 CHID1 CHID0 (cid:129) CHIDx: Channel ID. 0 = No effect. 1 = Disable interrupt for PWM channel x. 690 32058K AVR32-01/12
AT32UC3A 32.7.8 PWM Interrupt Mask Register Register Name: IMR Access Type: Read-only 31 30 29 28 27 26 25 24 – – – – – – – – 23 22 21 20 19 18 17 16 – – – – – – – – 15 14 13 12 11 10 9 8 – – – – – – – – 7 6 5 4 3 2 1 0 – CHID6 CHID5 CHID4 CHID3 CHID2 CHID1 CHID0 (cid:129) CHIDx: Channel ID. 0 = Interrupt for PWM channel x is disabled. 1 = Interrupt for PWM channel x is enabled. 691 32058K AVR32-01/12
AT32UC3A 32.7.9 PWM Interrupt Status Register Register Name: ISR Access Type: Read-only 31 30 29 28 27 26 25 24 – – – – – – – – 23 22 21 20 19 18 17 16 – – – – – – – – 15 14 13 12 11 10 9 8 – – – – – – – – 7 6 5 4 3 2 1 0 – CHID6 CHID5 CHID4 CHID3 CHID2 CHID1 CHID0 (cid:129) CHIDx: Channel ID 0 = No new channel period since the last read of the ISR register. 1 = At least one new channel period since the last read of the ISR register. Note: Reading ISR automatically clears CHIDx flags. 692 32058K AVR32-01/12
AT32UC3A 32.7.10 PWM Channel Mode Register Register Name: CMRx Access Type: Read/Write 31 30 29 28 27 26 25 24 – – – – – – – – 23 22 21 20 19 18 17 16 – – – – – – – – 15 14 13 12 11 10 9 8 – – – – – CPD CPOL CALG 7 6 5 4 3 2 1 0 – – – – CPRE (cid:129) CPRE: Channel Pre-scaler CPRE Channel Pre-scaler 0 0 0 0 MCK 0 0 0 1 MCK/2 0 0 1 0 MCK/4 0 0 1 1 MCK/8 0 1 0 0 MCK/16 0 1 0 1 MCK/32 0 1 1 0 MCK/64 0 1 1 1 MCK/128 1 0 0 0 MCK/256 1 0 0 1 MCK/512 1 0 1 0 MCK/1024 1 0 1 1 CLKA 1 1 0 0 CLKB Other Reserved (cid:129) CALG: Channel Alignment 0 = The period is left aligned. 1 = The period is center aligned. (cid:129) CPOL: Channel Polarity 0 = The output waveform starts at a low level. 1 = The output waveform starts at a high level. 693 32058K AVR32-01/12
AT32UC3A (cid:129) CPD: Channel Update Period 0 = Writing to the CUPDx will modify the duty cycle at the next period start event. 1 = Writing to the CUPDx will modify the period at the next period start event. 694 32058K AVR32-01/12
AT32UC3A 32.7.11 PWM Channel Duty Cycle Register Register Name: CDTYx Access Type: Read/Write 31 30 29 28 27 26 25 24 CDTY 23 22 21 20 19 18 17 16 CDTY 15 14 13 12 11 10 9 8 CDTY 7 6 5 4 3 2 1 0 CDTY Only the first 20 bits (internal channel counter size) are significant. (cid:129) CDTY: Channel Duty Cycle Defines the waveform duty cycle. This value must be defined between 0 and CPRD (CPRx). 695 32058K AVR32-01/12
AT32UC3A 32.7.12 PWM Channel Period Register Register Name: CPRDx Access Type: Read/Write 31 30 29 28 27 26 25 24 CPRD 23 22 21 20 19 18 17 16 CPRD 15 14 13 12 11 10 9 8 CPRD 7 6 5 4 3 2 1 0 CPRD Only the first 20 bits (internal channel counter size) are significant. (cid:129) CPRD: Channel Period If the waveform is left-aligned, then the output waveform period depends on the counter source clock and can be calculated: – By using the Master Clock (MCK) divided by an X given prescaler value (with X being 1, 2, 4, 8, 16, 32, 64, 128, 256, 512, or 1024). The resulting period formula will be: (X×CPRD) ------------------------------- MCK – By using a Master Clock divided by one of both DIVA or DIVB divider, the formula becomes, respectively: (CRPD×DIVA) (CRPD×DIVAB) ---------------------------------------- -o-r ---------------------------------------------- MCK MCK If the waveform is center-aligned, then the output waveform period depends on the counter source clock and can be calculated: – By using the Master Clock (MCK) divided by an X given prescaler value (with X being 1, 2, 4, 8, 16, 32, 64, 128, 256, 512, or 1024). The resulting period formula will be: (2×X×CPRD) ------------------------------------------ MCK – By using a Master Clock divided by one of both DIVA or DIVB divider, the formula becomes, respectively: (2×CPRD×DIVA) (2×CPRD×DIVB) ------------------------------------------------- -o---r ----------------------------------------------------- MCK MCK 696 32058K AVR32-01/12
AT32UC3A 32.7.13 PWM Channel Counter Register Register Name: CCNTx Access Type: Read-only 31 30 29 28 27 26 25 24 CNT 23 22 21 20 19 18 17 16 CNT 15 14 13 12 11 10 9 8 CNT 7 6 5 4 3 2 1 0 CNT (cid:129) CNT: Channel Counter Register Internal counter value. This register is reset when: (cid:129) the channel is enabled (writing CHIDx in the ENA register). (cid:129) the counter reaches CPRD value defined in the CPRDx register if the waveform is left aligned. 697 32058K AVR32-01/12
AT32UC3A 32.7.14 PWM Channel Update Register Register Name: CUPDx Access Type: Write-only 31 30 29 28 27 26 25 24 CUPD 23 22 21 20 19 18 17 16 CUPD 15 14 13 12 11 10 9 8 CUPD 7 6 5 4 3 2 1 0 CUPD This register acts as a double buffer for the period or the duty cycle. This prevents an unexpected waveform when modify- ing the waveform period or duty-cycle. Only the first 20 bits (internal channel counter size) are significant. CPD (CMRx Register) The duty-cycle (CDTY in the CDTYx register) is updated with the CUPD value at the beginning of 0 the next period. The period (CPRD in the CPRDx register) is updated with the CUPD value at the beginning of the 1 next period. 698 32058K AVR32-01/12
AT32UC3A 33. Analog-to-Digital Converter (ADC) Rev: 1.0.0.3 33.1 Features (cid:129) Integrated Multiplexer Offering Up to Eight Independent Analog Inputs (cid:129) Individual Enable and Disable of Each Channel (cid:129) Hardware or Software Trigger – External Trigger Pin –Timer Counter Outputs (Corresponding TIOA Trigger) (cid:129) PDC Support (cid:129) Possibility of ADC Timings Configuration (cid:129) Sleep Mode and Conversion Sequencer – Automatic Wakeup on Trigger and Back to Sleep Mode after Conversions of all Enabled Channels 33.2 Overview The ADC is based on a Successive Approximation Register (SAR) 10-bit Analog-to-Digital Con- verter (ADC). It also integrates an ADC_NB_CHANNELS-to-1 analog multiplexer, making possible the analog-to-digital conversions of ADC_NB_CHANNELS analog lines. The conver- sions extend from 0V to ADVREF. The ADC supports an 8-bit or 10-bit resolution mode, and conversion results are reported in a common register for all channels, as well as in a channel-dedicated register. Software trigger, external trigger on rising edge of the TRIGGER pin or internal triggers from Timer Counter out- put(s) are configurable. The ADC also integrates a Sleep Mode and a conversion sequencer and connects with a PDC channel. These features reduce both power consumption and processor intervention. Finally, the user can configure ADC timings, such as Startup Time and Sample & Hold Time. 699 32058K AVR32-01/12
AT32UC3A 33.3 Block Diagram Figure 33-1. Analog-to-Digital Converter Block Diagram Timer Counter Channels ADC Trigger TRIGGER Selection ADC Interrupt Control INTC Logic VDDANA ADVREF HSB AD- PDC Dedicated AD- Analog User Inputs Interface PeripheraBl ridge AD- Successive Approximation Register AD- Analog-to-Digital Analog Inputs PIO Converter PB Multiplexed AD- With I/O lines AD- GND 33.4 I/O Lines Description Table 33-1. ADC Pins Description Pin Name Description VDDANA Analog power supply ADVREF Reference voltage AD0 - AD[ADC_NB_CHANNELS-1] Analog input channels TRIGGER External trigger 33.5 Product Dependencies 33.5.1 GPIO The pin TRIGGER may be shared with other peripheral functions through the PIO Controller. In this case, the PIO Controller should be set accordingly to assign the pin TRIGGER to the ADC function. 700 32058K AVR32-01/12
AT32UC3A 33.5.2 Analog Inputs The analog input pins can be multiplexed with PIO lines. In this case, the assignment of the ADC input is automatically done as soon as the corresponding channel is enabled by writing the CHER register . By default, after reset, the PIO line is configured as input with its pull-up enabled and the ADC input is connected to the GND. 33.5.3 Power Manager The ADC is automatically clocked after the first conversion in Normal Mode. In Sleep Mode, the ADC clock is automatically stopped after each conversion. As the logic is small and the ADC cell can be put into Sleep Mode, the Power Manager(PM) has no effect on the ADC behavior. 33.5.4 Interrupt Controller The ADC interrupt line is connected on one of the internal sources of the Interrupt Controller. Using the ADC interrupt requires the INTC to be programmed first. 33.5.5 Timer Triggers Timer Counters may or may not be used as hardware triggers depending on user requirements. Thus, some or all of the timer counters may be non-connected. 33.5.6 Conversion Performances For performance and electrical characteristics of the ADC, see the DC Characteristics section. 701 32058K AVR32-01/12
AT32UC3A 33.6 Functional Description 33.6.1 Analog-to-digital Conversion The ADC uses the ADC Clock to perform conversions. Converting a single analog value to a 10- bit digital data requires Sample and Hold Clock cycles as defined in the field SHTIM of the MR register and 10 ADC Clock cycles. The ADC Clock frequency is selected in the PRESCAL field of the MR register. The ADC clock range is between CLK_ADC/2, if PRESCAL is 0, and CLK_ADC/128, if PRES- CAL is set to 63 (0x3F). PRESCAL must be programmed in order to provide an ADC clock frequency according to the parameters given in the Product definition section. 33.6.2 Conversion Reference The conversion is performed on a full range between 0V and the reference voltage pin ADVREF. Analog inputs between these voltages convert to values based on a linear conversion. 33.6.3 Conversion Resolution The ADC supports 8-bit or 10-bit resolutions. The 8-bit selection is performed by setting the bit LOWRES in the ADC Mode Register (MR). By default, after a reset, the resolution is the highest and the DATA field in the data registers is fully used. By setting the bit LOWRES, the ADC switches in the lowest resolution and the conversion results can be read in the eight lowest sig- nificant bits of the data registers. The two highest bits of the DATA field in the corresponding CDR register and of the LDATA field in the LCDR register read 0. Moreover, when a PDC channel is connected to the ADC, 10-bit resolution sets the transfer request sizes to 16-bit. Setting the bit LOWRES automatically switches to 8-bit data transfers. In this case, the destination buffers are optimized. 702 32058K AVR32-01/12
AT32UC3A 33.6.4 Conversion Results When a conversion is completed, the resulting 10-bit digital value is stored in the Channel Data Register (CDR) of the current channel and in the ADC Last Converted Data Register (LCDR). The channel EOC bit in the Status Register (SR) is set and the DRDY is set. In the case of a connected PDC channel, DRDY rising triggers a data transfer request. In any case, either EOC and DRDY can trigger an interrupt. Reading one of the CDR registers clears the corresponding EOC bit. Reading LCDR clears the DRDY bit and the EOC bit corresponding to the last converted channel. Figure 33-2. EOCx and DRDY Flag Behavior Write CR Write CR With START=1 Read CDRx Read LCDR With START=1 CHx(CHSR) EOCx(SR) Conversion Time Conversion Time DRDY(SR) 703 32058K AVR32-01/12
AT32UC3A If the CDR is not read before further incoming data is converted, the corresponding Overrun Error (OVRE) flag is set in the Status Register (SR). In the same way, new data converted when DRDY is high sets the bit GOVRE (General Overrun Error) in SR. The OVRE and GOVRE flags are automatically cleared when SR is read. Figure 33-3. GOVRE and OVREx Flag Behavior Read SR TRIGGER CH0(CHSR) CH1(CHSR) LCDR Undefined Data Data A Data B Data C CRD0 Undefined Data Data A Data C CRD1 Undefined Data Data B Conversion EOC0(SR) Conversion Read CDR0 Conversion EOC1(SR) Read CDR1 GOVRE(SR) DRDY(ASR) OVRE0(SR) Warning: If the corresponding channel is disabled during a conversion or if it is disabled and then reenabled during a conversion, its associated data and its corresponding EOC and OVRE flags in SR are unpredictable. 704 32058K AVR32-01/12
AT32UC3A 33.6.5 Conversion Triggers Conversions of the active analog channels are started with a software or a hardware trigger. The software trigger is provided by writing the Control Register (CR) with the bit START at 1. The hardware trigger can be one of the TIOA outputs of the Timer Counter channels, or the external trigger input of the ADC (TRIGGER). The hardware trigger is selected with the field TRGSEL in the Mode Register (MR). The selected hardware trigger is enabled with the bit TRGEN in the Mode Register (MR). If a hardware trigger is selected, the start of a conversion is detected at each rising edge of the selected signal. If one of the TIOA outputs is selected, the corresponding Timer Counter channel must be programmed in Waveform Mode. Only one start command is necessary to initiate a conversion sequence on all the channels. The ADC hardware logic automatically performs the conversions on the active channels, then waits for a new request. The Channel Enable (CHER) and Channel Disable (CHDR) Registers enable the analog channels to be enabled or disabled independently. If the ADC is used with a PDC, only the transfers of converted data from enabled channels are performed and the resulting data buffers should be interpreted accordingly. Warning: Enabling hardware triggers does not disable the software trigger functionality. Thus, if a hardware trigger is selected, the start of a conversion can be initiated either by the hardware or the software trigger. 33.6.6 Sleep Mode and Conversion Sequencer The ADC Sleep Mode maximizes power saving by automatically deactivating the ADC when it is not being used for conversions. Sleep Mode is selected by setting the bit SLEEP in the Mode Register MR. The SLEEP mode is automatically managed by a conversion sequencer, which can automati- cally process the conversions of all channels at lowest power consumption. When a start conversion request occurs, the ADC is automatically activated. As the analog cell requires a start-up time, the logic waits during this time and starts the conversion on the enabled channels. When all conversions are complete, the ADC is deactivated until the next trigger. Trig- gers occurring during the sequence are not taken into account. The conversion sequencer allows automatic processing with minimum processor intervention and optimized power consumption. Conversion sequences can be performed periodically using a Timer/Counter output. The periodic acquisition of several samples can be processed automat- ically without any intervention of the processor thanks to the PDC. Note: The reference voltage pins always remain connected in normal mode as in sleep mode. 705 32058K AVR32-01/12
AT32UC3A 33.6.7 ADC Timings Each ADC has its own minimal Startup Time that is programmed through the field STARTUP in the Mode Register MR. In the same way, a minimal Sample and Hold Time is necessary for the ADC to guarantee the best converted final value between two channels selection. This time has to be programmed through the bitfield SHTIM in the Mode Register MR. Warning: No input buffer amplifier to isolate the source is included in the ADC. This must be taken into consideration to program a precise value in the SHTIM field. See the section, ADC Characteristics in the product datasheet. 706 32058K AVR32-01/12
AT32UC3A 33.7 User Interface Table 33-2. ADC Register Mapping Offset Register Name Access Reset State 0x00 Control Register CR Write-only – 0x04 Mode Register MR Read/Write 0x00000000 0x10 Channel Enable Register CHER Write-only – 0x14 Channel Disable Register CHDR Write-only – 0x18 Channel Status Register CHSR Read-only 0x00000000 0x1C Status Register SR Read-only 0x000C0000 0x20 Last Converted Data Register LCDR Read-only 0x00000000 0x24 Interrupt Enable Register IER Write-only – 0x28 Interrupt Disable Register IDR Write-only – 0x2C Interrupt Mask Register IMR Read-only 0x00000000 0x30 Channel Data Register 0 CDR0 Read-only 0x00000000 ... ...(if implemented) ... ... ... 0x4C Channel Data Register 7(if implemented) CDR7 Read-only 0x00000000 0xFC Version Register VERSION Read-only – 707 32058K AVR32-01/12
AT32UC3A 33.7.1 Control Register Name: CR Access Type: Write-only Offset: 0x00 Reset Value: – 31 30 29 28 27 26 25 24 – – – – – – – – 23 22 21 20 19 18 17 16 – – – – – – – – 15 14 13 12 11 10 9 8 – – – – – – – – 7 6 5 4 3 2 1 0 – – – – – – START SWRST (cid:129) START: Start Conversion 0 = No effect. 1 = Begins analog-to-digital conversion. (cid:129) SWRST: Software Reset 0 = No effect. 1 = Resets the ADC simulating a hardware reset. 708 32058K AVR32-01/12
AT32UC3A 33.7.2 Mode Register Name: MR Access Type: Read/Write Offset: 0x04 Reset Value: 0x00000000 31 30 29 28 27 26 25 24 – – – – SHTIM 23 22 21 20 19 18 17 16 – – – STARTUP 15 14 13 12 11 10 9 8 – – PRESCAL 7 6 5 4 3 2 1 0 – – SLEEP LOWRES TRGSEL TRGEN (cid:129) SHTIM: Sample & Hold Time Sample & Hold Time = (SHTIM+1) / ADCClock (cid:129) STARTUP: Start Up Time Startup Time = (STARTUP+1) * 8 / ADCClock (cid:129) PRESCAL: Prescaler Rate Selection ADCClock = CLK_ADC / ( (PRESCAL+1) * 2 ) (cid:129) SLEEP: Sleep Mode SLEEP Selected Mode 0 Normal Mode 1 Sleep Mode (cid:129) LOWRES: Resolution LOWRES Selected Resolution 0 10-bit resolution 1 8-bit resolution (cid:129) TRGSEL: Trigger Selection TRGSEL Selected TRGSEL 0 0 0 Internal Trigger 0, depending of chip integration 0 0 1 Internal Trigger 1, depending of chip integration 0 1 0 Internal Trigger 2, depending of chip integration 0 1 1 Internal Trigger 3, depending of chip integration 1 0 0 Internal Trigger 4, depending of chip integration 709 32058K AVR32-01/12
AT32UC3A TRGSEL Selected TRGSEL 1 0 1 Internal Trigger 5, depending of chip integration 1 1 0 External trigger 1 1 1 Reserved (cid:129) TRGEN: Trigger Enable TRGEN Selected TRGEN 0 Hardware triggers are disabled. Starting a conversion is only possible by software. 1 Hardware trigger selected by TRGSEL field is enabled. 710 32058K AVR32-01/12
AT32UC3A 33.7.3 Channel Enable Register Name: CHER Access Type: Write-only Offset: 0x10 Reset Value: – 31 30 29 28 27 26 25 24 – – – – – – – – 23 22 21 20 19 18 17 16 – – – – – – – – 15 14 13 12 11 10 9 8 – – – – – – – – 7 6 5 4 3 2 1 0 CH2 CH6 CH5 CH4 CH3 CH2 CH1 CH0 (cid:129) CHx: Channel x Enable 0 = No effect. 1 = Enables the corresponding channel(if implemented). 711 32058K AVR32-01/12
AT32UC3A 33.7.4 Channel Disable Register Name: CHDR Access Type: Write-only Offset: 0x14 Reset Value: – 31 30 29 28 27 26 25 24 – – – – – – – – 23 22 21 20 19 18 17 16 – – – – – – – – 15 14 13 12 11 10 9 8 – – – – – – – – 7 6 5 4 3 2 1 0 CH7 CH6 CH5 CH4 CH3 CH2 CH1 CH0 (cid:129) CHx: Channel x Disable 0 = No effect. 1 = Disables the corresponding channel(if implemented). Warning: If the corresponding channel is disabled during a conversion or if it is disabled then reenabled during a conver- sion, its associated data and its corresponding EOC and OVRE flags in SR are unpredictable. 712 32058K AVR32-01/12
AT32UC3A 33.7.5 Channel Status Register Name: CHSR Access Type: Read-only Offset: 0x18 Reset Value: 0x00000000 31 30 29 28 27 26 25 24 – – – – – – – – 23 22 21 20 19 18 17 16 – – – – – – – – 15 14 13 12 11 10 9 8 – – – – – – – – 7 6 5 4 3 2 1 0 CH7 CH6 CH5 CH4 CH3 CH2 CH1 CH0 (cid:129) CHx: Channel x Status 0 = Corresponding channel is disabled(if implemented). 1 = Corresponding channel is enabled(if implemented). 713 32058K AVR32-01/12
AT32UC3A 33.7.6 Status Register Name: SR Access Type: Read-only Offset: 0x1C Reset Value: 0x000C0000 31 30 29 28 27 26 25 24 – – – – – – – – 23 22 21 20 19 18 17 16 – – – – RXBUFF ENDRX GOVRE DRDY 15 14 13 12 11 10 9 8 OVRE7 OVRE6 OVRE5 OVRE4 OVRE3 OVRE2 OVRE1 OVRE0 7 6 5 4 3 2 1 0 EOC7 EOC6 EOC5 EOC4 EOC3 EOC2 EOC1 EOC0 (cid:129) RXBUFF: RX Buffer Full 0 = RCR or RNCR have a value other than 0. 1 = Both RCR and RNCR have a value of 0. (cid:129) ENDRX: End of RX Buffer 0 = The Receive Counter Register has not reached 0 since the last write in RCR or RNCR. 1 = The Receive Counter Register has reached 0 since the last write in RCR or RNCR. (cid:129) GOVRE: General Overrun Error 0 = No General Overrun Error occurred since the last read of SR. 1 = At least one General Overrun Error has occurred since the last read of SR. (cid:129) DRDY: Data Ready 0 = No data has been converted since the last read of LCDR. 1 = At least one data has been converted and is available in LCDR. (cid:129) OVREx: Overrun Error x 0 = No overrun error on the corresponding channel(if implemented) since the last read of SR. 1 = There has been an overrun error on the corresponding channel (if implemented) since the last read of SR. (cid:129) EOCx: End of Conversion x 0 = Corresponding analog channel (if implemented) is disabled, or the conversion is not finished. 1 = Corresponding analog channel (if implemented) is enabled and conversion is complete. 714 32058K AVR32-01/12
AT32UC3A 33.7.7 Last Converted Data Register Name: LCDR Access Type: Read-only Offset: 0x20 Reset Value: 0x00000000 31 30 29 28 27 26 25 24 – – – – – – – – 23 22 21 20 19 18 17 16 – – – – – – – – 15 14 13 12 11 10 9 8 – – – – – – LDATA 7 6 5 4 3 2 1 0 LDATA (cid:129) LDATA: Last Data Converted The analog-to-digital conversion data is placed into this register at the end of a conversion and remains until a new conver- sion is completed. 715 32058K AVR32-01/12
AT32UC3A 33.7.8 Interrupt Enable Register Name: IER Access Type: Write-only Offset: 0x24 Reset Value: – 31 30 29 28 27 26 25 24 – – – – – – – – 23 22 21 20 19 18 17 16 – – – – RXBUFF ENDRX GOVRE DRDY 15 14 13 12 11 10 9 8 OVRE7 OVRE6 OVRE5 OVRE4 OVRE3 OVRE2 OVRE1 OVRE0 7 6 5 4 3 2 1 0 EOC7 EOC6 EOC5 EOC4 EOC3 EOC2 EOC1 EOC0 (cid:129) RXBUFF: Receive Buffer Full Interrupt Enable 0 = No effect. 1 = Enables the corresponding interrupt. ENDRX: End of Receive Buffer Interrupt Enable (cid:129) GOVRE: General Overrun Error Interrupt Enable (cid:129) DRDY: Data Ready Interrupt Enable (cid:129) OVREx: Overrun Error Interrupt Enable x (cid:129) EOCx: End of Conversion Interrupt Enable x 716 32058K AVR32-01/12
AT32UC3A 33.7.9 Interrupt Disable Register Name: IDR Access Type: Write-only Offset: 0x28 Reset Value: – 31 30 29 28 27 26 25 24 – – – – – – – – 23 22 21 20 19 18 17 16 – – – – RXBUFF ENDRX GOVRE DRDY 15 14 13 12 11 10 9 8 OVRE7 OVRE6 OVRE5 OVRE4 OVRE3 OVRE2 OVRE1 OVRE0 7 6 5 4 3 2 1 0 EOC7 EOC6 EOC5 EOC4 EOC3 EOC2 EOC1 EOC0 (cid:129) RXBUFF: Receive Buffer Full Interrupt Disable 0 = No effect. 1 = Disables the corresponding interrupt. (cid:129) ENDRX: End of Receive Buffer Interrupt Disable (cid:129) GOVRE: General Overrun Error Interrupt Disable (cid:129) DRDY: Data Ready Interrupt Disable (cid:129) OVREx: Overrun Error Interrupt Disable x (cid:129) EOCx: End of Conversion Interrupt Disable x 717 32058K AVR32-01/12
AT32UC3A 33.7.10 Interrupt Mask Register Name: IMR Access Type: Read-only Offset: 0x2C Reset Value: 0x00000000 31 30 29 28 27 26 25 24 – – – – – – – – 23 22 21 20 19 18 17 16 – – – – RXBUFF ENDRX GOVRE DRDY 15 14 13 12 11 10 9 8 OVRE7 OVRE6 OVRE5 OVRE4 OVRE3 OVRE2 OVRE1 OVRE0 7 6 5 4 3 2 1 0 EOC7 EOC6 EOC5 EOC4 EOC3 EOC2 EOC1 EOC0 (cid:129) RXBUFF: Receive Buffer Full Interrupt Mask 0 = The corresponding interrupt is disabled. 1 = The corresponding interrupt is enabled. (cid:129) ENDRX: End of Receive Buffer Interrupt Mask (cid:129) GOVRE: General Overrun Error Interrupt Mask (cid:129) DRDY: Data Ready Interrupt Mask (cid:129) OVREx: Overrun Error Interrupt Mask x (cid:129) EOCx: End of Conversion Interrupt Mask x 718 32058K AVR32-01/12
AT32UC3A 33.7.11 Channel Data Register Name: CDRx Access Type: Read-only Offset: 0x2C-0x4C Reset Value: 0x00000000 31 30 29 28 27 26 25 24 – – – – – – – – 23 22 21 20 19 18 17 16 – – – – – – – – 15 14 13 12 11 10 9 8 – – – – – – DATA 7 6 5 4 3 2 1 0 DATA (cid:129) DATA: Converted Data The analog-to-digital conversion data is placed into this register at the end of a conversion and remains until a new conver- sion is completed. The Convert Data Register (CDR) is only loaded if the corresponding analog channel is enabled. 719 32058K AVR32-01/12
AT32UC3A 33.7.12 Version Register Name: VERSION Access Type: Read-only Offset: 0xFC Reset Value: – 31 30 29 28 27 26 25 24 – – – – – – – – 23 22 21 20 19 18 17 16 – – – – VARIANT 15 14 13 12 11 10 9 8 – – – – VERSION[11:8] 7 6 5 4 3 2 1 0 VERSION[7:0] (cid:129) VARIANT: Variant Number Reserved. No functionality associated. (cid:129) VERSION: Version Number Version number of the module. No functionality associated. 720 32058K AVR32-01/12
AT32UC3A 34. Audio Bitstream DAC (ABDAC) Rev: 1.0.1.1 34.1 Features (cid:129) Digital Stereo DAC (cid:129) Oversampled D/A conversion architecture – Oversampling ratio fixed 128x – FIR equalization filter – Digital interpolation filter: Comb4 – 3rd Order Sigma-Delta D/A converters (cid:129) Digital bitstream outputs (cid:129) Parallel interface (cid:129) Connected to DMA Controller for background transfer without CPU intervention 34.2 Description The Audio Bitstream DAC converts a 16-bit sample value to a digital bitstream with an average value proportional to the sample value. Two channels are supported, making the Audio Bit- stream DAC particularly suitable for stereo audio. Each channel has a pair of complementary digital outputs, DACn and DACn_N, which can be connected to an external high input imped- ance amplifier. The Audio Bitstream DAC is compromised of two 3rd order Sigma Delta D/A converter with an oversampling ratio of 128. The samples are upsampled with a 4th order Sinc interpolation filter (Comb4) before being input to the Sigmal Delta Modulator. In order to compensate for the pass band frequency response of the interpolation filter and flatten the overall frequency response, the input to the interpolation filter is first filtered with a simple 3-tap FIR filter.The total frequency response of the Equalization FIR filter and the interpolation filter is given in Figure 34-2 on page 733. The digital output bitstreams from the Sigma Delta Modulators should be low-pass filtered to remove high frequency noise inserted by the Modulation process. The output DACn and DACn_N should be as ideal as possible before filtering, to achieve the best SNR quality. The output can be connected to a class D amplifier output stage, or it can be low pass filtered and connected to a high input impedance amplifier. A simple 1st order or higher low pass filter that filters all the frequencies above 50 kHz should be adequate. 721 32058K AVR32-01/12
AT32UC3A 34.3 Block Diagram Figure 34-1. Functional Block Diagram Audio Bitstream DAC clk Clock Generator bit_clk sample_clk COMB Sigma-Delta din1[15:0] Equalization FIR bit_out1 (INT=128) DA-MOD COMB Sigma-Delta din2[15:0] Equalization FIR bit_out2 (INT=128) DA-MOD 34.4 Pin Name List Table 34-1. I/O Lines Description Pin Name Pin Description Type DATA0 Output from Audio Bitstream DAC Channel 0 Output DATA1 Output from Audio Bitstream DAC Channel 1 Output DATAN0 Inverted output from Audio Bitstream DAC Channel 0 Output DATAN1 Inverted output from Audio Bitstream DAC Channel 1 Output 34.5 Product Dependencies 34.5.1 I/O Lines The output pins used for the output bitstream from the Audio Bitstream DAC may be multiplexed with PIO lines. Before using the Audio Bitstream DAC, the PIO controller must be configured in order for the Audio Bitstream DAC I/O lines to be in Audio Bitstream DAC peripheral mode. 34.5.2 Power Management The PB-bus clock to the Audio Bitstream DAC is generated by the power manager. Before using the Audio Bitstream DAC, the programmer must ensure that the Audio Bitstream DAC clock is enabled in the power manager. 722 32058K AVR32-01/12
AT32UC3A 34.5.3 Clock Management The Audio Bitstream DAC needs a separate clock for the D/A conversion operation. This clock should be set up in the generic clock register in the power manager. The frequency of this clock must be 256 times the frequency of the desired samplerate (f ). For f =48kHz this means that the s s clock must have a frequency of 12.288MHz. 34.5.4 Interrupts The Audio Bitstream DAC interface has an interrupt line connected to the interrupt controller. In order to handle interrupts, the interrupt controller must be programmed before configuring the Audio Bitstream DAC. All Audio Bitstream DAC interrupts can be enabled/disabled by writing to the Audio Bitstream DAC Interrupt Enable/Disable Registers. Each pending and unmasked Audio Bitstream DAC interrupt will assert the interrupt line. The Audio Bitstream DAC interrupt service routine can get the interrupt source by reading the Interrupt Status Register. 34.5.5 DMA The Audio Bitstream DAC is connected to the DMA controller. The DMA controller can be pro- grammed to automatically transfer samples to the Audio Bitstream DAC Sample Data Register (SDR) when the Audio Bitstream DAC is ready for new samples. This enables the Audio Bit- stream DAC to operate without any CPU intervention such as polling the Interrupt Status Register (ISR) or using interrupts. See the DMA controller documentation for details on how to setup DMA transfers. 34.6 Functional Description In order to use the Audio Bitstream DAC the product dependencies given in Section 34.5 on page 722 must be resolved. Particular attention should be given to the configuration of clocks and I/O lines in order to ensure correct operation of the Audio Bitstream DAC. The Audio Bitstream DAC is enabled by writing the ENABLE bit in the Audio Bitstream DAC Control Register (CR). The two 16-bit sample values for channel 0 and 1 can then be written to the least and most significant halfword of the Sample Data Register (SDR), respectively. The TX_READY bit in the Interrupt Status Register (ISR) will be set whenever the DAC is ready to receive a new sample. A new sample value should be written to SDR before 256 DAC clock cycles, or an underrun will occur, as indicated by the UNDERRUN status flags in ISR. ISR is cleared when read, or when writing one to the corresponding bits in the Interrupt Clear Register (ICR). For interrupt-based operation, the relevant interrupts must be enabled by writing one to the cor- responding bits in the Interrupt Enable Register (IER). Interrupts can be disabled by the Interrupt Disable Register (IDR), and active interrupts are indicated in the read-only Interrupt Mask Regis- ter (IMR). The Audio Bitstream DAC can also be configured for peripheral DMA access, in which case only the enable bit in the control register needs to be set in the Audio Bitstream DAC module. 34.6.1 Equalization Filter The equalization filter is a simple 3-tap FIR filter. The purpose of this filter is to compensate for the pass band frequency response of the sinc interpolation filter. The equalization filter makes the pass band response more flat and moves the -3dB corner a little higher. 723 32058K AVR32-01/12
AT32UC3A 34.6.2 Interpolation filter The interpolation filter interpolates from f to 128f . This filter is a 4th order Cascaded Integrator- s s Comb filter, and the basic building blocks of this filter is a comb part and an integrator part. 34.6.3 Sigma Delta Modulator This part is a 3rd order Sigma Delta Modulator consisting of three differentiators (delta blocks), three integrators (sigma blocks) and a one bit quantizer. The purpose of the integrators is to shape the noise, so that the noise is reduces in the band of interest and increased at the higher frequencies, where it can be filtered. 34.6.4 Data Format Input data is on two’s complement format. 724 32058K AVR32-01/12
AT32UC3A 34.7 Audio Bitstream DAC User Interface Table 34-2. Register Mapping Offset Register Register Name Access Reset 0x0 Sample Data Register SDR Read/Write 0x0 0x4 Reserved - - - 0x8 Control Register CR Read/Write 0x0 0xc Interrupt Mask Register IMR Read 0x0 0x10 Interrupt Enable Register IER Write - 0x14 Interrupt Disable Register IDR Write - 0x18 Interrupt Clear Register ICR Write - 0x1C Interrupt Status Register ISR Read 0x0 725 32058K AVR32-01/12
AT32UC3A 34.7.1 Audio Bitstream DAC Sample Data Register Name: SDR Access Type: Read-Write 31 30 29 28 27 26 25 24 CHANNEL1 23 22 21 20 19 18 17 16 CHANNEL1 15 14 13 12 11 10 9 8 CHANNEL0 7 6 5 4 3 2 1 0 CHANNEL0 (cid:129) CHANNEL0: Sample Data for Channel 0 Signed 16-bit Sample Data for channel 0. When the SWAP bit in the DAC Control Register (CR) is set writing to the Sample Data Register (SDR) will cause the values written to CHANNEL0 and CHANNEL1 to be swapped. (cid:129) CHANNEL1: Sample Data for Channel 1 Signed 16-bit Sample Data for channel 1. When the SWAP bit in the DAC Control Register (CR) is set writing to the Sample Data Register (SDR) will cause the values written to CHANNEL0 and CHANNEL1 to be swapped. 726 32058K AVR32-01/12
AT32UC3A 34.7.2 Audio Bitstream DAC Control Register Name: CR Access Type: Read-Write 31 30 29 28 27 26 25 24 EN SWAP - - - - - - 23 22 21 20 19 18 17 16 - - - - - - - - 15 14 13 12 11 10 9 8 - - - - - - - - 7 6 5 4 3 2 1 0 - - - - - - - - (cid:129) SWAP: Swap Channels 0: The CHANNEL0 and CHANNEL1 samples will not be swapped when writing the Audio Bitstream DAC Sample Data Register (SDR). 1: The CHANNEL0 and CHANNEL1 samples will be swapped when writing the Audio Bitstream DAC Sample Data Regis- ter (SDR). (cid:129) EN: Enable Audio Bitstream DAC 0:Audio Bitstream DAC is disabled. 1:Audio Bitstream DAC is enabled. 727 32058K AVR32-01/12
AT32UC3A 34.7.3 Audio Bitstream DAC Interrupt Mask Register Name: IMR Access Type: Read-only 31 30 29 28 27 26 25 24 - - TX_READY UNDERRUN - - - - 23 22 21 20 19 18 17 16 - - - - - - - - 15 14 13 12 11 10 9 8 - - - - - - - - 7 6 5 4 3 2 1 0 - - - - - - - - (cid:129) UNDERRUN: Underrun Interrupt Mask 0:The Audio Bitstream DAC Underrun interrupt is disabled. 1:The Audio Bitstream DAC Underrun interrupt is enabled. (cid:129) TX_READY: TX Ready Interrupt Mask 0:The Audio Bitstream DAC TX Ready interrupt is disabled. 1:The Audio Bitstream DAC TX Ready interrupt is enabled. 728 32058K AVR32-01/12
AT32UC3A 34.7.4 Audio Bitstream DAC Interrupt Enable Register Name: IER Access Type: Write-only 31 30 29 28 27 26 25 24 - - TX_READY UNDERRUN - - - - 23 22 21 20 19 18 17 16 - - - - - - - - 15 14 13 12 11 10 9 8 - - - - - - - - 7 6 5 4 3 2 1 0 - - - - - - - - (cid:129) UNDERRUN: Underrun Interrupt Enable 0:No effect. 1:Enables the Audio Bitstream DAC Underrun interrupt. (cid:129) TX_READY: TX Ready Interrupt Enable 0:No effect. 1:Enables the Audio Bitstream DAC TX Ready interrupt. 729 32058K AVR32-01/12
AT32UC3A 34.7.5 Audio Bitstream DAC Interrupt Disable Register Name: IDR Access Type: Write-only 31 30 29 28 27 26 25 24 - - TX_READY UNDERRUN - - - - 23 22 21 20 19 18 17 16 - - - - - - - - 15 14 13 12 11 10 9 8 - - - - - - - - 7 6 5 4 3 2 1 0 - - - - - - - - (cid:129) UNDERRUN: Underrun Interrupt Disable 0:No effect. 1:Disable the Audio Bitstream DAC Underrun interrupt. (cid:129) TX_READY: TX Ready Interrupt Disable 0:No effect. 1:Disable the Audio Bitstream DAC TX Ready interrupt. 730 32058K AVR32-01/12
AT32UC3A 34.7.6 Audio Bitstream DAC Interrupt Clear Register Name: ICR Access Type: Write-only 31 30 29 28 27 26 25 24 - - TX_READY UNDERRUN - - - - 23 22 21 20 19 18 17 16 - - - - - - - - 15 14 13 12 11 10 9 8 - - - - - - - - 7 6 5 4 3 2 1 0 - - - - - - - - (cid:129) UNDERRUN: Underrun Interrupt Clear 0:No effect. 1:Clear the Audio Bitstream DAC Underrun interrupt. (cid:129) TX_READY: TX Ready Interrupt Clear 0:No effect. 1:Clear the Audio Bitstream DAC TX Ready interrupt. 731 32058K AVR32-01/12
AT32UC3A 34.7.7 Audio Bitstream DAC Interrupt Status Register Name: ISR Access Type: Read-only 31 30 29 28 27 26 25 24 - - TX_READY UNDERRUN - - - - 23 22 21 20 19 18 17 16 - - - - - - - - 15 14 13 12 11 10 9 8 - - - - - - - - 7 6 5 4 3 2 1 0 - - - - - - - - (cid:129) UNDERRUN: Underrun Interrupt Status 0:No Audio Bitstream DAC Underrun has occured since the last time ISR was read or since reset. 1:At least one Audio Bitstream DAC Underrun has occured since the last time ISR was read or since reset. (cid:129) TX_READY: TX Ready Interrupt Status 0:No Audio Bitstream DAC TX Ready has occuredt since the last time ISR was read. 1:At least one Audio Bitstream DAC TX Ready has occuredt since the last time ISR was read. 732 32058K AVR32-01/12
AT32UC3A 34.8 Frequency Response Figure 34-2. Frequecy response, EQ-FIR+COMB4 10 0 -10 -20 -30 -40 -50 -60 0 1 2 3 4 5 6 7 8 9 10 x 104 733 32058K AVR32-01/12
AT32UC3A 35. On-Chip Debug Rev: 1.3.0.0 35.1 Features (cid:129) Debug interface in compliance with IEEE-ISTO 5001-2003 (Nexus 2.0) Class 2+ (cid:129) JTAG access to all on-chip debug functions (cid:129) Advanced Program, Data, Ownership, and Watchpoint trace supported (cid:129) NanoTrace JTAG-based trace access (cid:129) Auxiliary port for high-speed trace information (cid:129) Hardware support for 6 Program and 2 Data breakpoints (cid:129) Unlimited number of software breakpoints supported (cid:129) Automatic CRC check of memory regions 35.2 Overview Debugging on the AT32UC3A is facilitated by a powerful On-Chip Debug (OCD) system. The user accesses this through an external debug tool which connects to the JTAG port and the Aux- iliary (AUX) port. The AUX port is primarily used for trace functions, and a JTAG-based debugger is sufficient for basic debugging. The debug system is based on the Nexus 2.0 standard, class 2+, which includes: (cid:129) Basic run-time control (cid:129) Program breakpoints (cid:129) Data breakpoints (cid:129)Program trace (cid:129) Ownership trace (cid:129) Data trace In addition to the mandatory Nexus debug features, the AT32UC3A implements several useful OCD features, such as: (cid:129) Debug Communication Channel between CPU and JTAG (cid:129) Run-time PC monitoring (cid:129) CRC checking (cid:129) NanoTrace (cid:129) Software Quality Assurance (SQA) support The OCD features are controlled by OCD registers, which can be accessed by JTAG when the NEXUS_ACCESS JTAG instruction is loaded. The CPU can also access OCD registers directly using mtdr/mfdr instructions in any privileged mode. The OCD registers are implemented based on the recommendations in the Nexus 2.0 standard, and are detailed in the AVR32UC Technical Reference Manual. 734 32058K AVR32-01/12
AT32UC3A 35.3 Block diagram Figure 35-1. On-Chip Debug block diagram JTAG JTAG AUX On-Chip Debug Memory Service Access Bus Service Transmit Queue Watchpoints Unit Debug PC Program Ownership Data Trace Debug Trace Trace Breakpoints Instruction Internal Memories and CPU HSB Bus Matrix SRAM peripherals 35.4 Functional description 35.4.1 JTAG-based debug features A debugger can control all OCD features by writing OCD registers over the JTAG interface. Many of these do not depend on output on the AUX port, allowing a JTAG-based debugger to be used. A JTAG-based debugger should connect to the device through a standard 10-pin IDC connector as described in the AVR32UC Technical Reference Manual. 735 32058K AVR32-01/12
AT32UC3A Figure 35-2. JTAG-based debugger PC JTAG-based debug tool 10-pin IDC JTAG AVR32 35.4.1.1 Debug Communication Channel The Debug Communication Channel (DCC) consists of a pair OCD registers with associated handshake logic, accessible to both CPU and JTAG. The registers can be used to exchange data between the CPU and the JTAG master, both runtime as well as in debug mode. 35.4.1.2 Breakpoints One of the most fundamental debug features is the ability to halt the CPU, to examine registers and the state of the system. This is accomplished by breakpoints, of which many types are available: (cid:129) Unconditional breakpoints are set by writing OCD registers by JTAG, halting the CPU immediately. (cid:129) Program breakpoints halt the CPU when a specific address in the program is executed. (cid:129) Data breakpoints halt the CPU when a specific memory address is read or written, allowing variables to be watched. (cid:129) Software breakpoints halt the CPU when the breakpoint instruction is executed. When a breakpoint triggers, the CPU enters debug mode, and the D bit in the status register is set. This is a privileged mode with dedicated return address and return status registers. All privi- leged instructions are permitted. Debug mode can be entered as either OCD Mode, running instructions from JTAG, or Monitor Mode, running instructions from program memory. 736 32058K AVR32-01/12
AT32UC3A 35.4.1.3 OCD Mode When a breakpoint triggers, the CPU enters OCD mode, and instructions are fetched from the Debug Instruction OCD register. Each time this register is written by JTAG, the instruction is executed, allowing the JTAG to execute CPU instructions directly. The JTAG master can e.g. read out the register file by issuing mtdr instructions to the CPU, writing each register to the Debug Communication Channel OCD registers. 35.4.1.4 Monitor Mode Since the OCD registers are directly accessible by the CPU, it is possible to build a software- based debugger that runs on the CPU itself. Setting the Monitor Mode bit in the Development Control register causes the CPU to enter Monitor Mode instead of OCD mode when a breakpoint triggers. Monitor Mode is similar to OCD mode, except that instructions are fetched from the debug exception vector in regular program memory, instead of issued by JTAG. 35.4.1.5 Program Counter monitoring Normally, the CPU would need to be halted for a JTAG-based debugger to examine the current PC value. However, the AT32UC3A also proves a Debug Program Counter OCD register, where the debugger can continuously read the current PC without affecting the CPU. This allows the debugger to generate a simple statistic of the time spent in various areas of the code, easing code optimization. 35.4.2 Memory Service Unit The Memory Service Unit (MSU) is a block dedicated to test and debug functionality. It is con- trolled through a dedicated set of registers addressed through the MEMORY_SERVICE JTAG command. 35.4.2.1 Cyclic Redundancy Check (CRC) The MSU can be used to automatically calculate the CRC of a block of data in memory. The OCD will then read out each word in the specified memory block and report the CRC32-value in an OCD register. 35.4.2.2 NanoTrace The MSU additionally supports NanoTrace. This is an AVR32-specific feature, in which trace data is output to memory instead of the AUX port. This allows the trace data to be extracted by JTAG MEMORY_ACCESS, enabling trace features for JTAG-based debuggers. The user must write MSU registers to configure the address and size of the memory block to be used for Nano- Trace. The NanoTrace buffer can be anywhere in the physical address range, including internal and external RAM, through an EBI, if present. This area may not be used by the application run- ning on the CPU. 35.4.3 AUX-based debug features Utilizing the Auxiliary (AUX) port gives access to a wide range of advanced debug features. Of prime importance are the trace features, which allow an external debugger to receive continuous information on the program execution in the CPU. Additionally, Event In and Event Out pins allow external events to be correlated with the program flow. The AUX port contains a number of pins, as shown in Table 35-1 on page 738. These are multi- plexed with PIO lines, and must explicitly be enabled by writing OCD registers before the debug session starts. The AUX port is mapped to two different locations, selectable by OCD Registers, minimizing the chance that the AUX port will need to be shared with an application. 737 32058K AVR32-01/12
AT32UC3A Debug tools utilizing the AUX port should connect to the device through a Nexus-compliant Mic- tor-38 connector, as described in the AVR32UC Technical Reference manual. This connector includes the JTAG signals and the RESET_N pin, giving full access to the programming and debug features in the device. Table 35-1. Auxiliary port signals Signal Direction Description MCKO Output Trace data output clock MDO[5:0] Output Trace data output MSEO[1:0] Output Trace frame control EVTI_N Input Event In EVTO_N Output Event Out Figure 35-3. AUX+JTAG based debugger PC AU X+ JTAG Trace buffer debug tool M ictor38 AUX JTAG high speed AVR32 35.4.3.1 Trace operation Trace features are enabled by writing OCD registers by JTAG. The OCD extracts the trace infor- mation from the CPU, compresses this information and formats it into variable-length messages according to the Nexus standard. The messages are buffered in a 16-frame transmit queue, and are output on the AUX port one frame at a time. 738 32058K AVR32-01/12
AT32UC3A The trace features can be configured to be very selective, to reduce the bandwidth on the AUX port. In case the transmit queue overflows, error messages are produced to indicate loss of data. The transmit queue module can optionally be configured to halt the CPU when an overflow occurs, to prevent the loss of messages, at the expense of longer run-time for the program. 35.4.3.2 Program Trace Program trace allows the debugger to continuously monitor the program execution in the CPU. Program trace messages are generated for every branch in the program, and contains com- pressed information, which allows the debugger to correlate the message with the source code to identify the branch instruction and target address. 35.4.3.3 Data Trace Data trace outputs a message every time a specific location is read or written. The message contains information about the type (read/write) and size of the access, as well as the address and data of the accessed location. The AT32UC3A contains two data trace channels, each of which are controlled by a pair of OCD registers which determine the range of addresses (or sin- gle address) which should produce data trace messages. 35.4.3.4 Ownership Trace Program and data trace operate on virtual addresses. In cases where an operating system runs several processes in overlapping virtual memory segments, the Ownership Trace feature can be used to identify the process switch. When the O/S activates a process, it will write the process ID number to an OCD register, which produces an Ownership Trace Message, allowing the debug- ger to switch context for the subsequent program and data trace messages. As the use of this feature depends on the software running on the CPU, it can also be used to extract other types of information from the system. 35.4.3.5 Watchpoint messages The breakpoint modules normally used to generate program and data breakpoints can also be used to generate Watchpoint messages, allowing a debugger to monitor program and data events without halting the CPU. Watchpoints can be enabled independently of breakpoints, so a breakpoint module can optionally halt the CPU when the trigger condition occurs. Data trace modules can also be configured to produce watchpoint messages instead of regular data trace messages. 35.4.3.6 Event In and Event Out pins The AUX port also contains an Event In pin (EVTI_N) and an Event Out pin (EVTO_N). EVTI_N can be used to trigger a breakpoint when an external event occurs. It can also be used to trigger specific program and data trace synchronization messages, allowing an external event to be correlated to the program flow. When the CPU enters debug mode, a Debug Status message is transmitted on the trace port. All trace messages can be timestamped when they are received by the debug tool. However, due to the latency of the transmit queue buffering, the timestamp will not be 100% accurate. To improve this, EVTO_N can toggle every time a message is inserted into the transmit queue, allowing trace messages to be timestamped precisely. EVTO_N can also toggle when a break- point module triggers, or when the CPU enters debug mode, for any reason. This can be used to measure precisely when the respective internal event occurs. 739 32058K AVR32-01/12
AT32UC3A 35.4.3.7 Software Quality Analysis (SQA) Software Quality Analysis (SQA) deals with two important issues regarding embedded software development. Code coverage involves identifying untested parts of the embedded code, to improve test procedures and thus the quality of the released software. Performance analysis allows the developer to precisely quantify the time spent in various parts of the code, allowing bottlenecks to be identified and optimized. Program trace must be used to accomplish these tasks without instrumenting (altering) the code to be examined. However, traditional program trace cannot reconstruct the current PC value without correlating the trace information with the source code, which cannot be done on-the-fly. This limits program trace to a relatively short time segment, determined by the size of the trace buffer in the debug tool. The OCD system in AT32UC3A extends program trace with SQA capabilities, allowing the debug tool to reconstruct the PC value on-the-fly. Code coverage and performance analysis can thus be reported for an unlimited execution sequence. 740 32058K AVR32-01/12
AT32UC3A 36. JTAG and Boundary Scan Rev.: 2.0.0.2 36.1 Features (cid:129) IEEE1149.1 compliant JTAG Interface (cid:129) Boundary-Scan Chain for board-level testing (cid:129) Direct memory access and programming capabilities through JTAG interface (cid:129) On-Chip Debug access in compliance with IEEE-ISTO 5001-2003 (Nexus 2.0) 36.2 Overview Figure 36-1 on page 742 shows how the JTAG is connected in an AVR32 device. The TAP Con- troller is a state machine controlled by the TCK and TMS signals. The TAP Controller selects either the JTAG Instruction Register or one of several Data Registers as the scan chain (shift register) between the TDI-input and TDO-output. The Instruction Register holds JTAG instruc- tions controlling the behavior of a Data Register. The ID Register, Bypass Register, and the Boundary-Scan Chain are the Data Registers used for board-level testing. The Reset Register can be used to keep the device reset during test or programming. The Service Access Bus (SAB) interface contains address and data registers for the Service Access Bus, which gives access to on-chip debug, programming, and other functions in the device. The SAB offers several modes of access to the address and data registers, as dis- cussed in Section 36.6.4. Section 36.7 lists the supported JTAG instructions, with references to the description in this document. 741 32058K AVR32-01/12
AT32UC3A 36.3 Block diagram Figure 36-1. JTAG and Boundary Scan access AVR32 device Boundary scan enable JTAG master AP TTMCKS CoTnAtroPller JTAG T TTDDOI InstSruccatnio ne nRaebgleister Dscaatan reengaisbtleer Instruction Register TMSTCK TDO TDI JTAG data registers JTAG device ID Register By- pass Reset Register ... Service Access Bus interface OCD Registers Service CPU RAM Access Memories and High Speed Bus Bus MemoUryn Sitervice Boundary Scan Chain Pins and analog blocks peripherals 742 32058K AVR32-01/12
AT32UC3A 36.4 I/O Lines Description Table 36-1. I/O Lines Description Name Description Type TCK Test Clock Input. Fully asynchronous to system clock frequency. Input TMS Test Mode Select, sampled on rising TCK Input TDI Test Data In, sampled on rising TCK. Input TDO Test Data Out, driven on falling TCK. Output 36.5 Product Dependencies In order to use this module, other parts of the system must be configured correctly, as described below. 36.5.1 I/O Lines The JTAG interface pins are multiplexed with IO lines. When the JTAG is used the associated pins must be enabled. To enable the JTAG pins TCK must be zero while RESET_N has a zero to one transition. To disable the JTAG pins TCK must be one while RESET_N has a zero to one transition. While using the JTAG lines all normal peripheral activity on these lines are disabled. The user must make sure that no external peripheral is blocking the JTAG lines while debugging. 36.6 Functional description 36.6.1 JTAG interface The JTAG interface is accessed through the dedicated JTAG pins shown in Table 36-1 on page 743. The TMS control line navigates the TAP controller, as shown in Figure 36-2 on page 744. The TAP controller manages the serial access to the JTAG Instruction and Data registers. Data is scanned into the selected instruction or data register on TDI, and out of the register on TDO, in the Shift-IR and Shift-DR states, respectively. The LSB is shifted in and out first. TDO is high- Z in other states than Shift-IR and Shift-DR. Independent of the initial state of the TAP Controller, the Test-Logic-Reset state can always be entered by holding TMS high for 5 TCK clock periods. This sequence should always be applied at the start of a JTAG session to bring the TAP Controller into a defined state before applying JTAG commands. Applying a 0 on TMS for 1 TCK period brings the TAP Controller to the Run- Test/Idle state, which is the starting point for JTAG operations. The device implements a 5-bit Instruction Register (IR). A number of public JTAG instructions defined by the JTAG standard are supported, as described in Section 36.8, as well as a number of AVR32-specific private JTAG instructions described in Section 36.9. Each instruction selects a specific data register for the Shift-DR path, as described for each instruction. 743 32058K AVR32-01/12
AT32UC3A Figure 36-2. TAP Controller State Diagram Test-Logic- 1 Reset 0 1 Run-Test/ Select-DR Select-IR 0 1 1 Idle Scan Scan 0 0 Capture-DR Capture-IR 1 1 0 0 Shift-DR 0 Shift-IR 0 1 1 Exit1-DR Exit1-IR 0 0 Pause-DR 0 Pause-IR 0 1 1 1 1 0 Exit2-DR 0 Exit2-IR 1 1 1 Update-DR 1 Update-IR 0 0 36.6.2 Typical sequence Assuming Run-Test/Idle is the present state, a typical scenario for using the JTAG interface is: 36.6.2.1 Scanning in JTAG instruction At the TMS input, apply the sequence 1, 1, 0, 0 at the rising edges of TCK to enter the Shift Instruction Register - Shift-IR state. While in this state, shift the 5 bits of the JTAG instructions into the JTAG instruction register from the TDI input at the rising edge of TCK. The TMS input must be held low during input of the 4 LSBs in order to remain in the Shift-IR state. The JTAG Instruction selects a particular Data Register as path between TDI and TDO and controls the cir- cuitry surrounding the selected Data Register. Apply the TMS sequence 1, 1, 0 to re-enter the Run-Test/Idle state. The instruction is latched onto the parallel output from the shift register path in the Update-IR state. The Exit-IR, Pause-IR, and Exit2-IR states are only used for navigating the state machine. 744 32058K AVR32-01/12
AT32UC3A Figure 36-3. Scanning in JTAG instruction TCK TAP State TLR RTI SelDR SelIR CapIR ShIR Ex1IR UpdIR RTI TMS TDI Instruction TDO ImplDefined 36.6.2.2 Scanning in/out data At the TMS input, apply the sequence 1, 0, 0 at the rising edges of TCK to enter the Shift Data Register - Shift-DR state. While in this state, upload the selected Data Register (selected by the present JTAG instruction in the JTAG Instruction Register) from the TDI input at the rising edge of TCK. In order to remain in the Shift-DR state, the TMS input must be held low. While the Data Register is shifted in from the TDI pin, the parallel inputs to the Data Register captured in the Capture-DR state is shifted out on the TDO pin. Apply the TMS sequence 1, 1, 0 to re-enter the Run-Test/Idle state. If the selected Data Register has a latched parallel-output, the latching takes place in the Update-DR state. The Exit-DR, Pause-DR, and Exit2-DR states are only used for navigating the state machine. As shown in the state diagram, the Run-Test/Idle state need not be entered between selecting JTAG instruction and using Data Registers. 36.6.3 Boundary-Scan The Boundary-Scan chain has the capability of driving and observing the logic levels on the dig- ital I/O pins, as well as the boundary between digital and analog logic for analog circuitry having off-chip connections. At system level, all ICs having JTAG capabilities are connected serially by the TDI/TDO signals to form a long shift register. An external controller sets up the devices to drive values at their output pins, and observe the input values received from other devices. The controller compares the received data with the expected result. In this way, Boundary-Scan pro- vides a mechanism for testing interconnections and integrity of components on Printed Circuits Boards by using the 4 TAP signals only. The four IEEE 1149.1 defined mandatory JTAG instructions IDCODE, BYPASS, SAMPLE/PRE- LOAD, and EXTEST can be used for testing the Printed Circuit Board. Initial scanning of the data register path will show the ID-code of the device, since IDCODE is the default JTAG instruction. It may be desirable to have the AVR32 device in reset during test mode. If not reset, inputs to the device may be determined by the scan operations, and the internal software may be in an undetermined state when exiting the test mode. Entering reset, the outputs of any Port Pin will instantly enter the high impedance state, making the HIGHZ instruction redundant. If needed, the BYPASS instruction can be issued to make the shortest possible scan chain through the device. The device can be set in the reset state either by pulling the external RESETn pin low, or issuing the AVR_RESET instruction with appropriate setting of the Reset Data Register. The EXTEST instruction is used for sampling external pins and loading output pins with data. The data from the output latch will be driven out on the pins as soon as the EXTEST instruction is loaded into the JTAG IR-register. Therefore, the SAMPLE/PRELOAD should also be used for setting initial values to the scan ring, to avoid damaging the board when issuing the EXTEST 745 32058K AVR32-01/12
AT32UC3A instruction for the first time. SAMPLE/PRELOAD can also be used for taking a snapshot of the external pins during normal operation of the part. When using the JTAG interface for Boundary-Scan, the JTAG TCK clock is independent of the internal chip clock, which is not required to run. 36.6.4 Service Access Bus A number of private instructions are used to access Service Access Bus (SAB) resources. Each of these are described in detail in SAB address map in the Service Access Bus chapter. The MEMORY_SIZED_ACCESS instruction allows a sized read or write to any 36-bit address on the bus. MEMORY_WORD_ACCESS is a shorthand instruction for 32-bit accesses to any 36-bit address, while the NEXUS_ACCESS instruction is a Nexus-compliant shorthand instruction for accessing the 32-bit OCD registers in the 7-bit address space reserved for these. These instruc- tions require two passes through the Shift-DR TAP state: one for the address and control information, and one for data. To increase the transfer rate, consecutive memory accesses can be accomplished by the MEMORY_BLOCK_ACCESS instruction, which only requires a single pass through Shift-DR for data transfer only. The address is automatically incremented according to the size of the last SAB transfer. The access time to SAB resources depends on the type of resource being accessed. It is possi- ble to read external memory through the EBI, in which case the latency may be very long. It is possible to abort an ongoing SAB access by the CANCEL_ACCESS instruction, to avoid hang- ing the bus due to an extremely slow slave. "The access time to SAB resources depends on the type of resource being accessed. It is possible to abort an ongoing SAB access by the CANCEL_ACCESS instruction, to avoid hanging the bus due to an extremely slow slave." 36.6.4.1 Busy reporting As the time taken to perform an access may vary depending on system activity and current chip frequency, all the SAB access JTAG instructions can return a busy indicator. This indicates whether a delay needs to be inserted, or an operation needs to be repeated in order to be suc- cessful. If a new access is requested while the SAB is busy, the request is ignored. The SAB becomes busy when: (cid:129) Entering Update-DR in the address phase of any read operation, e.g. after scanning in a NEXUS_ACCESS address with the read bit set. (cid:129) Entering Update-DR in the data phase of any write operation, e.g. after scanning in data for a NEXUS_ACCESS write. (cid:129) Entering Update-DR during a MEMORY_BLOCK_ACCESS. (cid:129) Entering Update-DR after scanning in a counter value for SYNC. (cid:129) Entering Update-IR after scanning in a MEMORY_BLOCK_ACCESS if the previous access was a read and data was scanned after scanning the address. The SAB becomes ready again when: (cid:129) A read or write operation completes. 746 32058K AVR32-01/12
AT32UC3A (cid:129) A SYNC countdown completed. (cid:129) A operation is cancelled by the CANCEL_ACCESS instruction. What to do if the busy bit is set: (cid:129) During Shift-IR: The new instruction is selected, but the previous operation has not yet completed and will continue (unless the new instruction is CANCEL_ACCESS). You may continue shifting the same instruction until the busy bit clears, or start shifting data. If shifting data, you must be prepared that the data shift may also report busy. (cid:129) During Shift-DR of an address: The new address is ignored. The SAB stays in address mode, so no data must be shifted. Repeat the address until the busy bit clears. (cid:129) During Shift-DR of read data: The read data are invalid. The SAB stays in data mode. Repeat scanning until the busy bit clears. (cid:129) During Shift-DR of write data: The write data are ignored. The SAB stays in data mode. Repeat scanning until the busy bit clears. 36.6.4.2 Error reporting The Service access port may not be able to complete all accesses as requested. This may be because the address is invalid, the addressed area is read-only or cannot handle byte/halfword accesses, or because the chip is set in a protected mode where only limited accesses are allowed. The error bit is updated when an access completes, and is cleared when a new access starts. What to do if the error bit is set: (cid:129) During Shift-IR: The new instruction is selected. The last operation performed using the old instruction did not complete successfully. (cid:129) During Shift-DR of an address: The previous operation failed. The new address is accepted. If the read bit is set, a read operation is started. (cid:129) During Shift-DR of read data: The read operation failed, and the read data are invalid. (cid:129) During Shift-DR of write data: The previous write operation failed. The new data are accepted and a write operation started. This should only occur during block writes or stream writes. No error can occur between scanning a write address and the following write data. (cid:129) While polling with CANCEL_ACCESS: The previous access was cancelled. It may or may not have actually completed. 36.6.5 Memory programming The High-Speed Bus (HSB) in the device is mapped as a slave on the SAB. This enables all HSB-mapped memories to be read or written through the SAB using JTAG instructions, as described in Section 36.6.4. Internal SRAM can always be directly accessed. External static memory or SDRAM can be accessed if the EBI has been correctly configured to access this memory. It is also possible to access the configuration registers for these modules to set up the correct configuration. Simi- larly, external parallel flash can be programmed by accessing the registers for the flash device through the EBI. The internal flash and fuses can likewise be programmed by accessing the registers in the Flash Controller. When the security fuse is set, access to internal memory is blocked, and the CHIP_ERASE instruction must be used to erase the fuse and flash contents. For detail see the SAB address map section. 747 32058K AVR32-01/12
AT32UC3A Memory can be written while the CPU is executing, which can be utilized for debug purposes. When downloading a new program, the JTAG HALT instruction should be used to freeze the CPU, to prevent partially downloaded code from being executed. 36.7 JTAG Instruction Summary The implemented JTAG instructions in the AVR32 are shown in the table below. Table 36-2. JTAG Instruction Summary Instruction OPCODE Instruction Description Page 0x01 IDCODE Select the 32-bit ID register as data register. 749 Take a snapshot of external pin values without affecting system 0x02 SAMPLE_PRELOAD 749 operation. Select boundary scan chain as data register for testing circuitry 0x03 EXTEST 749 external to the device. 0x04 INTEST Select boundary scan chain for internal testing of the device. 749 Bypass device through Bypass register, while driving outputs from 0x06 CLAMP 750 boundary scan register. 0x0C AVR_RESET Apply or remove a static reset to the device 757 0x0F CHIP_ERASE Erase the device 757 Select the SAB Address and Data registers as data register for the 0x10 NEXUS_ACCESS 751 TAP. The registers are accessed in Nexusm ode. Select the SAB Address and Data registers as data register for the 0x11 MEMORY_WORD_ACCESS 754 TAP. Select the SAB Data register as data register for the TAP. The 0x12 MEMORY_BLOCK_ACCESS 755 address is auto-incremented. 0x13 CANCEL_ACCESS Cancel an ongoing Nexus or Memory access. 756 Select the SAB Address and Data registers as data register for the 0x14 MEMORY_SERVICE 752 TAP. Ther egisters are accessed in Memory Service mode. Select the SAB Address and Data registers as data register for the 0x15 MEMORY_SIZED_ACCESS 753 TAP. 0x17 SYNC Synchronization counter 757 0x1C HALT Halt the CPU for safe programming. 758 0x1F BYPASS Bypass this device through the bypass register. 750 Others N/A Acts as BYPASS 36.7.1 Security restrictions When the security fuse in the Flash is programmed, the following JTAG instructions are restricted: (cid:129) NEXUS_ACCESS (cid:129) MEMORY_WORD_ACCESS (cid:129) MEMORY_BLOCK_ACCESS (cid:129) MEMORY_SIZED_ACCESS 748 32058K AVR32-01/12
AT32UC3A For description of what memory locations remain accessible, please refer to the SAB address map. Full access to these instru ctions is re-enabl ed when the security fuse is erased by the CHIP_ERASE JTAG instruction. Note that the security bit will read as programmed and block these instructions also if the Flash Controller is statically reset. Other security mechanisms can also restrict these functions. If such mechanisms are present they are listed in the SAB address map section. 36.8 Public JTAG instructions 36.8.1 IDCODE This instruction selects the 32 bit ID register as Data Register. The ID register consists of a ver- sion number, a device number and the manufacturer code chosen by JEDEC. This is the default instruction after power-up. The active states are: (cid:129) Capture-DR: The static IDCODE value is latched into the shift register. (cid:129) Shift-DR: The IDCODE scan chain is shifted by the TCK input. 36.8.2 SAMPLE_PRELOAD JTAG instruction for taking a snap-shot of the input/output pins without affecting the system operation, and pre-loading the scan chain without updating the DR-latch. The Boundary-Scan Chain is selected as Data Register. The active states are: (cid:129) Capture-DR: Data on the external pins are sampled into the Boundary-Scan Chain. (cid:129) Shift-DR: The Boundary-Scan Chain is shifted by the TCK input. 36.8.3 EXTEST JTAG instruction for selecting the Boundary-Scan Chain as Data Register for testing circuitry external to the AVR32 package. The contents of the latched outputs of the Boundary-Scan chain is driven out as soon as the JTAG IR-register is loaded with the EXTEST instruction. The active states are: (cid:129) Capture-DR: Data on the external pins is sampled into the Boundary-Scan Chain. (cid:129) Shift-DR: The Internal Scan Chain is shifted by the TCK input. (cid:129) Update-DR: Data from the scan chain is applied to output pins. 36.8.4 INTEST This instruction selects the Boundary-Scan Chain as Data Register for testing internal logic in the device. The logic inputs are determined by the Boundary-Scan Chain, and the logic outputs are captured by the Boundary-Scan chain. The device output pins are driven from the Boundary- Scan Chain. The active states are: (cid:129) Capture-DR: Data from the internal logic is sampled into the Boundary-Scan Chain. 749 32058K AVR32-01/12
AT32UC3A (cid:129) Shift-DR: The Internal Scan Chain is shifted by the TCK input. (cid:129) Update-DR: Data from the scan chain is applied to internal logic inputs. 36.8.5 CLAMP This instruction selects the Bypass register as Data Register. The device output pins are driven from the Boundary-Scan Chain. The active states are: (cid:129) Capture-DR: Loads a logic ‘0’ into the Bypass Register. (cid:129) Shift-DR: Data is scanned from TDI to TDO through the Bypass register. 36.8.6 BYPASS JTAG instruction selecting the 1-bit Bypass Register for Data Register. The active states are: (cid:129) Capture-DR: Loads a logic ‘0’ into the Bypass Register. (cid:129) Shift-DR: Data is scanned from TDI to TDO through the Bypass register. 36.9 Private JTAG Instructions 36.9.1 Notation The AVR32 defines a number of private JTAG instructions. Each instruction is briefly described in text, with details following in table form. Table 36-4 on page 751 shows bit patterns to be shifted in a format like "peb01". Each character corresponds to one bit, and eight bits are grouped together for readability. The rightmost bit is always shifted first, and the leftmost bit shifted last. The symbols used are shown in Table 36-3. Table 36-3. Symbol description Symbol Description 0 Constant low value - always reads as zero. 1 Constant high value - always reads as one. a An address bit - always scanned with the least significant bit first A busy bit. Reads as one if the SAB was busy, or zero if it was not. See Section 36.6.4.1 for b details on how the busy reporting works. d A data bit - always scanned with the least significant bit first. An error bit. Reads as one if an error occurred, or zero if not. See Section 36.6.4.2 for details e on how the error reporting works. The chip protected bit. Some devices may be set in a protected state where access to chip p internals are severely restricted. See the documentation for the specific device for details. On devices without this possibility, this bit always reads as zero. r A direction bit. Set to one to request a read, set to zero to request a write. s A size bit. The size encoding is described where used. x A don’t care bit. Any value can be shifted in, and output data should be ignored. In many cases, it is not required to shift all bits through the data register. Bit patterns are shown using the full width of the shift register, but the suggested or required bits are emphasized using 750 32058K AVR32-01/12
AT32UC3A bold text. I.e. given the pattern "aaaaaaar xxxxxxxx xxxxxxxx xxxxxxxx xx", the shift register is 34 bits, but the test or debug unit may choose to shift only 8 bits "aaaaaaar". The following describes how to interpret the fields in the instruction description tables: Table 36-4. Instruction description Instruction Description Shows the bit pattern to shift into IR in the Shift-IR state in order to select this instruction. The pattern is show both in binary and in hexadecimal form for IR input value convenience. Example: 10000 (0x10) Shows the bit pattern shifted out of IR in the Shift-IR state when this instruction is IR output value active. Example: peb01 Shows the number of bits in the data register chain when this instruction is active. DR Size Example: 34 bits Shows which bit pattern to shift into the data register in the Shift-DR state when this instruction is active. Multiple such lines may exist, e.g. to distinguish between reads DR input value and writes. Example: aaaaaaar xxxxxxxx xxxxxxxx xxxxxxxx xx Shows the bit pattern shifted out of the data register in the Shift-DR state when this instruction is active. Multiple such lines may exist, e.g. to distinguish between reads DR output value and writes. Example: xx xxxxxxxx xxxxxxxx xxxxxxxx xxxxxxeb 36.9.2 NEXUS_ACCESS This instruction allows Nexus-compliant access to on-chip debug registers through the SAB. OCD registers are addressed by their register index, as listed in the AVR32 Technical Reference Manual. The 7-bit register index and a read/write control bit, and the 32-bit data is accessed through the JTAG port. The data register is alternately interpreted by the SAB as an address register and a data regis- ter. The SAB starts in address mode after the NEXUS_ACCESS instruction is selected, and toggles between address and data mode each time a data scan completes with the busy bit cleared. Starting in Run-Test/Idle, OCD registers are accessed in the following way: 1. Select the DR Scan path. 2. Scan in the 7-bit address for the OCD register and a direction bit (1=read, 0=write). 3. Go to Update-DR and re-enter Select-DR Scan. 4. For a read operation, scan out the contents of the addressed register. For a write oper- ation, scan in the new contents of the register. 5. Return to Run-Test/Idle. 751 32058K AVR32-01/12
AT32UC3A For any operation, the full 7 bits of the address must be provided. For write operations, 32 data bits must be provided, or the result will be undefined. For read operations, shifting may be termi- nated once the required number of bits have been acquired. Table 36-5. NEXUS_ACCESS details Instructions Details IR input value 10000 (0x10) IR output value peb01 DR Size 34 bits DR input value (Address phase) aaaaaaar xxxxxxxx xxxxxxxx xxxxxxxx xx DR input value (Data read phase) xxxxxxxx xxxxxxxx xxxxxxxx xxxxxxxx xx DR input value (Data write phase) dddddddd dddddddd dddddddd dddddddd xx DR output value (Address phase) xx xxxxxxxx xxxxxxxx xxxxxxxx xxxxxxeb DR output value (Data read phase) eb dddddddd dddddddd dddddddd dddddddd DR output value (Data write phase) xx xxxxxxxx xxxxxxxx xxxxxxxx xxxxxxeb 36.9.3 MEMORY_SERVICE This instruction allows access to registers in an optional Memory Service unit. Memory Service registers are addressed by their register index, as listed in the Memory Service documentation. The 7-bit register index and a read/write control bit, and the 32-bit data is accessed through the JTAG port. The Memory Service unit may offer features such as CRC calculation of memory, debug trace support, and test features. Please refer to the Memory Service Unit documentation and the part specific documentation for details. The data register is alternately interpreted by the SAB as an address register and a data regis- ter. The SAB starts in address mode after the MEMORY_SERVICE instruction is selected, and toggles between address and data mode each time a data scan completes with the busy bit cleared. Starting in Run-Test/Idle, Memory Service registers are accessed in the following way: 1. Select the DR Scan path. 2. Scan in the 7-bit address for the Memory Service register and a direction bit (1=read, 0=write). 3. Go to Update-DR and re-enter Select-DR Scan. 4. For a read operation, scan out the contents of the addressed register. For a write oper- ation, scan in the new contents of the register. 5. Return to Run-Test/Idle. 752 32058K AVR32-01/12
AT32UC3A For any operation, the full 7 bits of the address must be provided. For write operations, 32 data bits must be provided, or the result will be undefined. For read operations, shifting may be termi- nated once the required number of bits have been acquired. Table 36-6. MEMORY_SERVICE details Instructions Details IR input value 10100 (0x14) IR output value peb01 DR Size 34 bits DR input value (Address phase) aaaaaaar xxxxxxxx xxxxxxxx xxxxxxxx xx DR input value (Data read phase) xxxxxxxx xxxxxxxx xxxxxxxx xxxxxxxx xx DR input value (Data write phase) dddddddd dddddddd dddddddd dddddddd xx DR output value (Address phase) xx xxxxxxxx xxxxxxxx xxxxxxxx xxxxxxeb DR output value (Data read phase) eb dddddddd dddddddd dddddddd dddddddd DR output value (Data write phase) xx xxxxxxxx xxxxxxxx xxxxxxxx xxxxxxeb 36.9.4 MEMORY_SIZED_ACCESS This instruction allows access to the entire Service Access Bus data area. Data are accessed through a 36-bit byte index, a 2-bit size, a direction bit, and 8, 16, or 32 bits of data. Not all units mapped on the SAB bus may support all sizes of accesses, e.g. some may only support word accesses. The data register is alternately interpreted by the SAB as an address register and a data regis- ter. The SAB starts in address mode after the MEMORY_SIZED_ACCESS instruction is selected, and toggles between address and data mode each time a data scan completes with the busy bit cleared. The size field is encoded as i Table 36-7. Table 36-7. Size Field Semantics Size field value Access size Data alignment Address modulo 4 : data alignment 0: dddddddd xxxxxxxx xxxxxxxx xxxxxxxx 00 Byte (8 bits) 1: xxxxxxxx dddddddd xxxxxxxx xxxxxxxx 2: xxxxxxxx xxxxxxxx dddddddd xxxxxxxx 3: xxxxxxxx xxxxxxxx xxxxxxxx dddddddd 753 32058K AVR32-01/12
AT32UC3A Table 36-7. Size Field Semantics Size field value Access size Data alignment Address modulo 4 : data alignment 0: dddddddd dddddddd xxxxxxxx xxxxxxxx 01 Halfword (16 bits) 1: Not allowed 2: xxxxxxxx xxxxxxxx dddddddd dddddddd 3: Not allowed Address modulo 4 : data alignment 0: dddddddd dddddddd dddddddd dddddddd 10 Word (32 bits) 1: Not allowed 2: Not allowed 3: Not allowed 11 Reserved N/A Starting in Run-Test/Idle, SAB data are accessed in the following way: 1. Select the DR Scan path. 2. Scan in the 36-bit address of the data to access, a 2-bit access size, and a direction bit (1=read, 0=write). 3. Go to Update-DR and re-enter Select-DR Scan. 4. For a read operation, scan out the contents of the addressed area. For a write opera- tion, scan in the new contents of the area. 5. Return to Run-Test/Idle. For any operation, the full 36 bits of the address must be provided. For write operations, 32 data bits must be provided, or the result will be undefined. For read operations, shifting may be termi- nated once the required number of bits have been acquired. Table 36-8. MEMORY_SIZED_ACCESS details Instructions Details IR input value 10101 (0x15) IR output value peb01 DR Size 39 bits DR input value (Address phase) aaaaaaaa aaaaaaaa aaaaaaaa aaaaaaaa aaaassr DR input value (Data read phase) xxxxxxxx xxxxxxxx xxxxxxxx xxxxxxxx xxxxxxx DR input value (Data write phase) dddddddd dddddddd dddddddd dddddddd xxxxxxx DR output value (Address phase) xxxxxxx xxxxxxxx xxxxxxxx xxxxxxxx xxxxxxeb DR output value (Data read phase) xxxxxeb dddddddd dddddddd dddddddd dddddddd DR output value (Data write phase) xxxxxxx xxxxxxxx xxxxxxxx xxxxxxxx xxxxxxeb 36.9.5 MEMORY_WORD_ACCESS This instruction allows access to the entire Service Access Bus data area. Data are accessed through a 34-bit word index, a direction bit, and 32 bits of data. This instruction is identical to MEMORY_SIZED_ACCESS except that it always does word sized accesses. The size field is implied, and the two lowest address bits are removed. 754 32058K AVR32-01/12
AT32UC3A Note: This instruction was previously known as MEMORY_ACCESS, and is provided for back- wards compatibility. The data register is alternately interpreted by the SAB as an address register and a data regis- ter. The SAB starts in address mode after the MEMORY_WORD_ACCESS instruction is selected, and toggles between address and data mode each time a data scan completes with the busy bit cleared. Starting in Run-Test/Idle, SAB data are accessed in the following way: 1. Select the DR Scan path. 2. Scan in the 34-bit address of the data to access, and a direction bit (1=read, 0=write). 3. Go to Update-DR and re-enter Select-DR Scan. 4. For a read operation, scan out the contents of the addressed area. For a write opera- tion, scan in the new contents of the area. 5. Return to Run-Test/Idle. For any operation, the full 34 bits of the address must be provided. For write operations, 32 data bits must be provided, or the result will be undefined. For read operations, shifting may be termi- nated once the required number of bits have been acquired. Table 36-9. MEMORY_WORD_ACCESS details Instructions Details IR input value 10001 (0x11) IR output value peb01 DR Size 35 bits DR input value (Address phase) aaaaaaaa aaaaaaaa aaaaaaaa aaaaaaaa aar DR input value (Data read phase) xxxxxxxx xxxxxxxx xxxxxxxx xxxxxxxx xxx DR input value (Data write phase) dddddddd dddddddd dddddddd dddddddd xxx DR output value (Address phase) xxxxxxxx xxxxxxxx xxxxxxxx xxxxxxxx xeb DR output value (Data read phase) xeb dddddddd dddddddd dddddddd dddddddd DR output value (Data write phase) xxx xxxxxxxx xxxxxxxx xxxxxxxx xxxxxxeb 36.9.6 MEMORY_BLOCK_ACCESS This instruction allows access to the entire SAB data area. Up to 32 bits of data are accessed at a time, while the address is sequentially incremented from the previously used address. In this mode, the SAB address, size, and access direction is not provided with each access. Instead, the previous address is auto-incremented depending on the specified size and the pre- vious oper ation repe ated . The address must be set up in advance with MEMORY_SIZE_ACCESS or MEMORY_WORD_ACCESS. It is allowed, but not required, to shift data after shifting the address. This instruction is primarily intended to speed up large quantities of sequential word accesses. It is possible to use it also for byte and halfword accesses, but the overhead in this is case much larger as 32 bits must still be shifted for each access. The following sequence should be used: 755 32058K AVR32-01/12
AT32UC3A 1. Use the MEMORY_SIZE_ACCESS or MEMORY_WORD_ACCESS to read or write the first location. 2. Apply MEMORY_BLOCK_ACCESS in the IR Scan path. 3. Select the DR Scan path. The address will now have incremented by 1, 2, or 4 (corre- sponding to the next byte, halfword, or word location). 4. For a read operation, scan out the contents of the next addressed location. For a write operation, scan in the new contents of the next addressed location. 5. Go to Update-DR. 6. If the block access is not complete, return to Select-DR Scan and repeat the access. 7. If the block access is complete, return to Run-Test/Idle. For write operations, 32 data bits must be provided, or the result will be undefined. For read operations, shifting may be terminated once the required number of bits have been acquired. Table 36-10. MEMORY_BLOCK_ACCESS details Instructions Details IR input value 10010 (0x12) IR output value peb01 DR Size 34 bits DR input value (Data read phase) xxxxxxxx xxxxxxxx xxxxxxxx xxxxxxxx xx DR input value (Data write phase) dddddddd dddddddd dddddddd dddddddd xx DR output value (Data read phase) eb dddddddd dddddddd dddddddd dddddddd DR output value (Data write phase) xx xxxxxxxx xxxxxxxx xxxxxxxx xxxxxxeb The overhead using block word access is 4 cycles per 32 bits of data, resulting in an 88% trans- fer efficiency, or 2.1 MBytes per second with a 20 MHz TCK frequency. 36.9.7 CANCEL_ACCESS If a very slow memory location is accessed during a SAB memory access, it could take a very long time until the busy bit is cleared, and the SAB becomes ready for the next operation. The CANCEL_ACCESS instruction provides a possibility to abort an ongoing transfer and report a timeout to the user. When the CANCEL_ACCESS instruction is selected, the current access will be terminated as soon as possible. There are no guarantees about how long this will take, as the hardware may not always be able to cancel the access immediately. The SAB is ready to respond to a new command when the busy bit clears. Table 36-11. CANCEL_ACCESS details Instructions Details IR input value 10011 (0x13) IR output value peb01 DR Size 1 DR input value x DR output value 0 756 32058K AVR32-01/12
AT32UC3A 36.9.8 SYNC This instruction allows external debuggers and testers to measure the ratio between the external JTAG clock and the internal system clock. The SYNC data register is a 16-bit counter that counts down to zero using the internal system clock. The busy bit stays high until the counter reaches zero. Starting in Run-Test/Idle, SYNC instruction is used in the following way: 1. Select the DR Scan path. 2. Scan in an 16-bit counter value. 3. Go to Update-DR and re-enter Select-DR Scan. 4. Scan out the busy bit, and retry until the busy bit clears. 5. Calculate an approximation to the internal clock speed using the elapsed time and the counter value. 6. Return to Run-Test/Idle. The full 16-bit counter value must be provided when starting the synch operation, or the result will be undefined. When reading status, shifting may be terminated once the required number of bits have been acquired. Table 36-12. SYNC_ACCESS details Instructions Details IR input value 10111 (0x17) IR output value peb01 DR Size 16 bits DR input value dddddddd dddddddd DR output value xxxxxxxx xxxxxxeb 36.9.9 AVR_RESET This instruction allows a debugger or tester to directly control separate reset domains inside the chip. The shift register contains one bit for each controllable reset domain. Setting a bit to one resets that domain and holds it in reset. Setting a bit to zero releases the reset for that domain. See the device specific documentation for the number of reset domains, and what these domains are. For any operation, all bits must be provided or the result will be undefined. Table 36-13. AVR_RESET details Instructions Details IR input value 01100 (0x0C) IR output value p0001 DR Size Device specific. DR input value Device specific. DR output value Device specific. 36.9.10 CHIP_ERASE This instruction allows a programmer to completely erase all nonvolatile memories in a chip. This will also clear any security bits that are set, so the device can be accessed normally. In 757 32058K AVR32-01/12
AT32UC3A devices without non-volatile memories this instruction does nothing, and appears to complete immediately. The erasing of non-volatile memories starts as soon as the CHIP_ERASE instruction is selected. The CHIP_ERASE instruction selects a 1 bit bypass data register. A chip erase operation should be performed as: 1. Scan in the HALT instruction 2. Scan in the value 1 to halt the CPU 3. Stay in Run-Test/Idle for 10 TCK cycles to let the halt command propagate properly 4. Scan in the CHIP_ERASE instruction 5. Keep scanning the CHIP_ERASE instruction until the busy bit is cleared and the pro- tection bit is cleared. 6. Scan in the HALT instruction 7. Scan in the value 0 to release the CPU 8. Return to Run-Test/Idle 9. Stay in Run-Test/Idle for 10 TCK cycles to let the halt command propagate properly. Table 36-14. CHIP_ERASE details Instructions Details IR input value 01111 (0x0F) p0b01 IR output value Where b is the busy bit. DR Size 1 bit DR input value x DR output value 0 36.9.11 HALT This instruction allows a programmer to easily stop the CPU to ensure that it does not execute invalid code during programming. This instruction selects a 1-bit halt register. Setting this bit to one halts the CPU. Setting this bit to zero releases the CPU to run normally. The value shifted out from the data register is one if the CPU is halted. The HALT instruction can be used in the following way: 10. Scan in the value 1 to halt the CPU 11. Stay in Run-Test/Idle for 10 TCK cycles to let the command propagate properly 12. Use any MEMORY_* instructions to program the device 13. Scan in the HALT instruction 14. Scan in the value 0 to release the CPU 15. Return to Run-Test/Idle 758 32058K AVR32-01/12
AT32UC3A 16. Stay in Run-Test/Idle for 10 TCK cycles to let the command propagate properly - the device now runs with the new code. Table 36-15. HALT details Instructions Details IR input value 11100 (0x1C) IR output value p0001 DR Size 1 bit DR input value d DR output value d 759 32058K AVR32-01/12
AT32UC3A 36.10 JTAG Data Registers The following device specific registers can be selected as JTAG scan chain depending on the instruction loaded in the JTAG Instruction Register. Additional registers exist, but are implicitly described in the functional description of the relevant instructions. 36.10.1 Device Identification Register The Device Identification Register contains a unique identifier for each product. The register is selected by the IDCODE instruction, which is the default instruction after a JTAG reset. MS LSB B Bit 31 28 27 12 11 1 0 Device ID Revision Part Number Manufacturer ID 1 4 bits 16 bits 11 bits 1 bit Revision This is a 4 bit number identifying the revision of the component. Rev A = 0x0, B = 0x1, etc. Part Number The part number is a 16 bit code identifying the component. Manufacturer ID The Manufacturer ID is a 11 bit code identifying the manufacturer. The JTAG manufacturer ID for ATMEL is 0x01F. 36.10.1.1 Device specific ID codes The different device configurations have different JTAG ID codes, as shown in Table 36-16. Note that if the flash controller is statically reset, the ID code will be undefined. Table 36-16. Device and JTAG ID Device name JTAG ID code (r is the revision number) AT32UC3A0512 0xr1EDC03F AT32UC3A0256 0xr1EDF03F AT32UC3A0128 0xr1EE203F AT32UC3A1512 0xr1EDD03F AT32UC3A1256 0xr1EE003F AT32UC3A1128 0xr1EE303F 36.10.2 Reset register The reset register is selected by the AVR_RESET instruction and contains one bit for each reset domain in the device. Setting each bit to one will keep that domain reset until the bit is cleared. LSB Bit 4 3 2 1 0 Device ID OCD APP RESERVED RESERVED CPU 760 32058K AVR32-01/12
AT32UC3A CPU CPU APP HSB and PB buses OCD On-Chip Debug logic and registers RSERVED No effect Note: This register is primarily intended for compatibility with other AVR32 devices. Certain oper- ations may not function correctly when parts of the system are reset. It is generally recommended to only write 0x11111 or 0x00000 to these bits to ensure no unintended side effects occur. 36.10.3 Boundary-Scan Chain The Boundary-Scan Chain has the capability of driving and observing the logic levels on the dig- ital I/O pins, as well as driving and observing the logic levels between the digital I/O pins and the internal logic. Typically, output value, output enable, and input data are all available in the boundary scan chain. The boundary scan chain is described in the BDSL (Boundary Scan Description Language) file available at the Atmel web site. 36.11 SAB address map The Service Access Bus (SAB) gives the user access to the internal address space and other features through a 36 bits address space. The 4 MSBs identify the slave number, while the 32 LSBs are decoded within the slave’s address space. The SAB slaves are shown in Table 36-17. Table 36-17. SAB Slaves, addresses and descriptions. Slave Address [35:32] Description Unallocated 0x0 Intentionally unallocated OCD 0x1 OCD registers HSB 0x4 HSB memory space, as seen by the CPU Alternative mapping for HSB space, for compatibility with HSB 0x5 other AVR32 devices. Memory Service 0x6 Memory Service Unit registers Unit Reserved Other Unused 761 32058K AVR32-01/12
AT32UC3A 37. Boot Sequence This chapter summarizes the boot sequence of the AT32UC3A. The behaviour after power-up is controlled by the Power Manager. For specific details, refer to Section 13. ”Power Manager (PM)” on page 53. 37.1 Starting of clocks After power-up, the device will be held in a reset state by the Power-On Reset circuitry, until the power has stabilized throughout the device. Once the power has stabilized, the device will use the internal RC Oscillator as clock source. On system start-up, the PLLs are disabled. All clocks to all modules are running. No clocks have a divided frequency, all parts of the system recieves a clock with the same frequency as the internal RC Oscillator. 37.2 Fetching of initial instructions After reset has been released, the AVR32 UC CPU starts fetching instructions from the reset address, which is 0x8000_0000. This address points to the first address in the internal Flash. The code read from the internal Flash is free to configure the system to use for example the PLLs, to divide the frequency of the clock routed to some of the peripherals, and to gate the clocks to unused peripherals. 762 32058K AVR32-01/12
AT32UC3A 38. Electrical Characteristics 38.1 Absolute Maximum Ratings* Operating Temperature. -40⋅C to +85⋅C *NOTICE: Stresses beyond those listed under “Absolute Storage Temperature. -60°C to +150°C Maximum Ratings” may cause permanent dam- age to the device. This is a stress rating only and Voltage on Input Pin functional operation of the device at these or with respect to Ground except for PC00, PC01, PC02, PC03, other conditions beyond those indicated in the PC04, PC05..........................................................-0.3V to 5.5V operational sections of this specification is not Voltage on Input Pin implied. Exposure to absolute maximum rating with respect to Ground for PC00, PC01, PC02, PC03, PC04, conditions for extended periods may affect PC05.....................................................................-0.3V to 3.6V device reliability. Maximum Operating Voltage (VDDCORE, VDDPLL). 1.95V Maximum Operating Voltage (VDDIO, VDDIN, VDDANA).3.6V Total DC Output Current on all I/O Pin for TQFP100 package. 370 mA for LQGP144 package. 470 mA 763 32058K AVR32-01/12
AT32UC3A 38.2 DC Characteristics The following characteristics are applicable to the operating temperature range: T = -40°C to 85°C, unless otherwise spec- A ified and are certified for a junction temperature up to T = 100°C. J Table 38-1. DC Characteristics Symbol Parameter Condition Min. Typ. Max Units V VDDCOR DC Supply Core 1.65 1.95 V E V DC Supply PLL 1.65 1.95 V VDDPLL V DC Supply Peripheral I/Os 3.0 3.6 V VDDIO V Analog reference voltage 2.6 3.6 V REF V Input Low-level Voltage -0.3 +0.8 V IL All GPIOS except for PC00, PC01, PC02, 2.0 5.5V V V Input High-level Voltage PC03, PC04, PC05. IH PC00, PC01, PC02, PC03, PC04, PC05. 2.0 3.6V V I =-4mA for PA0-PA20, PB0, PB4-PB9, OL PB11-PB18, PB24-PB26, PB29-PB31, 0.4 V PX0-PX39 V Output Low-level Voltage OL I =-8mA for PA21-PA30, PB1-PB3, OL PB10, PB19-PB23, PB27-PB28, PC0- 0.4 V PC5 I =4mA for PA0-PA20, PB0, PB4-PB9, OH PB11-PB18, PB24-PB26, PB29-PB31, V - VDDIO V PX0-PX39 0.4 V Output High-level Voltage OH I =8mA for PA21-PA30, PB1-PB3, OH V - PB10, PB19-PB23, PB27-PB28, PC0- VDDIO V 0.4 PC5 PA0-PA20, PB0, PB4-PB9, PB11-PB18, -4 mA I PB24-PB26, PB29-PB31, PX0-PX39 OL Output Low-level Current PA21-PA30, PB1-PB3, PB10, PB19- -8 mA PB23, PB27-PB28, PC0-PC5 PA0-PA20, PB0, PB4-PB9, PB11-PB18, 4 mA I PB24-PB26, PB29-PB31, PX0-PX39 OH Output HIgh-level Current PA21-PA30, PB1-PB3, PB10, PB19- 8 mA PB23, PB27-PB28, PC0-PC5 I Input Leakage Current Pullup resistors disabled 1 µA LEAK C TQFP100 Package 7 pF IN Input Capacitance LQFP144 Package 7 pF R Pull-up Resistance All GPIO and RESET_N pin. 10K 15K Ohm PULLUP 764 32058K AVR32-01/12
AT32UC3A 38.3 Regulator characteristics Table 38-2. Electrical characteristics Symbol Parameter Condition Min. Typ. Max. Units V Supply voltage (input) 3 3.3 3.6 V VDDIN V Supply voltage (output) 1.81 1.85 1.89 V VDDOUT Maximum DC output current with V 100 mA VDDIN = 3.3V I OUT Maximum DC output current with V 90 mA VDDIN = 2.7V Low Power mode (stop, deep stop I Static Current of internal regulator 10 µA SCR or static) at T =25°C A Table 38-3. Decoupling requirements Symbol Parameter Condition Typ. Techno. Units C Input Regulator Capacitor 1 1 NPO nF IN1 C Input Regulator Capacitor 2 4.7 X7R uF IN2 C Output Regulator Capacitor 1 470 NPO pF OUT1 C Output Regulator Capacitor 2 2.2 X7R uF OUT2 38.4 Analog characteristics Table 38-4. Electrical characteristics Symbol Parameter Condition Min. Typ. Max. Units V Analog voltage reference (input) 2.6 3.6 V ADVREF Table 38-5. Decoupling requirements Techno Symbol Parameter Condition Typ. . Units C Voltage reference Capacitor 1 10 - nF VREF1 C Voltage reference Capacitor 2 1 - uF VREF2 38.4.1 BOD Table 38-6. BODLEVEL Values BODLEVEL Value Typ. Typ. Typ. Units. 00 0000b 1.40 1.47 1.55 V 01 0111b 1.45 1.52 1.6 V 01 1111b 1.55 1.6 1.65 V 10 0111b 1.65 1.69 1.75 V The values in Table 38-6 describes the values of the BODLEVEL in the flash FGPFR register. 765 32058K AVR32-01/12
AT32UC3A Table 38-7. BOD Timing Symbol Parameter Test Conditions Typ. Max. Units. Minimum time with Falling VDDCORE T VDDCORE < VBOD to 300 800 ns BOD from 1.8V to 1.1V detect power failure 38.4.2 POR Table 38-8. Electrical Characteristic Symbol Parameter Test Conditions Min. Typ. Max. Units. V VDDCORE rise rate to ensure power-on-reset 0.01 V/ms DDRR V VDDCORE fall rate to ensure power-on-reset 0.01 400 V/ms SSFR Rising threshold voltage: voltage up to which Rising VDDCORE: V device is kept under reset by POR on rising 1.35 1.5 1.6 V POR+ V -> V VDDCORE RESTART POR+ Falling threshold voltage: voltage when POR Falling VDDCORE: V 1.25 1.3 1.4 V POR- resets device on falling VDDCORE 1.8V -> V POR+ On falling VDDCORE, voltage must go down to Falling VDDCORE: V this value before supply can rise again to ensure -0.1 0.5 V RESTART 1.8V -> V reset signal is released at V RESTART POR+ Falling VDDCORE: T Minimum time with VDDCORE < V 15 us POR POR- 1.8V -> 1.1V T Time for reset signal to be propagated to system 200 400 us RST 766 32058K AVR32-01/12
AT32UC3A 38.5 Power Consumption The values in Table 38-9 and Table 38-10 on page 769 are measured values of power con- sumption with operating conditions as follows: (cid:129)V = 3.3V DDIO (cid:129)VDDCORE = VDDPLL = 1.8V (cid:129)TA = 25°C, TA = 85°C (cid:129)I/Os are configured in input, pull-up enabled. Figure 38-1. Measurement setup VDDANA VDDIO VDDIN Amp0 Internal Voltage Regulator VDDOUT Amp1 VDDCORE VDDPLL 767 32058K AVR32-01/12
AT32UC3A These figures represent the power consumption measured on the power supplies. Table 38-9. Power Consumption for Different Modes Mode Conditions Typ. Unit Typ : Ta =25 °C f = 12 MHz 9 mA CPU running from flash (1). f = 24 MHz 15 mA VDDIN=3.3 V. VDDCORE =1.8V. CPU clocked from PLL0 at f MHz f = 36MHz 20 mA Voltage regulator is on. f = 50 MHz 28 mA Active XIN0 : external clock. (1) XIN1 stopped. XIN32 stopped PLL0 running f = 66 MHz 36.3 mA All peripheral clocks activated. GPIOs on internal pull-up. JTAG unconnected with ext pull-up. Typ : Ta = 25 °C f = 12 MHz 5 mA CPU running from flash (1). f = 24 MHz 10 mA VDDIN=3.3 V. VDDCORE =1.8V. CPU clocked from PLL0 at f MHz f = 36MHz 14 mA Voltage regulator is on. f = 50 MHz 19 mA Idle XIN0 : external clock. XIN1 stopped. XIN32 stopped PLL0 running f = 66 MHz 25.5 mA All peripheral clocks activated. GPIOs on internal pull-up. JTAG unconnected with ext pull-up. Typ : Ta = 25 °C f = 12 MHz 3 mA CPU running from flash (1). f = 24 MHz 6 mA CPU clocked from PLL0 at f MHz f = 36MHz 9 mA Voltage regulator is on. XIN0 : external clock. f = 50 MHz 13 mA Frozen XIN1 stopped. XIN32 stopped PLL0 running All peripheral clocks activated. f = 66 MHz 16.8 mA GPIOs on internal pull-up. JTAG unconnected with ext pull-up. Typ : Ta = 25 °C f = 12 MHz 1 mA CPU running from flash (1). f = 24 MHz 2 mA CPU clocked from PLL0 at f MHz f = 36MHz 3 mA Voltage regulator is on. XIN0 : external clock. f = 50 MHz 4 mA Standby XIN1 stopped. XIN32 stopped PLL0 running All peripheral clocks activated. f = 66 MHz 4.8 mA GPIOs on internal pull-up. JTAG unconnected with ext pull-up. 768 32058K AVR32-01/12
AT32UC3A Table 38-9. Power Consumption for Different Modes Mode Conditions Typ. Unit Typ : Ta = 25 °C. on Amp0 47 uA CPU is in stop mode GPIOs on internal pull-up. Stop All peripheral clocks de-activated. on Amp1 40 uA DM and DP pins connected to ground. XIN0,Xin1 and XIN2 are stopped Typ : Ta = 25 °C.CPU is in deepstop mode on Amp0 36 uA GPIOs on internal pull-up. Deepstop All peripheral clocks de-activated. on Amp1 28 uA DM and DP pins connected to ground. XIN0,Xin1 and XIN2 are stopped Typ : Ta = 25 °C. CPU is in static mode on Amp0 25 uA GPIOs on internal pull-up. Static All peripheral clocks de-activated. on Amp1 14 uA DM and DP pins connected to ground. XIN0,Xin1 and XIN2 are stopped 1. Core frequency is generated from XIN0 using the PLL so that 140 MHz < fpll0 < 160 MHz and 10 MHz < fxin0 < 12MHz Table 38-10. Power Consumption by Peripheral in Active Mode Peripheral Typ. Unit GPIO 37 SMC 10 SDRAMC 4 ADC 18 EBI 31 INTC 25 TWI 14 MACB 45 µA/MHz PDCA 30 PWM 36 RTC 7 SPI 13 SSC 13 TC 10 USART 35 USB 45 38.6 Clock Characteristics These parameters are given in the following conditions: 769 32058K AVR32-01/12
AT32UC3A (cid:129)V = 1.8V DDCORE (cid:129) Ambient Temperature = 25°C 38.6.1 CPU/HSB Clock Characteristics Table 38-11. Core Clock Waveform Parameters Symbol Parameter Conditions Min Max Units 1/(t ) CPU Clock Frequency 66 MHz CPCPU t CPU Clock Period 15,15 ns CPCPU 38.6.2 PBA Clock Characteristics Table 38-12. PBA Clock Waveform Parameters Symbol Parameter Conditions Min Max Units 1/(t ) PBA Clock Frequency 66 MHz CPPBA t PBA Clock Period 15,15 ns CPPBA 38.6.3 PBB Clock Characteristics Table 38-13. PBB Clock Waveform Parameters Symbol Parameter Conditions Min Max Units 1/(t ) PBB Clock Frequency 66 MHz CPPBB t PBB Clock Period 15,15 ns CPPBB 38.7 Crystal Oscillator Characteristis The following characteristics are applicable to the operating temperature range: T = -40°C to 85°C and worst case of A power supply, unless otherwise specified. 38.7.1 32 KHz Oscillator Characteristics Table 38-14. 32 KHz Oscillator Characteristics Symbol Parameter Conditions Min Typ Max Unit 1/(t ) Crystal Oscillator Frequency 32 768 Hz CP32KHz C Equivalent Load Capacitance 6 12.5 pF L C = 6pF(1) 600 t Startup Time L ms ST C = 12.5pF(1) 1200 L Active mode 1.8 µA I Current Consumption OSC Standby mode 0.1 µA Note: 1. C is the equivalent load capacitance. L 770 32058K AVR32-01/12
AT32UC3A 38.7.2 Main Oscillators Characteristics Table 38-15. Main Oscillator Characteristics Symbol Parameter Conditions Min Typ Max Unit 1/(t ) Crystal Oscillator Frequency 0.45 16 MHz CPMAIN Internal Load Capacitance C , C 12 pF L1 L2 (C = C ) L1 L2 Duty Cycle 40 50 60 % t Startup Time 8 MHz 4 ms ST External clock 50 MHz 1/(t ) XIN Clock Frequency CPXIN Crystal 0.45 16 MHz 0.6 x 0.4 x t XIN Clock High Half-period t CHXIN t CPXIN CPXIN 0.4 x 0.6 x t XIN Clock Low Half-period CLXIN t t CPXIN CPXIN C XIN Input Capacitance 7 pF IN 38.7.3 PLL Characteristics Table 38-16. Phase Lock Loop Characteristics Symbol Parameter Conditions Min Typ Max Unit F Output Frequency 80 240 MHz OUT F Input Frequency 4 16 MHz IN active mode (Fout=80Mhz) 250 µA I Current Consumption PLL active mode (Fout=240Mhz) 600 µA 771 32058K AVR32-01/12
AT32UC3A 38.8 ADC Characteristics Table 38-17. Channel Conversion Time and ADC Clock Parameter Conditions Min Typ Max Units ADC Clock Frequency 10-bit resolution mode 5 MHz ADC Clock Frequency 8-bit resolution mode 8 MHz Startup Time Return from Idle Mode 20 µs Track and Hold Acquisition Time 600 ns Conversion Time ADC Clock = 5 MHz 2 µs Conversion Time ADC Clock = 8 MHz 1.25 µs Throughput Rate ADC Clock = 5 MHz 384(1) kSPS Throughput Rate ADC Clock = 8 MHz 533(2) kSPS Notes: 1. Corresponds to 13 clock cycles at 5 MHz: 3 clock cycles for track and hold acquisition time and 10 clock cycles for conversion. 2. Corresponds to 15 clock cycles at 8 MHz: 5 clock cycles for track and hold acquisition time and 10 clock cycles for conversion. Table 38-18. External Voltage Reference Input Parameter Conditions Min Typ Max Units ADVREF Input Voltage Range 2.6 VDDANA V ADVREF Average Current On 13 samples with ADC Clock = 5 MHz 200 250 µA Current Consumption on VDDANA 1.25 mA Note: ADVREF should be connected to GND to avoid extra consumption in case ADC is not used. Table 38-19. Analog Inputs Parameter Min Typ Max Units Input Voltage Range 0 V ADVREF Input Leakage Current 1 µA Input Capacitance 17 pF Table 38-20. Transfer Characteristicsin 8-bit mode Parameter Conditions Min Typ Max Units Resolution 8 Bit f=5MHz 0.8 LSB Absolute Accuracy f=8MHz 1.5 LSB f=5MHz 0.35 0.5 LSB Integral Non-linearity f=8MHz 0.5 1.0 LSB Differential Non-linearity f=5MHz 0.3 0.5 LSB f=8MHz 0.5 1.0 LSB Offset Error f=5MHz -0.5 0.5 LSB Gain Error f=5MHz -0.5 0.5 LSB 772 32058K AVR32-01/12
AT32UC3A Table 38-21. Transfer Characteristicsin 10-bit mode Parameter Conditions Min Typ Max Units Resolution 10 Bit Absolute Accuracy f=5MHz 3 LSB Integral Non-linearity f=5MHz 1.5 2 LSB f=5MHz 1 2 LSB Differential Non-linearity f=2.5MHz 0.6 1 LSB Offset Error f=5MHz -2 2 LSB Gain Error f=5MHz -2 2 LSB 773 32058K AVR32-01/12
AT32UC3A 38.9 EBI Timings These timings are given for worst case process, T = 85⋅C, VDDCORE = 1.65V, VDDIO = 3V and 40 pF load capacitance. Table 38-22. SMC Clock Signal. Symbol Parameter Max(1) Units 1/(t ) SMC Controller Clock Frequency 1/(t ) MHz CPSMC cpcpu Note: 1. The maximum frequency of the SMC interface is the same as the max frequency for the HSB. Table 38-23. SMC Read Signals with Hold Settings Symbol Parameter Min Units NRD Controlled (READ_MODE = 1) SMC Data Setup before NRD High 12 1 SMC Data Hold after NRD High 0 2 SMC NRD High to NBS0/A0 Change(1) nrd hold length * t - 1.3 3 CPSMC SMC NRD High to NBS1 Change(1) nrd hold length * t - 1.3 4 CPSMC SMC NRD High to NBS2/A1 Change(1) nrd hold length * t - 1.3 ns 5 CPSMC SMC NRD High to NBS3 Change(1) nrd hold length * t - 1.3 6 CPSMC SMC NRD High to A2 - A25 Change(1) nrd hold length * t - 1.3 7 CPSMC SMC NRD High to NCS Inactive(1) (nrd hold length - ncs rd hold length) * t - 2.3 8 CPSMC SMC NRD Pulse Width nrd pulse length * t - 1.4 9 CPSMC NRD Controlled (READ_MODE = 0) SMC Data Setup before NCS High 11.5 10 SMC Data Hold after NCS High 0 11 SMC NCS High to NBS0/A0 Change(1) ncs rd hold length * t - 2.3 12 CPSMC SMC NCS High to NBS0/A0 Change(1) ncs rd hold length * t - 2.3 13 CPSMC SMC NCS High to NBS2/A1 Change(1) ncs rd hold length * t - 2.3 ns 14 CPSMC SMC NCS High to NBS3 Change(1) ncs rd hold length * t - 2.3 15 CPSMC SMC NCS High to A2 - A25 Change(1) ncs rd hold length * t - 4 16 CPSMC SMC NCS High to NRD Inactive(1) ncs rd hold length - nrd hold length)* t - 1.3 17 CPSMC SMC NCS Pulse Width ncs rd pulse length * t - 3.6 18 CPSMC Note: 1. hold length = total cycle duration - setup duration - pulse duration. “hold length” is for “ncs rd hold length” or “nrd hold length”. 774 32058K AVR32-01/12
AT32UC3A Table 38-24. SMC Read Signals with no Hold Settings Symbol Parameter Min Units NRD Controlled (READ_MODE = 1) SMC Data Setup before NRD High 13.7 19 ns SMC Data Hold after NRD High 1 20 NRD Controlled (READ_MODE = 0) SMC Data Setup before NCS High 13.3 21 ns SMC Data Hold after NCS High 0 22 Table 38-25. SMC Write Signals with Hold Settings Symbol Parameter Min Units NRD Controlled (READ_MODE = 1) SMC Data Out Valid before NWE High (nwe pulse length - 1) * t - 0.9 23 CPSMC SMC Data Out Valid after NWE High(1) nwe hold length * t - 6 24 CPSMC SMC NWE High to NBS0/A0 Change(1) nwe hold length * t - 1.9 25 CPSMC SMC NWE High to NBS1 Change(1) nwe hold length * t - 1.9 26 CPSMC SMC NWE High to NBS2/A1 Change(1) nwe hold length * t - 1.9 ns 29 CPSMC SMC NWE High to NBS3 Change(1) nwe hold length * t - 1.9 30 CPSMC SMC NWE High to A2 - A25 Change(1) nwe hold length * t - 1.7 31 CPSMC SMC NWE High to NCS Inactive(1) (nwe hold length - ncs wr hold length)* t - 2.9 32 CPSMC SMC NWE Pulse Width nwe pulse length * t - 0.9 33 CPSMC NRD Controlled (READ_MODE = 0) SMC Data Out Valid before NCS High (ncs wr pulse length - 1)* t - 4.6 34 CPSMC SMC Data Out Valid after NCS High(1) ncs wr hold length * t - 5.8 ns 35 CPSMC SMC NCS High to NWE Inactive(1) (ncs wr hold length - nwe hold length)* t - 0.6 36 CPSMC Note: 1. hold length = total cycle duration - setup duration - pulse duration. “hold length” is for “ncs wr hold length” or “nwe hold length" 775 32058K AVR32-01/12
AT32UC3A Table 38-26. SMC Write Signals with No Hold Settings (NWE Controlled only). Symbol Parameter Min Units SMC NWE Rising to A2-A25 Valid 5.4 37 SMC NWE Rising to NBS0/A0 Valid 5 38 SMC NWE Rising to NBS1 Change 5 39 SMC NWE Rising to A1/NBS2 Change 5 40 SMC NWE Rising to NBS3 Change 5 ns 41 SMC NWE Rising to NCS Rising 5.1 42 SMC Data Out Valid before NWE Rising (nwe pulse length - 1) * t - 1.2 43 CPSMC SMC Data Out Valid after NWE Rising 5 44 SMC NWE Pulse Width nwe pulse length * t - 0.9 45 CPSMC Figure 38-2. SMC Signals for NCS Controlled Accesses. SMC16 SMC16 SMC16 A2-A25 SMC12 SMC12 SMC12 SMC13 SMC13 SMC13 SMC14 SMC14 SMC14 SMC15 SMC15 SMC15 A0/A1/NBS[3:0] NRD SMC17 SMC17 NCS SMC18 SMC18 SMC18 SMC21 SMC22 SMC10 SMC11 SMC34 SMC35 D0 - D15 SMC36 NWE 776 32058K AVR32-01/12
AT32UC3A Figure 38-3. SMC Signals for NRD and NRW Controlled Accesses. SMC7 SMC37 SMC7 SMC31 A2-A25 SMC3 SMC38 SMC3 SMC25 SMC4 SMC39 SMC4 SMC26 SMC5 SMC40 SMC5 SMC29 SMC6 SMC41 SMC6 SMC30 A0/A1/NBS[3:0] SMC42 SMC8 SMC32 NCS SMC8 SMC9 SMC9 NRD SMC19 SMC20 SMC43 SMC44 SMC1 SMC2 SMC23 SMC24 D0 - D15 SMC45 SMC33 NWE 38.9.1 SDRAM Signals These timings are given for 10 pF load on SDCK and 40 pF on other signals. Table 38-27. SDRAM Clock Signal. Symbol Parameter Max(1) Units 1/(t ) SDRAM Controller Clock Frequency 1/(t ) MHz CPSDCK cpcpu Note: 1. The maximum frequency of the SDRAMC interface is the same as the max frequency for the HSB. Table 38-28. SDRAM Clock Signal. Symbol Parameter Min Units SDRAMC SDCKE High before SDCK Rising Edge 7.4 ns 1 SDRAMC SDCKE Low after SDCK Rising Edge 3.2 2 SDRAMC SDCKE Low before SDCK Rising Edge 7 3 SDRAMC SDCKE High after SDCK Rising Edge 2.9 4 SDRAMC SDCS Low before SDCK Rising Edge 7.5 5 SDRAMC SDCS High after SDCK Rising Edge 1.6 6 SDRAMC RAS Low before SDCK Rising Edge 7.2 7 SDRAMC RAS High after SDCK Rising Edge 2.3 8 SDRAMC SDA10 Change before SDCK Rising Edge 7.6 9 SDRAMC SDA10 Change after SDCK Rising Edge 1.9 10 777 32058K AVR32-01/12
AT32UC3A Table 38-28. SDRAM Clock Signal. Symbol Parameter Min Units SDRAMC Address Change before SDCK Rising Edge 6.2 11 SDRAMC Address Change after SDCK Rising Edge 2.2 12 SDRAMC Bank Change before SDCK Rising Edge 6.3 13 SDRAMC Bank Change after SDCK Rising Edge 2.4 14 SDRAMC CAS Low before SDCK Rising Edge 7.4 15 SDRAMC CAS High after SDCK Rising Edge 1.9 16 SDRAMC DQM Change before SDCK Rising Edge 6.4 17 ns SDRAMC DQM Change after SDCK Rising Edge 2.2 18 SDRAMC D0-D15 in Setup before SDCK Rising Edge 9 19 SDRAMC D0-D15 in Hold after SDCK Rising Edge 0 20 SDRAMC SDWE Low before SDCK Rising Edge 7.6 23 SDRAMC SDWE High after SDCK Rising Edge 1.8 24 SDRAMC D0-D15 Out Valid before SDCK Rising Edge 7.1 25 SDRAMC D0-D15 Out Valid after SDCK Rising Edge 1.5 26 778 32058K AVR32-01/12
AT32UC3A Figure 38-4. SDRAMC Signals relative to SDCK. SDCK SDRAMC1 SDRAMC2 SDRAMC3 SDRAMC4 SDCKE SDRAMC5 SDRAMC6 SDRAMC5 SDRAMC6 SDRAMC5 SDRAMC6 SDCS SDRAMC7 SDRAMC8 RAS SDRAMC15 SDRAMC16 SDRAMC15 SDRAMC16 CAS SDRAMC23 SDRAMC24 SDWE SDRAMC9 SDRAMC10 SDRAMC9 SDRAMC10 SDRAMC9 SDRAMC10 SDA10 SDRAMC11 SDRAMC12 SDRAMC11 SDRAMC12 SDRAMC11 SDRAMC12 A0 - A9, A11 - A13 SDRAMC13 SDRAMC14 SDRAMC13 SDRAMC14 SDRAMC13 SDRAMC14 BA0/BA1 SDRAMC17 SDRAMC18 SDRAMC17 SDRAMC18 DQM0 - DQM3 SDRAMC19 SDRAMC20 D0 - D15 Read SDRAMC25 SDRAMC26 D0 - D15 to Write 779 32058K AVR32-01/12
AT32UC3A 38.10 JTAG Timings 38.10.1 JTAG Interface Signals Table 38-29. JTAG Interface Timing specification Symbol Parameter Conditions Min Max Units JTAG TCK Low Half-period (1) 6 ns 0 JTAG TCK High Half-period (1) 3 ns 1 JTAG TCK Period (1) 9 ns 2 JTAG TDI, TMS Setup before TCK High (1) 1 ns 3 JTAG TDI, TMS Hold after TCK High (1) 0 ns 4 JTAG TDO Hold Time (1) 4 ns 5 JTAG TCK Low to TDO Valid (1) 6 ns 6 JTAG Device Inputs Setup Time (1) ns 7 JTAG Device Inputs Hold Time (1) ns 8 JTAG Device Outputs Hold Time (1) ns 9 JTAG TCK to Device Outputs Valid (1) ns 10 Note: 1. V from 3.0V to 3.6V, maximum external capacitor = 40pF VDDIO 780 32058K AVR32-01/12
AT32UC3A Figure 38-5. JTAG Interface Signals JTAG 2 TCK JTAG JTAG 0 1 TMS/TDI JTAG JTAG 3 4 TDO JTAG 5 JTAG 6 Device Inputs JTAG7 JTAG8 Device Outputs JTAG 9 JTAG 10 38.11 SPI Characteristics Figure 38-6. SPI Master mode with (CPOL = NCPHA = 0) or (CPOL= NCPHA= 1) SPCK SPI0 SPI1 MISO SPI2 MOSI 781 32058K AVR32-01/12
AT32UC3A Figure 38-7. SPI Master mode with (CPOL=0 and NCPHA=1) or (CPOL=1 and NCPHA=0) SPCK SPI3 SPI4 MISO SPI 5 MOSI Figure 38-8. SPI Slave mode with (CPOL=0 and NCPHA=1) or (CPOL=1 and NCPHA=0) SPCK SPI 6 MISO SPI SPI 7 8 MOSI Figure 38-9. SPI Slave mode with (CPOL = NCPHA = 0) or (CPOL= NCPHA= 1) SPCK SPI 9 MISO SPI SPI 10 11 MOSI 782 32058K AVR32-01/12
AT32UC3A Table 38-30. SPI Timings Symbol Parameter Conditions Min Max Units SPI MISO Setup time before SPCK rises (master) 3.3V domain(1) 22 + (t )/2(2) ns 0 CPMCK SPI MISO Hold time after SPCK rises (master) 3.3V domain(1) 0 ns 1 SPI SPCK rising to MOSI Delay (master) 3.3V domain(1) 7 ns 2 SPI MISO Setup time before SPCK falls (master) 3.3V domain(1) 22 + (t )/2(2) ns 3 CPMCK SPI MISO Hold time after SPCK falls (master) 3.3V domain (1) 0 ns 4 SPI SPCK falling to MOSI Delay (master) 3.3V domain (1) 7 ns 5 SPI SPCK falling to MISO Delay (slave) 3.3V domain (1) 26.5 ns 6 SPI MOSI Setup time before SPCK rises (slave) 3.3V domain (1) 0 ns 7 SPI MOSI Hold time after SPCK rises (slave) 3.3V domain (1) 1.5 ns 8 SPI SPCK rising to MISO Delay (slave) 3.3V domain (1) 27 ns 9 SPI MOSI Setup time before SPCK falls (slave) 3.3V domain (1) 0 ns 10 SPI MOSI Hold time after SPCK falls (slave) 3.3V domain (1) 1 ns 11 Notes: 1. 3.3V domain: V from 3.0V to 3.6V, maximum external capacitor = 40 pF. VDDIO 2. t : Master Clock period in ns. CPMCK 38.12 MACB Characteristics Table 38-31. Ethernet MAC Signals Symbol Parameter Conditions Min (ns) Max (ns) EMAC Setup for EMDIO from EMDC rising Load: 20pF(2) 1 EMAC Hold for EMDIO from EMDC rising Load: 20pF(2) 2 EMAC EMDIO toggling from EMDC falling Load: 20pF(2) 3 Notes: 1. f: MCK frequency (MHz) 2. V from 3.0V to 3.6V, maximum external capacitor = 20 pF VDDIO Table 38-32. Ethernet MAC MII Specific Signals Symbol Parameter Conditions Min (ns) Max (ns) EMAC Setup for ECOL from ETXCK rising Load: 20pF (1) 3 4 EMAC Hold for ECOL from ETXCK rising Load: 20pF (1) 0 5 EMAC Setup for ECRS from ETXCK rising Load: 20pF (1) 3 6 EMAC Hold for ECRS from ETXCK rising Load: 20pF (1) 0 7 EMAC ETXER toggling from ETXCK rising Load: 20pF (1) 15 8 EMAC ETXEN toggling from ETXCK rising Load: 20pF (1) 15 9 EMAC ETX toggling from ETXCK rising Load: 20pF (1) 15 10 EMAC Setup for ERX from ERXCK Load: 20pF (1) 1 11 783 32058K AVR32-01/12
AT32UC3A Table 38-32. Ethernet MAC MII Specific Signals Symbol Parameter Conditions Min (ns) Max (ns) EMAC Hold for ERX from ERXCK Load: 20pF (1) 1.5 12 EMAC Setup for ERXER from ERXCK Load: 20pF (1) 1 13 EMAC Hold for ERXER from ERXCK Load: 20pF (1) 0.5 14 EMAC Setup for ERXDV from ERXCK Load: 20pF (1) 1.5 15 EMAC Hold for ERXDV from ERXCK Load: 20pF (1) 1 16 Note: 1. V from 3.0V to 3.6V, maximum external capacitor = 20 pF VDDIO Figure 38-10. Ethernet MAC MII Mode EMDC EMAC EMAC EMAC 3 1 2 EMDIO EMAC EMAC 4 5 ECOL EMAC EMAC 6 7 ECRS ETXCK EMAC 8 ETXER EMAC 9 ETXEN EMAC 10 ETX[3:0] ERXCK EMAC EMAC 11 12 ERX[3:0] EMAC EMAC 13 14 ERXER EMAC EMAC 15 16 ERXDV 784 32058K AVR32-01/12
AT32UC3A Table 38-33. Ethernet MAC RMII Specific Signals Symbol Parameter Min (ns) Max (ns) EMAC ETXEN toggling from EREFCK rising 7 14.5 21 EMAC ETX toggling from EREFCK rising 7 14.7 22 EMAC Setup for ERX from EREFCK 1.5 23 EMAC Hold for ERX from EREFCK 0 24 EMAC Setup for ERXER from EREFCK 1.5 25 EMAC Hold for ERXER from EREFCK 0 26 EMAC Setup for ECRSDV from EREFCK 1.5 27 EMAC Hold for ECRSDV from EREFCK 0 28 Figure 38-11. Ethernet MAC RMII Mode EREFCK EMAC 21 ETXEN EMAC 22 ETX[1:0] EMAC EMAC 23 24 ERX[1:0] EMAC EMAC 25 26 ERXER EMAC EMAC 27 28 ECRSDV 38.13 Flash Characteristics The following table gives the device maximum operating frequency depending on the field FWS of the Flash FSR register. This field defines the number of wait states required to access the Flash Memory. Table 38-34. Flash Wait States FWS Read Operations Maximum Operating Frequency (MHz) 0 1 cycle 33 1 2 cycles 66 785 32058K AVR32-01/12
AT32UC3A Table 38-35. Programming Time Temperature Operating Range Part Page Programming Time (ms) Chip Erase Time (ms) Industrial 4 4 Automotive 16 16 786 32058K AVR32-01/12
AT32UC3A 39. Mechanical Characteristics 39.1 Thermal Considerations 39.1.1 Thermal Data Table 39-1 summarizes the thermal resistance data depending on the package. Table 39-1. Thermal Resistance Data Symbol Parameter Condition Package Typ Unit θ Junction-to-ambient thermal resistance Still Air TQFP100 43.4 JA ⋅C/W θ Junction-to-case thermal resistance TQFP100 5.5 JC θ Junction-to-ambient thermal resistance Still Air LQFP144 39.8 JA ⋅C/W θ Junction-to-case thermal resistance LQFP144 8.9 JC 39.1.2 Junction Temperature The average chip-junction temperature, T , in °C can be obtained from the following: J 1. T = T +(P ×θ ) J A D JA 2. T = T +(P ×(θ +θ )) J A D HEATSINK JC where: (cid:129) θ = package thermal resistance, Junction-to-ambient (°C/W), provided in Table 39-1 on page JA 787. (cid:129) θ = package thermal resistance, Junction-to-case thermal resistance (°C/W), provided in JC Table 39-1 on page 787. (cid:129) θ = cooling device thermal resistance (°C/W), provided in the device datasheet. HEAT SINK (cid:129)P = device power consumption (W) estimated from data provided in the section ”Power D Consumption” on page 767. (cid:129)T = ambient temperature (°C). A From the first equation, the user can derive the estimated lifetime of the chip and decide if a cooling device is necessary or not. If a cooling device is to be fitted on the chip, the second equation should be used to compute the resulting average chip-junction temperature T in °C. J 787 32058K AVR32-01/12
AT32UC3A 39.2 Package Drawings Figure 39-1. TQFP-100 package drawing Table 39-2. Device and Package Maximum Weight 500 mg Table 39-3. Package Characteristics Moisture Sensitivity Level Jdec J-STD0-20D - MSL 3 Table 39-4. Package Reference JEDEC Drawing Reference MS-026 JESD97 Classification E3 788 32058K AVR32-01/12
AT32UC3A Figure 39-2. LQFP-144 package drawing Table 39-5. Device and Package Maximum Weight 1300 mg Table 39-6. Package Characteristics Moisture Sensitivity Level Jdec J-STD0-20D - MSL 3 Table 39-7. Package Reference JEDEC Drawing Reference MS-026 JESD97 Classification E3 789 32058K AVR32-01/12
AT32UC3A Figure 39-3. FFBGA-144 package drawing Table 39-8. Device and Package Maximum Weight 1300 mg Table 39-9. Package Characteristics Moisture Sensitivity Level MSL3 Table 39-10. Package Reference JEDEC Drawing Reference MS-026 JESD97 Classification E3 790 32058K AVR32-01/12
AT32UC3A 39.3 Soldering Profile Table 39-11 gives the recommended soldering profile from J-STD-20. Table 39-11. Soldering Profile Profile Feature Green Package Average Ramp-up Rate (217°C to Peak) 3°C/sec Preheat Temperature 175°C ±25°C Min. 150 °C, Max. 200 °C Time Maintained Above 217°C 60-150 sec Time within 5⋅C of Actual Peak Temperature 30 sec Peak Temperature Range 260 °C Ramp-down Rate 6 °C/sec Time 25⋅C to Peak Temperature Max. 8 minutes Note: It is recommended to apply a soldering temperature higher than 250°C. A maximum of three reflow passes is allowed per component. 791 32058K AVR32-01/12
AT32UC3A 40. Ordering Information Table 40-1. Ordering Information Device Ordering Code Package Conditioning Temperature Operating Range AT32UC3A0512 AT32UC3A0512-ALUT 144 LQFP Tray Industrial (-40⋅C to 85⋅C) AT32UC3A0512-ALUR 144 LQFP Reel Industrial (-40⋅C to 85⋅C) AT32UC3A0512-ALTRA 144 LQFP Reel Automotive (-40⋅C to 85⋅C) AT32UC3A0512-ALTTA 144 LQFP Tray Automotive (-40⋅C to 85⋅C) AT32UC3A0512-CTUT 144 FFBGA Tray Industrial (-40⋅C to 85⋅C) AT32UC3A0512-CTUR 144 FFBGA Reel Industrial (-40⋅C to 85⋅C) AT32UC3A0256 AT32UC3A0256-ALUT 144 LQFP Tray Industrial (-40⋅C to 85⋅C) AT32UC3A0256-ALUR 144 LQFP Reel Industrial (-40⋅C to 85⋅C) AT32UC3A0256-CTUT 144 FFBGA Tray Industrial (-40⋅C to 85⋅C) AT32UC3A0256-CTUR 144 FFBGA Reel Industrial (-40⋅C to 85⋅C) AT32UC3A0128 AT32UC3A0128-ALUT 144 LQFP Tray Industrial (-40⋅C to 85⋅C) AT32UC3A0128-ALUR 144 LQFP Reel Industrial (-40⋅C to 85⋅C) AT32UC3A0128-CTUT 144 FFBGA Tray Industrial (-40⋅C to 85⋅C) AT32UC3A0128-CTUR 144 FFBGA Reel Industrial (-40⋅C to 85⋅C) AT32UC3A1512 AT32UC3A1512-AUT 100 TQFP Tray Industrial (-40⋅C to 85⋅C) AT32UC3A1512-AUR 100 TQFP Reel Industrial (-40⋅C to 85⋅C) AT32UC3A1256 AT32UC3A1256-AUT 100 TQFP Tray Industrial (-40⋅C to 85⋅C) AT32UC3A1256-AUR 100 TQFP Reel Industrial (-40⋅C to 85⋅C) AT32UC3A1128 AT32UC3A1128-AUT 100 TQFP Tray Industrial (-40⋅C to 85⋅C) AT32UC3A1128-AUR 100 TQFP Reel Industrial (-40⋅C to 85⋅C) 40.1 Automotive Quality Grade The AT32UC3A have been developed and manufactured according to the most stringent requirements of the international standard ISO-TS-16949. This data sheet will contain limit val- ues extracted from the results of extensive characterization (Temperature and Voltage). The quality and reliability of the AT32UC3A is verified during regular product qualification as per AEC-Q100 grade 3. As indicated in the ordering information paragraph, the product is available in only one tempera- ture grade T: -40°C / + 85°C. 792 32058K AVR32-01/12
AT32UC3A 41. Errata All industrial parts labelled with -UES (engineering samples) are revision E parts. All automotive parts labelled with AT32UC3A0512-ALTRA or AT32UC3A0512-ALTTA are revi- sion K parts. 41.1 Rev. K, L, M 41.1.1 PWM 1. PWM channel interrupt enabling triggers an interrupt When enabling a PWM channel that is configured with center aligned period (CALG=1), an interrupt is signalled. Fix/Workaround When using center aligned mode, enable the channel and read the status before channel interrupt is enabled. 2. PWM counter restarts at 0x0001 The PWM counter restarts at 0x0001 and not 0x0000 as specified. Because of this the first PWM period has one more clock cycle. Fix/Workaround - The first period is 0x0000, 0x0001, ..., period - Consecutive periods are 0x0001, 0x0002, ..., period 3. PWM update period to a 0 value does not work It is impossible to update a period equal to 0 by the using the PWM update register (PWM_CUPD). Fix/Workaround Do not update the PWM_CUPD register with a value equal to 0. 41.1.2 ADC 1. Sleep Mode activation needs additional A to D conversion If the ADC sleep mode is activated when the ADC is idle the ADC will not enter sleep mode before after the next AD conversion. Fix/Workaround Activate the sleep mode in the mode register and then perform an AD conversion. 41.1.3 SPI 1. SPI Slave / PDCA transfer: no TX UNDERRUN flag There is no TX UNDERRUN flag available, therefore in SPI slave mode, there is no way to be informed of a character lost in transmission. Fix/Workaround For PDCA transfer: none. 2. SPI FDIV option does not work Selecting clock signal using FDIV = 1 does not work as specified. Fix/Workaround Do not set FDIV = 1. 793 32058K AVR32-01/12
AT32UC3A 3. SPI Bad Serial Clock Generation on 2nd chip_select when SCBR = 1, CPOL=1 and NCPHA=0 When multiple CS are in use, if one of the baudrate equals to 1 and one of the others doesn't equal to 1, and CPOL=1 and CPHA=0, then an aditional pulse will be generated on SCK. Fix/workaround When multiple CS are in use, if one of the baudrate equals 1, the other must also equal 1 if CPOL=1 and CPHA=0. 4. SPI Glitch on RXREADY flag in slave mode when enabling the SPI or during the first transfer In slave mode, the SPI can generate a false RXREADY signal during enabling of the SPI or during the first transfer. Fix/Workaround 1. Set slave mode, set required CPOL/CPHA. 2. Enable SPI. 3. Set the polarity CPOL of the line in the opposite value of the required one. 4. Set the polarity CPOL to the required one. 5. Read the RXHOLDING register. Transfers can now befin and RXREADY will now behave as expected. 5. SPI Disable does not work in Slave mode Fix/workaround Read the last received data then perform a Software reset. 41.1.4 Power Manager 1. If the BOD level is higher than VDDCORE, the part is constantly under reset If the BOD level is set to a value higher than VDDCORE and enabled by fuses, the part will be in constant reset. Fix/Workaround Apply an external voltage on VDDCORE that is higher than the BOD level and is lower than VDDCORE max and disable the BOD. 41.1.5 PDCA 1. Wrong PDCA behavior when using two PDCA channels with the same PID. Fix/Workaround The same PID should not be assigned to more than one channel. 41.1.6 TWI 1. The TWI RXRDY flag in SR register is not reset when a software reset is performed. Fix/Workaround After a Software Reset, the register TWI RHR must be read. 41.1.7 USART 1. ISO7816 info register US_NER cannot be read The NER register always returns zero. Fix/Workaround None 41.1.8 Processor and Architecture 1. LDM instruction with PC in the register list and without ++ increments Rp 794 32058K AVR32-01/12
AT32UC3A For LDM with PC in the register list: the instruction behaves as if the ++ field is always set, ie the pointer is always updated. This happens even if the ++ field is cleared. Specifically, the increment of the pointer is done in parallel with the testing of R12. Fix/Workaround None. 41.1.9 FLASHC 1. Reading from on-chip flash may fail after a flash fuse write operation (FLASHC LP, UP, WGPB, EGPB, SSB, PGPFB, EAGPF commands). After a flash fuse write operation (FLASHC LP, UP, WGPB, EGPB, SSB, PGPFB, EAGPF commands), the following flash read access may return corrupted data. This erratum does not affect write operations to regular flash memory. Fix/Workaround The flash fuse write operation (FLASHC LP, UP, WGPB, EGPB, SSB, PGPFB, EAGPF commands) must be issued from internal RAM. After the write operation, perform a dummy flash page write operation (FLASHC WP). Content and location of this page is not important and filling the write buffer with all one (FFh) will leave the current flash content unchanged. It is then safe to read and fetch code from the flash. 795 32058K AVR32-01/12
AT32UC3A 41.2 Rev. J 41.2.1 PWM 1. PWM channel interrupt enabling triggers an interrupt When enabling a PWM channel that is configured with center aligned period (CALG=1), an interrupt is signalled. Fix/Workaround When using center aligned mode, enable the channel and read the status before channel interrupt is enabled. 2. PWM counter restarts at 0x0001 The PWM counter restarts at 0x0001 and not 0x0000 as specified. Because of this the first PWM period has one more clock cycle. Fix/Workaround - The first period is 0x0000, 0x0001, ..., period - Consecutive periods are 0x0001, 0x0002, ..., period 3. PWM update period to a 0 value does not work It is impossible to update a period equal to 0 by the using the PWM update register (PWM_CUPD). Fix/Workaround Do not update the PWM_CUPD register with a value equal to 0. 41.2.2 ADC 1. Sleep Mode activation needs additional A to D conversion If the ADC sleep mode is activated when the ADC is idle the ADC will not enter sleep mode before after the next AD conversion. Fix/Workaround Activate the sleep mode in the mode register and then perform an AD conversion. 41.2.3 SPI 1. SPI Slave / PDCA transfer: no TX UNDERRUN flag There is no TX UNDERRUN flag available, therefore in SPI slave mode, there is no way to be informed of a character lost in transmission. Fix/Workaround For PDCA transfer: none. 2. SPI FDIV option does not work Selecting clock signal using FDIV = 1 does not work as specified. Fix/Workaround Do not set FDIV = 1. 3. SPI Bad Serial Clock Generation on 2nd chip_select when SCBR = 1, CPOL=1 and NCPHA=0 When multiple CS are in use, if one of the baudrate equals to 1 and one of the others doesn't equal to 1, and CPOL=1 and CPHA=0, then an aditional pulse will be generated on SCK. Fix/workaround 796 32058K AVR32-01/12
AT32UC3A When multiple CS are in use, if one of the baudrate equals 1, the other must also equal 1 if CPOL=1 and CPHA=0. 4. SPI Glitch on RXREADY flag in slave mode when enabling the SPI or during the first transfer In slave mode, the SPI can generate a false RXREADY signal during enabling of the SPI or during the first transfer. Fix/Workaround 1. Set slave mode, set required CPOL/CPHA. 2. Enable SPI. 3. Set the polarity CPOL of the line in the opposite value of the required one. 4. Set the polarity CPOL to the required one. 5. Read the RXHOLDING register. Transfers can now befin and RXREADY will now behave as expected. 5. SPI Disable does not work in Slave mode Fix/workaround Read the last received data then perform a Software reset. 41.2.4 Power Manager 1. If the BOD level is higher than VDDCORE, the part is constantly under reset If the BOD level is set to a value higher than VDDCORE and enabled by fuses, the part will be in constant reset. Fix/Workaround Apply an external voltage on VDDCORE that is higher than the BOD level and is lower than VDDCORE max and disable the BOD. 41.2.5 PDCA 1. Wrong PDCA behavior when using two PDCA channels with the same PID. Fix/Workaround The same PID should not be assigned to more than one channel. 41.2.6 TWI 1. The TWI RXRDY flag in SR register is not reset when a software reset is performed. Fix/Workaround After a Software Reset, the register TWI RHR must be read. 41.2.7 SDRAMC 1. Code execution from external SDRAM does not work Code execution from SDRAM does not work. Fix/Workaround Do not run code from SDRAM. 41.2.8 GPIO 1. PA29 (TWI SDA) and PA30 (TWI SCL) GPIO VIH (input high voltage) is 3.6V max instead of 5V tolerant The following GPIOs are not 5V tolerant : PA29 and PA30. Fix/Workaround 797 32058K AVR32-01/12
AT32UC3A None. 41.2.9 USART 1. ISO7816 info register US_NER cannot be read The NER register always returns zero. Fix/Workaround None 41.2.10 Processor and Architecture 1. LDM instruction with PC in the register list and without ++ increments Rp For LDM with PC in the register list: the instruction behaves as if the ++ field is always set, ie the pointer is always updated. This happens even if the ++ field is cleared. Specifically, the increment of the pointer is done in parallel with the testing of R12. Fix/Workaround None. 2. RETE instruction does not clear SREG[L] from interrupts. The RETE instruction clears SREG[L] as expected from exceptions. Fix/Workaround When using the STCOND instruction, clear SREG[L] in the stacked value of SR before returning from interrupts with RETE. 3. Exceptions when system stack is protected by MPU RETS behaves incorrectly when MPU is enabled and MPU is configured so that system stack is not readable in unprivileged mode. Fix/Woraround Workaround 1: Make system stack readable in unprivileged mode, or Workaround 2: Return from supervisor mode using rete instead of rets. This requires : 1. Changing the mode bits from 001b to 110b before issuing the instruction. Updating the mode bits to the desired value must be done using a single mt- sr instruction so it is done atomically. Even if this step is described in general as not safe in the UC technical reference guide, it is safe in this very specific case. 2. Execute the RETE instruction. 41.2.11 FLASHC 1. Reading from on-chip flash may fail after a flash fuse write operation (FLASHC LP, UP, WGPB, EGPB, SSB, PGPFB, EAGPF commands). After a flash fuse write operation (FLASHC LP, UP, WGPB, EGPB, SSB, PGPFB, EAGPF commands), the following flash read access may return corrupted data. This erratum does not affect write operations to regular flash memory. Fix/Workaround The flash fuse write operation (FLASHC LP, UP, WGPB, EGPB, SSB, PGPFB, EAGPF commands) must be issued from internal RAM. After the write operation, perform a dummy flash page write operation (FLASHC WP). Content and location of this page is not important and filling the write buffer with all one (FFh) will leave the current flash content unchanged. It is then safe to read and fetch code from the flash. 798 32058K AVR32-01/12
AT32UC3A 41.3 Rev. I 41.3.1 PWM 1. PWM channel interrupt enabling triggers an interrupt When enabling a PWM channel that is configured with center aligned period (CALG=1), an interrupt is signalled. Fix/Workaround When using center aligned mode, enable the channel and read the status before channel interrupt is enabled. 2. PWM counter restarts at 0x0001 The PWM counter restarts at 0x0001 and not 0x0000 as specified. Because of this the first PWM period has one more clock cycle. Fix/Workaround - The first period is 0x0000, 0x0001, ..., period - Consecutive periods are 0x0001, 0x0002, ..., period 3. PWM update period to a 0 value does not work It is impossible to update a period equal to 0 by the using the PWM update register (PWM_CUPD). Fix/Workaround Do not update the PWM_CUPD register with a value equal to 0. 41.3.2 ADC 1. Sleep Mode activation needs additional A to D conversion If the ADC sleep mode is activated when the ADC is idle the ADC will not enter sleep mode before after the next AD conversion. Fix/Workaround Activate the sleep mode in the mode register and then perform an AD conversion. 41.3.3 SPI 1. SPI Slave / PDCA transfer: no TX UNDERRUN flag There is no TX UNDERRUN flag available, therefore in SPI slave mode, there is no way to be informed of a character lost in transmission. Fix/Workaround For PDCA transfer: none. 2. SPI FDIV option does not work Selecting clock signal using FDIV = 1 does not work as specified. Fix/Workaround Do not set FDIV = 1. 3. SPI Bad Serial Clock Generation on 2nd chip_select when SCBR = 1, CPOL=1 and NCPHA=0 When multiple CS are in use, if one of the baudrate equals to 1 and one of the others doesn't equal to 1, and CPOL=1 and CPHA=0, then an aditional pulse will be generated on SCK. Fix/workaround 799 32058K AVR32-01/12
AT32UC3A When multiple CS are in use, if one of the baudrate equals 1, the other must also equal 1 if CPOL=1 and CPHA=0. 4. SPI Glitch on RXREADY flag in slave mode when enabling the SPI or during the first transfer In slave mode, the SPI can generate a false RXREADY signal during enabling of the SPI or during the first transfer. Fix/Workaround 1. Set slave mode, set required CPOL/CPHA. 2. Enable SPI. 3. Set the polarity CPOL of the line in the opposite value of the required one. 4. Set the polarity CPOL to the required one. 5. Read the RXHOLDING register. Transfers can now befin and RXREADY will now behave as expected. 5. SPI Disable does not work in Slave mode Fix/workaround Read the last received data then perform a Software reset. 41.3.4 Power Manager 1. If the BOD level is higher than VDDCORE, the part is constantly under reset If the BOD level is set to a value higher than VDDCORE and enabled by fuses, the part will be in constant reset. Fix/Workaround Apply an external voltage on VDDCORE that is higher than the BOD level and is lower than VDDCORE max and disable the BOD. 41.3.5 Flashc 1. On AT32UC3A0512 and AT32UC3A1512, corrupted read in flash after FLASHC WP, EP, EA, WUP, EUP commands may happen - After a FLASHC Write Page (WP) or Erase Page (EP) command applied to a page in a given half of the flash (first or last 256 kB of flash), reading (data read or code fetch) the other half of the flash may fail. This may lead to an exception or to other errors derived from this corrupted read access. - After a FLASHC Erase All (EA) command, reading (data read or code fetch) the flash may fail. This may lead to an exception or to other errors derived from this corrupted read access. - After a FLASHC Write User Page (WUP) or Erase User Page (EUP) command, reading (data read or code fetch) the second half (last 256 kB) of the flash may fail. This may lead to an exception or to other errors derived from this corrupted read access. Fix/Workaround Flashc WP, EP, EA, WUP, EUP commands: these commands must be issued from RAM or through the EBI. After these commands, read twice one flash page initialized to 00h in each half part of the flash. 41.3.6 PDCA 1. Wrong PDCA behavior when using two PDCA channels with the same PID. 800 32058K AVR32-01/12
AT32UC3A Workaround/fix The same PID should not be assigned to more than one channel. 41.3.7 GPIO 1. Some GPIO VIH (input high voltage) are 3.6V max instead of 5V tolerant Only 11 GPIOs remain 5V tolerant (VIHmax=5V):PB01, PB02, PB03, PB10, PB19, PB20, PB21, PB22, PB23, PB27, PB28. Workaround/fix None. 41.3.8 USART 1. ISO7816 info register US_NER cannot be read The NER register always returns zero. Fix/Workaround None. 41.3.9 TWI 1. The TWI RXRDY flag in SR register is not reset when a software reset is performed. Fix/Workaround After a Software Reset, the register TWI RHR must be read. 41.3.10 SDRAMC 1. Code execution from external SDRAM does not work Code execution from SDRAM does not work. Fix/Workaround Do not run code from SDRAM. 41.3.11 Processor and Architecture 1. LDM instruction with PC in the register list and without ++ increments Rp For LDM with PC in the register list: the instruction behaves as if the ++ field is always set, ie the pointer is always updated. This happens even if the ++ field is cleared. Specifically, the increment of the pointer is done in parallel with the testing of R12. Fix/Workaround None. 2. RETE instruction does not clear SREG[L] from interrupts. The RETE instruction clears SREG[L] as expected from exceptions. Fix/Workaround When using the STCOND instruction, clear SREG[L] in the stacked value of SR before returning from interrupts with RETE. 3. Exceptions when system stack is protected by MPU RETS behaves incorrectly when MPU is enabled and MPU is configured so that system stack is not readable in unprivileged mode. Fix/Woraround Workaround 1: Make system stack readable in unprivileged mode, or Workaround 2: Return from supervisor mode using rete instead of rets. This requires : 1. Changing the mode bits from 001b to 110b before issuing the instruction. Updating the mode bits to the desired value must be done using a single mtsr instruction so it is done atomically. Even if this step is described in general as not safe in the UC technical reference guide, it is safe in this very 801 32058K AVR32-01/12
AT32UC3A specific case. 2. Execute the RETE instruction. 41.3.12 FLASHC 1. Reading from on-chip flash may fail after a flash fuse write operation (FLASHC LP, UP, WGPB, EGPB, SSB, PGPFB, EAGPF commands). After a flash fuse write operation (FLASHC LP, UP, WGPB, EGPB, SSB, PGPFB, EAGPF commands), the following flash read access may return corrupted data. This erratum does not affect write operations to regular flash memory. Fix/Workaround The flash fuse write operation (FLASHC LP, UP, WGPB, EGPB, SSB, PGPFB, EAGPF commands) must be issued from internal RAM. After the write operation, perform a dummy flash page write operation (FLASHC WP). Content and location of this page is not important and filling the write buffer with all one (FFh) will leave the current flash content unchanged. It is then safe to read and fetch code from the flash. 802 32058K AVR32-01/12
AT32UC3A 41.4 Rev. H 41.4.1 PWM 1. PWM channel interrupt enabling triggers an interrupt When enabling a PWM channel that is configured with center aligned period (CALG=1), an interrupt is signalled. Fix/Workaround When using center aligned mode, enable the channel and read the status before channel interrupt is enabled. 2. PWM counter restarts at 0x0001 The PWM counter restarts at 0x0001 and not 0x0000 as specified. Because of this the first PWM period has one more clock cycle. Fix/Workaround - The first period is 0x0000, 0x0001, ..., period - Consecutive periods are 0x0001, 0x0002, ..., period 3. PWM update period to a 0 value does not work It is impossible to update a period equal to 0 by the using the PWM update register (PWM_CUPD). Fix/Workaround Do not update the PWM_CUPD register with a value equal to 0. 41.4.2 ADC 1. Sleep Mode activation needs additional A to D conversion If the ADC sleep mode is activated when the ADC is idle the ADC will not enter sleep mode before after the next AD conversion. Fix/Workaround Activate the sleep mode in the mode register and then perform an AD conversion. 41.4.3 SPI 1. SPI Slave / PDCA transfer: no TX UNDERRUN flag There is no TX UNDERRUN flag available, therefore in SPI slave mode, there is no way to be informed of a character lost in transmission. Fix/Workaround For PDCA transfer: none. 2. SPI FDIV option does not work Selecting clock signal using FDIV = 1 does not work as specified. Fix/Workaround Do not set FDIV = 1 3. SPI disable does not work in SLAVE mode. Fix/Workaround Read the last received data, then perform a Software Reset. 803 32058K AVR32-01/12
AT32UC3A 4. SPI Bad Serial Clock Generation on 2nd chip_select when SCBR = 1, CPOL=1 and NCPHA=0 When multiple CS are in use, if one of the baudrate equals to 1 and one of the others doesn't equal to 1, and CPOL=1 and CPHA=0, then an aditional pulse will be generated on SCK. Fix/workaround When multiple CS are in use, if one of the baudrate equals 1, the other must also equal 1 if CPOL=1 and CPHA=0. 5. SPI Glitch on RXREADY flag in slave mode when enabling the SPI or during the first transfer In slave mode, the SPI can generate a false RXREADY signal during enabling of the SPI or during the first transfer. Fix/Workaround 1. Set slave mode, set required CPOL/CPHA. 2. Enable SPI. 3. Set the polarity CPOL of the line in the opposite value of the required one. 4. Set the polarity CPOL to the required one. 5. Read the RXHOLDING register. Transfers can now befin and RXREADY will now behave as expected. 6. SPI Disable does not work in Slave mode Fix/workaround Read the last received data then perform a Software reset. 41.4.4 Power Manager 1. Wrong reset causes when BOD is activated Setting the BOD enable fuse will cause the Reset Cause Register to list BOD reset as the reset source even though the part was reset by another source. Fix/Workaround Do not set the BOD enable fuse, but activate the BOD as soon as your program starts. 2. If the BOD level is higher than VDDCORE, the part is constantly under reset If the BOD level is set to a value higher than VDDCORE and enabled by fuses, the part will be in constant reset. Fix/Workaround Apply an external voltage on VDDCORE that is higher than the BOD level and is lower than VDDCORE max and disable the BOD. 41.4.5 FLASHC 1. On AT32UC3A0512 and AT32UC3A1512, corrupted read in flash after FLASHC WP, EP, EA, WUP, EUP commands may happen - After a FLASHC Write Page (WP) or Erase Page (EP) command applied to a page in a given half of the flash (first or last 256 kB of flash), reading (data read or code fetch) the other half of the flash may fail. This may lead to an exception or to other errors derived from this corrupted read access. - After a FLASHC Erase All (EA) command, reading (data read or code fetch) the flash may fail. This may lead to an exception or to other errors derived from this corrupted read access. - After a FLASHC Write User Page (WUP) or Erase User Page (EUP) command, reading 804 32058K AVR32-01/12
AT32UC3A (data read or code fetch) the second half (last 256 kB) of the flash may fail. This may lead to an exception or to other errors derived from this corrupted read access. Fix/Workaround Flashc WP, EP, EA, WUP, EUP commands: these commands must be issued from RAM or through the EBI. After these commands, read twice one flash page initialized to 00h in each half part of the flash. 41.4.6 PDCA 1. Wrong PDCA behavior when using two PDCA channels with the same PID. Workaround/fix The same PID should not be assigned to more than one channel. 41.4.7 TWI 1. The TWI RXRDY flag in SR register is not reset when a software reset is performed. Fix/Workaround After a Software Reset, the register TWI RHR must be read. 41.4.8 SDRAMC 1. Code execution from external SDRAM does not work Code execution from SDRAM does not work. Fix/Workaround Do not run code from SDRAM. 41.4.9 GPIO 1. Some GPIO VIH (input high voltage) are 3.6V max instead of 5V tolerant Only 11 GPIOs remain 5V tolerant (VIHmax=5V):PB01, PB02, PB03, PB10, PB19, PB20, PB21, PB22, PB23, PB27, PB28. Workaround/fix None. 41.4.10 USART 1. ISO7816 info register US_NER cannot be read The NER register always returns zero. Fix/Workaround None. 41.4.11 Processor and Architecture 1. LDM instruction with PC in the register list and without ++ increments Rp For LDM with PC in the register list: the instruction behaves as if the ++ field is always set, ie the pointer is always updated. This happens even if the ++ field is cleared. Specifically, the increment of the pointer is done in parallel with the testing of R12. Fix/Workaround None. 2. RETE instruction does not clear SREG[L] from interrupts. The RETE instruction clears SREG[L] as expected from exceptions. Fix/Workaround When using the STCOND instruction, clear SREG[L] in the stacked value of SR before returning from interrupts with RETE. 3. Exceptions when system stack is protected by MPU 805 32058K AVR32-01/12
AT32UC3A RETS behaves incorrectly when MPU is enabled and MPU is configured so that system stack is not readable in unprivileged mode. Fix/Woraround Workaround 1: Make system stack readable in unprivileged mode, or Workaround 2: Return from supervisor mode using rete instead of rets. This requires : 1. Changing the mode bits from 001b to 110b before issuing the instruction. Updating the mode bits to the desired value must be done using a single mtsr instruction so it is done atomically. Even if this step is described in general as not safe in the UC technical reference guide, it is safe in this very specific case. 2. Execute the RETE instruction. 41.4.12 FLASHC 1. Reading from on-chip flash may fail after a flash fuse write operation (FLASHC LP, UP, WGPB, EGPB, SSB, PGPFB, EAGPF commands). After a flash fuse write operation (FLASHC LP, UP, WGPB, EGPB, SSB, PGPFB, EAGPF commands), the following flash read access may return corrupted data. This erratum does not affect write operations to regular flash memory. Fix/Workaround The flash fuse write operation (FLASHC LP, UP, WGPB, EGPB, SSB, PGPFB, EAGPF commands) must be issued from internal RAM. After the write operation, perform a dummy flash page write operation (FLASHC WP). Content and location of this page is not important and filling the write buffer with all one (FFh) will leave the current flash content unchanged. It is then safe to read and fetch code from the flash. 806 32058K AVR32-01/12
AT32UC3A 41.5 Rev. E 41.5.1 SPI 1. SPI FDIV option does not work Selecting clock signal using FDIV = 1 does not work as specified. Fix/Workaround Do not set FDIV = 1. 2. SPI Slave / PDCA transfer: no TX UNDERRUN flag There is no TX UNDERRUN flag available, therefore in SPI slave mode, there is no way to be informed of a character lost in transmission. Fix/Workaround For PDCA transfer: none. 3. SPI Bad serial clock generation on 2nd chip select when SCBR=1, CPOL=1 and CNCPHA=0 When multiple CS are in use, if one of the baudrate equals to 1 and one of the others doesn’t equal to 1, and CPOL=1 and CPHA=0, then an additional pulse will be generated on SCK. Fix/Workaround When multiple CS are in use, if one of the baudrate equals to 1, the other must also equal 1 if CPOL=1 and CPHA=0. 4. SPI Glitch on RXREADY flag in slave mode when enabling the SPI or during the first transfer In slave mode, the SPI can generate a false RXREADY signal during enabling of the SPI or during the first transfer. Fix/Workaround 1. Set slave mode, set required CPOL/CPHA. 2. Enable SPI. 3. Set the polarity CPOL of the line in the opposite value of the required one. 4. Set the polarity CPOL to the required one. 5. Read the RXHOLDING register. Transfers can now befin and RXREADY will now behave as expected. 5. SPI CSNAAT bit 2 in register CSR0...CSR3 is not available. Fix/Workaround Do not use this bit. 6. SPI disable does not work in SLAVE mode. Fix/Workaround Read the last received data, then perform a Software Reset. 7. SPI Bad Serial Clock Generation on 2nd chip_select when SCBR = 1, CPOL=1 and NCPHA=0 When multiple CS are in use, if one of the baudrate equals to 1 and one of the others doesn't equal to 1, and CPOL=1 and CPHA=0, then an aditional pulse will be generated on SCK. 807 32058K AVR32-01/12
AT32UC3A Fix/workaround When multiple CS are in use, if one of the baudrate equals 1, the other must also equal 1 if CPOL=1 and CPHA=0. 41.5.2 PWM 1. PWM counter restarts at 0x0001 The PWM counter restarts at 0x0001 and not 0x0000 as specified. Because of this the first PWM period has one more clock cycle. Fix/Workaround - The first period is 0x0000, 0x0001, ..., period - Consecutive periods are 0x0001, 0x0002, ..., period 2. PWM channel interrupt enabling triggers an interrupt When enabling a PWM channel that is configured with center aligned period (CALG=1), an interrupt is signalled. Fix/Workaround When using center aligned mode, enable the channel and read the status before channel interrupt is enabled. 3. PWM update period to a 0 value does not work It is impossible to update a period equal to 0 by the using the PWM update register (PWM_CUPD). Fix/Workaround Do not update the PWM_CUPD register with a value equal to 0. 4. PWM channel status may be wrong if disabled before a period has elapsed Before a PWM period has elapsed, the read channel status may be wrong. The CHIDx-bit for a PWM channel in the PWM Enable Register will read '1' for one full PWM period even if the channel was disabled before the period elapsed. It will then read '0' as expected. Fix/Workaround Reading the PWM channel status of a disabled channel is only correct after a PWM period has elapsed. 41.5.3 SSC 1. SSC does not trigger RF when data is low The SSC cannot transmit or receive data when CKS = CKDIV and CKO = none, in TCMR or RCMR respectively. Fix/Workaround Set CKO to a value that is not "none" and bypass the output of the TK/RK pin with the PIO. 2. SSC Data is not sent unless clock is set as output The SSC cannot transmit or receive data when CKS = CKDIV and CKO = none, in TCMR or RCMR respectively. Fix/Workaround Set CKO to a value that is not "none" and bypass the output of the TK/RK pin with the PIO. 808 32058K AVR32-01/12
AT32UC3A 41.5.4 USB 1. USB No end of host reset signaled upon disconnection In host mode, in case of an unexpected device disconnection whereas a usb reset is being sent by the usb controller, the UHCON.RESET bit may not been cleared by the hardware at the end of the reset. Fix/Workaround A software workaround consists in testing (by polling or interrupt) the disconnection (UHINT.DDISCI == 1) while waiting for the end of reset (UHCON.RESET == 0) to avoid being stuck. 2. USBFSM and UHADDR1/2/3 registers are not available. Do not use USBFSM register. Fix/Workaround Do not use USBFSM register and use HCON[6:0] field instead for all the pipes. 41.5.5 Processor and Architecture 1. Incorrect Processor ID The processor ID reads 0x01 and not 0x02 as it should. Fix/Workaround None. 2. Bus error should be masked in Debug mode If a bus error occurs during debug mode, the processor will not respond to debug com- mands through the DINST register. Fix/Workaround A reset of the device will make the CPU respond to debug commands again. 3. Read Modify Write (RMW) instructions on data outside the internal RAM does not work. Read Modify Write (RMW) instructions on data outside the internal RAM does not work. Fix/Workaround Do not perform RMW instructions on data outside the internal RAM. 4. CRC calculation of a locked device will calculate CRC for 512 kB of flash memory, even though the part has less flash. Fix/Workaround The flash address space is wrapping, so it is possible to use the CRC value by calculating CRC of the flash content concatenated with itself N times. Where N is 512 kB/flash size. 5. Need two NOPs instruction after instructions masking interrupts The instructions following in the pipeline the instruction masking the interrupt through SR may behave abnormally. Fix/Workaround Place two NOPs instructions after each SSRF or MTSR instruction setting IxM or GM in SR. 809 32058K AVR32-01/12
AT32UC3A 6. CPU Cycle Counter does not reset the COUNT system register on COMPARE match. The device revision E does not reset the COUNT system register on COMPARE match. In this revision, the COUNT register is clocked by the CPU clock, so when the CPU clock stops, so does incrementing of COUNT. Fix/Workaround None. 7. Memory Protection Unit (MPU) is non functional. Fix/Workaround Do not use the MPU. 8. The following alternate GPIO function C are not available in revE MACB-WOL on GPIO9 (PA09), MACB-WOL on GPIO18 (PA18), USB-USB_ID on GPIO21 (PA21), USB-USB_VBOF on GPIO22 (PA22), and all function B and C on GPIO70 to GPIO101 (PX00 to PX39). Fix/Workaround Do not use these alternate B and C functions on the listed GPIO pins. 9. Clock connection table on Rev E Here is the table of Rev E Figure 41-1. Timer/Counter clock connections on RevE Source Name Connection Internal TIMER_CLOCK1 32 KHz Oscillator TIMER_CLOCK2 PBA Clock / 4 TIMER_CLOCK3 PBA Clock / 8 TIMER_CLOCK4 PBA Clock / 16 TIMER_CLOCK5 PBA Clock / 32 External XC0 XC1 XC2 10. Local Bus fast GPIO not available in RevE. Fix/Workaround Do not use on this silicon revision. 11. Spurious interrupt may corrupt core SR mode to exception If the rules listed in the chapter `Masking interrupt requests in peripheral modules' of the AVR32UC Technical Reference Manual are not followed, a spurious interrupt may occur. An interrupt context will be pushed onto the stack while the core SR mode will indicate an exception. A RETE instruction would then corrupt the stack.. Fix/Workaround Follow the rules of the AVR32UC Technical Reference Manual. To increase software robustness, if an exception mode is detected at the beginning of an interrupt handler, change the stack interrupt context to an exception context and issue a RETE instruction. 810 32058K AVR32-01/12
AT32UC3A 12. CPU cannot operate on a divided slow clock (internal RC oscillator) Fix/Workaround Do not run the CPU on a divided slow clock. 13. LDM instruction with PC in the register list and without ++ increments Rp For LDM with PC in the register list: the instruction behaves as if the ++ field is always set, ie the pointer is always updated. This happens even if the ++ field is cleared. Specifically, the increment of the pointer is done in parallel with the testing of R12. Fix/Workaround None. 14. RETE instruction does not clear SREG[L] from interrupts. The RETE instruction clears SREG[L] as expected from exceptions. Fix/Workaround When using the STCOND instruction, clear SREG[L] in the stacked value of SR before returning from interrupts with RETE. 15. Exceptions when system stack is protected by MPU RETS behaves incorrectly when MPU is enabled and MPU is configured so that system stack is not readable in unprivileged mode. Fix/Woraround Workaround 1: Make system stack readable in unprivileged mode, or Workaround 2: Return from supervisor mode using rete instead of rets. This requires : 1. Changing the mode bits from 001b to 110b before issuing the instruction. Updating the mode bits to the desired value must be done using a single mtsr instruction so it is done atomically. Even if this step is described in general as not safe in the UC technical reference guide, it is safe in this very specific case. 2. Execute the RETE instruction. 41.5.6 SDRAMC 1. Code execution from external SDRAM does not work Code execution from SDRAM does not work. Fix/Workaround Do not run code from SDRAM. 2. SDRAM SDCKE rise at the same time as SDCK while exiting self-refresh mode SDCKE rise at the same time as SDCK while exiting self-refresh mode. Fix/Workaround None. 41.5.7 USART 1. USART Manchester Encoder Not Working Manchester encoding/decoding is not working. Fix/Workaround Do not use manchester encoding. 811 32058K AVR32-01/12
AT32UC3A 2. USART RXBREAK problem when no timeguard In asynchronous mode the RXBREAK flag is not correctly handled when the timeguard is 0 and the break character is located just after the stop bit. Fix/Workaround If the NBSTOP is 1, timeguard should be different from 0. 3. USART Handshaking: 2 characters sent / CTS rises when TX If CTS switches from 0 to 1 during the TX of a character, if the Holding register is not empty, the TXHOLDING is also transmitted. Fix/Workaround None. 4. USART PDC and TIMEGUARD not supported in MANCHESTER Manchester encoding/decoding is not working. Fix/Workaround Do not use manchester encoding. 5. USART SPI mode is non functional on this revision. Fix/Workaround Do not use the USART SPI mode. 6. DCD is active High instead of Low. In modem mode the DCD signal is assumed to be active high by the USART, butshould have been active low. Fix/Workaround Add an external inverter to the DCD line. 7. ISO7816 info register US_NER cannot be read The NER register always returns zero. Fix/Workaround None. 41.5.8 Power Manager 1. Voltage regulator input and output is connected to VDDIO and VDDCORE inside the device The voltage regulator input and output is connected to VDDIO and VDDCORE respectively inside the device. Fix/Workaround Do not supply VDDCORE externally, as this supply will work in paralell with the regulator. 2. Wrong reset causes when BOD is activated Setting the BOD enable fuse will cause the Reset Cause Register to list BOD reset as the reset source even though the part was reset by another source. Fix/Workaround Do not set the BOD enable fuse, but activate the BOD as soon as your program starts. 3. PLL0/1 Lock control does not work Lock Control does not work for PLL0 and PLL1. 812 32058K AVR32-01/12
AT32UC3A Fix/Workaround In PLL0/1 Control register, the bit 7 should be set in order to prevent unexpected behaviour. 4. Peripheral Bus A maximum frequency is 33MHz instead of 66MHz. Fix/Workaround Do not set PBA frequency higher than 33 MHz. 5. PCx pins go low in stop mode In sleep mode stop all PCx pins will be controlled by GPIO module instead of oscillators. This can cause drive contention on the XINx in worst case. Fix/Workaround Before entering stop mode set all PCx pins to input and GPIO controlled. 6. On some rare parts, the maximum HSB and CPU speed is 50MHz instead of 66MHz. Fix/Workaround Do not set the HSB/CPU speed higher than 50MHz when the firmware generate exceptions. 7. If the BOD level is higher than VDDCORE, the part is constantly under reset If the BOD level is set to a value higher than VDDCORE and enabled by fuses, the part will be in constant reset. Fix/Workaround Apply an external voltage on VDDCORE that is higher than the BOD level and is lower than VDDCORE max and disable the BOD. 8. System Timer mask (Bit 16) of the PM CPUMASK register is not available. Fix/Workaround Do not use this bit. 41.5.9 HMatrix 1. HMatrix fixed priority arbitration does not work Fixed priority arbitration does not work. Fix/Workaround Use Round-Robin arbitration instead. 41.5.10 ADC 1. ADC possible miss on DRDY when disabling a channel The ADC does not work properly when more than one channel is enabled. Fix/Workaround Do not use the ADC with more than one channel enabled at a time. 2. ADC OVRE flag sometimes not reset on Status Register read The OVRE flag does not clear properly if read simultaneously to an end of conversion. Fix/Workaround None. 3. Sleep Mode activation needs additional A to D conversion 813 32058K AVR32-01/12
AT32UC3A If the ADC sleep mode is activated when the ADC is idle the ADC will not enter sleep mode before after the next AD conversion. Fix/Workaround Activate the sleep mode in the mode register and then perform an AD conversion. 41.5.11 ABDAC 1. Audio Bitstream DAC is not functional. Fix/Workaround Do not use the ABDAC on revE. 41.5.12 FLASHC 1. The address of Flash General Purpose Fuse Register Low (FGPFRLO) is 0xFFFE140C on revE instead of 0xFFFE1410. Fix/Workaround None. 2. The command Quick Page Read User Page(QPRUP) is not functional. Fix/Workaround None. 3. PAGEN Semantic Field for Program GP Fuse Byte is WriteData[7:0], ByteAddress[1:0] on revision E instead of WriteData[7:0], ByteAddress[2:0]. Fix/Workaround None. 4. On AT32UC3A0512 and AT32UC3A1512, corrupted read in flash after FLASHC WP, EP, EA, WUP, EUP commands may happen - After a FLASHC Write Page (WP) or Erase Page (EP) command applied to a page in a given half of the flash (first or last 256 kB of flash), reading (data read or code fetch) the other half of the flash may fail. This may lead to an exception or to other errors derived from this corrupted read access. - After a FLASHC Erase All (EA) command, reading (data read or code fetch) the flash may fail. This may lead to an exception or to other errors derived from this corrupted read access. - After a FLASHC Write User Page (WUP) or Erase User Page (EUP) command, reading (data read or code fetch) the second half (last 256 kB) of the flash may fail. This may lead to an exception or to other errors derived from this corrupted read access. Fix/Workaround Flashc WP, EP, EA, WUP, EUP commands: these commands must be issued from RAM or through the EBI. After these commands, read twice one flash page initialized to 00h in each half part of the flash. 41.5.13 RTC 1. Writes to control (CTRL), top (TOP) and value (VAL) in the RTC are discarded if the RTC peripheral bus clock (PBA) is divided by a factor of four or more relative to the HSB clock. Fix/Workaround Do not write to the RTC registers using the peripheral bus clock (PBA) divided by a factor of four or more relative to the HSB clock. 814 32058K AVR32-01/12
AT32UC3A 2. The RTC CLKEN bit (bit number 16) of CTRL register is not available. Fix/Workaround Do not use the CLKEN bit of the RTC on Rev E. 41.5.14 OCD 1. Stalled memory access instruction writeback fails if followed by a HW breakpoint. Consider the following assembly code sequence: A B If a hardware breakpoint is placed on instruction B, and instruction A is a memory access instruction, register file updates from instruction A can be discarded. Fix/Workaround Do not place hardware breakpoints, use software breakpoints instead. Alternatively, place a hardware breakpoint on the instruction before the memory access instruction and then single step over the memory access instruction. 41.5.15 PDCA 1. Wrong PDCA behavior when using two PDCA channels with the same PID. Workaround/fix The same PID should not be assigned to more than one channel. 41.5.16 TWI 1. The TWI RXRDY flag in SR register is not reset when a software reset is performed. Fix/Workaround After a Software Reset, the register TWI RHR must be read. 41.5.17 FLASHC 1. Reading from on-chip flash may fail after a flash fuse write operation (FLASHC LP, UP, WGPB, EGPB, SSB, PGPFB, EAGPF commands). After a flash fuse write operation (FLASHC LP, UP, WGPB, EGPB, SSB, PGPFB, EAGPF commands), the following flash read access may return corrupted data. This erratum does not affect write operations to regular flash memory. Fix/Workaround The flash fuse write operation (FLASHC LP, UP, WGPB, EGPB, SSB, PGPFB, EAGPF commands) must be issued from internal RAM. After the write operation, perform a dummy flash page write operation (FLASHC WP). Content and location of this page is not important and filling the write buffer with all one (FFh) will leave the current flash content unchanged. It is then safe to read and fetch code from the flash. 815 32058K AVR32-01/12
AT32UC3A 42. Datasheet Revision History Please note that the referring page numbers in this section are referred to this document. The referring revision in this section are referring to the document revision. 42.1 Rev. K – 01/12 1. Update Errata Section 2. Update Electrical characteristic Section 42.2 Rev. I – 11/09 1. Remove ordering code for automotive engineering samples 2. Replace old automotive odering codes AT32UC3A0512-ALTR (revision I) by AT32UC3A0512-ALTRA (revision K). Replace old automotive odering codes AT32UC3A0512-ALTT (revision I) by AT32UC3A0512-ALTTA (revision K). 42.3 Rev. H – 03/09 1. Update ”Errata” on page 779. 2. Update eletrical characteristic in ”DC Characteristics” on page 2. 3. Add BGA144 package information. 42.4 Rev. G – 01/09 1. Update ”Errata” on page 779. 2. Update GPIO eletrical characteristic in ”DC Characteristics” on page 2. 42.5 Rev. F – 08/08 1. Add revision J to ”Errata” on page 779. 2. Update DMIPS number in ”Features” on page 1. 816 32058K AVR32-01/12
AT32UC3A 42.6 Rev. E – 04/08 1. Open Drain Mode removed from ”General-Purpose Input/Output Controller (GPIO)” on page 151. 42.7 Rev. D – 04/08 1. Updated ”Signal Description List” on page 8. Removed RXDN and TXDN from USART section. 2. Updated ”Errata” on page 779. Rev G replaced by rev H. 42.8 Rev. C – 10/07 1. Updated ”Signal Description List” on page 8. Removed RXDN and TXDN from USART section. 2. Updated ”Errata” on page 779. Rev G replaced by rev H. 42.9 Rev. B – 10/07 1. Updated ”Features” on page 1. 2. Update ”Blockdiagram” on page 4 with local bus. 3. Updated ”Peripherals” on page 34 with local bus. 4. Add SPI feature in ”Universial Synchronous/Asynchronous Receiver/Transmitter (USART)” on page 315. 5. Updated ”USB On-The-Go Interface (USBB)” on page 517. 6. Updated ”JTAG and Boundary Scan” on page 750 with programming procedure . 7. Add description for silicon Rev G. 42.10 Rev. A – 03/07 1. Initial revision. 817 32058K AVR32-01/12
AT32UC3A Table of Contents 1 Description ..............................................................................................3 2 Configuration Summary . ........................................................................4 3 Abbreviations . .........................................................................................4 4 Blockdiagram . .........................................................................................5 4.1Processor and architecture ........................................................................................6 5 Signals Description . ................................................................................8 6 Power Considerations . .........................................................................13 6.1Power Supplies ........................................................................................................13 6.2Voltage Regulator ....................................................................................................14 6.3Analog-to-Digital Converter (A.D.C) reference. .......................................................15 7 Package and Pinout . .............................................................................16 8 I/O Line Considerations . .......................................................................20 8.1JTAG pins .................................................................................................................20 8.2RESET_N pin ..........................................................................................................20 8.3TWI pins ..................................................................................................................20 8.4GPIO pins ................................................................................................................20 9 Processor and Architecture . ................................................................21 9.1AVR32 Architecture .................................................................................................21 9.2The AVR32UC CPU ................................................................................................21 9.3Programming Model ................................................................................................25 9.4Exceptions and Interrupts ........................................................................................29 10 Memories ...............................................................................................33 10.1Embedded Memories ............................................................................................33 10.2Physical Memory Map ...........................................................................................33 10.3Bus Matrix Connections .........................................................................................34 11 Fuses Settings . ......................................................................................36 11.1Flash General Purpose Fuse Register (FGPFRLO) ..............................................36 11.2Default Fuse Value ................................................................................................37 12 Peripherals . ............................................................................................38 12.1Peripheral address map ........................................................................................38 12.2CPU Local Bus Mapping .......................................................................................39 i 32058K AVR32-01/12
AT32UC3A 12.3Interrupt Request Signal Map ................................................................................41 12.4Clock Connections .................................................................................................43 12.5Nexus OCD AUX port connections ........................................................................44 12.6PDC handshake signals ........................................................................................44 12.7Peripheral Multiplexing on I/O lines .......................................................................45 12.8Oscillator Pinout .....................................................................................................48 12.9USART Configuration ............................................................................................48 12.10GPIO ....................................................................................................................49 12.11Peripheral overview .............................................................................................49 13 Power Manager (PM) . ............................................................................53 13.1Features .................................................................................................................53 13.2Description .............................................................................................................53 13.3Block Diagram .......................................................................................................54 13.4Product Dependencies ..........................................................................................55 13.5Functional Description ...........................................................................................55 13.6User Interface ........................................................................................................66 14 Real Time Counter (RTC) ......................................................................86 14.1Features .................................................................................................................86 14.2Description .............................................................................................................86 14.3Block Diagram .......................................................................................................87 14.4Product Dependencies ..........................................................................................87 14.5Functional Description ...........................................................................................87 14.6User Interface ........................................................................................................89 15 Watchdog Timer (WDT) . .......................................................................94 15.1Features .................................................................................................................94 15.2Description .............................................................................................................94 15.3Block Diagram .......................................................................................................94 15.4Product Dependencies ..........................................................................................94 15.5Functional Description ...........................................................................................95 15.6User Interface ........................................................................................................96 16 Interrupt Controller (INTC) . ..................................................................99 16.1Description .............................................................................................................99 16.2Block Diagram .......................................................................................................99 16.3Operation ...............................................................................................................99 16.4User Interface ......................................................................................................101 ii 32058K AVR32-01/12
AT32UC3A 17 External Interrupts Controller (EIC) . ..................................................105 17.1Features ..............................................................................................................105 17.2Description ...........................................................................................................105 17.3Block Diagram .....................................................................................................106 17.4Product Dependencies ........................................................................................106 17.5Functional Description .........................................................................................107 17.6User Interface ......................................................................................................109 18 Flash Controller (FLASHC) . ................................................................115 18.1Features ..............................................................................................................115 18.2Description ...........................................................................................................115 18.3Product dependencies .........................................................................................115 18.4Functional description ..........................................................................................116 18.5Flash commands .................................................................................................118 18.6General-purpose fuse bits ...................................................................................120 18.7Security bit ...........................................................................................................122 18.8User interface ......................................................................................................123 19 HSB Bus Matrix (HMATRIX) . ..............................................................132 19.1Features ..............................................................................................................132 19.2Description ...........................................................................................................132 19.3Memory Mapping .................................................................................................132 19.4Special Bus Granting Mechanism .......................................................................132 19.5Arbitration ............................................................................................................133 19.6Slave and Master assignation .............................................................................135 19.7User Interface ......................................................................................................136 20 External Bus Interface (EBI) . ..............................................................145 20.1Features ..............................................................................................................145 20.2Description ...........................................................................................................145 20.3Block Diagram .....................................................................................................146 20.4I/O Lines Description ...........................................................................................147 20.5Application Example ............................................................................................148 20.6Product Dependencies ........................................................................................151 20.7Functional Description .........................................................................................151 21 Peripheral DMA Controller (PDCA) . ...................................................153 21.1Features ..............................................................................................................153 21.2Overview ..............................................................................................................153 iii 32058K AVR32-01/12
AT32UC3A 12.3Interrupt Request Signal Map ................................................................................41 12.4Clock Connections .................................................................................................43 12.5Nexus OCD AUX port connections ........................................................................44 12.6PDC handshake signals ........................................................................................44 12.7Peripheral Multiplexing on I/O lines .......................................................................45 12.8Oscillator Pinout ....................................................................................................48 12.9USART Configuration ............................................................................................48 12.10GPIO ....................................................................................................................49 12.11Peripheral overview .............................................................................................49 13 Power Manager (PM) ..............................................................................53 13.1Features ................................................................................................................53 13.2Description .............................................................................................................53 13.3Block Diagram .......................................................................................................54 13.4Product Dependencies ..........................................................................................55 13.5Functional Description ...........................................................................................55 13.6User Interface ........................................................................................................66 14 Real Time Counter (RTC) .......................................................................86 14.1Features ................................................................................................................86 14.2Description .............................................................................................................86 14.3Block Diagram .......................................................................................................87 14.4Product Dependencies ..........................................................................................87 14.5Functional Description ...........................................................................................87 14.6User Interface ........................................................................................................89 15 Watchdog Timer (WDT) .........................................................................94 15.1Features ................................................................................................................94 15.2Description .............................................................................................................94 15.3Block Diagram .......................................................................................................94 15.4Product Dependencies ..........................................................................................94 15.5Functional Description ...........................................................................................95 15.6User Interface ........................................................................................................96 16 Interrupt Controller (INTC) ....................................................................99 16.1Description .............................................................................................................99 16.2Block Diagram .......................................................................................................99 16.3Operation ...............................................................................................................99 16.4User Interface ......................................................................................................101 ii 32058–AVR32–11/09
AT32UC3A 25.1Features ..............................................................................................................259 25.2Overview ..............................................................................................................259 25.3Block Diagram .....................................................................................................260 25.4Application Block Diagram ...................................................................................260 25.5I/O Lines Description ...........................................................................................261 25.6Product Dependencies ........................................................................................261 25.7Functional Description .........................................................................................261 25.8SSC Application Examples ..................................................................................273 25.9User Interface ......................................................................................................275 26 Universal Synchronous/Asynchronous Receiver/Transmitter (USART) 299 26.1Features ..............................................................................................................299 26.2Overview ..............................................................................................................299 26.3Block Diagram .....................................................................................................300 26.4Application Block Diagram ...................................................................................301 26.5I/O Lines Description ..........................................................................................302 26.6Product Dependencies ........................................................................................303 26.7Functional Description .........................................................................................304 26.8Universal Synchronous/Asynchronous Receiver/Transmitter (USART) User Interface 339 27 Static Memory Controller (SMC) . .......................................................366 27.1Features ..............................................................................................................366 27.2Overview ..............................................................................................................366 27.3Block Diagram .....................................................................................................367 27.4I/O Lines Description ...........................................................................................367 27.5Product Dependencies ........................................................................................368 27.6Functionnal Description .......................................................................................368 27.7User Interface ......................................................................................................403 28 SDRAM Controller (SDRAMC) . ...........................................................410 28.1Features ..............................................................................................................410 28.2Description ...........................................................................................................410 28.3Block Diagram .....................................................................................................411 28.4I/O Lines Description ...........................................................................................411 28.5Application Example ............................................................................................412 28.6Product Dependencies ........................................................................................415 28.7Functional Description .........................................................................................417 28.8SDRAM Controller User Interface .......................................................................424 v 32058K AVR32-01/12
AT32UC3A 29 Ethernet MAC (MACB) . .......................................................................437 29.1Features ..............................................................................................................437 29.2Description ...........................................................................................................437 29.3Block Diagram .....................................................................................................438 29.4Product Dependencies ........................................................................................438 29.5Functional Description .........................................................................................439 29.6Programming Interface ........................................................................................451 29.7Ethernet MAC (MACB) User Interface .................................................................454 30 USB On-The-Go Interface (USBB) . ....................................................497 30.1Features ..............................................................................................................497 30.2Description ...........................................................................................................497 30.3Block Diagram .....................................................................................................499 30.4Application Block Diagram ...................................................................................500 30.5I/O Lines Description ...........................................................................................501 30.6Product Dependencies ........................................................................................502 30.7Functional Description .........................................................................................503 30.8USB User Interface ..............................................................................................530 31 Timer/Counter (TC) . ............................................................................639 31.1Features ..............................................................................................................639 31.2Description ...........................................................................................................639 31.3Block Diagram .....................................................................................................640 31.4Pin Name List ......................................................................................................641 31.5Product Dependencies ........................................................................................641 31.6Functional Description .........................................................................................641 31.7Timer Counter (TC) User Interface ......................................................................654 32 Pulse Width Modulation Controller (PWM) . ......................................673 32.1Features ..............................................................................................................673 32.2Description ...........................................................................................................673 32.3Block Diagram .....................................................................................................674 32.4I/O Lines Description ...........................................................................................674 32.5Product Dependencies ........................................................................................675 32.6Functional Description .........................................................................................676 32.7Pulse Width Modulation (PWM) Controller User Interface ..................................684 33 Analog-to-Digital Converter (ADC) . ...................................................699 33.1Features ..............................................................................................................699 vi 32058K AVR32-01/12
AT32UC3A 33.2Overview ..............................................................................................................699 33.3Block Diagram .....................................................................................................700 33.4I/O Lines Description ...........................................................................................700 33.5Product Dependencies ........................................................................................700 33.6Functional Description .........................................................................................702 33.7User Interface ......................................................................................................707 34 Audio Bitstream DAC (ABDAC) . ........................................................721 34.1Features ..............................................................................................................721 34.2Description ...........................................................................................................721 34.3Block Diagram .....................................................................................................722 34.4Pin Name List ......................................................................................................722 34.5Product Dependencies ........................................................................................722 34.6Functional Description .........................................................................................723 34.7Audio Bitstream DAC User Interface ...................................................................725 34.8Frequency Response ..........................................................................................733 35 On-Chip Debug . ...................................................................................734 35.1Features ..............................................................................................................734 35.2Overview ..............................................................................................................734 35.3Block diagram ......................................................................................................735 35.4Functional description ..........................................................................................735 36 JTAG and Boundary Scan . .................................................................741 36.1Features ..............................................................................................................741 36.2Overview ..............................................................................................................741 36.3Block diagram ......................................................................................................742 36.4I/O Lines Description ...........................................................................................743 36.5Product Dependencies ........................................................................................743 36.6Functional description ..........................................................................................743 36.7JTAG Instruction Summary .................................................................................748 36.8Public JTAG instructions .....................................................................................749 36.9Private JTAG Instructions ....................................................................................750 36.10JTAG Data Registers .........................................................................................760 36.11SAB address map ..............................................................................................761 37 Boot Sequence . ...................................................................................762 37.1Starting of clocks ..................................................................................................762 37.2Fetching of initial instructions ..............................................................................762 vii 32058K AVR32-01/12
AT32UC3A 38 Electrical Characteristics . ..................................................................763 38.1Absolute Maximum Ratings* ...............................................................................763 38.2DC Characteristics ...............................................................................................764 38.3Regulator characteristics .....................................................................................765 38.4Analog characteristics .........................................................................................765 38.5Power Consumption ............................................................................................767 38.6Clock Characteristics ...........................................................................................769 38.7Crystal Oscillator Characteristis ..........................................................................770 38.8ADC Characteristics ............................................................................................772 38.9EBI Timings .........................................................................................................774 38.10JTAG Timings ....................................................................................................780 38.11SPI Characteristics ............................................................................................781 38.12MACB Characteristics .......................................................................................783 38.13Flash Characteristics .........................................................................................785 39 Mechanical Characteristics . ...............................................................787 39.1Thermal Considerations ......................................................................................787 39.2Package Drawings ...............................................................................................788 39.3Soldering Profile ..................................................................................................791 40 Ordering Information . .........................................................................792 40.1Automotive Quality Grade ...................................................................................792 41 Errata . ...................................................................................................793 41.1Rev. K ...................................................................................................................793 41.2Rev. J ...................................................................................................................796 41.3Rev. I ...................................................................................................................799 41.4Rev. H ...................................................................................................................803 41.5Rev. E ...................................................................................................................807 42 Datasheet Revision History . ...............................................................816 42.1Rev. K – 01/12 .....................................................................................................816 42.2Rev. G – 01/09 ....................................................................................................816 42.3Rev. F – 08/08 .....................................................................................................816 42.4Rev. E – 04/08 .....................................................................................................816 42.5Rev. D – 04/08 .....................................................................................................816 42.6Rev. C – 10/07 .....................................................................................................817 42.7Rev. B – 10/07 .....................................................................................................817 42.8Rev. A – 03/07 .....................................................................................................817 viii 32058K AVR32-01/12
Atmel Corporation Atmel Asia Limited Atmel Munich GmbH Atmel Japan 2325 Orchard Parkway Unit 1-5 & 16, 19/F Business Campus 16F, Shin Osaki Kangyo Bldg. San Jose, CA 95131 BEA Tower, Millennium City 5 Parkring 4 1-6-4 Osaka Shinagawa-ku USA 418 Kwun Tong Road D-85748 Garching b. Munich Tokyo 104-0032 Tel: (+1)(408) 441-0311 Kwun Tong, Kowloon GERMANY JAPAN Fax: (+1)(408) 487-2600 HONG KONG Tel: (+49) 89-31970-0 Tel: (+81) 3-6417-0300 www.atmel.com Tel: (+852) 2245-6100 Fax: (+49) 89-3194621 Fax: (+81) 3-6417-0370 Fax: (+852) 2722-1369 © 2012 Atmel Corporation. All rights reserved. Atmel®, Atmel logo and combinations thereof, AVR® and others are registered trademarks or trademarks of Atmel Corporation or its subsidiaries. Other terms and product names may be trademarks of others. Disclaimer: The information in this document is provided in connection with Atmel products. No license, express or implied, by estoppel or otherwise,to any intellectualproperty right is granted by this document or in connection with the sale of Atmel products. EXCEPT AS SET FORTH IN THE ATMEL TERMS AND CONDITIONS OF SALES LOCATED ON THE ATMEL WEBSITE, ATMEL ASSUMES NO LIABILITY WHATSOEVER AND DISCLAIMS ANY EXPRESS, IMPLIED OR STATUTORY WARRANTY RELATING TO ITS PRODUCTS INCLUDING, BUT NOT LIMITED TO, THE IMPLIED WARRANTY OF MERCHANTABILITY, FITNESS FOR A PARTICULAR PURPOSE, OR NON-INFRINGEMENT. IN NO EVENT SHALL ATMEL BE LIABLE FOR ANY DIRECT, INDIRECT, CONSEQUENTIAL, PUNITIVE, SPECIAL OR INCIDENTAL DAMAGES (INCLUDING, WITHOUT LIMITATION, DAMAGES FOR LOSS AND PROF- ITS, BUSINESS INTERRUPTION, OR LOSS OF INFORMATION) ARISING OUT OF THE USE OR INABILITY TO USE THIS DOCUMENT, EVEN IF ATMEL HAS BEEN ADVISED OF THE POSSIBILITY OF SUCH DAMAGES. Atmel makes no representationsor warranties with respect to the accuracy or com- pleteness of the contents of this document and reserves the right to make changes to specifications and product descriptions at any time without notice. Atmel does not make any commitment to update the information contained herein. Unless specifically provided otherwise, Atmel products are not suit- able for, and shall not be used in, automotive applications. Atmel products are not intended, authorized, or warranted for use as components in applica- tions intended to support or sustainlife. 32058K -AVR32-01/12
Mouser Electronics Authorized Distributor Click to View Pricing, Inventory, Delivery & Lifecycle Information: M icrochip: AT32UC3A1256-AUT AT32UC3A1512-AUT AT32UC3A0512-ALUT AT32UC3A0256-ALUT AT32UC3A1128-AUT AT32UC3A0128-ALUT AT32UC3A0128-ALUR AT32UC3A0256-ALUR AT32UC3A0256-DDW AT32UC3A0512-ALUR AT32UC3A0512-DDW AT32UC3A1128-AUR AT32UC3A1256-AUR AT32UC3A1512-AUR AT32UC3A0128-CTUR AT32UC3A0128-CTUT AT32UC3A0256-CTUR AT32UC3A0256-CTUT AT32UC3A0512-CTUR AT32UC3A0512- CTUT AT32UC3A0512-ALTRA AT32UC3A0512-ALTTA AT32UC3A0128AU-ALUT AT32UC3A0256AU-ALUT AT32UC3A0512AU-ALUT AT32UC3A1256AU-AUR AT32UC3A1512AU-AUR AT32UC3A0512AU-ALTRA