ICGOO在线商城 > 33000
- 型号: 33000
- 制造商: Parallax
- 库位|库存: xxxx|xxxx
- 要求:
| 数量阶梯 | 香港交货 | 国内含税 |
| +xxxx | $xxxx | ¥xxxx |
查看当月历史价格
查看今年历史价格
33000产品简介:
ICGOO电子元器件商城为您提供33000由Parallax设计生产,在icgoo商城现货销售,并且可以通过原厂、代理商等渠道进行代购。 提供33000价格参考以及Parallax33000封装/规格参数等产品信息。 你可以下载33000参考资料、Datasheet数据手册功能说明书, 资料中有33000详细功能的应用电路图电压和使用方法及教程。
| 参数 | 数值 |
| 产品目录 | |
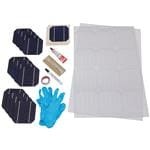
| 描述 | 34 WATT SOLAR PANEL KIT |
| 产品分类 | |
| 品牌 | Parallax Inc |
| 数据手册 | |
| 产品图片 |
|
| 产品型号 | 33000 |
| rohs | 无铅 / 符合限制有害物质指令(RoHS)规范要求 |
| 产品系列 | * |
| 功率(W)-最大值 | 30W |
| 封装/外壳 | - |
| 工作温度 | * |
| 标准包装 | 1 |
| 电压-开路 | - |
| 电压@Pmpp | 6V |
| 电流@Pmpp | 4.9A |
| 相关产品 | /product-detail/zh/750-00042/750-00042-ND/3083208/product-detail/zh/750-00043/750-00043-ND/3083210/product-detail/zh/750-00044/750-00044-ND/3083211 |
| 短路电流(Isc) | * |
| 类型 | * |


- 商务部:美国ITC正式对集成电路等产品启动337调查
- 曝三星4nm工艺存在良率问题 高通将骁龙8 Gen1或转产台积电
- 太阳诱电将投资9.5亿元在常州建新厂生产MLCC 预计2023年完工
- 英特尔发布欧洲新工厂建设计划 深化IDM 2.0 战略
- 台积电先进制程称霸业界 有大客户加持明年业绩稳了
- 达到5530亿美元!SIA预计今年全球半导体销售额将创下新高
- 英特尔拟将自动驾驶子公司Mobileye上市 估值或超500亿美元
- 三星加码芯片和SET,合并消费电子和移动部门,撤换高东真等 CEO
- 三星电子宣布重大人事变动 还合并消费电子和移动部门
- 海关总署:前11个月进口集成电路产品价值2.52万亿元 增长14.8%


PDF Datasheet 数据手册内容提取
Web Site: www.parallax.com Office: (916) 624-8333 Forums: forums.parallax.com Fax: (916) 624-8003 Sales: sales@parallax.com Sales: (888) 512-1024 Technical: support@parallax.com Tech Support: (888) 997-8267 34 Watt Solar Panel Kit (#33000) Parallax’s 34 Watt Solar Panel Kit is a do-it-yourself system that can produce up to a maximum of 34 watts of electrical energy. This solar panel is designed to be not only a fun and interesting project to build, but when fully assembled, is rugged enough for permanent power production (including rooftop installations), and can be used in many portable applications as well. Features Key Specifications (12) 125 mm (~5”), 2.85 watt, ~18.5% Maximum Power output: 6.3 VDC @ 5.4 efficiency monocrystalline solar cells amps (approx. 34 watts max.) UV stabilized polycarbonate base and cover Dimensions: 23.8 x 15.8 x .375 in (60.45 x panels provide outdoor durability 40.12 x 0.95 cm) assembled Custom-milled base panel simplifies assembly and protects the solar cells Application Ideas Daisy-chain multiple units for higher voltage/current/power Portable power for remote monitoring & Online video demonstrates solar cell control systems handling and soldering techniques Fixed power station for energy production Budget 8 to 12 hours for assembly Mobile robotics and solar charging stations Kit Overview Q: Is this just another solar demonstration kit? A: No, not really. There are many solar power “kits” that demonstrate how electrical energy is generated by direct sunlight. These kits typically produce small amounts of voltage and/or current, and are used to run small motors, indicator lamps or LEDs. Some of these kits even include meters which allow you to observe how voltage and current change under various light and/or load conditions. This product is different. Not only is it a true “kit”—you assemble it from a pile of raw parts—but when you’re done, it produces a substantial amount of electrical power. In fact, the energy produced per square foot is comparable to many commercially available solar panels. After you permanently seal the panel, it can withstand the outside environment as well. Q: Is this 34 Watt Solar Panel Kit a toy? A: No, you will be making a real solar panel that can be sealed and used outside in a permanent installation (such as on a rooftop), or in mobile applications like camping, robotics, battery charging, etc. Assembling the kit is a process that demonstrates how the cells are properly handled and interconnected to produce usable electric power. Going through the assembly process will yield multiple benefits. You will… gain an appreciation for how modern-day solar panel systems are assembled. learn-by-doing how to properly handle and solder the delicate cells and their wiring interconnections. know that when you’re done, the solar panel can produce real, useable power. have a great sense of accomplishment. gain first-hand knowledge of how solar electric panels work. have a source of electrical energy for possibly years* to come. permanently seal the panel if you like, and use it outside year-round. save $ by doing the assembly work yourself. have the option to add additional panels at anytime, thereby producing more power. * Parallax cannot guarantee that the Sun will continue to shine during the useful life of this product. Copyright © Parallax Inc. 30 Watt Solar Panel Kit (#33000) v1.0 9/13/2012 Page 1 of 20
Assembly Process Caution! Warning! Danger! Solar cells are FRAGILE. They are only about eight-thousandths of an inch (0.22 mm) thick. Treat them like ultra-ultra-ultra-thin potato chips (but don’t eat them!) They WILL BREAK EASILY if not handled with EXTREME care. Do not open the package of cells until you are ready for Section B. WATCH THE VIDEOS demonstrating safe cell handling and soldering techniques before beginning. Search “33000” at www.parallax.com, and then find the video link on the 33000 product page. (You may also download the latest version of this documentation as a full-color PDF from the same page.) Now that the Warning is out of the way, if you do happen to break a cell, there is an extra one included in this kit (the 13th cell). And if you happen to break more than one, repair is relatively easy provided the cell is not shattered into many little pieces. More on this later (only if you need it!). If all else fails, you can order individual replacement cells from Parallax (Part #750-00034). Before you Begin Step 1 — Check the box contents and gather your tools Carefully unpack the contents of the 34 Watt Solar Panel Kit, shown in Figure 1. Do not open the package containing the cells until instructed to do so in Section B. Check your kit contents against the Bill of Materials below. If anything is missing, contact the Parallax Sales Team (see top of Page 1.) Watch the demonstration YouTube video linked to the 33000 product page at www.parallax.com. Figure 1 Qty Description Part # 1 Polycarbonate Base Panel (milled) 720-28315 1 Polycarbonate Cover Panel 720-28305 1 13-pack of Solar Cells, 125 mm2, 2.85 watt 750-00037 1 Flux pen 800-00015 25 ft Tabbing wire, tinned 700-00130 4 ft Flat adhesive copper wire, double-bus 700-00135 1 Polycarbonate cement (tube) 700-00105 2 Disposable gloves X00-00030 2 6 x 6” Plywood “workbenches” (included in Solar Cell packaging) X40-33000 Gather the Additional items Required: 30 to 40 watt soldering X-acto® or utility knife Steady, slow-moving hands iron (RadioShack #640- Masking or blue painter’s tape Sharpie® or felt tip pen 2071 works well) Measuring tape or ruler Nerves of steel…and lots of Solder Hot glue gun patience! Volt-ohm meter (VOM) Hot glue stick Several heavy books Pair of scissors Safety glasses: wear them! Flat, clean work surface Copyright © Parallax Inc. 34 Watt Solar Panel Kit (#33000) v1.1 9/13/2012 Page 2 of 20
Section A – Base Panel Bus-Bar Installation Step 2 — Prepare the Base Panel On a flat and clean work surface, remove the protective film from the backside of the Base Panel (the polycarbonate sheet that has routed out cavities) and orient it as shown in Figure 2. The two thru- holes should be on the right side and the cavities should be facing up. You may wish to use a pen and label the cell locations (1-12) as shown. Check the Base Panel thoroughly. Use an X-acto knife or a small pair of needle nose pliers to remove any flakes of polycarbonate machined residue. All the grooves and cell cavities should be completely clear of burs or pieces of debris. Not only will your panel look better when assembled, but it is critical that nothing prevents the cells and wiring from being fully-seated into these pockets during installation. Figure 2 Step 3 — Prepare the double-conductor bus-bar Locate the double-conductor flat wire. As shown in Figure 3, this wire assembly is a “sandwich” of three layers: A white protective cover, two copper conductors embedded in an adhesive base, and a pink protective cover. The white strip covers the bare (non-adhesive) copper conductors and the pink strip covers the sticky side. Figure 3 Copyright © Parallax Inc. 30 Watt Solar Panel Kit (#33000) v1.0 9/13/2012 Page 3 of 20
Carefully measure out a length of flat, double-conductor wire 23” long, and cut it with a pair of scissors. Then, with a sharp knife (X-acto knives work well), carefully slice through just the white protective cover 3/8” from each end and remove it, as shown in Figure 4 (both ends are shown here for clarity). Be careful to not cut through the copper conductors - only the white protective cover. Figure 4 Remove the pink protective strip (exposing the adhesive side), and place the double conductor bus-bar in groove “A”, as shown in Figure 5. Burnish or rub the bus-bar to ensure that it’s flat, and fully adhered to the groove. Only the ends of the bus-bar should have the white cover removed. The rest of the white cover should remain in place. Figure 5 Step 4 — Prepare the single-conductor bus-bars Measuring carefully, cut two 7.75” long pieces of double conductor bus-bars with the pair of scissors. Cut out each conductor so that there are four strips with the protective covers intact (Figure 6). Cut right next to the copper itself; leave no transparent “sticky” material along the edges. This way, when you place the single bars into the grooves, there are no “stickies” along the vertical walls of the grooves—the whole bus-bar assembly will lay flat on the bottom of the groove. Figure 6 Copyright © Parallax Inc. 34 Watt Solar Panel Kit (#33000) v1.1 9/13/2012 Page 4 of 20
Remove the pink protective cover from one of the single-conductor strips, and thread it through the hole (in groove “F”), then lay it into the groove, adhesive side down. It should overlap the two- conductor bus-bar, as shown in Figure 7 such that there is an exposed copper area where a solder bridge can be made at the overlapping junction. Remove the full length of the white protective cover (including the portion that goes through the hole to the backside of the panel). Stick the bus-bar to the backside of the panel as well. Figure 7 Remove the pink cover from the second 7.75” single bus-bar. Place the single bus-bar in groove “D” as shown in Figure 8. Thread the excess through the hole to the backside, and remove the white protective cover, just like we did above. Figure 8 Place the third 7.75” single bus-bar into groove “E” and the fourth into groove “B,” and then remove the white protective covers from both. Cut a single bus-bar 3.5” long, and place it into groove “C,” and remove the white protective cover. Your panel should now look like that shown in Figure 9. Figure 9 Copyright © Parallax Inc. 34 Watt Solar Panel Kit (#33000) v1.1 9/13/2012 Page 5 of 20
Step 5 — Soldering the bus-bars The adhesive between the overlap of the bus-bar junctions makes getting solder between the flat conductors (like a sandwich) impossible. The easiest way to solder the joint is to create four solder blobs: two on top of the double-bar right next to where the single bar overlaps them, and two on the single bar, right next to the ones one the double-bar. Then, create a “bridge” of solder across the tops of the copper conductors. The topside of the bus-bars are perfectly clean copper, so as long as there is no sticky residue that bubbles up from their undersides (preventing a bridge), a good solder connection is achieved. If you see a crevice or line at the joint, you’ll need to use your X-acto knife to remove any residual adhesive, and then add a little more solder to complete the bridge. Solder both overlapping junctions of the double bus-bar, as shown in Figure 10. Figure 10 Test your solder connections by using an ohmmeter and doing a continuity check between bus-bars “C” and “F.” (See Figure 11 for groove locations.) Now, using your VOM, place one probe on the bus-bar in groove “C” and then touch the other probe to each of the opposite ends of the double bus-bar (not on the groove “F” bus-bar), but rather on the copper conductors that are actually part of the double bus-bar itself. This checks the continuity of the solder connections between each of the solder bridges to bus-bar “C.” Next do the same for the bus-bar in groove “F” and measure continuity each of the other ends of the double bus-bar. This checks the continuity of the solder connections between each of the solder bridges to bus-bar “F.” All (5) measurements should be zero (or near zero) ohms. If not, then re- flow your solder connections to make it so. Figure 11 Copyright © Parallax Inc. 34 Watt Solar Panel Kit (#33000) v1.1 9/13/2012 Page 6 of 20
Section B – Tabbing Wire Preparation: Patience Is Essential! This panel is designed with (12) solar cells connected in series, yielding about 6.3 VDC (12 cells at 0.525 volts each). Figure 12 shows the connection scheme that we ultimately want to accomplish. To wire solar cells in series, we need to connect the top of the first cell to the bottom of the second cell, and the top of the second to the bottom of the third, and so on…until all (12) cells are connected in series. Top of cell Tabbing wire soldered to first cell’s top bus-bar …nth cell 2nd cell 1st cell Tabbing wire soldered to adjacent cell’s bottom bus-bar Figure 12 Since the bottom of the cells are not accessible after they’ve been mounted on the Base Panel, we need to solder the tabbing wire to these underside connections first. We’ll then place each cell into its appropriate location on the Base Panel, and make the top-of-cell solder connections last. Step 6 — Preparing the Tabbing Wire and Opening the Solar Cell Pack Measure and pre-cut (18) pieces of flat tabbing wire, 10” long each. Carefully straighten each tabbing wire to get rid of any kinks, so the wire will solder perfectly flat against the cell: Firmly grasp an end of the wire with one hand, pinch the wire with your other hand’s index finger and thumbnail, and then slowly draw out any kinks or curves in the wire. Be wary of “crimped-cuts” on the wire ends, which will not lie flat during the soldering process. Take the time to flatten out these little imperfections, and subsequent assembly will go much smoother. WATCH THE VIDEO demonstrating safe cell handling and soldering techniques before beginning. Search “33000” at www.parallax.com, and then find the video link on the 33000 product page. If you break a cell in any of the following steps, don’t panic. Go to page 19 and read through Section F – ...Oh, no… I broke a cell! You may be able to salvage it. Make sure that you have a clean and flat surface for this stage of assembly. Place the cell package with the “cut along dotted lines” side up, as shown in Figure 13. Use an X-acto knife to cut an “X” diagonally across the plastic wrapper, as shown on the package. Carefully lift the top piece of plywood off of the cell package. Carefully open the paper wrapper to expose the cells, but leave them in their “stack.” Do not spread the cells out across your work area – they are far less likely to chip, crack, or break when kept in their “stack.” Figure 13 Copyright © Parallax Inc. 34 Watt Solar Panel Kit (#33000) v1.1 9/13/2012 Page 7 of 20
Do not try to pick up a cell by merely pinching one corner and lifting it like a potato chip. One of the safest ways to pick up a cell is to gently slide it off the edge of a table into the palm of your hand. Once the cell is in your palm, you can gently grasp it with your other hand by spanning across the cell with your thumb and finger. Gently, ever so gently… Gloves are provided in the kit, but using them is optional. They will prevent fingerprints on the cells, but this is only a cosmetic issue that won’t significantly affect the panel’s power output. If you do choose to use the gloves, your sense of touch is reduced and could result in mishandling and/or breakage of cells. Step 7 — Preparing cells for Base Panel cavities 2,3,4,6,7,8,10,11, and 12 (refer to Figure 2) The blocks of plywood serve two purposes. First, they prevented cell breakage during shipping and they are now going to be used as solar cell “workbenches.” It’s critical that the platform on which you prepare the cells is absolutely flat, firm, clean, and smooth. These “workbenches” fit the bill nicely. The top of the cell is the “pretty” blue side with the small silver wires spread out horizontally across the surface. The top side is “negative” and the bottom is “positive”—like a very, very flat flashlight battery. Soldering the tabbing wires to the cells is Proper tape location to hold the cell the most delicate portion of the assembly for tabbing wire installation process. Move slowly and gently! Carefully place the first cell face down on the cell workbench. Using masking tape, attach it as shown in Figure 14. Do not burnish it to the cell too much, and do not put tape anywhere else on the cell (like the bad examples shown in Figure 15). Only burnish the tape enough to hold the cell in place. The tape is only used to prevent the cell from sliding around during the soldering process, and you want to be able to remove it easily without risk of breaking the cell Figure 14 Incorrect tape holding methods. Incorrect taping will cause cells to break! Figure 15 You will notice during—and immediately after—the soldering process that the cell will “bow” or cup upwards. This is normal. If the cell is incorrectly restrained by the tape, stress will build up and the cell may break, especially when you try to remove the tape. Copyright © Parallax Inc. 34 Watt Solar Panel Kit (#33000) v1.1 9/13/2012 Page 8 of 20
Begin by priming the flux pen. Remove the cap and press the tip onto a corner of the “workbench” to start the flow of flux. Do not try to prime the flux pen by pushing it on the cell itself. Once the flux starts to flow, gently brush it along the cell’s conductive strips as shown in Figure 16. Flux is your friend! Make sure the cell strips are well coated. Each time you use the flux pen, put the cap back on immediately so that it will not dry out. DO NOT USE FLUX REMOVER! The rapid evaporation and cooling may cause the cell to flex and break. Flux on the back side of a cell won’t lower power output. Figure 16 Place a 10” piece of tabbing wire on the cell as shown in Figure 17. Although the tabbing wire is pre-tinned with solder, improved heat transfer is achieved by adding a ¼” or so of solder to your soldering iron tip. Making sure that the wire is lined up with the cell’s conductive strip, gently touch the iron to the top of the wire which is about 1/8” from the edge of the cell. This anchors the wire in place. Figure 17 Next, apply a coat of flux to the top of the tabbing wire itself, as shown in Figure 18. Make sure that the flux is flowing well. Re-prime the flux pen by depressing the tip as necessary. Figure 18 Copyright © Parallax Inc. 34 Watt Solar Panel Kit (#33000) v1.1 9/13/2012 Page 9 of 20
The tabbing wire MUST be soldered flat to the cell, with NO solder blobs or spikes anywhere along the conductors. Blobs and spikes prevent the cell from being fully seated into the Base Panel, not only preventing the Cover Panel from sealing tightly, but the cells can break during the gluing/seating process much more easily. If you do get any spikes or blobs as you work, re-tin your iron with some solder, add more flux to the contact area, and re-wipe across the connection to make everything smooth. Note that a “break” is different than a “crack.” If at any point you break a cell, you’ll need to repair it before proceeding (see page 19). However, if you happen to crack a cell but it’s still all in one piece, don’t worry, just be extra careful with it and proceed with the process. Cracks do not appreciably diminish the cell’s output power, so don’t stress over it. Pre-tin your soldering iron with about 3/8” of solder. Gently wipe it across the top of the tabbing wire in one smooth motion (Figure 19). Be careful—don’t push too hard on the cell. If the solder is not melting to the cell, re-tin your soldering iron and apply additional flux if necessary. As you wipe the iron across the cell, gently guide the wire to keep it aligned with the cell’s conductor. If you notice that the solder on your iron is used up, stop and add a little more solder to your iron tip and then continue wiping the rest of the junction, slightly overlapping the point where you stopped so that no part of the wire is skipped. It wouldn’t affect performance, but this ensures that the wire is soldered as flat Figure 19 to the cell as possible. Solder another piece of tabbing wire to the second conductive strip. You should end up with something that resembles Figure 20. You may need to add additional solder to your iron tip as you wipe across the cell. A proper solder connection is made when you see the pre-tinned solder (that’s already on the flat wire) melting just slightly ahead of your “wipe” across the cell. Look closely at your solder connections and make sure that they are as flat as possible. If not, re-tin, add flux, and re- wipe to smooth them out. Fixing problems at this stage is much easier than trying to fix them later. Figure 20 Allow the cell to cool for about a minute before removing the tape. Slowly peel the tape off of the cell, trying to not stress it in any way. When the cell is free, lift it by the two tabbing wires, and put it in a safe place. Do not handle or flex the cell any more than you have to, until final assembly in Section C below. Repeat this tabbing wire procedure for eight more cells (for a total of nine). Copyright © Parallax Inc. 34 Watt Solar Panel Kit (#33000) v1.1 9/13/2012 Page 10 of 20
Step 8 — Preparing cells for Base Panel cavities 1, 5, and 9 (refer to Figure 2) Cut (6) tabbing wires, 5.25” long. Following the same flux and soldering procedures in Step 7, place the tabbing wire so that it extends past the edge of the cell 1/2”, as shown in Figure 21. Prepare two more cells like this one for a total of three. Figure 21 Section C – Cell Installation and Final Assembly Step 9 — Installing the cells into the base panel As you begin to install the cells into the Base Panel, it is very important to remember that the Panel is slightly bowed and quite flexible (because of the machining operation), and the cells are not. Therefore, if you must lift the Panel up from your work surface, be sure to support it in the center, so as to not allow it to sag and possibly break some cells. Temporarily place one of the 10” long tabbed cells into cavity #4, and gently push down with two fingers, as shown in Figure 22. Look across the top of the Base Panel from a very low angle to see if the cell, when gently pressed flat to the cavity, is fully recessed. If it is not, check for solder blobs or spikes on the bottom tabbing wires and reflow any joints as necessary. Figure 22 The drops of glue that will hold each cell in its cavity should be in line with the conductive strips of the solar cell. It is important to note that the cell should sit flat in the cavity. If you allow the glue to harden before placing the cell, scrape the glue off and do it again. With a low temperature hot glue gun, you have about 10 seconds or so to place the cell, so don’t rush it – but don’t delay either. Copyright © Parallax Inc. 34 Watt Solar Panel Kit (#33000) v1.1 9/13/2012 Page 11 of 20
When you’re certain that the cell will fit properly within the cavity, place two drops of hot glue (each the size of a small pea) in cavity #4, as shown in Figure 23. Figure 23 Place one of the cells with the 10” long tabbing wires (prepared in Step 7) with the tabs pointing towards the left (away from the two Base Panel thru holes), in the cavity and gently push down with two fingers directly over the glue droplets, and hold for about 30 seconds or until the glue cures. See Figure 24. Figure 24 Glue two more cells in cavities 3 and 2, each with their tabs pointing left. Slightly bend the tabbing wires up and out of the way (they will eventually be soldered across the tops of the adjacent cells). See Figure 25. Be careful to not stress the cell as you bend the wires gently upward. Figure 25 Copyright © Parallax Inc. 34 Watt Solar Panel Kit (#33000) v1.1 9/13/2012 Page 12 of 20
Glue one of the short tabbed cells (made in Step 8 above) into cavity #1. The short tabs should overlap the bus-bar in groove “C”. We’re now going to be soldering the side of the panel that everybody sees, therefore you may wish to use more care in the application of flux along the topside of the cells. It is still very important to make sure that the entire conductive strip is covered in flux, so don’t skimp. However, a little Figure 26 care in flux placement will make for a better looking panel. If you’re not so worried about looks, don’t worry about it because the flux does not appreciably reduce the power output of the panel anyway. Because of the rapid cooling effects of many de-fluxing chemicals, their use is strongly discouraged. Discolored cells are better looking (and better performing) than shattered cells! Apply flux to the top of each of the conductive strips on the tops of the cells in cavities #1 thru #3, and (using the same soldering techniques that we used in Step 8), gently wipe Figure 27 the iron from right to left guiding the wire down the center of the cell’s conductors as you go. See Figure 26. Cut two lengths of tabbing wire 5.25” long. Solder one end of each of these to the copper bus-bar in groove “E” as shown in Figure 27. Then apply flux and solder these to the top of the cell just like we did above. Finish the first row of cells by soldering the tabbing wires from the cell in cavity #1 to the bus-bar in groove “C” as shown in Figure 28. Figure 28 Copyright © Parallax Inc. 34 Watt Solar Panel Kit (#33000) v1.1 9/13/2012 Page 13 of 20
Begin the second row of cells by hot-gluing long tabbed cells into cavities 8, 7, and 6. Note that the tabbing wires are pointing toward and overlapping the cells to their right, as shown in Figure 29. Next, install a short tabbed cell into cavity #5. All of the tabbing wires should be pointing to the right, and the short tabbed cell in cavity #5 should have its wires overlap the bus-bar in groove “E”. See Figure 29. Figure 29 Apply flux and solder the tabbing wires across the tops of the cells, just as we did above, and then solder the short tabbed cell in cavity #5 to the bus-bar in groove “E”. Cut two 5.25” tabbing wires and solder them to the bus-bar in groove “B,” and then lay them across the top of the cell in cavity #8, and solder. Don’t forget to use flux across not only the top of the cells, but also the top of the tabbing wires. Your panel should now look like Figure 30. Figure 30 Copyright © Parallax Inc. 34 Watt Solar Panel Kit (#33000) v1.1 9/13/2012 Page 14 of 20
Rotate the panel so that the thru-holes are on the left side. This way we don’t have to reach across the two finished rows of cells, and risk possible breakage. Hot glue the remaining short-tabbed cell into cavity #9. Place the last three long-tabbed cells into cavities 10, 11, and 12, with their tabbing wires pointing to the right as shown in Figure 31. Figure 31 Cut two pieces of tabbing wire 5.75” long and solder them to the bus-bar in groove “D.” Then finish the cell installations by making all final solder connections, as shown in Figure 32. Figure 32 Copyright © Parallax Inc. 34 Watt Solar Panel Kit (#33000) v1.1 9/13/2012 Page 15 of 20
Section D – Testing and Checking Clearances Step 10 — Measuring the voltage and current CAUTION: Be very careful if and when you need to lift the populated Base Panel up off your work surface. Since the panel is flexible but the cells are not, any bending of the panel can result in broken cells. Be sure to support the center of the panel when you lift it, so that it doesn’t sag. The easiest way to test your panel is to point it towards the sun and measure the open circuit voltage and the short circuit current at the conductors that go out the two thru-holes in grooves “D” and “F.” Open circuit voltage should be over 7.0 VDC. 7.5 VDC or more is not uncommon. The short circuit current will vary greatly, depending on light intensity, but on a sunny day with no clouds, you should get somewhere around 4.8 to 5.2 amps or more, depending on the season and time of day. In bright summer sunshine 5.7 amps or more is possible. With all cells installed in the cavities and all bus- bar connections soldered, carefully move the panel into bright sunlight. Measure the open circuit voltage at the two thru- hole copper bus-bars. It should be over 7.0 VDC. Measure the short circuit current. It should be over 4.5 amps. Figure 33 Troubleshooting If your measurements are significantly less from these figures, check your solder connections, especially the ones between the bus-bars and the cells themselves. Double-check the solder connections between the bus-bar in groove “C” and the double bus-bar in groove “A.” Double-check the solder joint going from the double bus-bar to the single bar in groove “F”. Copyright © Parallax Inc. 34 Watt Solar Panel Kit (#33000) v1.1 9/13/2012 Page 16 of 20
Step 11 — Checking cell clearances within the Base Panel Remove the protective film from both sides of the 1/8” thick Cover Panel. Carefully place the Cover Panel over the Base Panel to check whether or not the cells and solder connections are recessed enough into their cavities to clear the cover, as shown in Figure 34. If anything does interfere, re-flow the solder connections as required to create the necessary clearance. To re-flow any “blobs,” simply add flux to the problem area, add a little solder to your iron and wipe gently, smoothing out the imperfections. REMINDER: don’t use flux remover! The rapid evaporation may cause the cell to flex and break. Flux on the front of the cell won’t significantly lower power output. Figure 34 Section E – Sealing the Panel As mentioned earlier, the Base Panel is slightly bowed because of the machining process. Once the Cover is cemented to the Base Panel, the bow will be removed and the Panel will become quite rigid. Cementing the panels together is a critical part of the assembly process. Be sure to follow all polycarbonate cement manufacturer’s precautions and recommendations on the tube label. The cement is a “solvent weld” type which means that it chemically melts the two surfaces of the panels together (very similar to the white PVC water pipe cementing process). By melting the Base and Cover Panels together the finished panel becomes a very strong and protective encapsulation for the delicate cells. However, once you seal the panel, you’ll never be able to access the cells again. Be sure that you’re pleased with the solder connections and the performance of the panel before you commit to sealing it. As shown in Figure 35, there will be a single continuous bead of cement running around the outside perimeter of the Base Panel, to form a complete seal. It is also important to note that cement does cause a “frost” or opaqueness to the panels wherever it is applied, so you want to use just enough to make a good joint, but not enough to spill over into the cell cavities and obscure too much of the adjacent cells. A little bit of obscurity is ok, just don’t flood it. Copyright © Parallax Inc. 34 Watt Solar Panel Kit (#33000) v1.1 9/13/2012 Page 17 of 20
Step 12 — Cementing the Cover Panel in place The ideal size of the cement “bead” is between 1/8” and 3/16” wide. The cement is only slightly thicker than water, so it will spread out quite a bit once the two panels are “sandwiched.” With this size bead, you’ll have only about 90 to 120 seconds for the whole process: lay down the cement, put the Cover Panel in place, and set weight on it. Also, once the Cover Panel makes contact with the Base Panel, you will have several seconds to accurately line up the corners (much the same as when you cement together plastic water pipe). You will need to work swiftly but carefully! Since you have plenty of cement, it is recommended that you lay down several beads of cement on some paper (or some other surface) to practice making a consistent cement line. This practice is for both speed and consistency. Place the Base Panel back on a flat table, and have a good number of books (15–20 or more) to use as “weights” near your work area. BASIC Stamp and Propeller manuals work particularly well... Place the Cover Panel within instant reach of where you’ll be cementing it to the Base Panel. Cement Cement Cement Cement Figure 35 Lay down a continuous bead of cement around the perimeter of the Base Panel… Line up and place the Cover over the Base Panel…. Immediately place evenly distributed weights (books) directly on top of the Cover, especially around the perimeter. Leave it undisturbed for at least 1 hour, to allow the cement to set up. As a final precaution, you may wish run a bead of glue around the outside edge (where the seams between the Base and Cover Panels come together) to further seal the Panel from moisture and the elements if you plan on using it outside (where else would you put a solar panel anyway?) That’s it...Congratulations! You now have your own Solar Electric Power Plant! Copyright © Parallax Inc. 34 Watt Solar Panel Kit (#33000) v1.1 9/13/2012 Page 18 of 20
Section F – ...Oh, no… I broke a cell! Ok…you’re reading this section because the “worst” has happened. Not to worry! If your cell looks like Figure 36, the fix is relatively simple. After repair, the cell’s “crack” will probably still be visible, but with the pieces re-attached, the efficiency of the cell should be so close to its rated output, that the difference is negligible. If it’s shattered into many little pieces, that’s why the 13th cell was included in the kit (just in case). If you shattered more than one cell into many little pieces, you can order individual replacements from Parallax (#750- 00042). When you break a cell, and then repair it so well that it’s difficult to detect the break—both visually and in terms of performance—congratulations, you’re a Figure 36 certified Solar Cell Surgeon! Remember that the entire top of the cell is “negative” and the bottom is “positive”. Because of this characteristic, all we really need to do is bridge across the conductive paths on both sides of the cell. Notice that we’re not soldering a full length of tabbing wire at this point, therefore the amount and location of the pieces of tape can vary depending on how you need to hold the cell parts in place. Put tape where you need it, to hold the pieces in place during surgery. Place a short piece of tabbing wire on the backside of the cell, spanning the break(s), as shown in Figure 37. Solder this short piece of tabbing wire as flat to the cell as you can, and remember “flux is your friend.” Once you’ve got this “bandage” in place, reposition the tape properly and proceed with the standard tabbing wire process. The cell will be “floppy” because the repair is only on one side at this point, so handle it even more delicately than before. Place the cell into its cavity. The top tabbing wire from the adjacent cell) can be soldered in place, just like the “normal” procedure. Figure 37 Copyright © Parallax Inc. 34 Watt Solar Panel Kit (#33000) v1.1 9/13/2012 Page 19 of 20
Copyright © Parallax Inc. 34 Watt Solar Panel Kit (#33000) v1.1 9/13/2012 Page 20 of 20
Mouser Electronics Authorized Distributor Click to View Pricing, Inventory, Delivery & Lifecycle Information: P arallax: 33000
 Datasheet下载
