ICGOO在线商城 > 220189-1

 Datasheet下载
- 型号: 220189-1
- 制造商: CORCOM/TYCO ELECTRONICS
- 库位|库存: xxxx|xxxx
- 要求:
| 数量阶梯 | 香港交货 | 国内含税 |
| +xxxx | $xxxx | ¥xxxx |
查看当月历史价格
查看今年历史价格
220189-1产品简介:
ICGOO电子元器件商城为您提供220189-1由CORCOM/TYCO ELECTRONICS设计生产,在icgoo商城现货销售,并且可以通过原厂、代理商等渠道进行代购。 提供220189-1价格参考以及CORCOM/TYCO ELECTRONICS220189-1封装/规格参数等产品信息。 你可以下载220189-1参考资料、Datasheet数据手册功能说明书, 资料中有220189-1详细功能的应用电路图电压和使用方法及教程。
| 参数 | 数值 |
| 产品目录 | |
| CompatibleTools | 354940-1 |
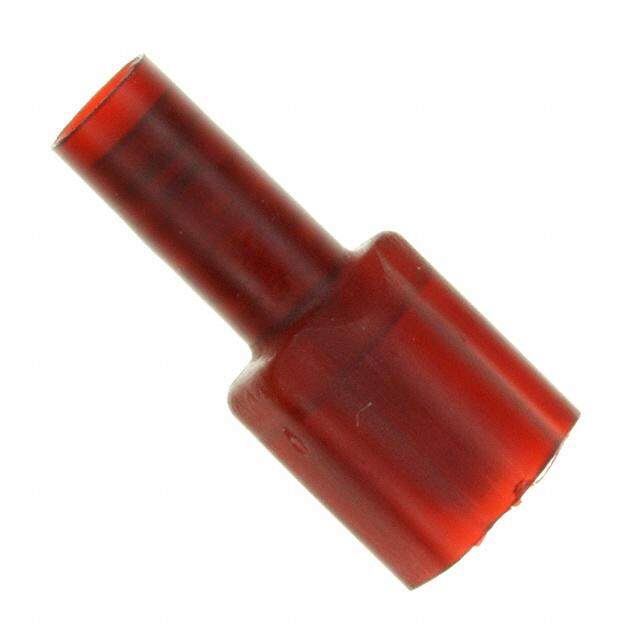
| 描述 | BNC CRIMPING DIE FOR COMM TOOL |
| 产品分类 | |
| 品牌 | TE Connectivity |
| 数据手册 | |
| 产品图片 |
|
| 产品型号 | 220189-1 |
| rohs | 不适用 / 不适用 |
| 产品系列 | Pro-Crimper III,AMP |
| 产品目录页面 | |
| 其它名称 | 2201891 |
| 工具类型 | 模具组套 |
| 标准包装 | 1 |
| 特色产品 | http://www.digikey.cn/product-highlights/zh/procrimper-iii-hand-tools/52602 |
| 电缆组 | RG-55,58,141,142,223,303,400 |
| 相关产品 | /product-detail/zh/354940-1/A9996-ND/132335 |
| 规格 | - |
| 视频文件 | http://www.digikey.cn/classic/video.aspx?PlayerID=1364138032001&width=640&height=505&videoID=3630218868001 |
| 配套使用产品/相关产品 | 同轴,RF - BNC,TNC |


- 商务部:美国ITC正式对集成电路等产品启动337调查
- 曝三星4nm工艺存在良率问题 高通将骁龙8 Gen1或转产台积电
- 太阳诱电将投资9.5亿元在常州建新厂生产MLCC 预计2023年完工
- 英特尔发布欧洲新工厂建设计划 深化IDM 2.0 战略
- 台积电先进制程称霸业界 有大客户加持明年业绩稳了
- 达到5530亿美元!SIA预计今年全球半导体销售额将创下新高
- 英特尔拟将自动驾驶子公司Mobileye上市 估值或超500亿美元
- 三星加码芯片和SET,合并消费电子和移动部门,撤换高东真等 CEO
- 三星电子宣布重大人事变动 还合并消费电子和移动部门
- 海关总署:前11个月进口集成电路产品价值2.52万亿元 增长14.8%

PDF Datasheet 数据手册内容提取
InstructionSheet 408--2786 CrimpingDieAssemblies 220189-[]and58330-1 03MAY11 RevJ PROPERUSEGUIDELINES CumulativeTraumaDisorderscanresultfromtheprolongeduseofmanuallypoweredhandtools.Handtoolsareintendedforoccasionaluseandlowvolume applications.Awideselectionofpoweredapplicationequipmentforextended--use,productionoperationsisavailable. DieRetainingScrews StationaryJaw IndenterDie PRO--CRIMPER*III FrameAssembly CrimpingDie 354940--1(Ref) Assembly(Ref) Moveable AnvilDie Jaw CenterContact FerruleCrimping CrimpingChamber Chamber DIEASSEMBLYPARTNUMBER CONNECTORBASEPARTNUMBER 220189--1,220189--2 227000,227079,228980,228979 220189--3 225395,225396,225397,225398 58330--1 227079 Figure1 1. INTRODUCTION ReasonsforreissueareprovidedinSection8, REVISIONSUMMARY. NOTE Alldimensionsinthisdocumentareinmillimeters Thisinstructionsheetcoverstheuseand [withinchesinbrackets].FiguresandIllustrations maintenanceofCrimpingDieAssemblieslistedin i areforreferenceonlyandarenotdrawntoscale. Figure1.ThediesareusedinPRO--CRIMPERIII FrameAssembly354940--1tocrimp50-- and 75--OhmBNC,and50--OhmTNCDual--Crimp 2. DESCRIPTION Connectorsontovarioussizecable.RefertoFigure1 Eachdieassemblyconsistsofanindenterdieandan foralistofconnectorsthatarecompatiblewiththe anvildie,whichwhenmatedformtwocrimping dieassemblies.RefertoCatalog82074foradditional chambers.Thelargecrimpingchambercrimpsthe productpartnumberinformation.Forpartnumbers connectorferruleandthesmallcrimpingchamber notlisted,contactTEConnectivityProduct crimpstheconnectorcentercontact.Eachdieisheld Engineeringforrecommendations. inthetoolbyasinglescrew.SeeFigure1. E2011TycoElectronicsCorporation,aTEConnectivityLtd.Company TOOLINGASSISTANCECENTER1--800--722--1111 Thiscontrolleddocumentissubjecttochange. 1of5 AllRightsReserved PRODUCTINFORMATION1--800--522--6752 ForlatestrevisionandRegionalCustomerService, *Trademark visitourwebsiteatwww.te.com TEConnectivity,TEconnectivity(logo),andTE(logo)aretrademarks. Otherlogos,productand/orCompanynamesmaybetrademarksoftheirrespectiveowners. LOCB
408-2786 3. DIEINSTALLATION Crimpingthe CenterContact Tobesurethatthedieassemblyisproperlyaligned duringinstallation,proceedasfollows: 1. Slidethedieassemblyintothepartially--opened tooljaws.Theanvildiemustbeinstalledinthe movablejawofthetoolandtheindenterinthe stationaryjaw.Thecentercontactcrimping chambermustbetowardthefrontofthetoolas CenterContact showninFigure1. FlangeButt 2. Insert,butdonotcompletelytighten,thedie AgainstEdge retainingscrews. ofDie 3. Closethetooljawsandcarefullyalignthedies sothattheanvildieenterstheindenterdie.Once AnvilDie theanvilhasenteredtheindenter,placeacopper busbar(1.57+0.05mm[.062+.002in.]diameter) intothecentercontactcrimpingchamberofthedie StrippedCable assembly. 4. Withbusbarinplace,closethetooljaws completely.Holdthetoolhandlestogetherand FlangeonEndof tightenthedieretainingscrewswiththe Cross--Sectional CenterContact appropriatescrewdriver. View 4. CRIMPINGPROCEDURE EdgeofDie NOTE Fordetailedinformationoncableselection,cable Figure2 striplengths,andproperassemblyofthe i connector,refertotheinstructionsprovidedwith 4.2. Ferrule(Figure3) theconnector. 1. Insertthecrimpedcentercontactintothe connectorbodyuntilthecabledielectricbutts Selecttheappropriatedieassemblythatis againstthedielectricinsidetheconnectorbody. compatiblewiththeconnectorbeingused.Proceed Theflaredbraidmustfitaroundthesupportsleeve asfollows: oftheconnectorbody. 4.1. CenterContact(Figure2) Shoulderon 1. Slidetheferruleontothecable,thenstripthe Connector cabletotheproperdimensions. BodyButts Against 2. Slidecentercontactontocenterconductorof EdgeofDie cable;theninsertcontactassemblyintothecenter contactcrimpingchamberoftheanvildie.See Figure2. NOTE Makesurethattheflangeontheendofthe centercontactbuttsagainsttheedgeofthedie. Ferrulein i Refertothecross--sectionalviewinFigure2. Crimping Chamber onAnvil 3. Crimpthecentercontactbyholdingthecablein Die place;thenclosethetoolhandlesuntiltheratchet releases. 4. Removethecrimpedcentercontactassembly Figure3 fromthecrimpingdies. 2of5 RevJ
408-2786 2. Slidetheferruleforwardoverthebraiduntilthe 4. Whenthediesarenotinuse,mateandstore ferrulebuttsagainsttheshoulderontheconnector theminaclean,dryarea. body. 6.2. PeriodicInspections 3. Placetheferruleintheferrulecrimpingchamber oftheanvildiesothattheshoulderonthe Regularinspectionsshouldbeperformedbyquality connectorbodybuttsagainsttheedgeofthedie. controlpersonnel.Arecordofscheduledinspections SeeFigure3. shouldremainwiththediesand/orbesuppliedto supervisorypersonnelresponsibleforthedies. 4. Holdingtheassemblyinplace,closethetool Thoughrecommendationscallforatleastone handlesuntiltheratchetreleases. inspectionpermonth,theinspectionfrequencyshould bebasedonamountofuse,workingconditions, 5. Removecrimpedassemblyfromthecrimping operatortrainingandskill,andestablishedcompany dies. standards.Theseinspectionsshouldbeperformedin thefollowingsequence: 5. CRIMPHEIGHTADJUSTMENT(Figure4) Screwdriver Thetoolframeassemblyratchetmechanismfeatures anadjustmentwheelwithnumberedsettings.Ifthe crimpheightisnotacceptable,adjusttheratchetas follows: 1. Removethelockscrewfromtheratchet adjustmentwheel. 2. Withascrewdriver,adjusttheratchetwheel Ratchet fromtheoppositesideofthetool. Adjustment Wheel 3. Observetheratchetadjustmentwheel.Ifa tightercrimpisrequired,rotatetheadjustment wheelCOUNTERCLOCKWISEtoa higher--numberedsetting.Ifaloosercrimpis Lockscrew(Typ) required,rotatetheadjustmentwheel CLOCKWISEtoalower--numberedsetting. Figure4 4. Replacethelockscrew. A. VisualInspection 5. Makeasamplecrimpandmeasurethecrimp height.Ifthecrimpheightisacceptable,securethe 1. Removealllubricationandaccumulatedfilmby lockscrew.Ifthedimensionisunacceptable, immersingthediesinasuitablecommercial removelockscrewandcontinuetoadjustthe degreaser. ratchet,andagainmeasureasamplecrimp. 2. Makecertainalldieretainingscrewsanddie componentsareinplaceandsecured.If 6. MAINTENANCEANDINSPECTION replacementsarenecessary,refertoSection7, REPLACEMENT. 6.1. DailyMaintenance 3. Inspectthecrimpareaforflattened,chipped, worn,cracked,orbrokenareas.Ifdamageis Itisrecommendedthateachoperatorofthetoolwith evident,thediesmustbereplaced(seeSection7, thedieassemblybemadeawareof,andresponsible REPLACEMENT). for,thefollowingfourstepsofdailymaintenance: 1. Removedust,moisture,andothercontaminants B. GagingtheCrimpingChamber withaclean,softbrush,oraclean,soft,lint--free cloth.DoNOTuseanyobjectsthatcoulddamage Thisinspectionrequirestheuseofapluggage thediesortool. conformingtothediametersprovidedinFigure5.TE doesnotmanufacture,ormarket,thesegages. 2. Makesurethattheproperdieretainingscrews Proceedasfollows: areinplaceandsecured. 1. Matethediesuntilitisevidentthattheyhave 3. Makecertainthatallsurfacesareprotectedwith bottomed.Holdthediesinthispositionbyholding aTHINcoatofanygoodSAE20motoroil. thetoolhandlesclosedwithmoderatepressure. RevJ 3of5
408-2786 2. AligntheGOelementofthegagewiththe 7. REPLACEMENT crimpingchamber.Pushtheelementstraightinto thechamberwithoutusingforce.TheGOelement PartslistedinFigure6arecustomer--replaceable.A mustpasscompletelythroughthecrimping completeinventorycanbestockedandcontrolledto chamberasshowninFigure5. preventlosttimewhenreplacementofpartsisneces- sary.OrderreplacementsthroughyourlocalTE Representative,orcall1--800--526--5142,orsenda 3. AligntheNO--GOelementwiththecrimping facsimileofyourpurchaseorderto1--717--986--7605, chamberandtrytoinsertitstraightintothe orwriteto: chamber.TheNO--GOelementmaystartentrybut mustnotpasscompletelythrough.SeeFigure5. CUSTOMERSERVICE(38--35) TYCOELECTRONICSCORPORATION P.O.BOX3608 Ifthecrimpingchambersconformtothegage HARRISBURG,PA17105--3608 inspection,thediesareconsidereddimensionally correctandshouldbelubricatedwithathincoatof anygoodSAE20motoroil.Ifnot,thediesmustbe replacedbeforereturningthemtoservice. 8. REVISIONSUMMARY S Updateddocumenttocorporaterequirements. Foradditionalinformationconcerningtheuseofthe pluggage,refertoInstructionSheet408--7424. SuggestedPlugGageDesignfor SuggestedPlugGageDesign GO CenterContactCrimpingChamber NO--GO GO forFerruleCrimpingChamber W Dia Dia Dia NO--GO Dia R Crimping “GO”elementmust Chamber passcompletelythrough thedieclosure. “NO--GO”elementmayenter partially,butmustnotpass GOElement NO--GOElement completelythroughthedieclosure. GAGEELEMENTDIAMETER(mm[in.]) CRIMPINGCHAMBER DDIIEEAASSSSEEMMBBLLYY PARTNO. CENTERCONTACT FERRULE RADIUS WIDTH GO NO--GO GO NO--GO ‘‘R”(Max) ‘‘W”(Max) 1.207--1.214 1.359--1.367 5.156--5.164 5.408--5.410 2.51 5.03 220189--1 [.0475--.0478] [.0535--.0538] [.2030--.2033] [.2129--.2130] [.099] [.198] 1.054--1.062 1.181--1.189 5.969--5.977 6.220--6.223 2.92 5.84 220189--2 [.0415--.0418] [.0465--.0468] [.2350--.2353 [.2449--.2450] [.115] [.230] 1.925--1.928 1.984--1.986 5.405--5.408 5.667--5.669 2.64 5.28 220189--3 [.0758--.0759] [.0781--.0782] [.2128--.2129] [.2231--.2232] [.104] [.208] 1.029--1.036 1.181--1.189 4.191--4.199 4.442--4.445 2.03 4.06 58330--1 [.0405--.0408] [.0465--.0468] [.1650--.1653] [.1749--.1750] [.080] [.160] Figure5 4of5 RevJ
408-2786 30.48mm 11.89mm [1.20in.] [.468in.] 2 34.80mm [1.37in.] 1 WEIGHT:227g[8oz] CUSTOMER--REPLACEABLEPARTS DIEASSEMBLY ANVIL INDENTER PARTNO. (Item1) (Item2) 220189--1 310498--2 310497--2 220189--2 310498--4 310497--4 220189--3 310567--1 310568--1 58330--1 313764--1 313763--1 Figure6 RevJ 5of5