ICGOO在线商城 > 190-2255
- 型号: 190-2255
- 制造商: Bluetechnix
- 库位|库存: xxxx|xxxx
- 要求:
| 数量阶梯 | 香港交货 | 国内含税 |
| +xxxx | $xxxx | ¥xxxx |
查看当月历史价格
查看今年历史价格
190-2255产品简介:
ICGOO电子元器件商城为您提供190-2255由Bluetechnix设计生产,在icgoo商城现货销售,并且可以通过原厂、代理商等渠道进行代购。 提供190-2255价格参考以及Bluetechnix190-2255封装/规格参数等产品信息。 你可以下载190-2255参考资料、Datasheet数据手册功能说明书, 资料中有190-2255详细功能的应用电路图电压和使用方法及教程。
| 参数 | 数值 |
| 产品目录 | 编程器,开发系统 |
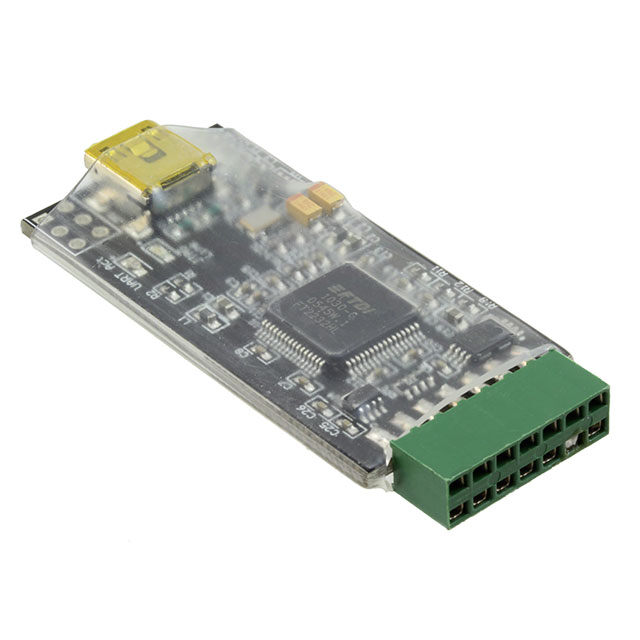
| 描述 | EMULATOR GNICE PLUS JTAG UCLINUX |
| 产品分类 | 内电路编程器、仿真器以及调试器 |
| 品牌 | Bluetechnix GmbH |
| 数据手册 | |
| 产品图片 | |
| 产品型号 | 190-2255 |
| rohs | 无铅 / 符合限制有害物质指令(RoHS)规范要求 |
| 产品系列 | gnICE |
| 其它名称 | 190-2253 |
| 内容 | 仿真模块 |
| 标准包装 | 1 |
| 类型 | In-Circuit 仿真器 |
| 配套使用产品/相关产品 | Blackfin® 处理器 |

PDF Datasheet 数据手册内容提取
Blackfin uClinux User Guide Tinyboards from Bluetechnix www.bluetechnix.com
Tinyboards maximum performance at minimum size Contact Bluetechnix Mechatronische Systeme GmbH Waidhausenstr. 3/19 A‐1140 Vienna AUSTRIA/EUROPE office@bluetechnix.at http://www.bluetechnix.com Document No.: 099‐0110‐01 Version 6 Date: 2009‐09‐02 Blackfin uClinux User Guide Page 2
Tinyboards maximum performance at minimum size Table of Contents 1 Introduction ......................................................................................................................... 8 2 Where to get Information and Help .................................................................................... 9 3 Support DVD ...................................................................................................................... 10 3.1 Content ....................................................................................................................... 10 3.2 VMWare image setup ................................................................................................. 10 3.2.1 Install packages .................................................................................................... 10 3.2.2 Useful hints ........................................................................................................... 11 3.2.3 Setup without VMWare image ............................................................................. 11 3.3 Kermit .......................................................................................................................... 11 3.4 TFTP server .................................................................................................................. 12 3.5 NFS server ................................................................................................................... 12 4 Development Environment Setup ..................................................................................... 13 5 Software Packages ............................................................................................................. 14 6 Development Tools ............................................................................................................ 15 6.1 gnICE JTAG .................................................................................................................. 15 6.2 PEEDI JTAG .................................................................................................................. 16 6.2.1 Resources ............................................................................................................. 16 6.2.2 Updating the configuration file ............................................................................ 16 6.2.3 Updating the firmware ......................................................................................... 16 6.2.4 Debugging the uClinux kernel .............................................................................. 17 6.2.5 Debugging uClinux applications ........................................................................... 17 6.3 ICEbear JTAG ............................................................................................................... 17 7 Blackfin uClinux Tool Chain ............................................................................................... 19 8 The U‐Boot boot loader ..................................................................................................... 20 8.1 Flashing the U‐Boot ..................................................................................................... 20 8.2 U‐Boot environment ................................................................................................... 20 8.3 Loading files onto the Core Module ........................................................................... 21 8.4 Building U‐Boot from source ...................................................................................... 22 8.5 Upgrading the U‐Boot ................................................................................................. 23 8.6 Booting U‐Boot from UART ......................................................................................... 23 8.7 Programming a uClinux image to flash memory ........................................................ 23 Blackfin uClinux User Guide Page 3
Tinyboards maximum performance at minimum size 8.8 Booting a uClinux Image ............................................................................................. 24 9 Blackfin uClinux ................................................................................................................. 26 9.1 First impression with pre‐compiled images ................................................................ 26 9.2 Compiling your own uClinux Image ............................................................................ 26 9.2.1 Downloading the Source Code ............................................................................. 26 9.2.2 Configuring the Kernel and User Space Applications ........................................... 27 9.2.3 Compiling uClinux ................................................................................................. 27 9.2.4 Special considerations for CM‐BF548 .................................................................. 28 9.3 Configuration of on‐board Components .................................................................... 28 9.3.1 SD/MMC card ....................................................................................................... 28 9.3.2 USB support (CM‐BF527, CM‐BF548) ................................................................... 28 10 Document Revision History ............................................................................................ 30 A List of Figures and Tables .................................................................................................. 31 Blackfin uClinux User Guide Page 4
Tinyboards maximum performance at minimum size Edition 2007‐02 © Bluetechnix Mechatronische Systeme GmbH 2007 All Rights Reserved. The information herein is given to describe certain components and shall not be considered as a guarantee of characteristics. Terms of delivery and rights of technical change reserved. We hereby disclaim any warranties, including but not limited to warranties of non‐ infringement, regarding circuits, descriptions and charts stated herein. Bluetechnix makes and you receive no warranties or conditions, express, implied, statutory or in any communication with you. Bluetechnix specifically disclaims any implied warranty of merchantability or fitness for a particular purpose. Bluetechnix takes no liability for any damages and errors causing of the usage of this board. The user of this board is responsible by himself for the functionality of his application. He is allowed to use the board only if he has the qualification. More information is found in the General Terms and Conditions (AGB). Information For further information on technology, delivery terms and conditions and prices please contact Bluetechnix (http://www.bluetechnix.com). Warnings Due to technical requirements components may contain dangerous substances. The Core Modules and development systems contain ESD (electrostatic discharge) sensitive devices. Electro‐ static charges readily accumulate on the human body and equipment and can discharge without detection. Permanent damage may occur on devices subjected to high‐energy discharges. Proper ESD precautions are recommended to avoid performance degradation or loss of functionality. Unused Core Modules and Development Boards should be stored in the protective shipping package. Blackfin uClinux User Guide Page 5
Tinyboards maximum performance at minimum size BLACKFIN Products Core Modules: CM‐BF533: Blackfin Processor Module powered by Analog Devices single core ADSP‐BF533 processor; up to 600MHz, 32MB RAM, 2MB Flash, 120 pin expansion connector and a size of 36.5x31.5mm CM‐BF537E: Blackfin Processor Module powered by Analog Devices single core ADSP‐BF537 processor; up to 600MHz, 32MB RAM, 4MB Flash, integrated TP10/100 Ethernet physical transceiver, 120 pin expansion connector and a size of 36.5x31.5mm CM‐BF537U: Blackfin Processor Module powered by Analog Devices single core ADSP‐BF537 processor; up to 600MHz, 32MB RAM, 4MB Flash, integrated USB 2.0 Device, 120 pin expansion connector and a size of 36.5x31.5mm (will be replaced by CM‐BF527). TCM‐BF537: Blackfin Processor Module powered by Analog Devices single core ADSP‐BF537 processor; up to 500MHz, 32MB RAM, 8MB Flash, 28x28mm, 120 pin expansion connector, Ball Grid Array or Border Pads for reflow soldering, industrial temperature range ‐40°C to +85°C. CM‐BF561: Blackfin Processor Module powered by Analog Devices dual core ADSP‐BF561 processor; up to 2x 600MHz, 64MB RAM, 8MB Flash, 120 pin expansion connector and a size of 36.5x31.5mm. CM‐BF527: The new Blackfin Processor Module is powered by Analog Devices single core ADSP‐BF527 processor; key features are USB OTG 2.0 and Ethernet. The 2x60 pin expansion connectors are backwards compatible with other Core Modules. CM‐BF548: The new Blackfin Processor Module is powered by Analog Devices single core ADSP‐BF548 processor; key features are 64MB DDR SD‐ RAM 2x100 pin expansion connectors. Development Boards: EVAL‐BF5xx: Low cost Blackfin processor Evaluation Board with one socket for any Bluetechnix Blackfin Core Module. Additional peripherals are available, such as an SD‐Card. DEV‐BF5xxDA‐Lite: Get ready to program and debug Bluetechnix Core Modules with this tiny development platform including a USB Based Debug Agent. The Blackfin uClinux User Guide Page 6
Tinyboards maximum performance at minimum size DEV‐BF5xxDA‐Lite is a low cost starter development system including VDSP++ Evaluation Software License. DEV‐BF5xx‐FPGA: Blackfin Development Board with two sockets for any combination of Blackfin Core Modules. Additional peripherals are available, such as SD‐Card, Ethernet, USB host, multi‐port JTAG including a USB based Debug Agent, connector for an LCD‐TFT Display and connector for a digital camera system. A large on‐board SPARTAN‐3 FPGA and Soft IPs make this board the most flexible Blackfin development platforms ever developed. DEV‐BF548DA‐Lite: Get ready to program and debug Bluetechnix CM‐BF548 Core Module with this tiny development platform including a USB Based Debug Agent. The DEV‐BF548DA‐Lite is a low cost starter development system including VDSP++ Evaluation Software License. EXT‐Boards: The following Extender Boards are available: EXT‐BF5xx‐Audio, EXT‐ BF5xx‐Video, EXT‐BF5xx‐Camera, EXT‐BF5xx‐Exp, EXT‐BF5xx‐ETH‐ USB, EXT‐BF5xx‐AD/DA. Additional boards based on customer request are also available. Software Support: BLACKSheep: The BLACKSheep VDK is a multithreaded framework for the Blackfin processor family from Analog Devices that includes driver support for a variety of hardware extensions. It is based on the real‐time VDK kernel included within the VDSP++ development environment. LabVIEW: LabVIEW embedded support for the CM‐BF537E, CM‐BF537U and TCM‐BF537 Core Modules is based upon the BLACKSheep VDK driver Framework. uClinux: All the Core Modules are fully supported by uClinux. The required boot loader and uClinux can be downloaded from: http://blackfin.uClinux.org. Upcoming Products and Software Releases: Keep up‐to‐date with all the changes to the Bluetechnix product line and software updates at: www.bluetechnix.com BLACKFIN Design Service Based on more than five years of experience with Blackfin, Bluetechnix offers development assistance as well as custom design services and software development. Blackfin uClinux User Guide Page 7
Tinyboards maximum performance at minimum size 1 Introduction This document is intended to provide help for starting development with uClinux on Bluetechnix Blackfin based Tinyboards. Bluetechnix provides a set of high sophisticated Core Modules. For all Blackfin based Core Modules (CM‐BF527, CM‐BF533, CM‐BF537E, CM‐ BF537U, TCM‐BF537, CM‐BF548, CM‐BF561) uClinux support is available. In addition, Bluetechnix provides development tools (gnICE JTAG, PEEDI‐JTAG, ICEbear JTAG) and Development Boards (EVAL‐BF5xx, DEV‐BF5xxDA‐Lite, etc.) and Extender boards (EXT‐BF5xx‐ Audio, EXT‐BF5xx‐Cam, EXT‐BF5xx‐USB‐ETH2, etc.). Please visit www.bluetechnix.com for the complete list. In the following, we will introduce the development environment setup, the required Software packages and the development tools. A short intro to the Blackfin uClinux tool chain, the U‐Boot boot loader and uClinux is given. Blackfin uClinux User Guide Page 8
Tinyboards maximum performance at minimum size 2 Where to get Information and Help For starting Blackfin uClinux development, we recommend reading this guide and retrieving information from the following resources. • Bluetechnix web site: http://www.bluetechnix.at This site provides Hardware User Manuals of all Bluetechnix Products and Schematics for the EVAL, DEV and Extender boards. • Bluetechnix project on Blackfin uClinux web site: http://blackfin.uclinux.org/gf/project/bluetechnix/ The Blackfin uClinux website contains a dedicated project for support of Bluetechnix products. We provide pre‐compiled images of U‐Boot and uClinux, patches for Bluetechnix Core Modules and instructions regarding several topics. We post news regarding uClinux support there as well, and you may ask questions in the forum. • Documentation Wiki on Blackfin uClinux web site: http://docs.blackfin.uclinux.org There is plenty of general and specific information about all topics regarding uClinux development for Blackfin processors. • Forums on Blackfin uClinux web site Each project (U‐Boot, uClinux, tool chain, etc.) has a help forum. If you have any problems or questions regarding uClinux for Blackfin processors, post it there and you will get an answer usually within 1 day. Blackfin uClinux User Guide Page 9
Tinyboards maximum performance at minimum size 3 Support DVD 3.1 Content The support DVD contains the following files: • DevEnvVMWareImage.zip: Archive containing a VMWare image with the Bluetechnix Development Environment for Blackfin uClinux development. • Toolchain2009R1.tar.bz2: Binary tool chain, 2009R1 branch • U-Boot2009.06.tar.bz2: U‐Boot sources (SVN checkout), trunk/2009.06 branch • uClinux-dist-2009R1.tar.bz2: uClinux distribution and Kernel sources (SVN checkout), 2009R1 branch • Bluetechnix_Images/: Pre‐compiled images for all Bluetechnix Core Modules • Blackfin_uClinux_UserGuide.pdf: This file 3.2 VMWare image setup The VMWare image contains a Xubuntu Linux installation (http://www.xubuntu.org/). Choose it as your development environment if you want to develop in a Linux environment on a Windows PC, or if you want to have a separate Linux installation for Blackfin uClinux development. First, unpack the file DevEnvVMWareImage.zip to a place of your choice. If you don’t have VMWare Workstation or VMWare Player installed, download and install the VMWare Player for your operating system for free from http://www.vmware.com/products/player/. After installation, open the VMWare image you just unpacked by selecting “Open an existing Virtual Machine” and choosing the file Bluetechnix Development Environment.vmx. You will be automatically logged in to the Xubuntu desktop. 3.2.1 Install packages Now you have to install the tool chain, the uClinux distribution and the U‐Boot sources. Insert the Support DVD into your DVD drive. If it does not show up automatically on the desktop, select the following from the VMWare Player menu: Devices (cid:198) CD/DVD (IDE) (cid:198) Connect Double‐click the DVD icon on the desktop. This will open a file manager window and mount the DVD automatically to /media/cdrom1. Now open a terminal. In your home directory (/home/blt) type the following commands to uncompress the packages: tar -xjf /media/cdrom1/Toolchain2009R1.tar.bz2 tar -xjf /media/cdrom1/U-Boot2009.06.tar.bz2 tar -xjf /media/cdrom1/uClinux-dist-2009R1.tar.bz2 Blackfin uClinux User Guide Page 10
Tinyboards maximum performance at minimum size You will end up having the following directories in your home directory: • toolchain2009R1/ contains the binary tool chain. To add the tool chain path to the $PATH environment variable, an entry was already added to the ~/.bashrc file. If you wish to have another directory layout or you want to use another tool chain, you have to modify this entry. • u-boot-2009.06/ contains the U‐Boot source code. It was checked out from SVN and patches for our Core Modules are already applied. In this directory, you may execute “svn update” to get the latest updates from the Blackfin uClinux SVN. • uclinux-2009R1/ contains the uClinux distribution, including the Linux kernel. In this directory, you may execute “svn update” to get the latest updates from Blackfin uClinux SVN (2009R1 branch). The kernel sources are in the linux-2.6.x/ subdirectory. 3.2.2 Useful hints To release the mouse and keyboard focus, press Ctrl+Alt keys. In case you want to modify the installation, you need the password of the default user: User: blt Password: blt To install Linux applications, you may use the Synaptic Package Manager that comes with Xubuntu. It is contained in the Applications menu, section System. 3.2.3 Setup without VMWare image If you don’t have the need to work with the VMWare image, you can simply unpack the tool chain, uClinux and U‐Boot packages to a place of your choice. Then add the following lines to the ~/.bashrc file. The tool chain path will then automatically be added to the $PATH environment variable each time you log in. # BFIN UCLINUX TOOLCHAIN TOOLCHAINDIR=/home/blt/toolchain2009R1 export PATH=$PATH:$TOOLCHAINDIR/bfin-uclinux/bin:$TOOLCHAINDIR/bfin- elf/bin:$TOOLCHAINDIR/bfin-linux-uclibc/bin 3.3 Kermit Kermit is a serial terminal program. We use it to communicate with the Core Modules over a USB cable that is connected to the UART‐to‐USB converter chip on the Dev/Eval board. See http://docs.blackfin.uclinux.org/doku.php?id=terminal_programs for more information about serial terminals. To access the serial terminal within VMWare Player, attach the USB cable first to your PC. Most Linux distributions detect the UART‐to‐USB converter automatically. (See the Blackfin uClinux User Guide Page 11
Tinyboards maximum performance at minimum size Hardware User Manual of your Eval/Dev‐BF5xx board how to install a driver for the UART‐to‐ USB converter chip in Windows.) In the VMWare Player menu, click Devices (cid:198) … USB to UART Bridge Controller (cid:198) Connect to connect the serial cable to the virtual machine. For your convenience, a shell script was installed that automatically searches for the last serial connection that was detected and opens the Kermit program with the correct parameters. In the terminal, type (from the home directory) stuff/serialterminal 3.4 TFTP server To be able to load files from the virtual machine onto the Core Modules, a TFTP server is required. It is already installed in the virtual machine. The TFTP server’s root directory is /tftpboot/. The TFTP server must be accessible in order to be able to download files to your Core Module. It is recommended to set up bridged Ethernet mode for the virtual machine. In the VMWare Player, select Devices (cid:198) Network Adapter (cid:198) Bridged Now, the virtual machine will be directly connected to your physical network, and it will receive a DHCP address in case a DHCP server is installed on your LAN. Now, you can use this IP address to download files to the Core Module. 3.5 NFS server An NFS server is already installed in the virtual machine. If you want to mount the root file system on your Core Module via NFS, you have to add a similar line to /etc/exports, depending on where the file system is: /home/blt/uclinux-2009R1/romfs/ *(rw,no_root_squash,async) Afterwards, restart the NFS server with the command /etc/init.d/nfs-kernel-server restart Note that you have to configure your network as described in chapter 3.4. See http://docs.blackfin.uclinux.org/doku.php?id=uclinux‐dist:nfs for instructions how to set up an NFS root file system. Blackfin uClinux User Guide Page 12
Tinyboards maximum performance at minimum size 4 Development Environment Setup A serial connection is necessary for communicating with your Bluetechnix Core Module. Either a USB or a standard RS232 can be used. Please refer to the Bluetechnix Hardware User Manual for the necessary base board switch settings. To connect via USB cable, your operating system must have a device driver for the CP2101 USB‐to‐UART converter chip. Most pre‐compiled kernels of Linux distributions have it already enabled. To verify this, power on your Bluetechnix board and connect to your machine. A device file /dev/ttyUSB0 or similar should be automatically generated. The output of the “dmesg” command in a Linux terminal also reports if the device was correctly detected: usb 3-2: configuration #1 chosen from 1 choice cp2101 3-2:1.0: cp2101 converter detected usb 3-2: reset full speed USB device using uhci_hcd and address 4 usb 3-2: cp2101 converter now attached to ttyUSB0 For the connection to the prompts of U‐Boot and uClinux, a terminal program is needed. We recommend Kermit. It is part of most Linux distributions – the package is usually named “ckermit”. A quick introduction to terminal programs is given on the web site http://docs.blackfin.uclinux.org/doku.php?id=terminal_programs&s=kermit The basic connection parameters for terminal programs are as follows: Baud rate 115200 Data bits 8 Stop bits 1 Flow control none Parity none If you use Kermit, it is recommended to create the settings file .kermrc in your home directory with the following lines: set line /dev/ttyUSB0 set speed 115200 set carrier-watch off set flow-control none set prefixing all set parity none set stop-bits 1 set modem none set file type bin set file name lit For fast transfer of files (e.g., uClinux images) to the target hardware via Ethernet, it is recommended to install a TFTP server on the development workstation. This requires either a Core Module with on‐board Ethernet capability or a certain Base or Extender board. Please refer to your Linux distribution’s package database for appropriate TFTP packages. Also, there is an entry in the Bluetechnix uClinux Wiki about installing a TFTP server: http://docs.blackfin.uclinux.org/doku.php?id=setting_up_a_tftp_server Blackfin uClinux User Guide Page 13
Tinyboards maximum performance at minimum size 5 Software Packages The three basic software packages needed for uClinux development are: • Blackfin uClinux distribution, includes uClinux kernel • U‐Boot boot loader • Tool chain for cross‐compiling These software packages are available for download at the Blackfin uClinux web site http://blackfin.uclinux.org. Please follow the links on this page. Each project has a “Files” section where releases can be downloaded from. Furthermore, SVN access is available via the “SVN” section to get the latest snapshot of each. You can either work with releases of these software packages, or with the current sources from SVN. Releases are naturally stable and well tested. The advantage of SVN sources is that you will get the newest features and drivers from the uClinux kernel and the newest applications. But please keep in mind that this is the place where development is going on! For the tool chain, daily generated pre‐compiled SVN snapshots (“nightly snapshots”) are available. Pre‐compiled images for U‐Boot and uClinux as well as specific patches for the Bluetechnix Core Modules can be downloaded from the Bluetechnix project site at http://blackfin.uclinux.org/gf/project/bluetechnix/frs. Blackfin uClinux User Guide Page 14
Tinyboards maximum performance at minimum size 6 Development Tools The Bluetechnix Core Modules are either shipped with pre‐flashed BLACKSheep software (for further details please see the BLACKSheep documentation) or with U‐Boot and uClinux. Both provide a boot loader. Anyway, if they are corrupted or not available at your target hardware, you will need a JTAG programmer for flashing u‐Boot and/or uClinux. Besides the HP‐USB‐ICE from Analog Devices, flashing and/or debugging Bluetechnix Core Modules is supported by three JTAG devices, the gnICE from Analog Devices, the PEEDI from Ronetix, and the ICEBear from Section 5. Certain Core Modules allow for booting the U‐Boot from UART: CM‐BF527, (T)CM‐BF537x, CM‐BF548. For these, a JTAG device is not required if the software was deleted/corrupted. 6.1 gnICE JTAG The gnICE (http://docs.blackfin.uclinux.org/doku.php?id=hw:jtag:gnice) is a fast and low cost USB JTAG In‐Circuit‐Emulator for Blackfin processors. It's designed to provide reliable JTAG debugging and CFI NOR Flash programming via USB. The gnICE JTAG Adapter Cable is an Open Source hardware, based on the FT2232 chip from Future Technology Devices International Ltd. Features: • USB 2.0 Full Speed • JTAG clock (TCK) 6 MHz • Link Status LED Supported OSes: • Linux (any distribution) • Mac OS X • Windows 2000 and newer Software: The Blackfin tool chain fully supports this ICE. Supported Blackfin derivatives (among others): • BF527 • BF533 • BF537 • BF561 • BF548 Blackfin uClinux User Guide Page 15
Tinyboards maximum performance at minimum size 6.2 PEEDI JTAG The PEEDI from Ronetix (http://www.ronetix.at/peedi.html) is a high speed JTAG/BDM Emulator and Flash Programmer. It enables you to debug software running on ARM, PowerPC, ColdFire and Blackfin processor cores via the JTAG/BDM port. PEEDI provides the services needed to perform all debugging operations. PEEDI supports native GNU gdb/Eclipse and provides a very high real download speed – up to 1.25 Mbytes/s. For rapid starting a new project Ronetix provides complete GNU tool chains including Eclipse for Linux and Windows for ARM/XScale, PowerPC, ColdFire and Blackfin. The tool chains can be downloaded for free from the company’s website. It supports uClinux as well as native C‐ Programs without an operating system. 6.2.1 Resources Readme file for Blackfin uClinux: http://download.ronetix.at/blackfin/README‐uClinux‐bfin Downloads (including firmware updates): http://www.ronetix.at/downloads.html Configuration files for the PEEDI JTAG: http://download.ronetix.at/peedi/peedi_config_files.zip Examples without uClinux: http://download.ronetix.at/blackfin/bf53x_examples.tar.bz2 6.2.2 Updating the configuration file PEEDI has a serial terminal similar to Bluetechnix Core Modules. Connect a serial cable and connect to it e.g. with Kermit to get a prompt. The configuration file is placed in EEPROM and can be accessed via the address eep://bf537.cfg To make a backup of PEEDI’s current configuration file, type transfer eep://bf537.cfg tftp://192.168.1.1/bf537.cfg at the PEEDI prompt. This will copy it to your TFTP server’s root directory. To update the configuration file from a TFTP server, type config tftp://192.168.1.1/bf537.cfg at the RedBoot prompt (Refer to section 6.2.3 for instructions how to reach the RedBoot prompt). Then press the Reset button on PEEDI. 6.2.3 Updating the firmware First, you have to get to the RedBoot prompt of PEEDI: • Press and hold the two buttons on the front side. • Press the Reset button on the back side once. • Wait awhile and release the two buttons on the front side afterwards. Blackfin uClinux User Guide Page 16
Tinyboards maximum performance at minimum size Now you can connect to PEEDI with Telnet. The RedBoot prompt appears. Type the command update tftp://192.168.1.1/firmware.bin to start the update process (assuming that the file “firmware.bin” in your TFTP directory contains the new firmware). 6.2.4 Debugging the uClinux kernel Follow the instructions in the Readme file on how to compile the kernel. After the uClinux image is programmed into flash memory, start GDB with the command bfin-uclinux-gdb vmlinux Note that you have to take the “vmlinux” file from the “linux‐2.6.x/” directory because it is the only one that contains debugging symbols for GDB. Example: • U‐Boot and kernel boot in the serial console window as usual. • Hit Ctrl+C for halting the processor. • Create a sample breakpoint and continue (gdb) break sys_open (gdb) c • Now type „ls“ on the serial console running uClinux. The breakpoint will be hit. 6.2.5 Debugging uClinux applications Because of some bugs in bfin‐uclinux‐gdb as mentioned in the Readme file, it is recommended to use gdbserver for debugging uClinux applications as described at http://docs.blackfin.uclinux.org/doku.php?id=debuggers. 6.3 ICEbear JTAG The ICEbear adapter from Section5 (http://www.section5.ch) in conjunction with libbfemu, gdbproxy and the GNU tool chain (binutils, gdb, gcc) is a cost effective development tool for Blackfin hardware platforms. Based on a USB 2.0 (1.1 compatible) connection to the host PC, it 'outsources' all the JTAG signal generation to a dedicated JTAG controller, yielding improved timing and signal integrity compared to a classic parallel port connector. It mainly supports: • Fast flash programming (~20 sec. per MB or 50 kB/s under MS Windows) • Loading and debugging of executables • Automated system testing Supported CPUs (in brackets: CPU types that are compatible, but not tested): • ADSP‐BF527 in 1.3 release • ADSP‐BF533, BF531, (BF532) , ADSP‐BF534 • ADSP‐BF536, BF537, BF539, BF539F4 (BF538) • ADSP‐BF548(9) in 1.3 release Blackfin uClinux User Guide Page 17
Tinyboards maximum performance at minimum size • ADSP‐BF561 dual core • SHARC 2116X (Boundary Scan/Flash tool only) • Multi device chain support (Xilinx, ADI, etc.) on request (alpha releases) Well tested and supported platforms: • EZKIT Lite ADSP‐BF533, BF537 and BF561 • STAMP BF533/537 • SRV‐1 Robot core module (www.surveyor.com) • Z‐Brain‐BF533 from Schmid Engineering AG • DSPStamp BF533 and Minotaur BF537 from Cambridge Signal Processing LTD • CM‐BF533/537/561 (v1 and v2) from Bluetechnix Blackfin uClinux User Guide Page 18
Tinyboards maximum performance at minimum size 7 Blackfin uClinux Tool Chain To be able to cross‐compile uClinux for the Blackfin processor, you must install the tool chain from the Blackfin uClinux web site on your development workstation. The pre‐compiled tool chain is available from http://blackfin.uclinux.org/gf/project/toolchain/frs, both releases and nightly snapshots. Most versions are available in the RPM format. The necessary files will be installed in the directory /opt/uClinux/. The tool chain consists of several packages which are explained in detail at http://docs.blackfin.uclinux.org/doku.php?id=toolchain:installing. If you want to compile the tool chain from source, you can use a build script that is contained in the tool chain’s source code package. This works for released tool chains as well as for tool chains from SVN. Please refer to the following web site for instructions: http://docs.blackfin.uclinux.org/doku.php?id=toolchain:buildscript It is required to add the bin/ directories of the tool chain to your $PATH environment variable. For the bash, type the following command: export PATH=$PATH:/opt/uClinux/bfin-uclinux/bin:/opt/uClinux/bfin- elf/bin:/opt/uClinux/bfin-linux-uclibc/bin For your convenience, it is recommended to add these lines to the ~/.bashrc file of your home directory, so that these settings will are automatically be done each time you log in. Note! There are dependencies between Linux distribution, kernel and the tool chain. If you use different versions of each (e.g. an old release of the Linux kernel, but the latest tool chain from SVN), you may experience problems. Blackfin uClinux User Guide Page 19
Tinyboards maximum performance at minimum size 8 The U-Boot boot loader In order to load and boot uClinux on the Blackfin, a boot loader is required. The Bluetechnix project on the Blackfin uClinux web site contains pre‐compiled U‐Boot images for each Core Module in the “Files” section (http://blackfin.uclinux.org/gf/project/bluetechnix/frs/). The source code of U‐Boot is available on the Blackfin uClinux web site: http://blackfin.uclinux.org/gf/project/u‐boot The documentation Wiki (available at http://docs.blackfin.uclinux.org/) contains lot of information about U‐Boot. 8.1 Flashing the U-Boot If U‐Boot is not installed yet on your Core Module, you can either use a JTAG flash programmer, the BLACKSheep software, or UART boot, to program U‐Boot into flash memory. UART boot is supported by BF527, BF537, and BF548 processors only. Core CM‐ CM‐ TCM‐ Module CM‐BF527 CM‐BF533 BF537U BF537E BF537 CM‐BF548 CM‐BF561 U‐Boot file u‐boot.ldr u‐boot.bin u‐boot.bin u‐boot.bin u‐boot.bin u‐boot.ldr u‐boot.ldr Table 8‐1: U‐Boot image types for Core Modules Table 8‐1 lists all Core Modules and the file type of U‐Boot that must be used for flash programming. Please refer to the “BLACKSheep Command Reference” (available on the Bluetechnix web site, http://www.bluetechnix.at) for instructions how to program U‐Boot with BLACKSheep. It is recommended to first program U‐Boot as application and to test it before replacing BLACKSheep with U‐Boot, because if the U‐Boot does not work and you have already removed the BLACKSheep, you would need a JTAG flash programmer. After you have replaced BLACKSheep with U‐Boot, you have to change the boot mode of those Core Modules that execute the u-boot.bin file. Please refer to the “Hardware User Manual” (available on the Bluetechnix web site) of your Core Module for the appropriate DIP switch settings. Note! Do not use the “saveenv” command of U‐Boot if you programmed it as application with BLACKSheep. This command saves the U‐Boot environment variables to flash memory and may overwrite parts of BLACKSheep, making it unusable. 8.2 U-Boot environment The U‐Boot boot loader uses environment variables for configuration of network and boot settings. Blackfin uClinux User Guide Page 20
Tinyboards maximum performance at minimum size There are 3 commands to modify these variables: 1. printenv – Prints all environment variables to the terminal. 2. setenv [name] [value] – Creates a new variable or overwrites an existing one. Note that, if special characters are used in the value, they have to be prefixed with “\”. 3. saveenv – Saves the current environment variables to flash memory so that they are restored after a reset. Task 1: Set IP addresses of the Core Module and of the TFTP server setenv ipaddr 192.168.5.7 setenv serverip 192.168.5.1 Task 2: Set the MAC address for the Ethernet device setenv ethaddr 02:80:ad:20:31:e8 Task 3: Set the kernel boot arguments for booting with JFFS2 file system setenv bootargs root=/dev/mtdblock2 rootfstype=jffs2 rw clkin_hz=25000000 earlyprintk=serial,uart0,115200 console=ttyBF0,115200 setenv bootargs root=/dev/mtdblock2 rootfstype=jffs2 rw clkin_hz=30000000 earlyprintk=serial,uart0,115200 console=ttyBF0,115200 (for CM‐BF537U only) Task 4: Run a script setenv flashboot flread 0x20040000 0x1000000 0x280000\; bootm 0x1000000 (define the script) run flashboot (execute the script) Task 5: Modify the boot command of U‐Boot setenv bootcmd run flashboot (U‐Boot will run the “flashboot” command at boot) 8.3 Loading files onto the Core Module If you have access to Ethernet via your Bluetechnix board and a TFTP server is installed on your workstation, you can transfer any file from the TFTP server to the Core Module by typing tftp [file name] at the U‐Boot prompt. After the transfer is complete, the file size is printed to the terminal. The default load address is 0x1000000 in RAM memory. It can be specified optionally before the file name. Blackfin uClinux User Guide Page 21
Tinyboards maximum performance at minimum size If no Ethernet access is available, files can be transferred over the serial connection. Please note that the transfer rate is very slow. The procedure is described for the terminal program Kermit: 1. Type loadb at the U‐Boot prompt. 2. Switch to the Kermit prompt by pressing Ctrl‐\ followed by c. 3. Type send [file name] to start the transfer. The status is shown during the data transfer. 4. After the transfer is complete, type c to return to the U‐Boot prompt. The file size is printed to the terminal. Note! If the transfer fails with an error, try using 2 stop‐bits instead of 1. In Kermit, you can do this by typing “set stop‐bits 2” at the Kermit prompt. (This behavior was observed with CM‐BF561 core modules.) 8.4 Building U-Boot from source Download the source code for U‐Boot from the Blackfin uClinux web site. Please check the web site http://blackfin.uclinux.org/gf/project/bluetechnix/frs/ afterwards if there are patches for the source code that are needed for your Bluetechnix Core Module. Apply the patches to the source code by entering the command patch –p0 < [patch file] in the U‐Boot source directory. To adapt U‐Boot to your specific needs (core/system clock, environment variables, network settings, etc.), please edit the configuration file corresponding to your Core Module: CM‐BF527: u-boot-2009.06/include/configs/cm-bf527.h CM‐BF533: u-boot-2009.06/include/configs/cm-bf533.h CM‐BF537E: u-boot-2009.06/include/configs/cm-bf537e.h CM‐BF537U: u-boot-2009.06/include/configs/cm-bf537u.h TCM‐BF537: u-boot-2009.06/include/configs/tcm-bf537.h CM‐BF548: u-boot-2009.06/include/configs/cm-bf548.h CM‐BF561: u-boot-2009.06/include/configs/cm-bf561.h If you want to build an U‐Boot image for UART boot, you have to change the CONFIG_BFIN_BOOT_MODE setting in this configuration file to BFIN_BOOT_UART. Next, type make, followed by the name of the Core Module (equal to the header file names above). For example, type make cm-bf537e to build U‐Boot for the CM‐BF537E Core Module. Several files named u-boot.* are created, whereof u-boot.bin and u-boot.ldr respectively (see Table 8‐1) is the binary image which is used to program U‐Boot into flash memory. Blackfin uClinux User Guide Page 22
Tinyboards maximum performance at minimum size If you want to create an Intel HEX image that is compatible to Analog Devices’ VisualDSP++ flash programmer, you need to type the following command: bfin-uclinux-objcopy –I binary –O ihex u-boot.bin u-boot.hex or bfin-uclinux-objcopy –I binary –O ihex u-boot.ldr u-boot.hex 8.5 Upgrading the U-Boot If you want to replace the existing U‐Boot by a newer one, you can use U‐Boot itself for upgrading. It is recommended to test the new U‐Boot image prior to programming it. In the case of a non‐functional image, you would have to use a JTAG flash programmer or UART boot (not supported by all Core Modules). First, load the binary U‐Boot image (u-boot.bin) onto the Core Module. Instructions for loading files with U‐Boot are given in section 8.3. Assuming that you used load address 0x1000000, type go 0x1000000 at the U‐Boot prompt to execute the new U‐Boot. If it boots, the test was successful and you can program the new image to flash memory. Reset the device, load u-boot.bin or u- boot.ldr respectively into RAM, and type the following commands at the U‐Boot prompt: protect off 0x20000000 +$(filesize) (un‐protects required sectors) erase 0x20000000 +$(filesize) (erases sectors) cp.b 0x1000000 0x20000000 $(filesize) (copies image into flash memory) cmp.b 0x1000000 0x20000000 $(filesize) (compares written data) After the programming process is finished, you can reset your device. The new U‐Boot is now installed. 8.6 Booting U-Boot from UART See the following web site for instructions how to boot U‐Boot from UART for processors that support it (BF527, BF537, BF548): http://docs.blackfin.uclinux.org/doku.php?id=bootloaders:u‐ boot:loading#boot_via_the_uart 8.7 Programming a uClinux image to flash memory To program a uClinux image to flash memory, you must first transfer the uClinux and file system images into the Core Module RAM. Please refer to section 8.3 for instructions. You have several choices what to program into flash memory, here are two that are commonly used: • uImage: contains the compressed Linux kernel and the root file system (initram disk). You have to program this file only. The file system will be uncompressed to RAM when Linux boots. Changes to the file system are not persistent. Blackfin uClinux User Guide Page 23
Tinyboards maximum performance at minimum size • vmImage: contains the compressed Linux kernel. You have to program a root file system image additionally. • rootfs.jffs2: Root file system in JFFS2 format. The file system is accessed directly in flash memory. Changes to the file system are persistent. If the flash memory is not empty, you have to erase it first. The erase command needs two arguments: The first is the start address of flash memory (0x20000000), the second is the memory size. To erase all sectors in flash memory (including U‐Boot), type: protect off all erase all To erase as much memory as is needed by a file that was loaded into RAM previously, type: protect off 0x20040000 +$(filesize) erase 0x20040000 +$(filesize) The U‐Boot boot loader requires 256Kbytes of flash memory. So, storing a uClinux image at address 0x20040000 is a good choice. After erasing, the image is transferred to flash memory with the cp.b command which needs three arguments: The first one is the “copy‐from” address, it is usually 0x1000000 (RAM). The second one is the “copy‐to” address. The default for our Core Modules is 0x20040000. The third one is the length. The command for programming is as follows: cp.b 0x1000000 0x20040000 $(filesize) (uImage) cp.b 0x1000000 0x20040000 $(filesize) (vmImage) (now load the rootfs.jffs2 file to RAM) cp.b 0x1000000 0x20140000 $(filesize) (rootfs.jffs2) To verify the written data, you can use the cmp.b command which takes the same arguments: cmp.b 0x1000000 0x20040000 $(filesize) Note! On Core Modules that use GPIOs for flash addressing, the compare command cmp.b does only work for the lowest 2 MBytes of flash memory, because cmp.b and similar commands are strictly memory‐mapped and do not care about GPIOs. 8.8 Booting a uClinux Image How to boot a uClinux image from flash memory depends on the type of the Core Module. If the Core Module uses GPIOs as address lines for flash memory, U‐Boot provides the “flread” command, which reads an image from flash to RAM while handling addressing with GPIOs transparently. All other core modules read the image directly from flash memory. Blackfin uClinux User Guide Page 24
Tinyboards maximum performance at minimum size CM‐BF527, CM‐BF537E, CM‐BF537U, TCM‐BF537: flread 0x20040000 0x1000000 0x300000 bootm 0x1000000 CM‐BF533, CM‐BF548, CM‐BF561: bootm 0x20040000 The first argument is the source address, the second the destination address, and the third the image length. It does not matter if the length is greater than the actual image size. If you know the exact length of your image, you may store it in the filesize U‐Boot environment variable and replace the fixed length 0x300000 in the above example with $(filesize). If a file is loaded in U‐Boot, U‐Boot sets this variable automatically to the file size of the last file transferred. If you save the environment afterwards, the variable content will be restored at each boot. The default of U‐Boot is to boot a uImage stored at 0x20040000 in flash memory. For using a JFFS2 file system, modifications to the U‐Boot environment are required. See chapter 8.2 for a short reference. Blackfin uClinux User Guide Page 25
Tinyboards maximum performance at minimum size 9 Blackfin uClinux The uClinux distribution for the Blackfin processor contains the uClinux kernel and lots of tools and applications known from the Linux world. It is available from the “uClinux distribution” project on the following web site: http://blackfin.uclinux.org To become familiar with uClinux, reading through the introduction of the documentation Wiki of Blackfin uClinux is a good idea. It is available on http://docs.blackfin.uclinux.org. 9.1 First impression with pre-compiled images We provide pre‐compiled images with U‐Boot, uClinux, and root file system for all of our Core Modules. They are available at the Bluetechnix Blackfin project site http://blackfin.uclinux.org/gf/project/bluetechnix/frs as well as on the Support DVD: u-boot.bin/.ldr: U‐Boot binary uImage: uClinux kernel and initram disk with root file system vmImage: uClinux kernel image rootfs.jffs2: JFFS2 root file system uboot+uImage.bin/.ldr: All‐in‐one image (program to address 0x20000000) 9.2 Compiling your own uClinux Image 9.2.1 Downloading the Source Code The source code of the last uClinux release can be downloaded from the “Files” tab on the Blackfin uClinux web site (uClinux project) or simply go to http://blackfin.uclinux.org/gf/project/uclinux‐dist/frs. Only the last release is shown at the beginning, if you want to see all available releases click on the package name “Blackfin uClinux”. The file containing the source code is named uClinux-dist-[release].tar.bz2 which you have to download and unpack. Instructions for checking out the sources via SVN as well as viewing the repository with your browser are available on the “SVN” tab of this web site. The uClinux kernel and the uClinux distribution are managed in different SVN repositories. However, if you check out uClinux‐ dist via SVN, the uClinux kernel is fetched automatically as an external item. Note! It is important that the dates of the tool chain and the uClinux kernel are close to each other. If you work with the last release of each, this requirement is fulfilled. Blackfin uClinux User Guide Page 26
Tinyboards maximum performance at minimum size 9.2.2 Configuring the Kernel and User Space Applications Change to the uclinux-2009R1/ (or similar) directory and start the configuration by typing make menuconfig In the first configuration dialog, you must choose the vendor and the product for which you want to compile uClinux. Always choose “Bluetechnix” as the vendor and select your Core Module in the products option. For example, if you have a CM‐BF537E Core Module, you have to make the following settings: Vendor/Product Selection ---> --- Select the Vendor you wish to target (Bluetechnix) Vendor --- Select the Product you wish to target (CM-BF537E) Bluetechnix Products For further configuration dialogs for the kernel configuration and for user space programs configuration enable the following options: Kernel/Library/Defaults Selection ---> [*] Customize Kernel Settings [*] Customize Application/Library Settings Then exit from this dialog and save your settings when asked. In the following, two configuration dialogs are opened consecutively: The first one includes all configuration options for the uClinux kernel, e.g. Blackfin specific settings, device drivers and file system support. After you have made changes according to your wishes, exit from that dialog and save the settings. Now, the last dialog is opened which includes options for tools and applications. They are divided into categories. If you want a program to be available under uClinux, enable it here to build it. Again, exit and save your settings. 9.2.3 Compiling uClinux In the uClinux‐dist directory, simply type make after the configuration to start the building process. Now, the kernel will be built first, followed by the selected applications. The first compilation from fresh source code needs some time to complete, thereafter a compilation runs much faster. After a successful build, the uClinux and file system images are copied to the uClinux- dist/images/ directory, see chapter 9.1 for short a short explanation of the generated files. Please refer to section 8.8 for instructions how to boot these images with U‐Boot. Blackfin uClinux User Guide Page 27
Tinyboards maximum performance at minimum size 9.2.4 Special considerations for CM-BF548 There is an issue with BF548 processors with revision number < 0.2 with uClinux due to an anomaly of the processor. You will get an error explaining the details for those processor revisions at compile time. Setting the revision of the processor is done in the kernel configuration menu: Blackfin Processor Options ---> Silicon Rev (0.0) ---> The checks for the BF548 processor revision are done in the following source files: • arch/blackfin/mach-bf548/include/mach/anomaly.h, around line 17 • arch/blackfin/mach-common/arch_checks.c, around line 71 • arch/blackfin/kernel/setup.c, around line 905 9.3 Configuration of on-board Components This section is dedicated to components of the Bluetechnix Evaluation Boards and Development Boards. 9.3.1 SD/MMC card To enable SD/MMC card support in uClinux, the following kernel configuration is required: Block layer ---> [*] Enable the block layer Device Drivers ---> [*] SPI support ---> <*> SPI controller driver for ADI Blackfin5xx <*> MMC/SD/SDIO card support ---> <*> MMC block device driver <*> MMC/SD/SDIO over SPI Furthermore, enable additional file system support in the “File Systems” menu which you want to use. 9.3.2 USB support (CM-BF527, CM-BF548) The default setting in the kernel configuration is for USB Host: Device Drivers ---> [*] USB support ---> <M> Support for Host-side USB [*] USB device filesystem [*] Disable external hubs <M> Inventra Highspeed Dual Role Controller (TI, ADI, ...) Driver Mode (USB Host) ---> [*] Disable DMA (always use PIO) (only for CM‐BF527) <M> USB Mass Storage support Blackfin uClinux User Guide Page 28
Tinyboards maximum performance at minimum size <M> USB Gadget Support ---> USB Peripheral Controller Inventra HDRC USB Peripheral (TI, ADI, ...) <M> Ethernet Gadget (with CDC Ethernet support) (Note that SCSI disk support is required for USB Mass Storage Support.) USB Host Example: To attach a USB mass storage device, connect Jumper JP3 of your Eval/Dev‐BF5xx >=V5.1 board to provide VBUS voltage. Boot uClinux, and load the following modules: modprobe usbcore modprobe musb_hdrc modprobe usb-storage Then connect the device to USB. The kernel detects the new USB device and creates a new device file in the /dev/ directory. To mount the first partition of the device with VFAT file system, type mount –t vfat /dev/sdb1 /mnt USB Device example: To enable Ethernet over USB, remove jumper JP3. In the kernel configuration, set the driver mode to device mode: Device Drivers ---> [*] USB support ---> <M> Inventra Highspeed Dual Role Controller (TI, ADI, ...) Driver Mode ---> USB Peripheral (gadget stack) USB Gadget Support ---> USB Peripheral Controller ---> Inventra HDRC USB Peripheral (TI, ADI, ...) Compile and boot uClinux. Then load the following modules: modprobe musb_hdrc modprobe g_ether Then connect the USB plug of the Eval/Dev‐BF5xx to a Linux PC. In the output of the dmesg command, you see the Ethernet device usb0 be generated: usb0: register 'cdc_ether' at usb-0000:00:10.4-8, CDC Ethernet Device, 4a:c4:12:9e:87:99 usbcore: registered new interface driver cdc_ether Blackfin uClinux User Guide Page 29
Tinyboards maximum performance at minimum size 10 Document Revision History Version Date Document Revision 6 2009 09 02 Updated information about U‐Boot and uClinux; removed deprecated FAQ; added USB description; added Support DVD chapter; added UART boot description 5 2007 12 05 Information about SVN tool chain added 4 2007 07 19 Information about PEEDI JTAG added 3 2007 06 21 General Information 2 2007 06 13 Development Tools added 1 2007 05 31 First release V1.0 of the Document Table 10‐1: Document Revision History Blackfin uClinux User Guide Page 30
Tinyboards maximum performance at minimum size A List of Figures and Tables Figures No table of figures entries found. Tables Table 8‐1: U‐Boot image types for Core Modules .................................................................... 20 Table 10‐1: Document Revision History .................................................................................. 30 Blackfin uClinux User Guide Page 31
 Datasheet下载




.jpg)
